That’s great to hear!
Thank you for sharing this info.
P.S. yes, the Base Curve is off.
That’s great to hear!
Thank you for sharing this info.
P.S. yes, the Base Curve is off.
When I use the preserve chrominance, I usually end up reducing the saturation to 20% - 50%. If you leave it at 100%, then the image is usually over saturated, like your example.
Bill
Right,
I tried that too, but I still get artifacts.
This is with 20% saturation:

And this at 10%

Unless you adjust the saturation from another module, which then makes kind of confusing the saturation slider in the filmic module.
I’ve been struggling with this as well. My solution has depended a lot on the image and I haven’t tackled anything with skintones yet, but I’ve been able to get where I wanted with other modules in addition to filmic, usually by increasing saturation and then playing with the various color balancing/saturating modules.
Glad to hear that 2.7 is addressing this issue because otherwise I love Filmic. it’s got me going back through years of images and reprocesses ones that I was never quite happy with, with Filmic I’m getting the results I wanted but couldn’t get originally. Usually anyway. It’s quite subtle, but it has something special.
(another quirk I’ve noticed is that haze removal turns everything horribly blue)
I’ve had a few images where I could not get a satisfactory result from desaturating. I’ve also run into a couple of images that increasing the saturation with color balance caused artifacts. In those cases I’ve just used saturation from the contrast brightness saturation module.
That shouldn’t be. Could you show me ?
First, you should try to put the skin tones around the middle of the histogram, using the grey luminance at lower values. Filmic desaturates extreme luminances, “extreme” being what’s outside the latitude (outside the 2 nodes in the center of the graph). So that should fix part of the problem.
Then, if you use the chroma preservation mode, you will have to fix the saturation somewhere else (color balance). The thing is there is no reliable algorithm out there that can consistently remap the color saturation accordingly to the luminance correction. So my design choice has been to let users deal with it manually. The default color mode let the RGB values do their stuff, as would the base curve. The chroma preservation ensures the RGB ratios are conserved all along, but obviously, your eyes expect some sort of desaturation when the luminance is raised, and it’s not what happens here, so it looks over-saturated.
Also, the chroma preservation is not forgiving when your base picture has color casts and shifts, so, when your colors look off, fix the white balance first.
@anon41087856 here’s a crop showing the problem, along with the raw and the xmp files
The bottom one is color balance, the top is contrast brightness saturation. Notice the red in the sleeve has dark artifacts. They increase as the output saturation increases._7D_1873.cr2 (24.8 MB)
_7D_1873.cr2.xmp (9.4 KB)
_7D_1873_01.cr2.xmp (7.3 KB)
You have put your black level (in exposure module) at 0.0040, which leads to pixels having negative RGB values, and color balance cannot apply a power/gamma function f(x) = x^\gamma if x < 0, so these values get clipped.
Never use the exposure module to add more contrast, you can do that at the end of the pipe, using the levels. Exposure should be used to ensure nothing is clipped. Think of it: exposure means light energy, energy cannot be negative, except in a dark hole (but you don’t live there). So no pixel should ever be negative.
Also, I will see if skipping pixels < 0 instead of clipping them in the colorbalance could improve things (I suspect it might create other artifacts by contrast whith the valid neighbours, though).
Thanks @anon41087856. I wondered if it was something I had done since I didn’t see it in any of the other images with the same scene and exposure.
Ok, I tested the bypass in case of negative pixels, and it’s actually worse than the problem you see (bright green pixels instead of dark red). So I will add a warning in exposure instead.
That’s why I proposed to rebrand the “base modules” tab as a “technical modules” one: exposure is not where you take creative/aesthetic decisions. That part of the editing should aim at getting something clean and a bit dull, the candies come after.
I propose to rename the black parameter “unclip negative values” and I strongly advise users to adjust the black density in the tone curve or in the levels modules.
I don’t see the point of renaming “black”. It is named “black level” in other raw processors. I don’t think adjusting black level necessarily “unclip[s] negative values”. I mean, it is more of a side effect. Rule of thumb for any user is to not touch anything that they don’t understand. I normally don’t change the black level, so maybe I got it all wrong.
Perhaps, your warning could be placed in the manual at the end of this paragraph.
A black level adjustment is a basic tool to increase contrast and pop of an image. The value defines at what threshold dark gray values are cut off to pure black. Use with care as the clipped values can not be recovered in other modules further down the pixelpipe. Please also have a look at the tone curve module (see Section 3.4.2.3, “Tone curve”) and the levels module (see Section 3.4.2.2, “Levels”) which can produce similar results with less side effects as they come later in pixelpipe.
I’m not quite sure how/why I adjusted the black value negative in exposure. My workflow with filmic is to turn the base curve off, then adust the exposure so that I’m 1/2 stop away from the edges in the histogram, then use filmic. I must have gone to the histogram and pulled the black value down without thinking, probably trying to get more contrast. A bad habit, that I need to break  .
.
The point of renaming is to turn something that sounds nice into something that sounds scary so people don’t use it lightly, because it can be harmful (proof here).
I’d rather have the tooltip in the UI, this way I’m sure users will see it, although it’s worth an explanation in the manual too. The point is, it should be used only to recover negative RGB values if there are any, meaning if the raw black point was ill-set by the raw decoding lib. It’s too dangerous to use it for anything else, and the black level can be set later, in a safe way, in levels, for aesthetic purposes.
I know your reasoning. I think having an appropriate tool tip and manual entry is enough. Renaming is going too far. Anyway, the discussion on GitHub will sort this out; just sharing my thoughts. 
Thank you so much for taking the time to explain the workflow, Pierre. Much appreciated.
All in all, it seems I can keep my current approach which is, doing the first adjustments with Filmic and then take care of the saturation with other modules, and I usually resort to Color Balance for this.
I’m still learning how to use Filmic and, although I’m not there yet, I’m more happy with the results than with my previous workflow.
One thing I’m still struggling with and having a hard time understanding is why, after I applied Filmic, the local contrast looks more aggressive than if I use the Base Curve.
When I use the latter, I can push the local contrast (usually Detail and a little of Midtone) quite a bit. With Filmic, even if I balanced the image in order to get a flat profile (or sort of), a touch of local contrast usually ends up darkening the shadows quite significantly. In fact, I need to go back and tweak the settings in Filmic again in order to avoid pure blacks (which I’m not a big fan of).
Anyway, thanks again for this great module, I feel I have a lot to learn but also a lot to experiment with and have fun!
I am still inexperienced with dt and its filmic and color balance modules. I rarely use dt and, when I use a raw processor, I do the bare minimal. So, take my thoughts with a grain of paprika.
Base curve is a simple curve that brightens up the overall image, including the shadows. That is why you would have more latitude there, comparatively. When using filmic, you should leave some headroom and foot room in the highlights and shadows so that you can manipulate the image further afterwards. I suggest that you play with black relative exposure and contrast to give more room for local contrast.
Thank you, @afre
Saving enough room by using the black relative for later tweaking it’s what I’m doing, the contrast, on the other hand, doesn’t seem to help much.
I forgot to mention one thing I do when I use the Base Curve, which is, most of the time I switched to the logarithmic curve and recovered the shadows from there.
By the way, trying to preserve the contrast with Filmic by pushing the black relative often results in extra noise.
That said, the confusing part is that even if I tweak the image with Filmic and create sort of a flat curve, I can’t still push the local contrast as much as I would do with the Base Curve. I get they are two different things and the nature of Filmic is meant for a different workflow. I guess I probably need to read more about it
Anyway, here’s an example.
Filmic before local contrast:

Filmic after local contrast (shadows on the door gate are gone):

Base Curve before local contrast:

Base Curve after local contrast:

Now, that’s just a random example.
In some cases, I’m not too worried if I lose information in the shadows. To me, it really depends on whether it’s an important part of the image I need to save or not. This is just to give a context of what I’m trying to figure out.
Thanks
P.S. Local Contrast used in the examples above have the same settings in both cases.
When you say that, you’re thinking mainly about pale white skin tones that can easily reach extreme luminances, like on a studio setting where you get plenty of light, correct?
I’m a bit confused about when to use chroma preservation, since I always have to go to another tool to compensate its over-saturation. I mean, if I have to do that, why simply not unchecking chroma saturation, and then raise a bit global and extreme saturation sliders? Also, chroma saturation seems to have a stronger effect on the reds.
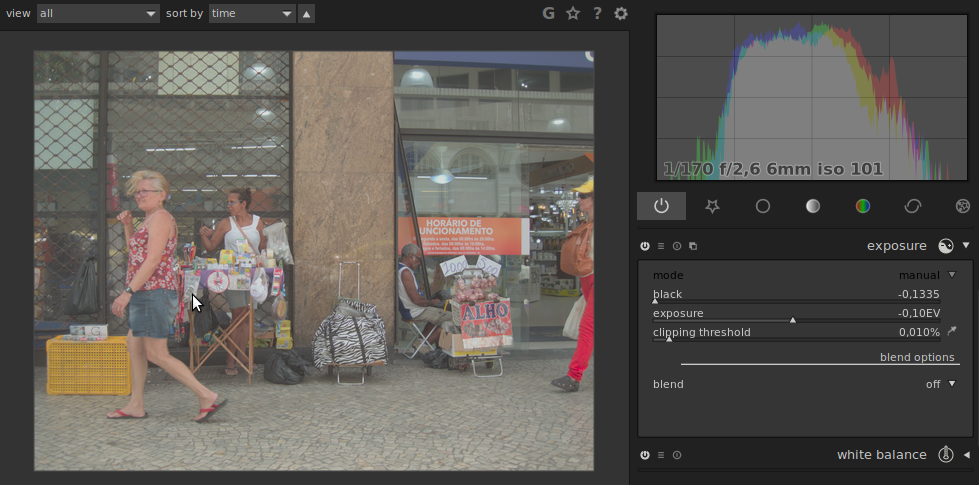
So, if I’m going to use filmic, should I set exposure like this…
… instead of this (default exposure settings, original raw without any clipping)
Usually I wouldn’t change anything on the exposure tool on an image like this.
Those are interesting questions, @gadolf
I too wonder at this point the use of the chroma preservation.
As for the exposure, my approach is similar to yours as I rarely touch it, in fact I think I did it only in one or two particular cases, other than that I leave it with its default values. It’s interesting what I’m noticing with the exposure module, though, as whether it’s on (with the default values) or off it doesn’t change the way the picture looks.