Editing moments with darktable

From the manual:

" …However, it will also increase the image’s dynamic range, which may void filmic settings in the pipe. For global contrast adjustments, you should normally use the tone equalizer module – the color balance RGB contrast slider is best used with masks, e.g. for selective corrections over the foreground or background."

https://docs.darktable.org/usermanual/3.8/en/module-reference/processing-modules/color-balance-rgb/#module-controls

6 Likes

@s7habo thank you once again for a great tutorial. A couple questions I have after watching both parts:

  • I see that you tend to use the tone equalizer module with the simple tone curve preset often; I believe this preset is just setting preserve details to “no”. Why do you prefer this mode over the default eigf, or what is your rule for when to use one verses the other (it still wasn’t clear to me after reading the manual)?
  • in several of the photos, I saw in the waveform that you left quite a bit of “headroom” between the brightest whites and the clipping line. To provide a strong contrast, wouldn’t you want to try and stretch the image to have as many EVs between the darkest blacks and the lightest whites?
2 Likes

On the second point I do it sometimes too…anything below the cutoff gets the same adjustment…the mask is 8ev so sometimes I will spread more of the highlights or the shadows at the expense of cutting off the other and then use multiple instances…I think many people get frustrated with the tone eq because they try to make adjustments that are too bold…and second they try to tone the whole image with one instance…

I am likely using it in the “wrong” way but it works for what I am trying to achieve…

On point one I had the same question…

1 Like

:point_down:

10 Likes

If I get too close to the edge, I lose too much of the saturation in the highlights. This is caused by the chrominance perservation algorithms in the filmic.

3 Likes

Regarding the tone equalizer, there was a long discussion here:

Quite a few people found this useful, so I’ll link it directly here:

6 Likes

Thanks, this is a helpful visual to see what is going on with the exposure in each case. Do you have an example where you can see in the real image itself when the simple tone curve causes problems, where eigf is necessary? I’m trying to understand when you’d need to preserve details, e.g. with foliage where there is a lot of contrast in a small region maybe?

Does adjusting the preserve chrominance drop-down help in this regard (allowing you to use more of that headroom) or are all of the values problematic for the highlights? And in the case of a black and white image, you still want the saturation in the highlights (even though ultimately there is no color) because you want to use it to provide more contrast in the black and white image?

Thanks, I’ll read through this thread!

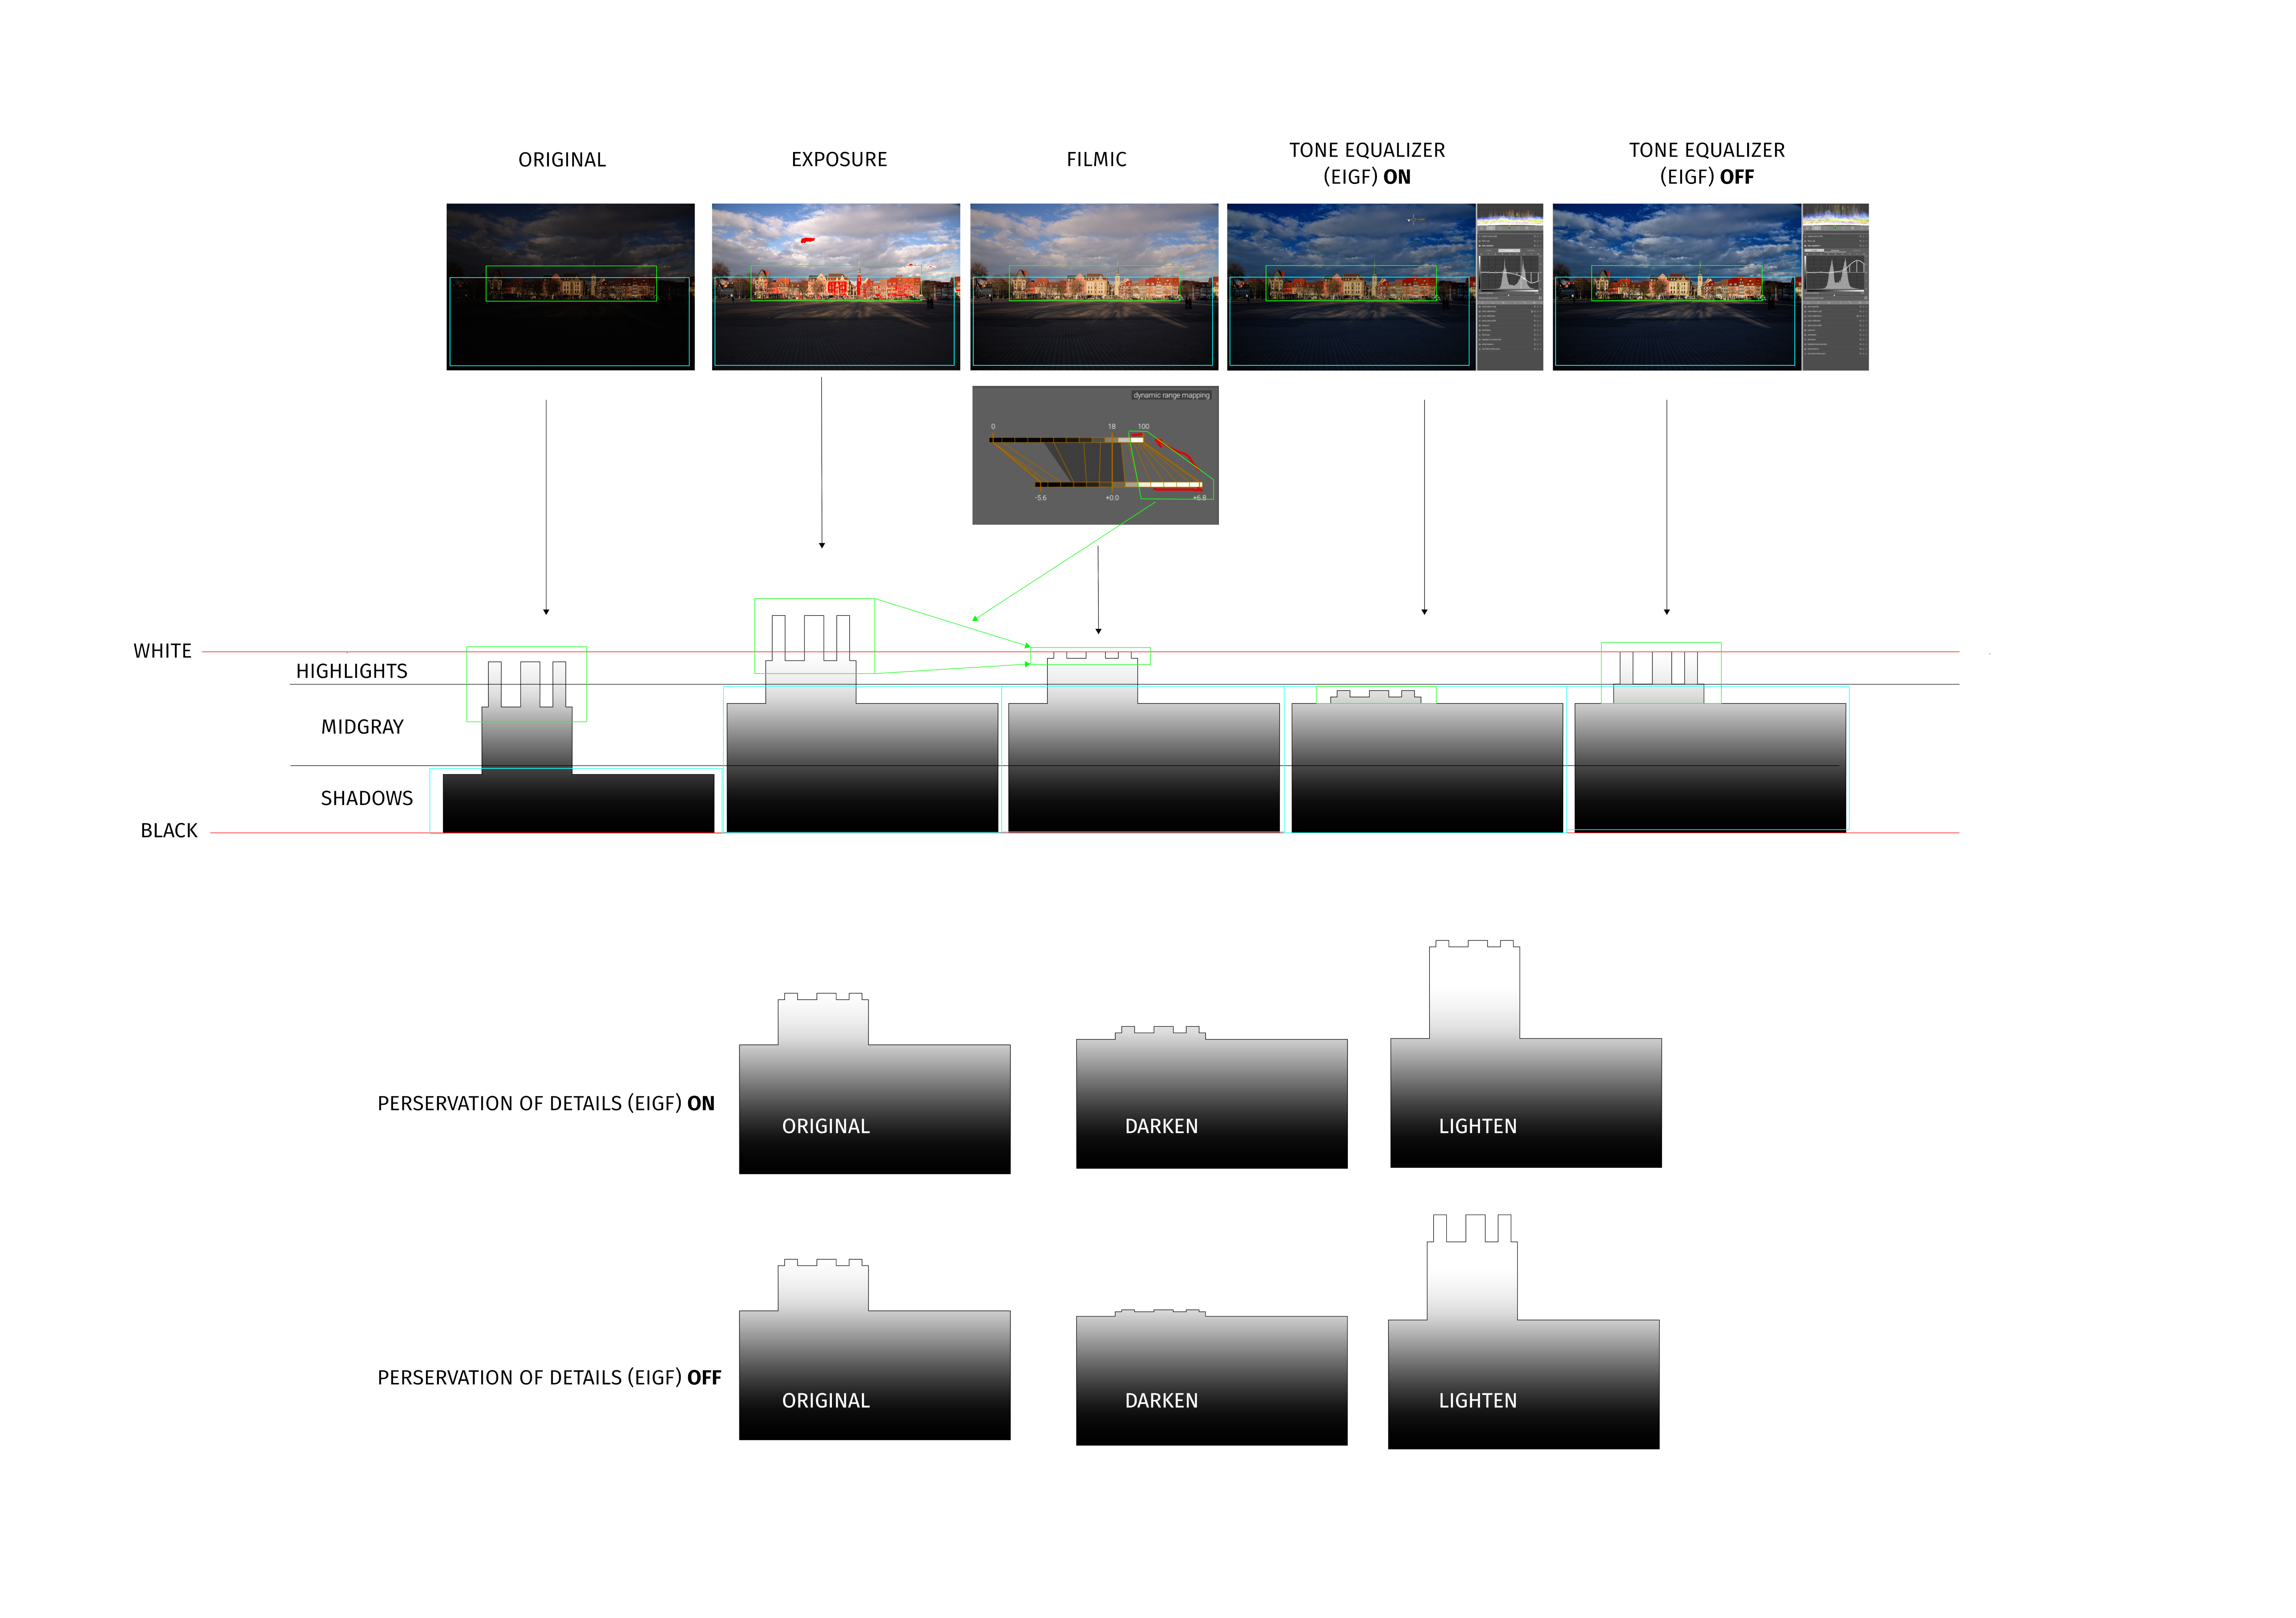
When Preserve Detail is turned on, the local contrast in the area is preserved regardless of whether you darken or lighten the area.

When preserving detail is turned off, and if you want to add contrast

…besides increasing the contrast, local contrast is also increased

Here for comparison the same curve with preservation of details switched on:

If you do it the other way round, compressing shadows and highlights, in difference to switched on preservation of details, besides the contrast also the local contrast will be reduced.

Without preservation of details:

With preservation of details:

According to this logic, if you want to treat only the highlights, you use preservation of details for darkening and no preservation of details for lightening.

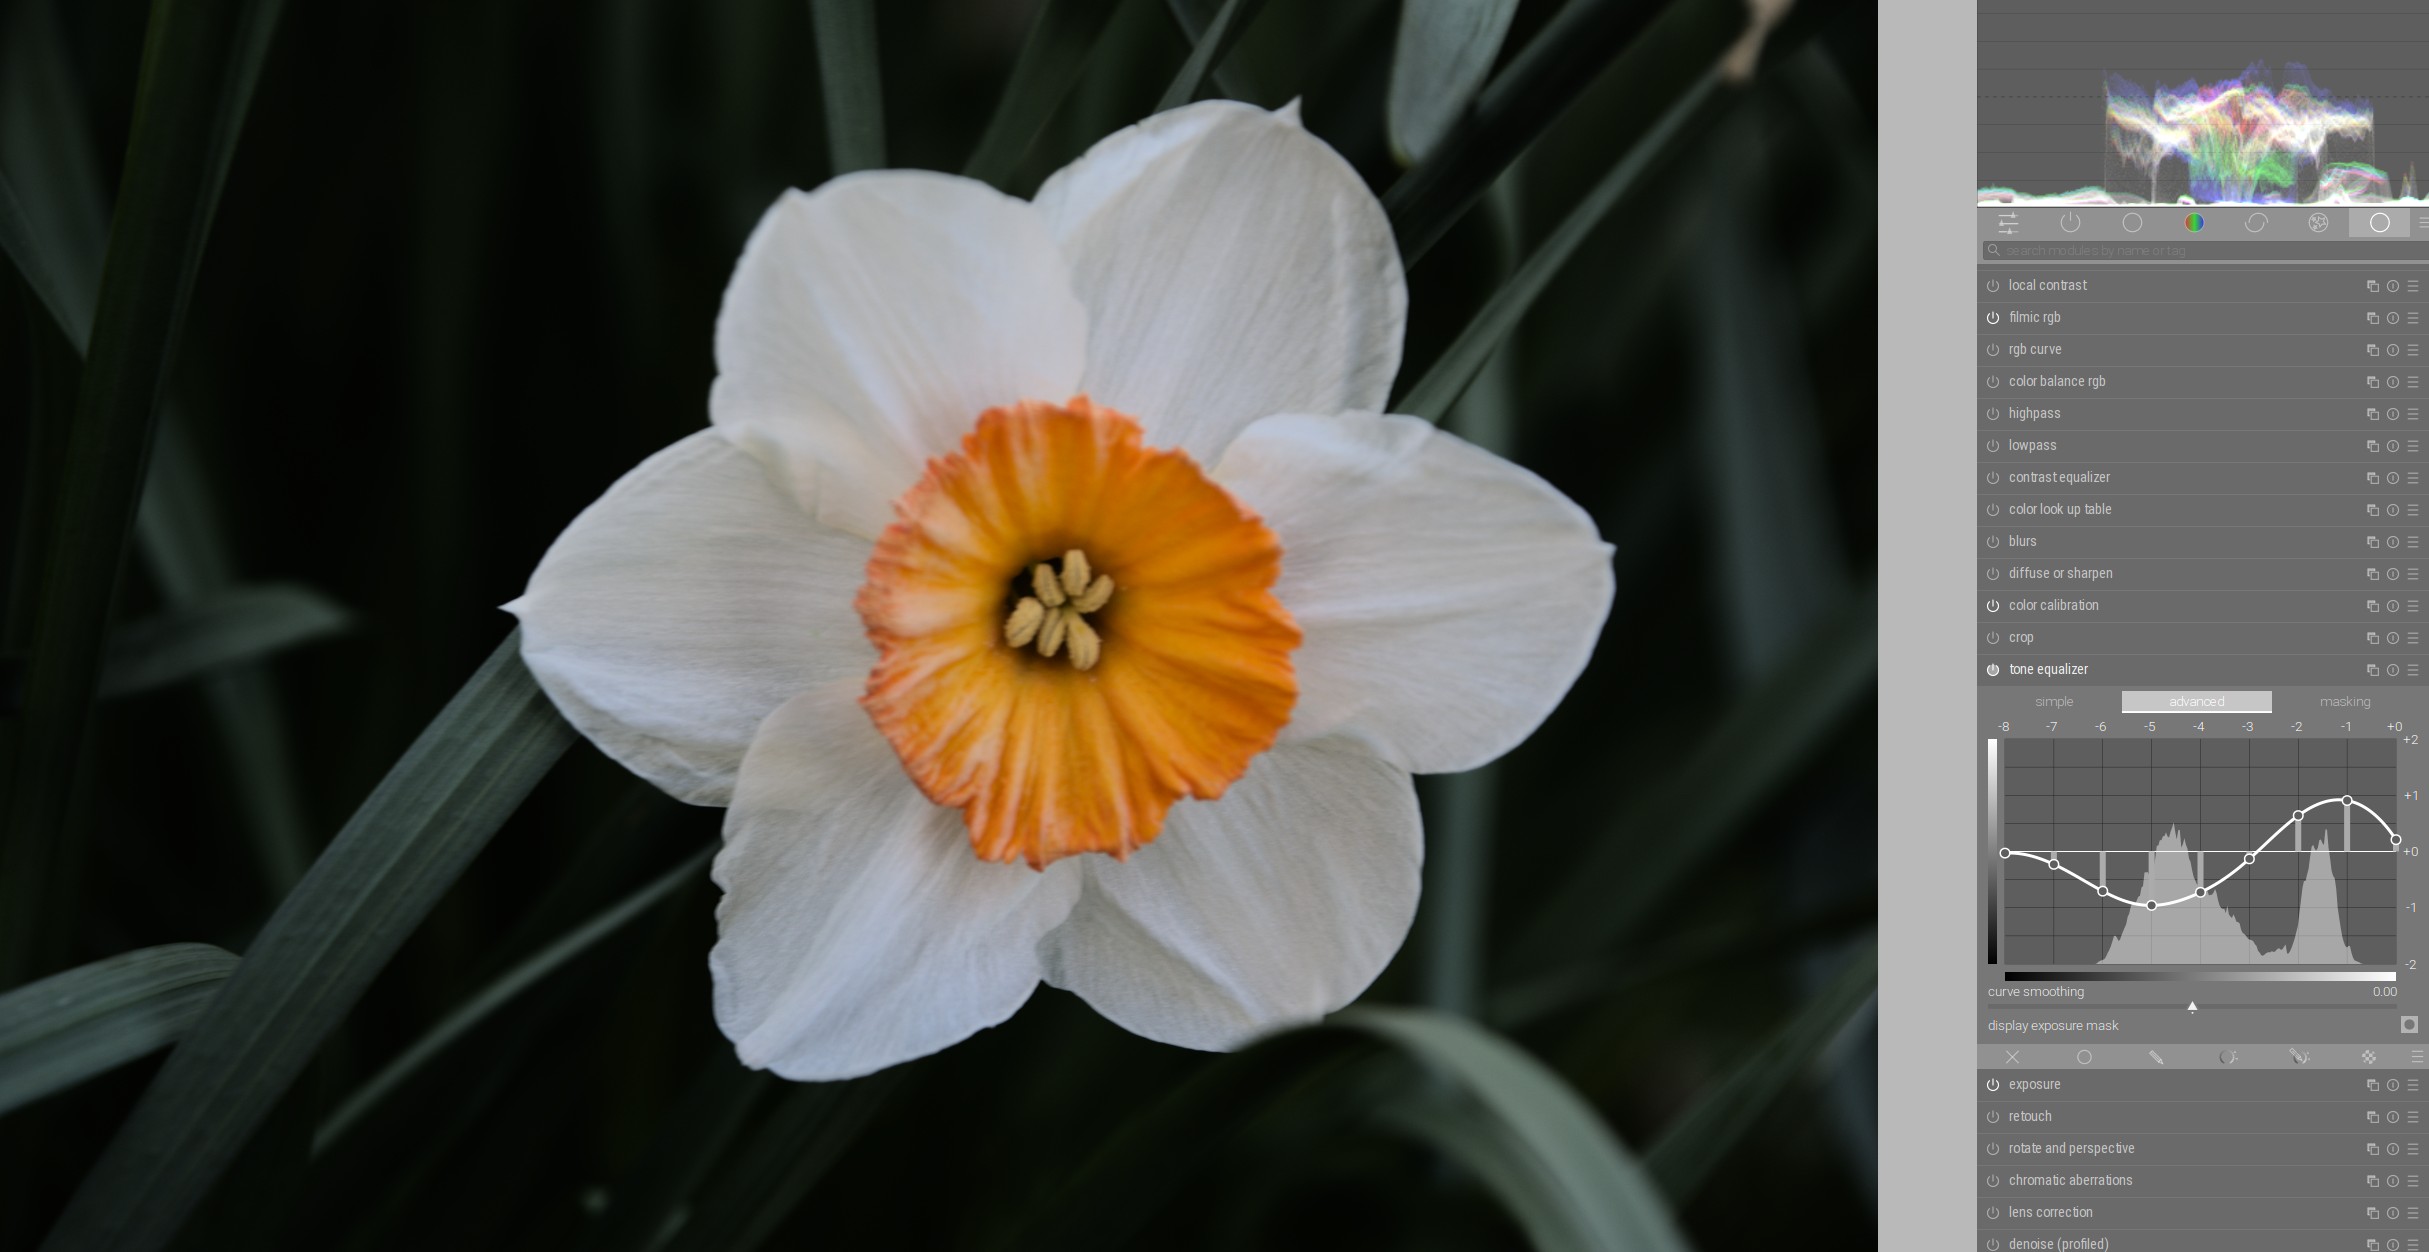
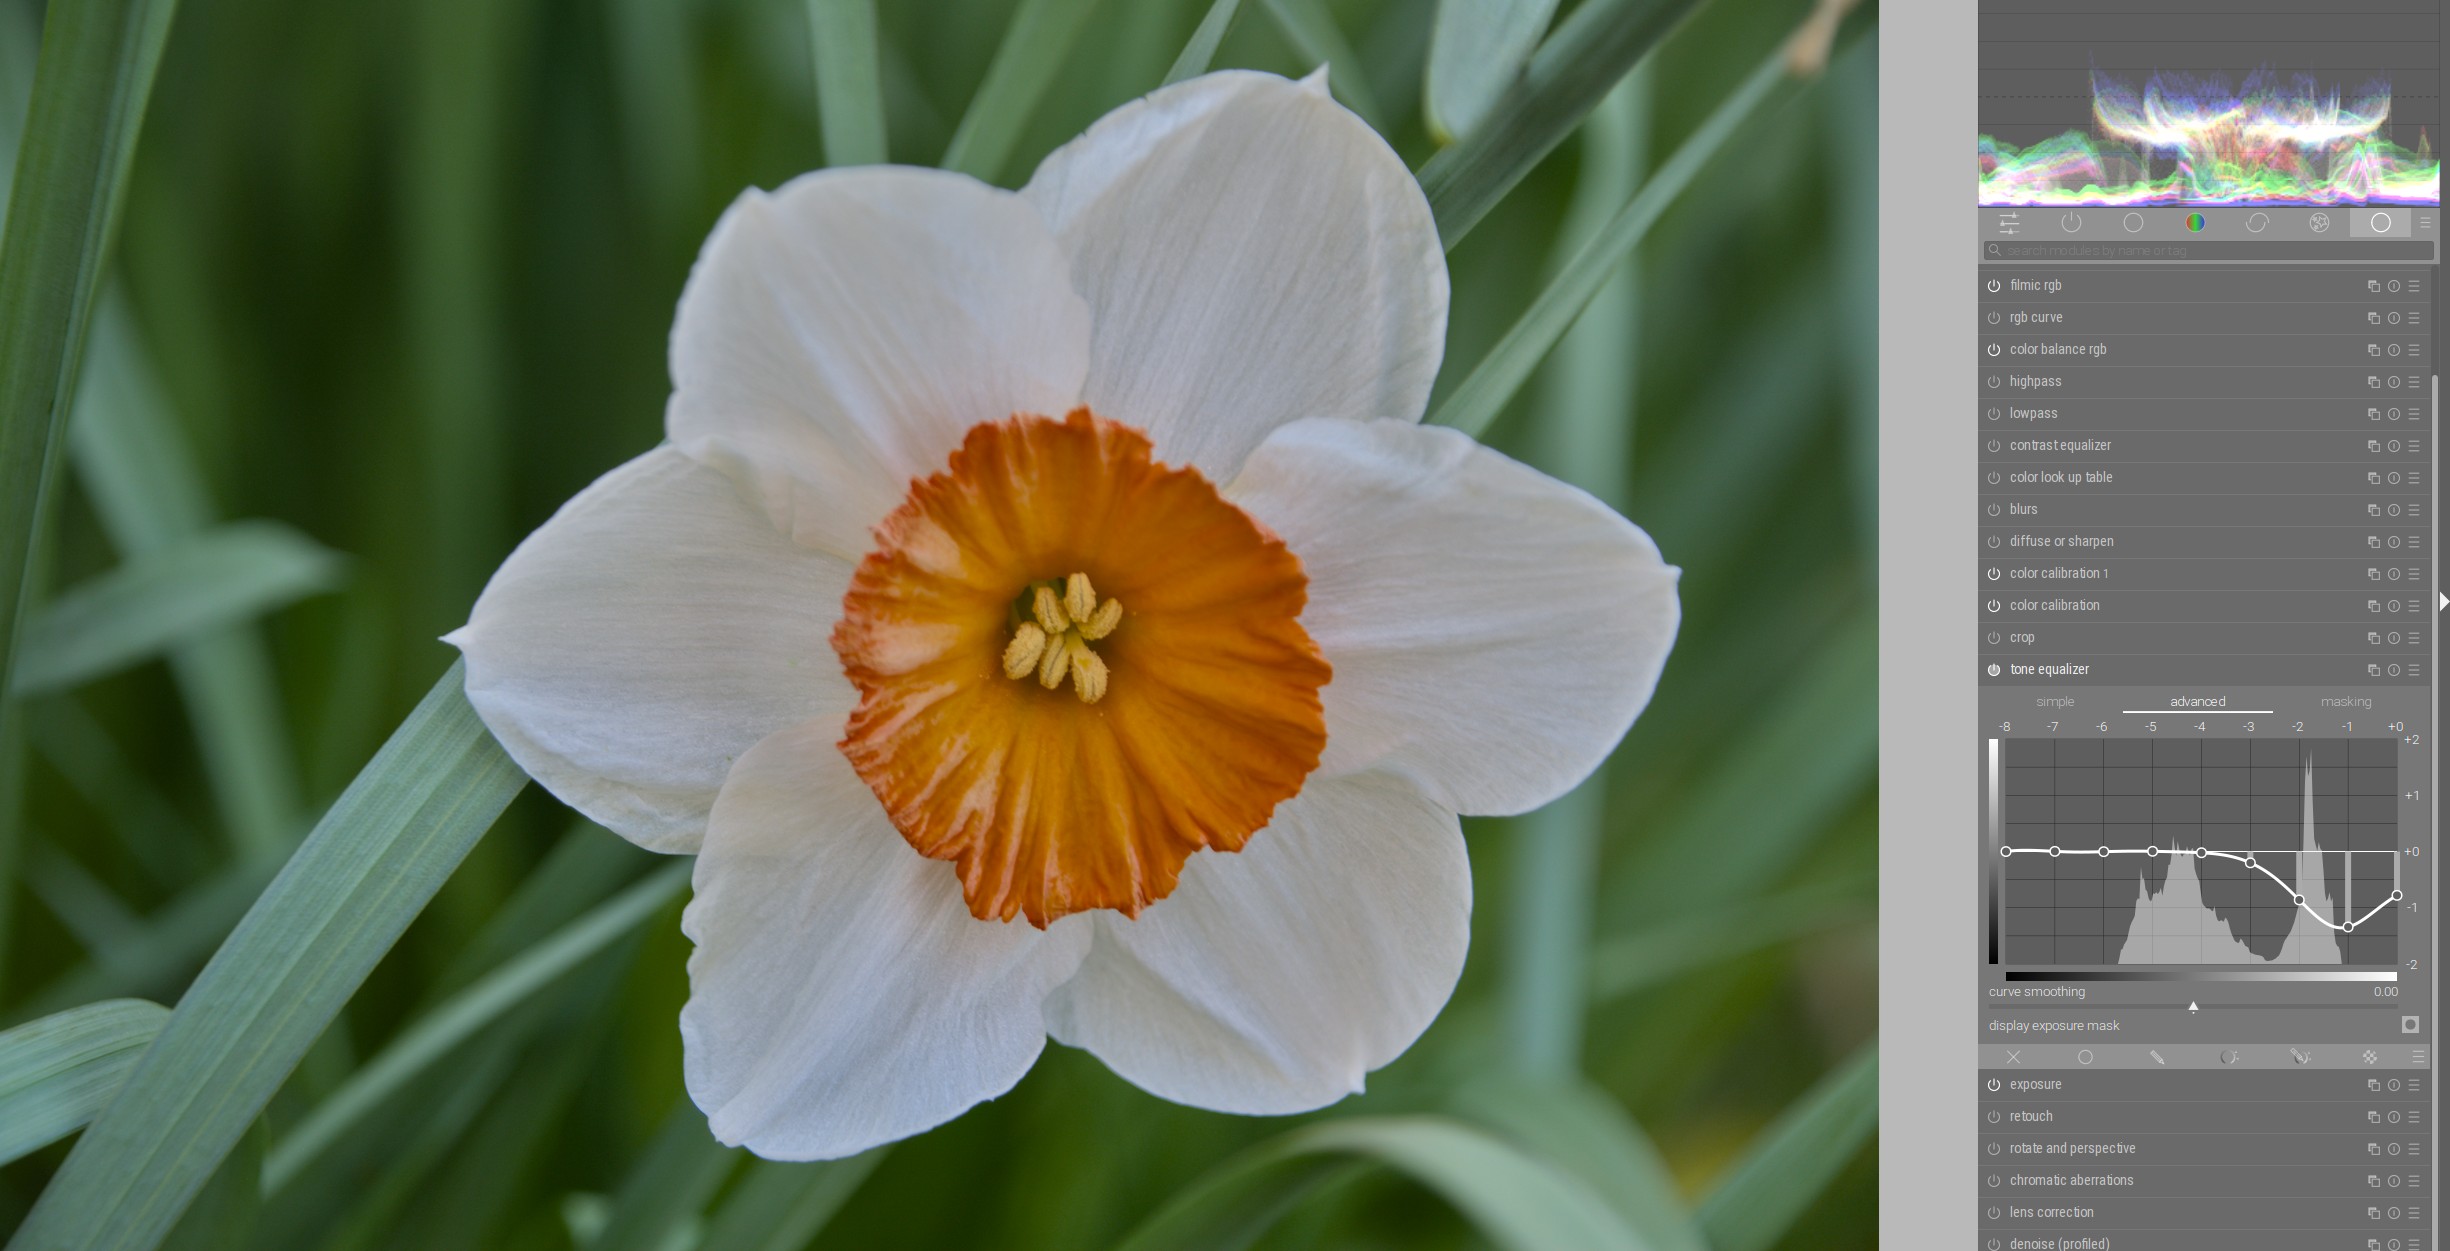
Example. I only want to darken the flower in this photo:

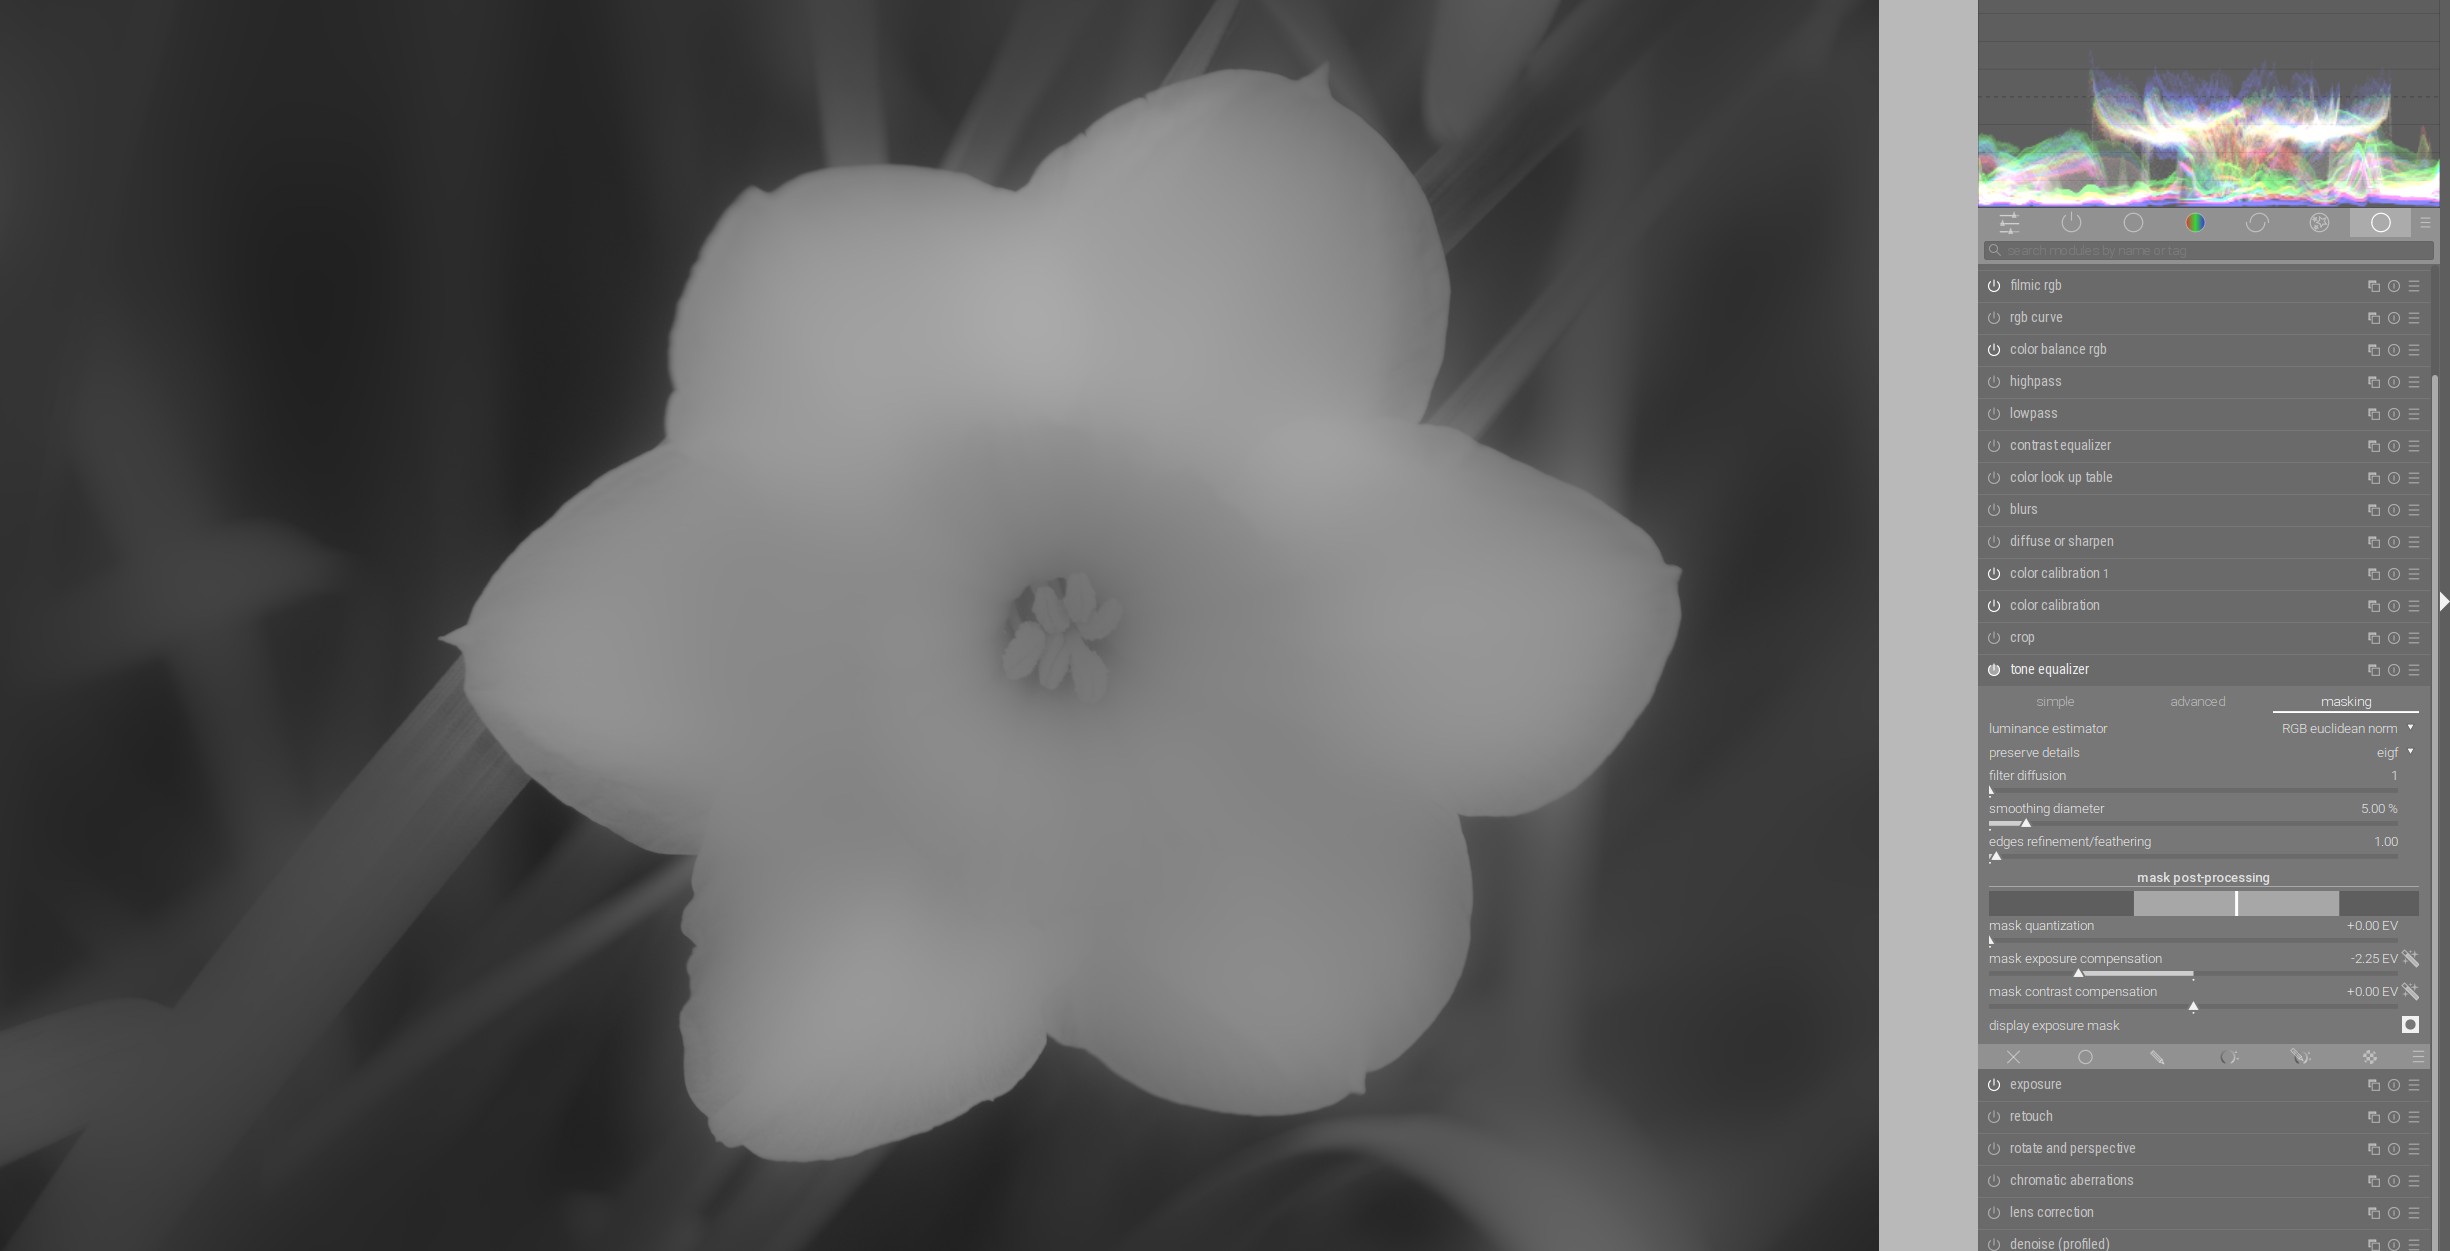
Preserving details is on and the mask looks like this:

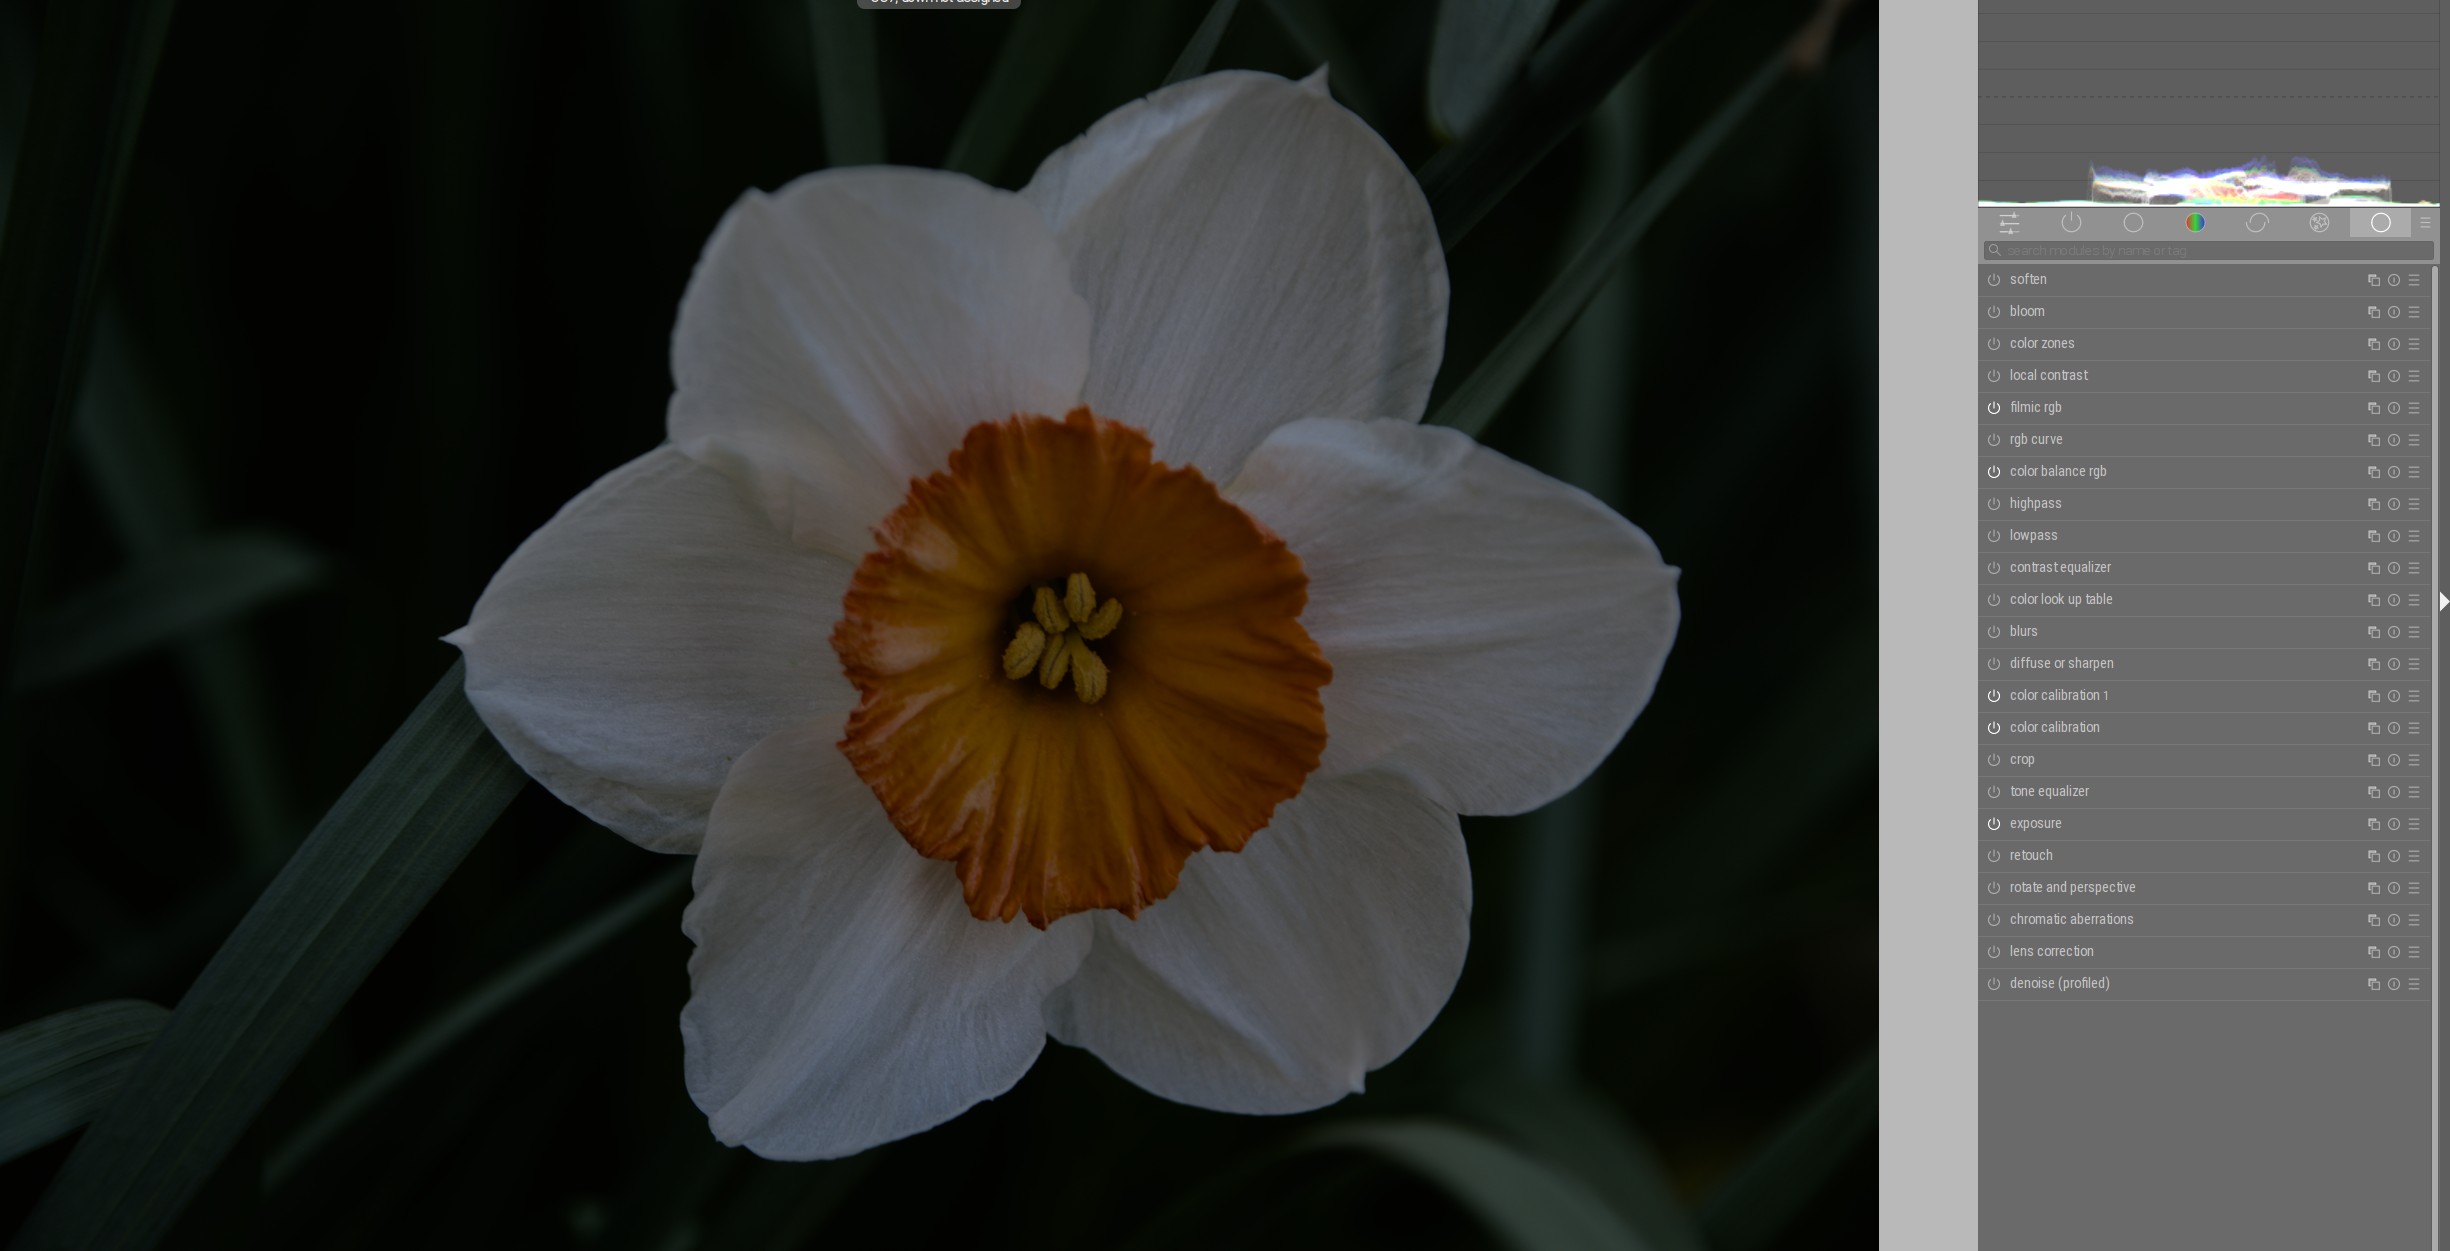
If I now darken the area, the details (local contrasts) are preserved:

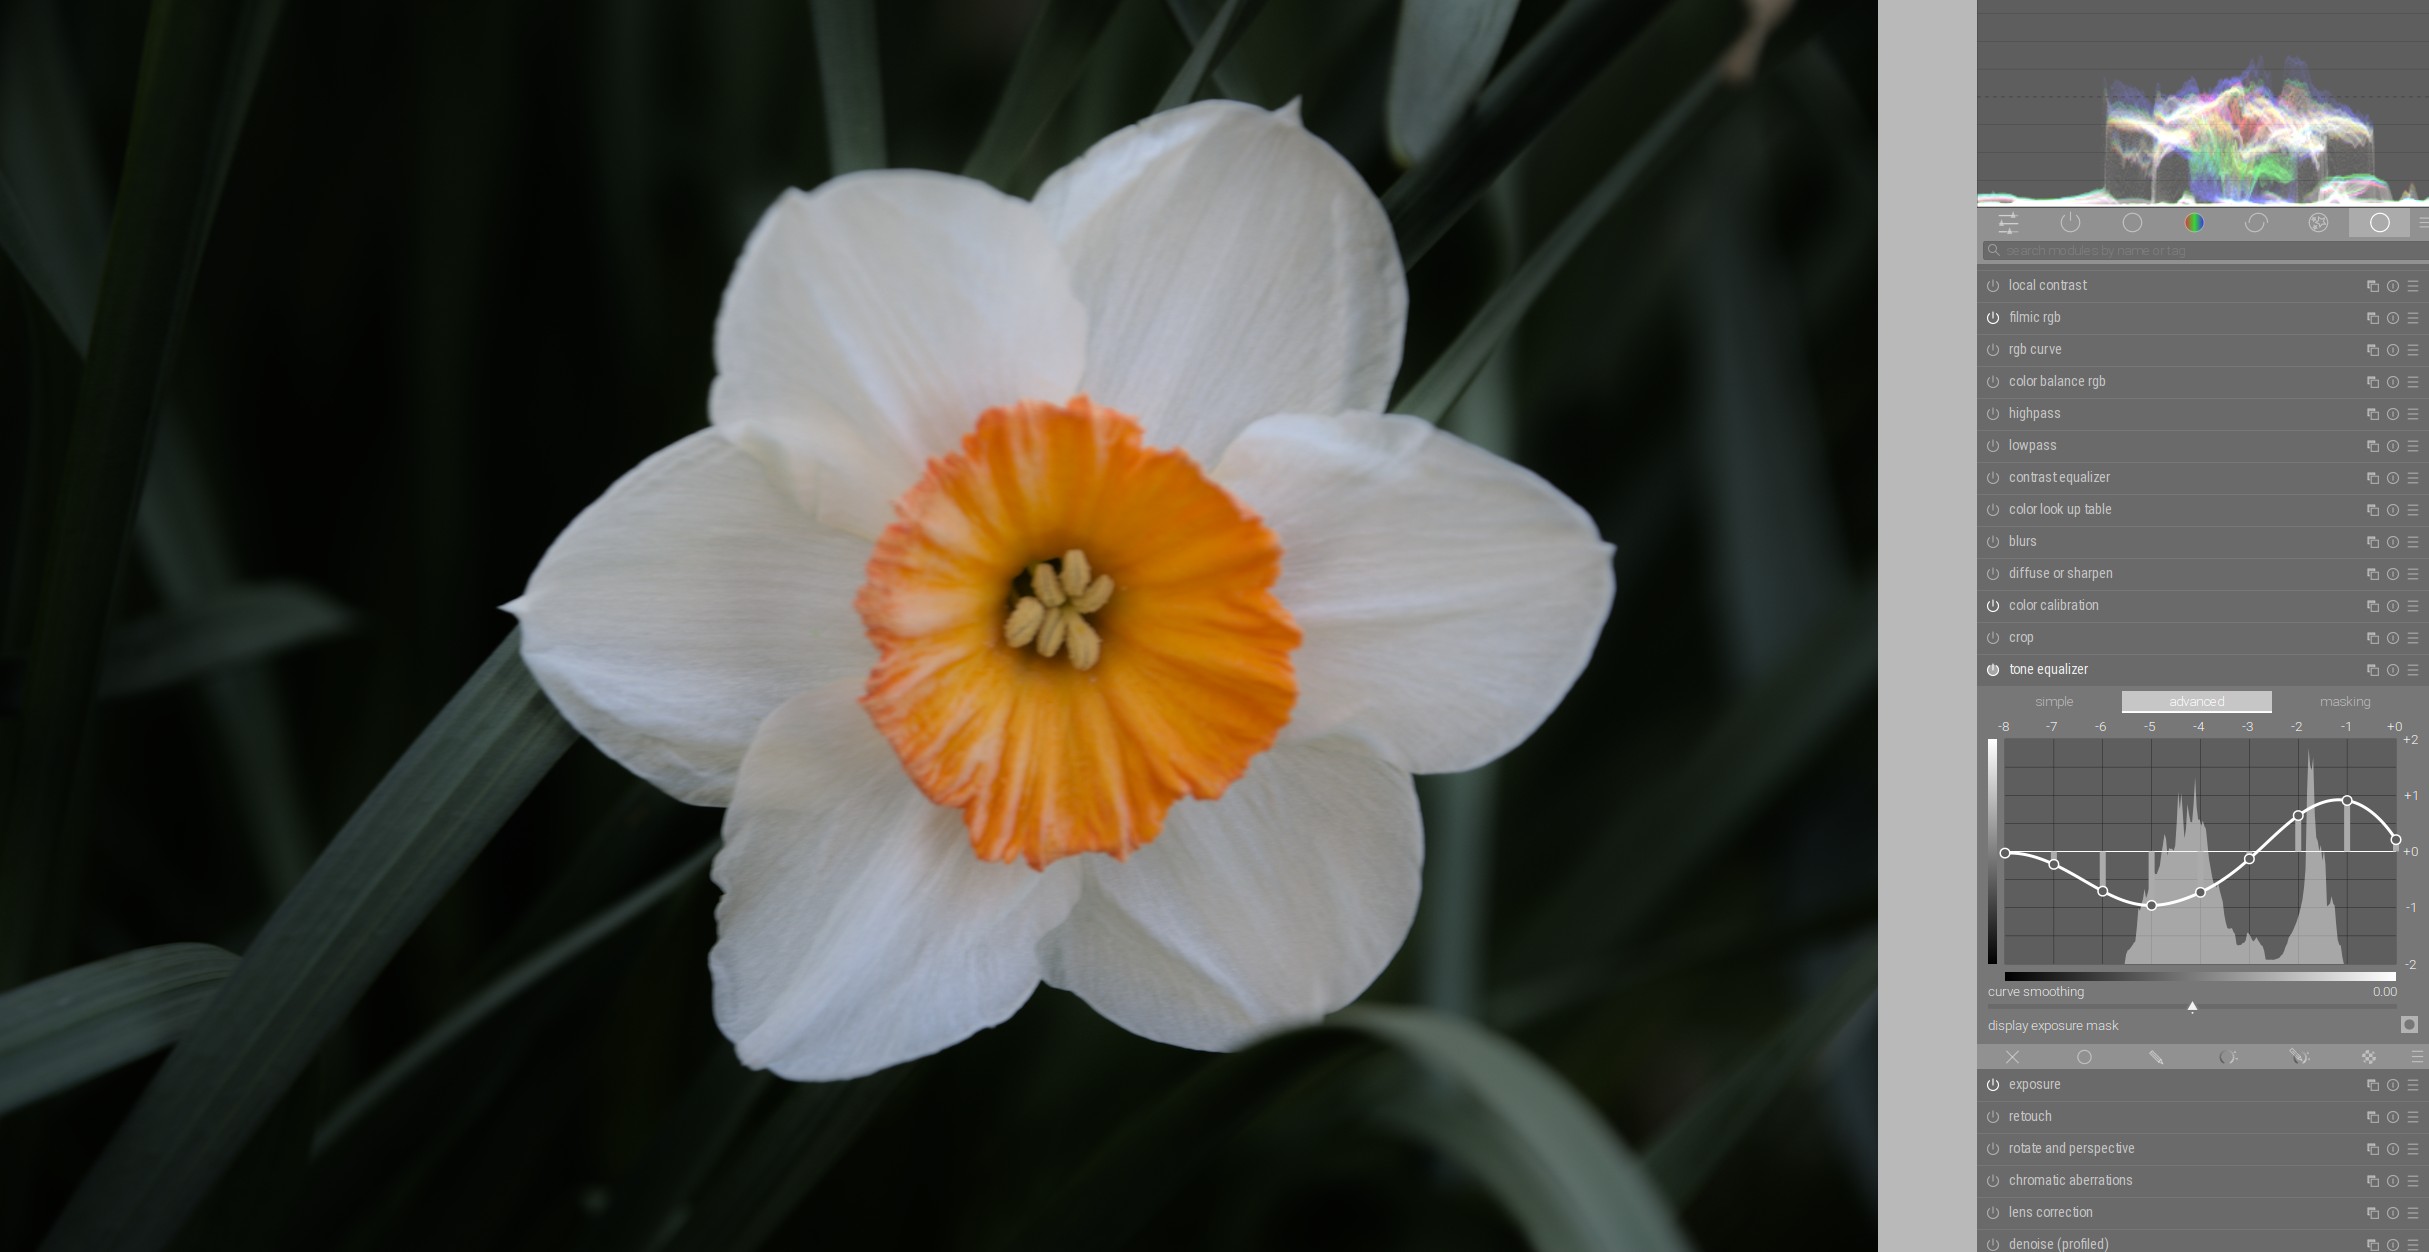
If I switch off the preservation of details, the mask looks like this:

And if I now darken the area, I lose the local contrast on the flower:

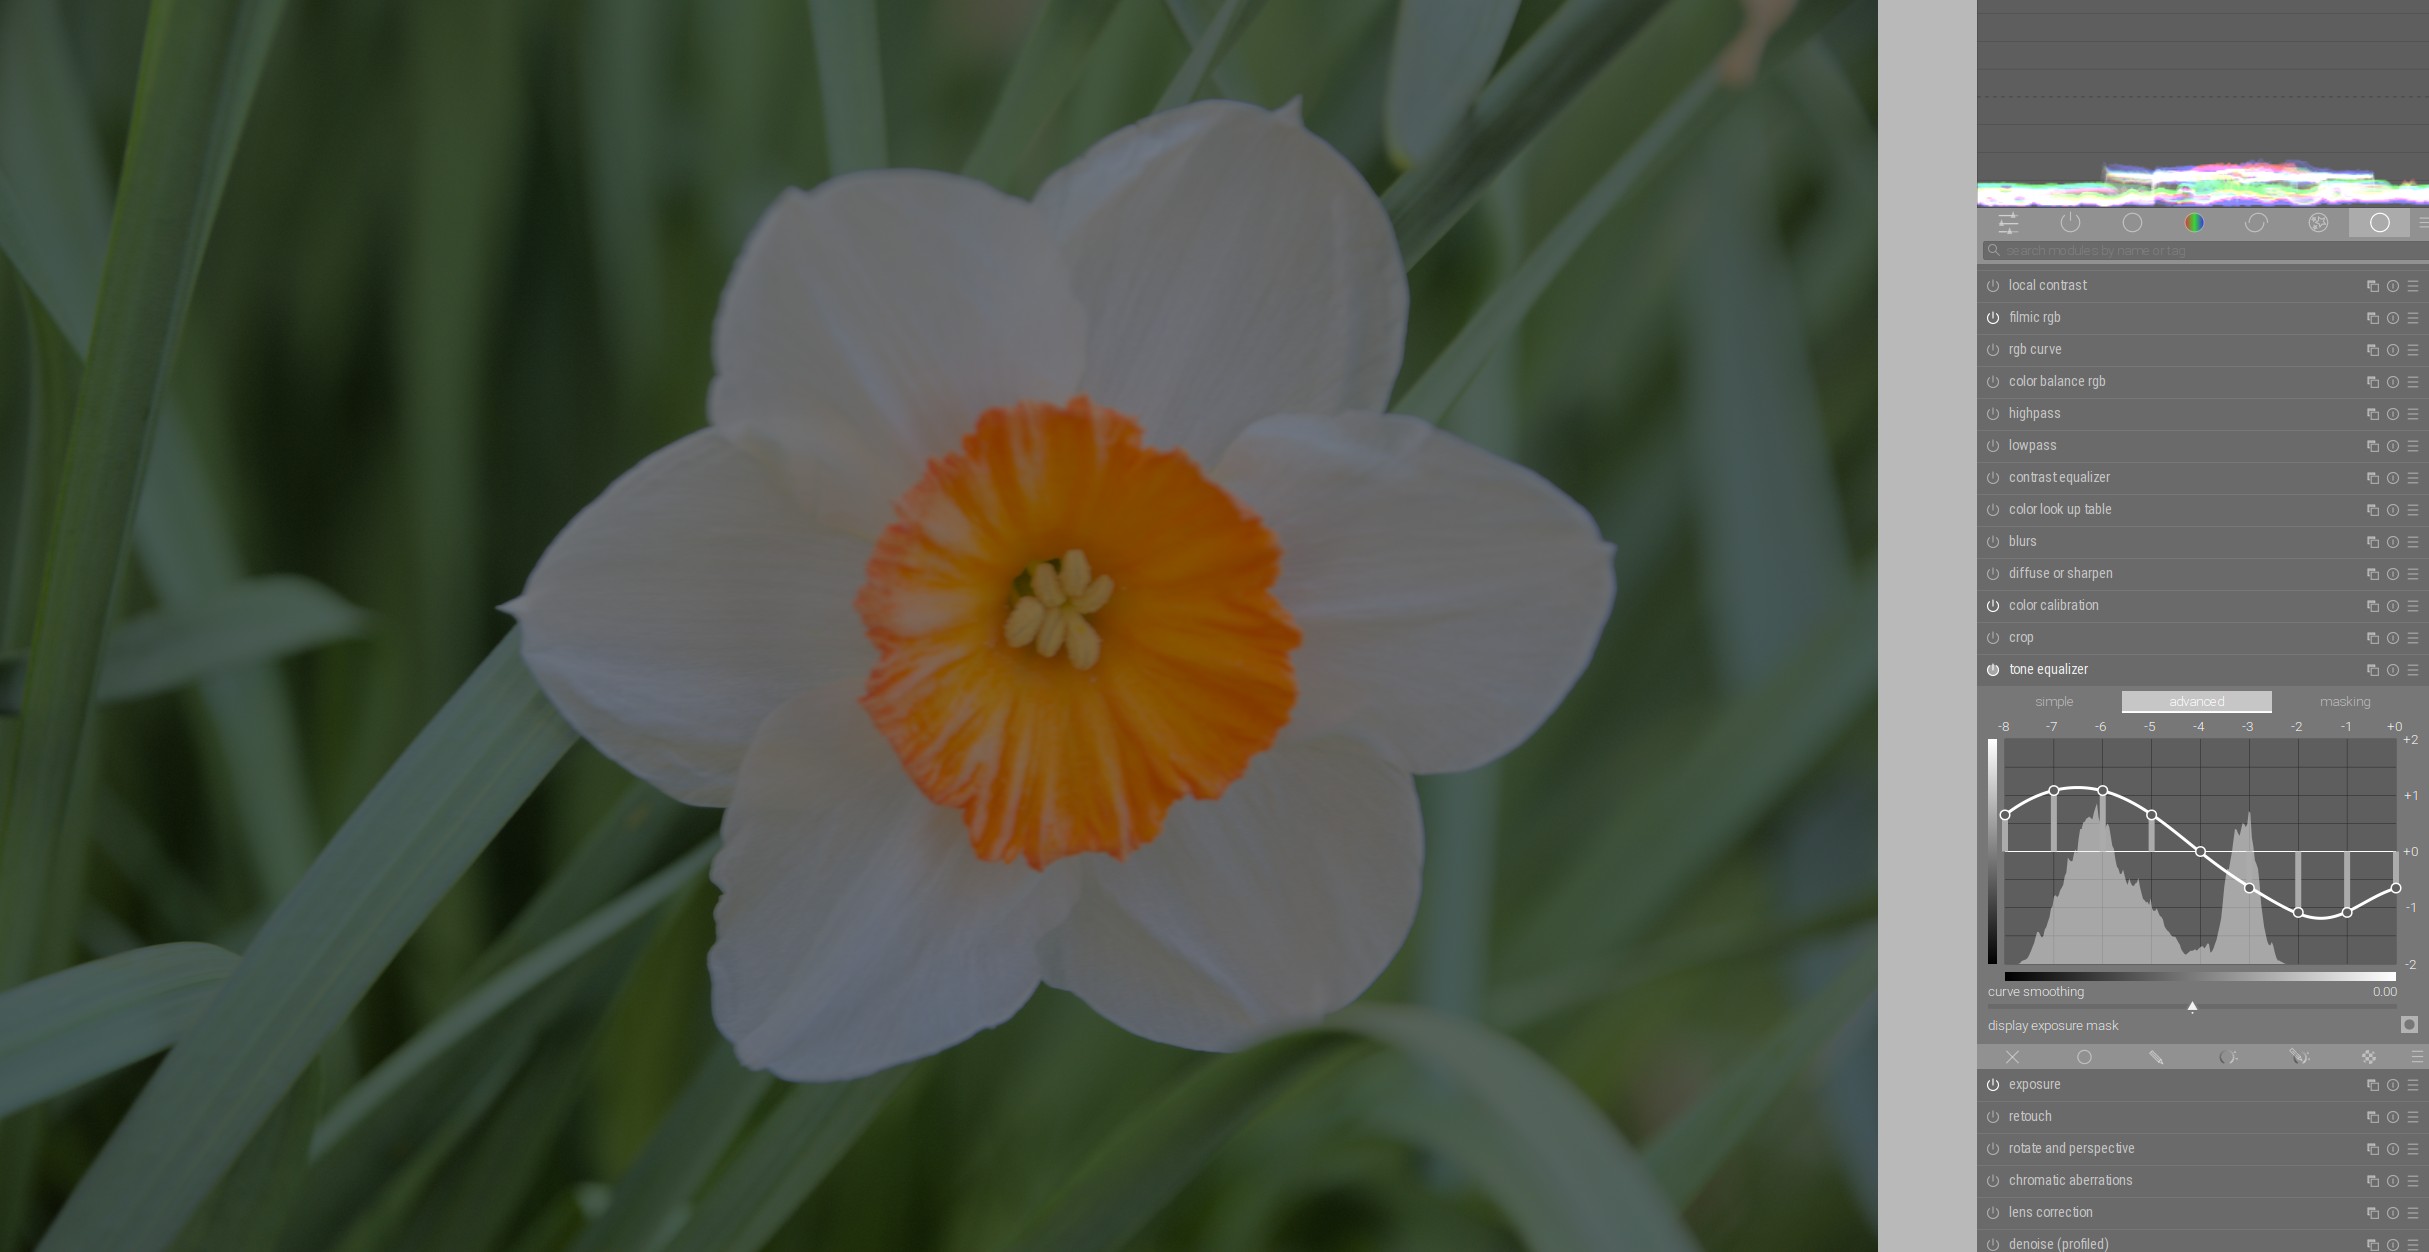
Now let’s see what happens when we lighten the flower. Initial photo:

With preservation of details. Local contrast - as expected - remains as it is:

Without preservation of details. Local contrast is enhanced:

Yes and no. This is a choice of different algorithms, and which one fits always depends on the scene. You can find out relatively easily by trying them out.

Yes, because the conversion takes place before the filmic and is therefore not influenced by chroma preservation.

12 Likes

I think this is wrong. Let me show an example using the raw from

With exposure raised a bit + filmic white relative exposure set automatically:

Tone equalizer without preserve details:

With eigf enabled:

In the version without detail preservation, a darker pixel, between -5 – -4 EV, was brightened by a lot; the less dark ‘relative highlights’ on the rocks, at about -3 EV, were brightened less:
dark part:


lighter part, the ‘bright’ spot on the rock – it’s at -2 EV, and does not get brightened at all:

Therefore, the difference between the two was reduced → less contrast.

WIth _eigf: on, the darker area’s mask (‘average of its surroundings’) is also about -5 EV:

But the surroundings of the ‘bright spot’ are averaged, thanks to the mask, to -3.4 EV, and it still gets a boost of ~1EV:

If I turn off eigf, modify the curve to lift the bright spot’s -2 EV exposure value by ~1EV (so it’s brightened my the same amount that we had with preserve details), contrast is regained:

With that modification in place, the image still retains way more detail with eigf:

Without detail preservation, but with +1EV lift at -2EV:

10 Likes

You’re right.

I mistakenly only focused on brightening the highlights in my examples where it works. If you brighten other areas without preserving the details, they will be compensated with pixels that are already in that brighter area.

That was a mistake in my thinking. I will correct my article.
Thanks for the hint!

7 Likes

Done, I hope that is correct now. :slightly_smiling_face:

3 Likes

Thank you, these examples really help illustrate exactly what is going on.

This is a good rule of thumb

1 Like

New episode: black and white conversion part 3: portraits

22 Likes

Thank you for these exquisite series = clear, and very well explained.

Best regards,

1 Like

Thank you for these masterclasses

Cheers

1 Like

Thanks for these great videos Boris and the links you sent me on YouTube. I’ve read through some of this thread and now understand what you mean by using bloom and multiply to achieve soft contrast. I used it to get some glow in the leaves of a noisy near infrared pic I took of a local sculpture in the river. My attempt was not very subtle but will keep experimenting. Many thanks.


5 Likes

Welcome to the Forum Tony!

1 Like

Thanks for the BW series. Such a fantastic tutorial! Your image selection, your thought process for achieving a goal, module selection, frequent comparisons of before and after images made the tutorial such an informative enjoyable one.

3 Likes

New episode: diffuse and sharpen module in practice :computer:

21 Likes