Do you evaluate the modules against their intended purpose or just whole sale against each other? The way both of them are supposed to work and their results are supposed to be different, no?
Read the post I’m referring to. It’s even quoted. @jorismak repeatedly says there’s no noticeable difference which is surprising to me because I see a considerable difference. Just trying to figure out from what perspective and with what settings they become similar.
1 Like
As I mentioned above any ongoing discussion of differences and what looks better etc really isn’t that helpful iMO without example ie the image in question and the xmp to illustrate how the result was obtained…
I am neither for or against either tool I would just like to evaluate them less subjectively.
2 Likes
I did. I was asking you a question.
Your question is more confusing then. I’m not evaluating any modules with these posts but trying to understand another users evaluation.
These are the sorts of comments that would really benefit from the image and the processing… It could also serve to reinforce your comments or set up a concrete discussion…
1 Like
I’m sensing some coming fire in this thread, please try to stay constructive and focused on what you can and can not do with the new module. Any problems I should try to tackle before the Christmas release, etc?
As for comparing sigmoid with filmic…
filmic has been a water-dividing module since its very beginning people have either loved or hated it, and I think that still remains today. The difference between the two modules isn’t huge if one tries to achieve the same result with the two modules. I can attest that they are different from a mathematical point of view even though they are similar (they are trying to do the same thing, after all). Users who dislikes/hates filmic will probably find sigmoid to be a breath of fresh air. Users who likes/loves filmic will probably find it confusing why the sigmoid module is needed at all. And that is honestly totally fine, we are different.
I personally hope that the inclusion of the sigmoid module will make darktable nicer to use for the group of users who dislikes working with filmic. That the two display transform modules can push each other forwards towards better results, not by being precisely the same but by being good at their own thing and not having to please everyone!
Lastly, keep those tests coming! I want to see more examples of the topic of what highlights should and shouldn’t do. I want to see examples where the sigmoid module fails. I want to see examples of where the sigmoid module shines. Thank you 
31 Likes
Great feedback…its not an either or but more what are the strengths and weaknesses and for what type of images. This might further inform the next iteration of one or both of the modules…Before the sigmoid module I would often revert to v5 of filmic… I think in many ways it was easier to work with once you understood how to manage it. V6 introduced some common artifact related to some gamut mapping, UCS and not desaturating because people complained about flat images and having to do extra color work… well that led to some other problems … but these one could argue forced some work in the area of HLR and that has had some nice improvements …
Now I think your module is doing the same…introducing some options and approaching things in a different way…
The best outcome of this discussion is not a winner but a collective exercise on how both of these tools can be maximally leveraged to best edit our images…
5 Likes
It works well for film negatives too, turned out better than my RT edit. I had some issue making the output bright enough (it’s maybe still too dark), I add to boost exposure quite a bit and pull down the skew to compensate. I kinda wish there was an exposure slider in sigmoid to make adjustments easier, maybe with a smaller range than in the exposure module.

Interesting…how old is your build??
Mine is 5 min old and I got this loading your image…

Hello,
Here are my first observations.
- works very well with the other modules of Darktable.
- very good complementarity with the RGB-UCS color balance, the tone equalizer and the new HLR module.
- sometimes, I prefer to move the local contrast module just before sigmoid in the pipeline.
- I really appreciate the simplicity of the module and so far I have no negative comments.
Personally, depending on the photo and the desired result, I will give preference to sigmoid or filmic. I will take the best of both worlds.
Here is a picture of a cicada that has just been born and dries its wings in the sun.

and here is another example
https://discuss.pixls.us/t/struggling-with-direct-light/33199/30
Greetings from Brussels,
Christian
8 Likes
I am having a mixed experience with sigmoid. One thing that I’ve discovered is that it is definitely not a drop-in replacement for filmic. Going thru some old edits, sigmoid seems to crush/smooth out the highlights too much.
With filmic. Notice the definition in the highlights on cheek.

Notice the excessive smoothing in the highlights on the cheek and nose. It almost looks airbrushed.

2 Likes
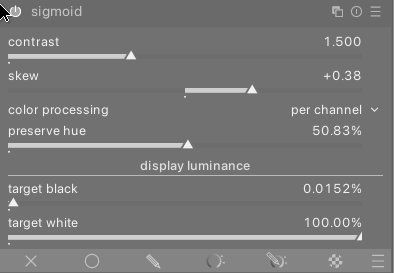
I see you are set to rgb ratio …same thing …better…worse in per channel?? Just curious as we are testing to try all options…
The only difference I could discern between the two modes was a slight shift in hue in the highlights, however, both modes produced equally smoothed results.
1 Like
Yet another portrait.
I think this is a good example where filmic does some things better than sigmoid in some areas of the image and sigmoid does better in other areas of the image. I tried to compare the best settings for each module against each other. The goal was to tone map the extreme highlights on the side of face and shoulder without touching much else. The photo is slightly out of focus which tends to happen photographing a very active child, so the smoothing effect I posted about above is not detectable here.
Image with no tone mapping. Please know that there is no clipping in the original raw file. Exposure is boosted by about 2.25EV to get subject properly exposed.

Image with filmic. To my eyes, filmic is a little to happy to crush shadows. Also, note the loss of contrast/detail in the fur. The highlight on the shoulder is nicely rendered imo. Highlights on the chin are desaturated too much (can probably be corrected, but a little beyond my ability with dt at the moment).

With sigmoid. I like the slightly warmer tone. I also like that the shadows aren’t crushed. The fur also suffers from loss of contrast/detail compared to original with no tonemapping. The highlight on the shoulder especially is lacking detail (detail that filmic is able to preserve). Sigmoid handles the highlights on the face much better.

The settings for sigmoid. The simple controls of sigmoid are great!
And changing the color processing to rgb ratio results in this. The hightlights on the jaw are more desaturated and gives the fur a bluish tint on the shadow side. The highlight on the shoulder it gets a slightly warmer tint.

As for my goal of tone mapping the extreme highlights. For the shoulder highlight, I prefer filmic (simply because it appears to preserve more detail). For the jaw, I prefer sigmoid. I dislike the loss of contrast in the fur in both filmic and sigmoid. I like how sigmoid handles shadows more gently than filmic.
I’m not an expert with dt and photography is purely a hobby. I hope this is helpful feedback. I really appreciate the work you’ve put into this @jandren. I’ve followed your original sigmoid thread and I’m really excited that has finally been merged into master! Having both tone mapping modules is a treat.
4 Likes
@jandren
Jakob, here is an image where I fail to control the highlights and the shadows. Left: filmic auto, right: sigmoid.
If I try to match the highlights, the shadows are darker with sigmoid.

OK, so let’s reduce contrast, and tweak skew:

But now, the details in the sky are much softer.
I’ve been using filmic for years, in all its different incarnations, and it took a while (both for me and the module) to get to the current point. And, of course, on some images it takes a while to get what I want (and that may require turning the filmic off), so I’m OK if learning sigmoid takes some time. It’s also possible we’ll find your module works great for some images, and less well for others. Or that filmic’s look is simply one that some people prefer, with others loving sigmoid (or base curve, for that matter). I don’t expect sigmoid to look exactly how filmic looks – there would be little sense in including the module, if that were all it did. On this image, I’m comparing it to filmic because there I feel I can control the look more. With sigmoid, I have to increase contrast to control the highlights, but that also affects the shadows, and then I have to tweak skew and/or the exposure. Maybe I’m using it wrong. Is there a recommended workflow (like with filmic you set your midtones first, and then the black/white point, then contrast, highlight reconstruction, chroma preservation and so on).
Anyway, thanks for the new module, I’m looking forward to working with it on more images. I’m attaching the raw and XMPs, and would love to see your take.
The panorama at Mt Rigi (‘the queen of the mountains’, according to the marketing department):
2022-10-30_18-18-36_DSC_0775.NEF (20.3 MB)
2022-10-30_18-18-36_DSC_0775_03.NEF.xmp (6.8 KB)
2022-10-30_18-18-36_DSC_0775_04.NEF.xmp (12.4 KB)


2 Likes
I haven’t used sigmoid yet, but my initial reaction would be to use tone eq to lighten the shadows.
Yes, that can be done, but then the simplicity of sigmoid is no longer there.
Thanks for the test and comments. I think besides the highlights a big difference is the face. If you look at the area around the cheek and eyes while flipping between esig and efilmic you see how filmic and to a lesser extent sigrgb changes, sort of flattens, the appearance of the face. Making it closer to one block colour.
I think that when examining images with sigmoid and filmic there’re two distinct macro “variables” in the system to consider:
-
The tone curve
-
How it’s applied to the rgb channels:
- filmic
color science+preserve chrominanceoptions) - sigmoid
color processing+ (preserve hueforper channel color processing) or (the unique available normforrgb ratio color processing).
They can both affect the perceived differences in contrast, highlights/shadows etc…
Theoretically one should implement the sigmoid “color processing” inside filmic and the filmic “color science” inside sigmoid and then only the “tone curve” and how it’s controlled will be different between the two (that’s one of the reason in the main sigmoid thread there was a proposal to implement sigmoid changes inside filmic).
If we could do the above and being able to fix point 2. it’ll be easier to compare only the effect of the tone curve.