I’m fairly new to RawTherapee and using v. 5.8 on a Windows 10 machine. I have 75 similar raw files. In Editor I cropped the first file and used Exposure Compensation to brighten it up. I copied the processing profile then selected all the other files and did a Paste - Partial checking Crop and Exposure (I guess a full paste would have accomplished the same thing as I only did those two operations on the first image). It appears to correctly apply these two operations to the other 74 images. They all show the crop and are brightened up.
The problem occurs when I put the images in the Queue and export them, choosing either 16-bit TIFF or 8-bit JPEG images. They look okay in the Queue, but it appears that the exposure step is applied somewhat erratically in the first few exported images, then after a number of images the remainder all look dark as if no exposure change was done. I have repeated this several times, starting from scratch by first deleting the .pp3 files, and the same thing always happens. I even tried it using a smaller subset of the 75 images with the same result.
Can you elaborate on what auto settings might be involved? I just used the Exposure Compensation slider. I don’t see any auto setting except Auto Levels, which I didn’t use.
Modify Exposure compensation, go to File Browser, copy the profile of that image, and paste it to all and every image that should have the same compensation.
I’ve been trying various combination of steps and it appears that the neutral profile is what does the trick. Thank you.
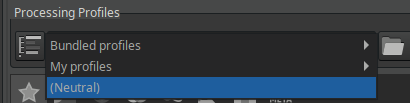
I went into the preferences and under Image Processing I selected Neutral for raw (and non-raw) photos and unchecked Use Bundled Profiles. I assume this will by default apply a neutral profile going forward.
One other question if I may: If I select an image and apply a neutral profile, then go to another image and paste partial, profile doesn’t appear to show up in the long list of items to check. Why is that?
A processing profile is just a list of all the tools within RT, and their state (on or off). Then inside each tool there are the settings of the tool with their values at the time of saving the pp3.
The Neutral profile is a profile where all the tools are turned off, so you will not paste a profile, but the state and settings of each tool.
On the other hand, when you paste the settings from one image to another, this is what I understand: if you apply all the settings (the Fill mode in RawPedia), then you copy everything inside a pp3, and if there’s a tool not listed in the pp3 copied, then the default is applied.
However, if you apply-partial a copied profile (the Preserve mode in RawPedia), then only the turned on tools will be replaced, and all the other tools will be left alone. This implies that if you have 2 images with completely different processings and you apply-partial a copied profile to them, only the turned on tools will be pasted, and the images will still be processed very differently.
E.g.: one is a low-key image, and the other is a high-key image. Then you copy a profile where only Capture Sharpening has been applied. When you apply-partial that profile to those images, they will still be high-key and low-key, but with some sharpening applied to them.
Getting a little complicated. This is from RawPedia:
Pay attention to the " Processing profile fill mode " button!
“Fill” mode
When the button is activated and you open a partial profile, the missing values will be replaced with RawTherapee’s hard-coded default values.
For instance if you apply a partial profile which contains only sharpening settings, all of the remaining tools (such as Exposure, Tone Mapping, Noise Reduction, Resize, etc) will pop into their default positions.
“Preserve” mode
If the button is deactivated and you open a partial profile, only those values in the profile will be applied, and the missing ones remain unchanged.
For instance if you apply a partial profile which contains only sharpening settings, only those sharpening settings will be applied, and your other tools remain unchanged.
But this is all just about applying profiles, right? Copy/pasting of tool adjustments is a separate thing and there the processing profile fill mode doesn’t apply i.e. a partial paste of adjustments does just that, leaving all other tool settings alone. At least that seems to be the case after some experimentation.
When you apply a copied profile, you are pasting its information into the target image (or images).
When applying a profile from file, you are not strictly pasting a copied profile, but reading the information from a file and pasting it to the target image.
About the Neutral profile, I must agree with you that my explanation was vague or at least incomplete: I have checked and I can’t find the Neutral.pp3 profile. It seems that it’s hardcoded into the program, and it’s a special profile to leave the image completely untouched, without any tool applied (just some default things as the demosaic algorithm).
If you choose e.g. the POP 3 Skin bundled profile, which only has information about a few tools, you will see the difference between Fill mode (button pressed, button background black, all list items white) and Preserve mode (button released, grey button background, some list items white and others grayed out). If you forget the misleading Neutral profile, you will realize that Fill mode has the same effect as apply, and Preserve mode has the same effect as apply partial, but only if the profile copied doesn’t have any information about deactivated tools. If it has any tool listed as deactivated, it will be pasted as such in the target image.
At least is what it seems to me right now. I will further test this when I have time, but if any developer chimes in maybe the doubt will clarified much faster.