Finally the time has come

After quite exhausting last two months, everything is running a little bit calmer again. During this time I have avoided our forum in order not to distract myself too much. I really had a lot to do.

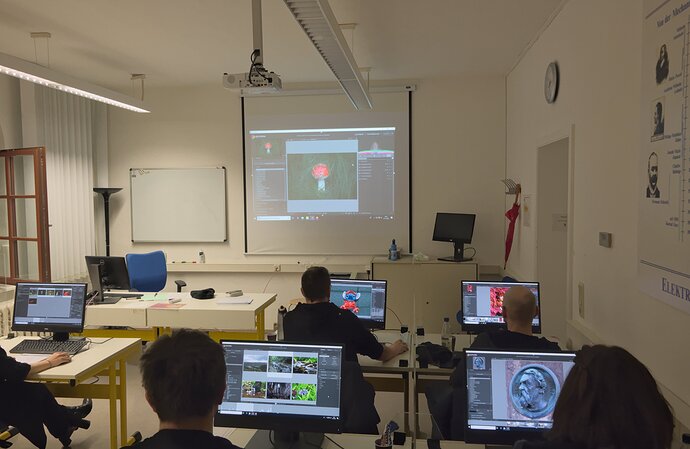
And there is a very nice news. Despite increased corona measures, in the adult education center here in Erfurt finally darktable course takes place:

I am incredibly happy to finally be able to lead the course.

Yesterday evening we had the second session and I had some interesting observations regarding the acceptance and handling of darktable.

I decided to start immediately with the scene-reffered workflow because I was interested to see if the participants would be able to understand and adopt it.

The participants were mostly new users, but all of them had already tried darktable and found it very difficult to use on their own. All of them are amateur photographers, but the photos they brought were of a higher quality. So they are good at their craft.

It was very interesting for me to learn about the difficulties they had before we started.

They were overwhelmed with the number of modules and the fact that there is no clear approach at first glance. The modules were also described and labeled in a very “technical” way for them. This made it seem that one has to be well informed and acquire the appropriate knowledge first in order to be able to use it correctly. That was a big threshold for all of them at first.

And for me, the most interesting thing was that my task was largely to dispel the fears and show them that the actual application was not as complicated as the “technical” terms would first suggest.

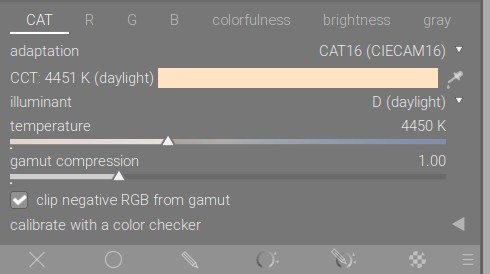
You should have seen their faces when I introduced color calibration yesterday, for example :grin::

color_cal

But, after these “scary moments” were over and I could demonstrate how simple and logical the modules are to use, they were very quickly impressed with the functionality.

Above all, they experienced how high quality results they could achieve, which they were not able to do with the other tools they have used so far.
69 Likes

what a great experience and it must have been so rewarding for you!

1 Like

That’s very interesting. Are you suggesting that the barrier to entry for using darktable is primarily an issue of literacy (in the domain of image processing), or are these users also missing some key conceptual knowledge needed to drive the modules?

Did any of these users look at the introductory sections of the user manual? Are there any improvements we could implement there to make the workflow clearer?

4 Likes

Yes, that is indeed interesting. I will say in part both play a role here.

For example, regarding the first one - the problem of basic knowledge about image processing - most participants already know what color spaces are, e.g. the sRGB color space is familiar to them, but what is the difference between a linear and perceptual color space is not clear, because this is not addressed at user level in other software.
Knowing this distinction is essential for the scene-reffered workflow.

This means, on the other hand, that you first have to acquire additional knowledge here without being able to immediately see the benefits of it in practical use. So, lot of reading first.

And we are not dealing with enthusiasts who are curious to find out what is behind this method, but the primary interest lies in the refinement of their photos.

So, that’s the first threshold. The second is the design of the modules themselves.

So with the RGB color balance, for example, some wondered why you would need 13 sliders for saturation?

And why are they named in such a way that no one can imagine what they mean. That means, you have to read again what is behind these names to understand how to use them. Just by trying them out, you don’t get much further here.

This does not mean that this is complicated, but that a change of familiar terms for them is necessary, and new terms are added whose usefulness must first be developed in intensive practical work.

The documentation is only conditionally helpful here. For example, in the question of when to use which saturation mode is written:

“In practice, you should use the chroma setting if you want to preserve the scene-linearity of the light emission and/or keep the luminance unchanged. However, these changes might affect some hues more heavily than others, due to the fact that the color space is not fully perceptually-scaled.”

Now I have to look up again what is meant by “scene-linearity of the light emission” and how do I apply this knowledge to my flower?

But if you have a good example with the corresponding demonstration, it will become obvious very quickly.

My luck here was that I could catch everyone in the typical problem that everyone has with over-saturation of flowers especially with the tulips roses or poppies that then just turn to colored mud if you only have one saturation control.

I then used this photo to demonstrate how you can have very precise and superior control over saturation especially with these different ways of influencing the color intensity:

Such example and explanations on concrete cases understandably can not be provided by the documentation. Even if you had enough people to work on it, it would quickly become overloaded.

There must be something that can accompany the documentation.
I am still thinking about how to approach the problem in the most elegant way.

I do not know. I will ask the next times more exactly how they proceeded to inform themselves about the Darktable. That is a good question!

15 Likes

A very simple thing that I don’t think is well-understood is that there is an order of application, from black subtract to export, in any raw processing software. Sometimes operations can be combined, like CA and lens distortion correction (look at the lensfun library for that), but that’s not the norm. And, I think we all know here that order is important, put filmic in the correct place or be forever know as the person who abused scene-referred… :laughing:

My personal observation is that, once that importance is comprehended, the new darktable organization should be clearer.

FWIW…

1 Like

Interestingly, that was the least of the problems here.
The hierarchical structure of the modules with filmic at the end of the pixel pipe is logically structured and clearly comprehensible. The participants understood it very well.

The problem was the chronological order. For example, after the basic corrections were made, the question was how far to go with the exposure correction. If I brighten my main subject sufficiently, do I still have enough room for the contrasts? If I increase contrast even more, the highlights get overexposed and I am forced to compress with filmic dynamic range. But with additional compression I lose the contrasts again. Etc.

4 Likes

@s7habo Brilliant explanation of what happens in the “real world” of user base :+1:

1 Like

I think the feedback from these students and your elegant assessment above is a good insight into some of the challenges with presenting such powerful software to new users.

What about if when you first open darktable, a modal dialog pops up and asks “Need help getting started?” and if you click on it, it takes you to a webpage of high-quality videos that walk you through an example photo of a variety of types (e.g. portrait, landscape, macro, etc) using the scene-referred workflow. As you said, you’d need to be careful to keep the number of these videos manageable, but I think almost every new user probably has a photo in mind that they want to try processing when they try out the software, so letting them find the example video that is most similar to their photo, then watching it, and then repeating the steps on their photo will help get them started. Of course these results won’t be optimal, but it would at least let new users successfully process a photo without needing to deep-dive into the documentation until they feel confident in the basic workflow

Video is a very difficult medium, and it goes stale pretty quickly.

Avoiding the documentation is a mistake, spending time with it will only help.

In engineering school, I had to learn mechanical design and 3D modeling with Catia V5R20. I had 35h of classes on it with real-life teachers, then I worked on the solar car of the school and did some modeling there. I became quite good with it.

Before getting out of school, I tried to learn the competitor, Autodesk Inventor, which is much more elegantly designed and has a yearly license fee much more realistic for a freelancer. Also, they give students free licenses for 3 years. Autodesk has awesome doc, with text and video, most of them translated into my native language (not English…). But at that point, I had mostly specialized in coding thermodynamics software and lost some motivation and interest for mechanical parts design. However awesome the doc, there is still a lot to cover to get a sense of the internal logic and I never reached a similar level of mastership in Inventor than what I did in Catia. Also, not having a teacher makes learning incredibly slow.


I have used KDEnlive as a video editor for years now. It sucks at color science, it used to be super unstable (much better now), and used to be super slow (minimal GPU makes it usable now, or makes the output completly garbled, depends on days). Then I tried to learn Da Vinci Resolve. Again, awesome docs, PDF, website, videos… Then I tried to edit my 10 FPS screencasts in it, they are not supported. I have some more serious artistic-ish stuff I need to edit, I’m still procrastinating doing it in Resolve, and still using semi-shitty KDEnlive when I must.


So. Learning.
First, you need a real motivation, as in : a goal.
Then, you need some real dedication, as in… a really important goal.
Then, you need some really real dedication, as in : the courage of not falling back to the semi-shitty stuff you already master that doesn’t work well but gets you some results now.
Finally, you might need someone to answer your questions in real time and guide you through shortcuts and personalized pieces of advice because docs are a reference material, not a class, not a handbook, not a lesson.

To use a doc properly, you need some prior idea of what you try to achieve and why. Which brings us to something very unoriginal : school, teachers, seminars, internships and the like.

12 Likes

Wow Boris, wonderful! I think that teaching is always a great experience and, despite the fact I did myself some “introduction lessons to darktable” in my local photoclub, I would really love to be good enough in doing what you did.

BTW I’ve always appreciated your videos, and I would kill :hocho: :japanese_ogre: to be part of that class you had. Because, as you mentioned, the manual is not enough to give an holistic view of what the process (and possibilities) are, and the videos alone can’t do it either. Have you considered online classes? :wink:

Exactly, this is the thin red line that connects the concepts into a “story”. Stories teach more than a manual sometime!

Hi All,
I teach Darktable to Adult Education students in Tasmania Australia. Later when I have some more time I will try and share some experiences and thoughts about teaching Darktable. One experience however was with Film V4. I got the students to do an edit using the base curve approach (Display referred), the same image with none were they created their own curves to create the look they wanted. However, 100% of the students preferred the scene-referred approach with Filmic. A win for Aurelien. I do however, have one question about Filmic V5, which I am hoping Aurelien will answer. The custom grey slider has been removed from the default view of Filmic scene tab. I believe because Aurelien found most people were confused how to use it. I actually like to reactivate through options and often use it for fine tuning the image rather than depending on the exposure module. Is this a good or bad idea in Aurelien’s opinion.

1 Like

The fact that he hid it is probably the answer to your question

Hi Todd, he said he hid it because most people did not understand how to use it. I watched his videos and experimented and found it very useful. Jumping back and forth to the exposure module seems less useful. But Aurelien often has reasons for why he prefers one option over another in Darktable.

No need to jump back and forth between modules. Set a keyboard shortcut for changing the exposure and then you can still adjust everything while the filmic module is open.

1 Like

If I can find the reference I will pass it along but he clearly stated that exposure is the preferred and perhaps proper way to do it…maybe because the adjustment happens early in the pipeline and changes in filmic are later??? I don’t recall the logic…I don’t think exposure has any effect on rw and rb but I think they might change if you move the middle gray…this might be the desired result wrt dynamic range adjust wrt middle gray but maybe not?? In any case if you get the results you want I would use the method that suits you best…and as Chris said…not sure if it comes preset but you can hold down the e key and use the scroll wheel at any time for exposure changes even when you are in filmic or some other module

I can’t speak for aurelien of course.

But the middle grey slider basically does what the exposure module does.

Raising exposure (with filmic enabled ) has the same effect has the middle grey slider.

But… Because now you have set the proper exposure before filmic, other modules now also know what the correct exposure / middle grey is (well, I’m not sure if the modules ‘know’ but the data has better values for them ) .

This means things like the tone equaliser, color correction RGB, color calibration, etc… (which all slot in between exposure and filmic ) have a better understanding of what are shadows and what are highlights (and what is middle grey of course ).

By using the middle grey slider in filmic , you keep that information only to filmic …

2 Likes

I think @Terry still wants to use exposure to set the middle grey. He mentioned that he’s using filmic’s middle grey slider to fine tune.

In my edits, in fact, I start with exposure and set it to middle grey.

But after enabling other modules above (below filmic), sometimes what I decided to be middle grey seems to change. In this case, I use color calibration perceptual brilliance grading to add punch, and/or tweak filmic’s white/black relative exposure / dynamic range scaling to get back the “correct exposure” (what I think is middle grey in a given photo), or even create a new exposure instance and move it right below filmic.

(Not sure if this late discussion on exposure X middle grey in filmic should be split into another thread…)

If I’m right - a big if - I think making minor tweaks to filmic middle grey should be fine , specially as a final step. If all other modules are basically doing what you want them to do, then I see little harm in making a little grey adjustment in filmic if you’re almost done.

Setting the exposure right really helps to let tone equaliser’s masking to have a sane default , most of the times (at least, if you’re after making adjustments around middle grey and shadows , not extreme highlights. Then the masking needs an exposure adjustment). And color balance RGB does what you expect it to do with the sliders that affect shadows, mids and highlights.

After that is all set and you’re almost happy, tweaking a bit with filmic middle grey seems fine to me. I just never ran into that need. But I’m also quite liberal and 'quick n easy ’ in my edits.

2 Likes