Glad to see elsamuko still updating scripts! 
I thought there was a style transfer filter for G’MIC? (Not sure, I haven’t checked for something like that in a while).
Glad to see elsamuko still updating scripts!
I thought there was a style transfer filter for G’MIC? (Not sure, I haven’t checked for something like that in a while).
Yup, can’t thank him but he have my eternal gratitude for doing this
There is things like Transfer Colors patch based with the haldclut in Gmic that comes to my mind,probably there is more plugins ( hence why i made the first post ) but never i could get a result like i get with this plugin, same when trying with a process including many steps and various plugins…
Also found 10 days ago during a google search a script requested by someone who was missing this plugin and trying to find a solution but the rendering was not excellent and sometimes differing too much from the expected result.
This get curves plugin acts like magic for me, take 2 pics, the original, the modified, get the curves difference saved as a curve, then apply it on a copy of the original pic and try to spot the difference with naked eyes, the best thing is when you work on series of images where only a few were edited long time ago :
get the original and modified one, get the curve difference and now you are good to apply the same on the other images from the serie you left untouched for so long, also from my tests it works really well to get a curve from a pic where a LUT was applied, then i can apply the same process just with this difference curve on other pics, or on a reference haldclut that i will use in Gmic like a LUT, it’s like magic
Yep, I used this script for a long time. 
I am fairly certain this would be trivial for a G’MIC guru to put together, though (and maybe save having to track down and maintain another plugin). Any takers? 
I’d be interested by this, I’d need a detailed explanation of what the script does by the way ![]()
Isn’t this the equivalent to the new histogram match tool in Raw Therapee?
My understanding is that the tool in Rawtherapee just applies one single tone curve on luminosity (not affecting colors independantly), while the Gimp plugin calculates one curve for each of the 3rgb curves, thus applying a kind of color grading.
Given two images, calculate each R,G,B channel to get from one to another (for each pixel). Save/show the resulting curve for the transform.
The images are usually identical, but with some sort of color/RGB channel modification to one of them.
(I can expand on this more tomorrow if needed.)
Fitting the R,G,B histograms is already what is done by the filter ‘Colors / Transfer colors [basic]’.
Also I think G’MIC won’t be able to save curve data, unless I figure out how this is done internally (where the curve files are stored ?).
Hello,
The results obtained from Color Transfers plugins in Gmic were never close to matching the sources with all the pics i tried, sometimes not too far, sometimes the results was way different, I don’t know, maybe i am missing something here but never could get good results in my tries.
I don’t know exactly how the plugin works to do his magic but the source code is available here it might help to understand, I am not a coder so i can not really be of any help for this.
For windows version of Gimp the curves are stored by default in: “C:\Users\username\AppData\Roaming\GIMP\2.10\curves\”
But it is possible to get curves stored anywhere and load them in gimp ( like in the video below )
The curve created using the plugin is automatically stored in this path folder with a name like:
curve_date_time
for example : “curve_2018-01-01_16-38-15”
Here it is a small video example of the plugin in action :
https://streamable.com/zlv62
Direct link just in case ( possible to make a right click and save video) :
https://cdn-b-east.streamable.com/video/mp4/zlv62.mp4?token=7skwCP2IXjzq1_iKQ-Wcew&expires=1532433232
The original pic used in video is this :
The curve the plugin when launched created is this file ( hosted on zippyshare ) : https://www78.zippyshare.com/v/hQWF8qPc/file.html
You can try to apply it to the pic above ^^
Content of the curve file once opened in notepad++ is this : https://pastebin.com/raw/NYS5zS5y
Hope this can help a bit,
Thank you very much
@Yalba correct me if I’m wrong: it’s assumed you have an original and an altered version of that same image. Find the curve difference between those two. Then those curves can be applied to a third image.
If that’s the case then that’s a different problem from the G’MIC transfer colours filters. They try to transfer colours without having an intermediate version of the original to compare with (actually a harder problem).
I compiled the plugin in Linux and ran a little comparison with the 3 G’MIC filters for color transfer.
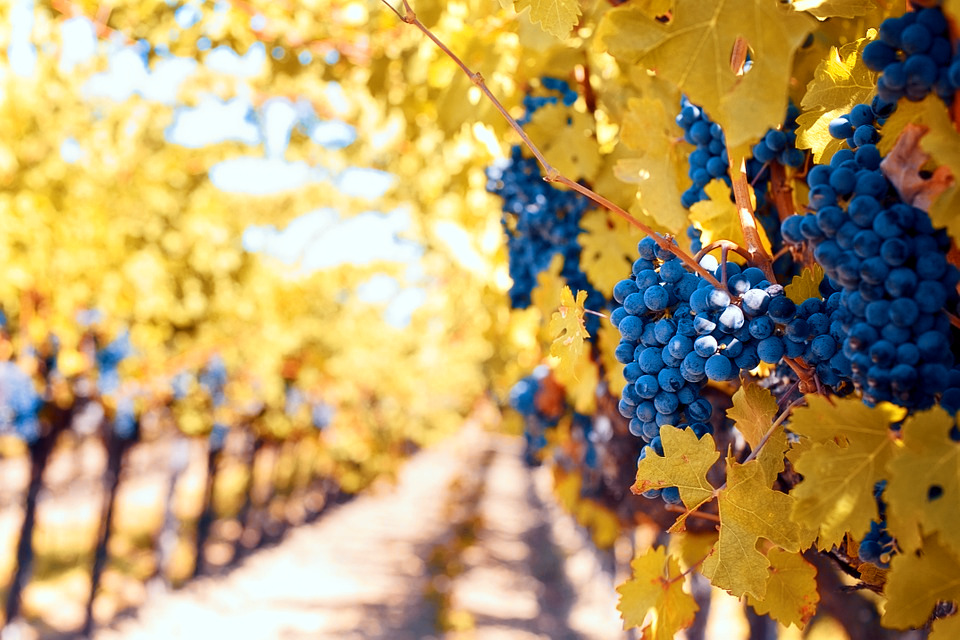
First, the two original images (from pixabay):
This one is the reference:
And this the one I will transfer colors to:
Now the results:
Elsamuko’s get curves plugin:
G’MIC transfer colors “basic”:
G’MIC transfer colors “patch-based”:
G’MIC transfer colors “advanced”:
Note that I used the default settings in G’MIC.
So, elsamuko’s plugin seems works even with two different images, but be careful: it works strangely, and I haven’t succeeded doing the transfer twice… The first time it gave a wrong result, the second it was ok (what I showed above), the third time wrong again…
EDIT: take the get-curves plugin results with a grain of salt… Now I’m not sure how I got a correct result, I can’t make it work correctly with different pictures.
Once @David_Tschumperle adds the mythical machine learning to G’MIC, every problem will solve itself. 

Well, color transfer is not the same thing as style transfer, which is more than just transfering colours (for example it can transfer “texture” like brush strokes).
I think that among the three different flavours of color transfer in G’MIC, we are already blessed with a neat tool.
Ok so if the two images are exactly the same, color transfer is indeed not the best method.
But, it reminds me a lot a test I’ve done a few weeks ago to encode a color transform between two similar images into a single CLUT file (which is even better than curves IMHO, as it can express more complex transformations).
I don’t find the post anymore, where we talked about that last time, but I can give another try this afternoon.
@garagecoder Yup, that’s how i use it in general, especially usefull when you have a series of similar pics from a shoot and you modified only a couple of them, you can then extract the curve from the original vs modified and apply the same changes into the ones you left untouched using the obtained curve, instead of trying remember and find all the changes you applied on those pics.
Once i get the curve i can either apply the curve directly on the pics from the same series that i left untouched or apply the curve on a reference haldclut and use it in Gmic as a kind of LUT.
Also possible with this reference haldclut where the curve was applied to apply it on a video taken with the series of pics to get a similar effect on the video.
@sguyader I never really used it to transfer colors from 2 different content pics, i tried with your examples and i get a very strange result:
The weird obtained picture can be used somehow, putting this in layer on the top of the destination image and modifying the layer mode to use something like Soft light, or inverting the colors and using it in overlay mode and you get some interesting results but in the end it’s a bit the same as taking the reference pic, use blur filter > pixelize and get a single big pixel that will be the average color of the reference pic and then invert colors and do the same i guess.
Can’t remember where i saw this method to match colors between pics by making a single average color pixel and inverting colors, not even sure if it really efficient and really match in terms of transfer of colors too…
I tried the Histogram Match script on those pics, the result is very similar to Gmic transfer colors basic result you posted :

In the end the plugin is not the same purpose as colors transfers indeed, but it helps a lot when you have the original and edited pic + a bunch of other pics coming from the same location and shoot serie.
@David_Tschumperle That will be great indeed, but take your time no hurry ( I know i asked a couple of things about haldclut’s here but it wasn’t a few weeks back so i doubt it was me^^ )
Thanks a lot all
Yes this was this one.
I’ve just finished re-implementing it again by the way (and probably with better options).
I’m preparing a new G’MIC filter CLUT from before/after images, so stay tuned ![]()
OK, so here is my attempt.
I’ve added a new filter ‘Colors / CLUT from after-before layers’ which can be used to estimate the color transformation that has been applied between two given layers.
Of course, the filter won’t work if the two layers represent different images!
In the video below, I show how it can be used, with these different steps:
To apply the CLUT, I also use a G’MIC filter, namely ‘Film emulation / User-defined’.

Let me know what you think about it !
Wow that was fast and it seems to do the job well, I took a few similar pics and tried it :
Original pic :
Quickly modified in Gimp :
Then using your Plugin to get the haldclut and applying the Clut on the 1st pic :
Now let’s try on similar images, original :
Now with the clut generated from the plugin :
And a last one :
With the haldclut applied :
Looks very good !
Between the modified pic and the one resulting in the Clut applied on the original picture there is only a very light difference, very subtle but noticeable when you switch a few times from one pic to the other.
I used 100% for the setting “Influence of the color sample” not sure how much it can change with the different %'s, also used the 512x512 haldclut, need to try with the 4096px one, i’ll have to try more but overall it’s more than i expected, it’s marvelous
Thanks a lot for this.
Magnifique, big thanks.