Yes, my point was that it effects what you see on screen, including the histogram, but not the raw data. So when I was usinf this feature I ended up clipping all the highlights. It makes no sense to me why it even exists, I only shoot in manual mode.
@Terry I didn’t provide an image actually - just screenshot of the histogram and link to a previous post that the user was having some challenges too.
The screenshot b/w with histogram in the middle is how my image looks on the LCD - in essence - centered histogram without visible clipping left or right
Thank you!
This video is very informative!
I think I will have to go for a manual adjustment to handle properly the highlights.
@jorismak Thank you!
I think I will have to experiment more with it. Yes - I’d rather have the noise than the highlight clip. Even when I don’t like the noise either.
Canon’s “D+” , Fuji’s “Dynamic Range” … They do the same thing - underexpose, without you even knowing, in order to save extra highlights and then raising darker parts “in post” , i.e. when baking JPG (or RAW thumbnail).
Please notice - when you use D+ in Canon or DR in Fuji, you are no longer able to select the lowest ISO.
(Well, in Fuji you can, but then DR goes back to DR100%, which is the same as “OFF” )
Plus, the histogram shown in camera is based on embeded JPG thumbnail, which in turn is based on the “Picture style / Film simulation / Picture control / etc” you had chosen before.
Darktable alwyas shows the real RAW, while most commercial software reads the EXIF tag of dynamic range modes and silently adjust the image’s brightness.
2 Likes
I think that many people set up the highlight warnings and then take some test shot increasing the EV in small increments and then come up with a fairly good guide of how far they can push the DNR of their camera…maybe this changes for different lenses not sure but it seems like a robust and quick way to be able to work quickly without too much fiddling…
Thank you…
My photos were vacation photos - often on the go with few sec. time to adjust…
Didn’t have time to properly assess.
I think this is what happens indeed. I will try to turn OFF D+ then manual adjust to slightly under expose -1/3 to -2/3 to deal with the highlights.
1 Like
I’d hope that once you get all the wacky jpeg-first stuff disabled that you’ll find that you generally have +1/2-1stop of headroom from the jpeg. That’s how its been for the other systems I’ve shot on.
2 Likes
One item not discussed is the metering modes on the camera. Those will have a big effect on the exposure compensation.
I recommend switching your camera to M (manual mode). Keep the iso at 400 and learn how to expose on your camera. Keep it there for a month or more. Correlate to darktable and then eventually switch to A (aperture). If you do this, you won’t be looking at camera histograms.
My answer to this problem is to set the camera to auto exposure bracketing of 1EV. With continuous drive the camera quickly gets the three shots and this covers me in most situations. Also reduces the chance of a person having their eyes closed because of blinking. Camera sounds more professional as well so the BS factor makes you look like a better photographer.
1 Like
![]()
I’ve done this quite a bit. Have 9k photos to sort ![]()
My information regarding Fuji cameras, differs from yours: as I understand it the ‘L’ histogram is directly taken from the display/JPG data but the R.G.B. histograms are from the RAW data.
I follow the advice from AP and allow the camera to establish the exposure ‘pivot-point’ (mid gray). My Fuji underexposes this value by a full (protective) stop, which I reverse automatically in processing. The only other exposure correction that I make is through the camera’s compensation control which again is automatically reversed as a part of the exposure preset.
In general I find that only very rarely do I need to mess further with exposure during the development process.
I believe that this way my exposure/development pivots around the 18.45% and filmic takes care of the tone mapping as needed. Using ETTR as a basis for exposure appears to me counter-productive with this ‘modern’ system.
Closer to the raw data given what gets disabled but still not a true raw histogram I don’t think…Fuji Natural Live View | Exposing to the Right | Fuji Frame
I am not aware of any system (sans Magic Lantern) that provides raw histogram data. I welcome specific information to the contrary, as I’d sell all other gear immediately and buy into that system.
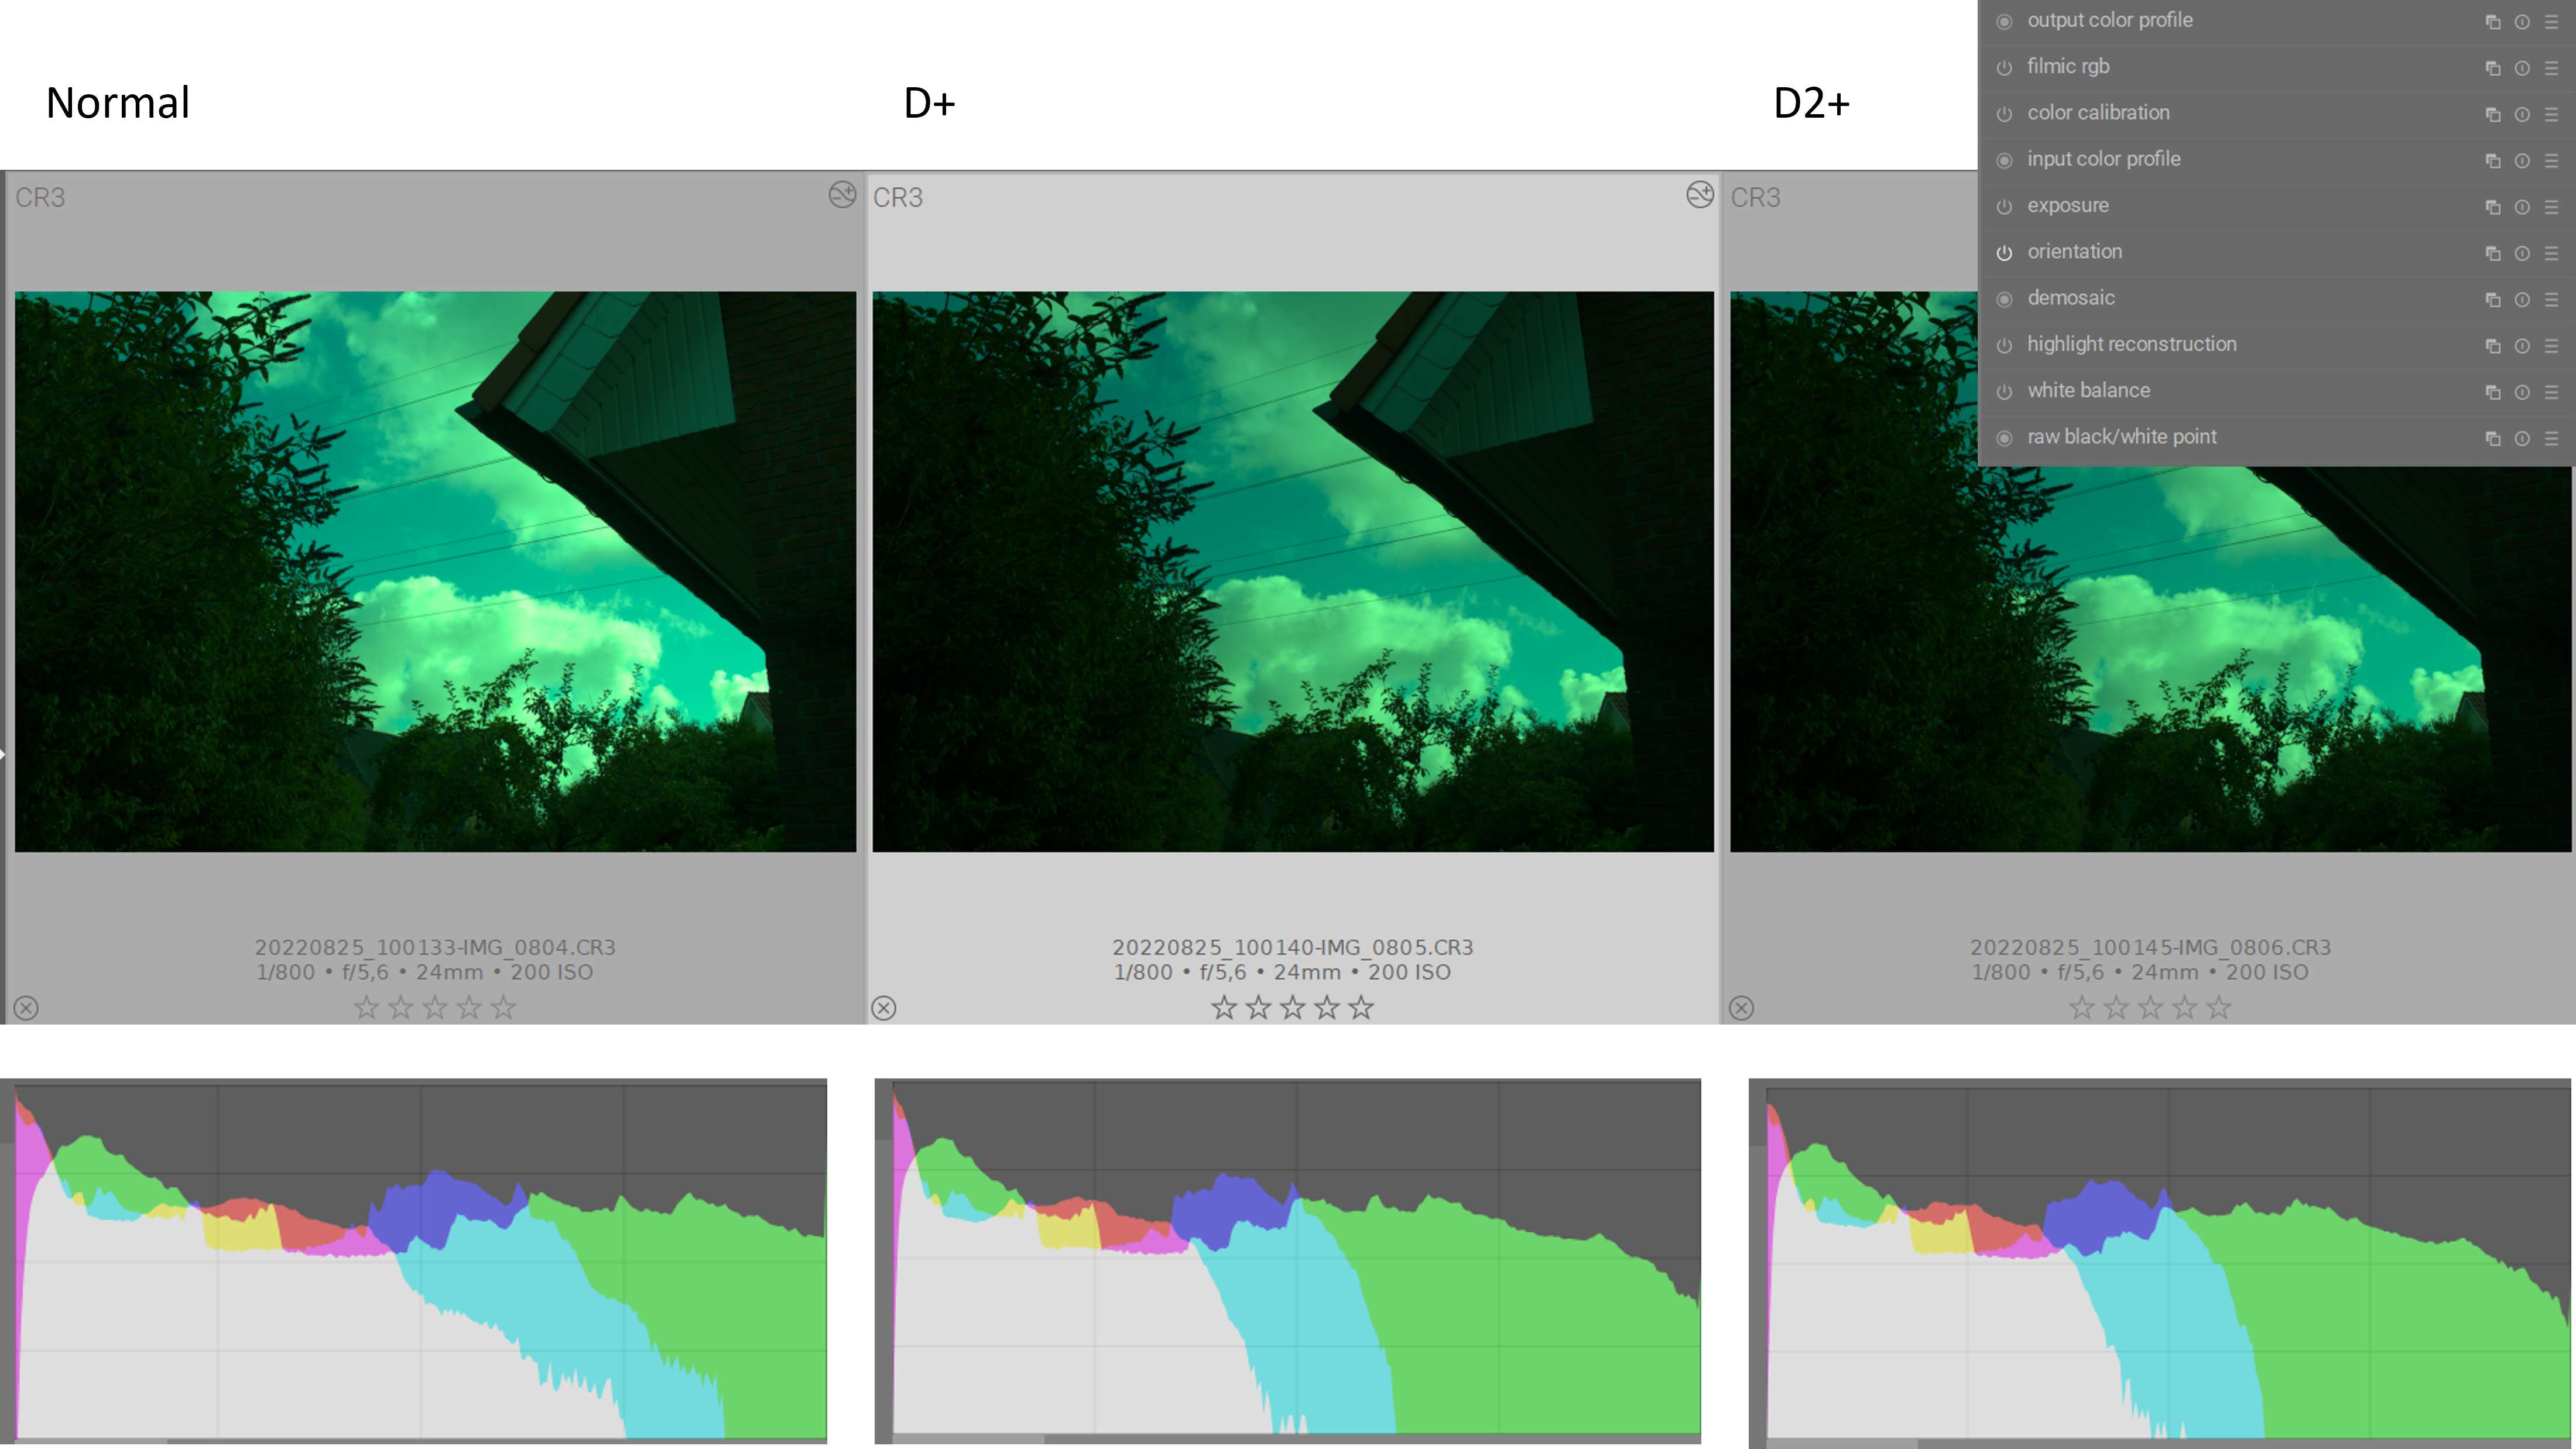
I made a small test using my Canon EOS 850D. That model provides the modes D+ and D2+ to avoid clipping.
Indeed the image is exposed at ISO 1 EV or so lower and subsequently the dark parts are processed to look like the set ISO. So far so good … It looks like this processing is baked into the raw. If I turn off almost all moduls and look at the histogram of the same scene shot at different modes. There is a difference between the “normal” more and the D-modes histograms.
Would it be too much to ask if you can include the following?
- the histograms from DT in linear form (in order to match the camera)
- the histograms from the LCD of the camera (in order to match to the one from DT)
What is the black/white point for each picture? And could you upload raw samples?
Given the shape of the histogram, I’d agree.
If the RBG histograms are a true direct readout of the sensor, you’d expect the values to be bunched to the left.
Otoh, if there is a log transform done on the sensor data, is it still a raw histogram? Though even in that case, I’d expect a difference in shape between the L and the RGB histograms (no S-curve on the raw histogram).
Also, I’d like to see an authoritive reference documenting those “raw histograms” (the mentions I found were just “reflect the red, green and blue pixels of the sensor”, which is not the same as “show the sensor values”)