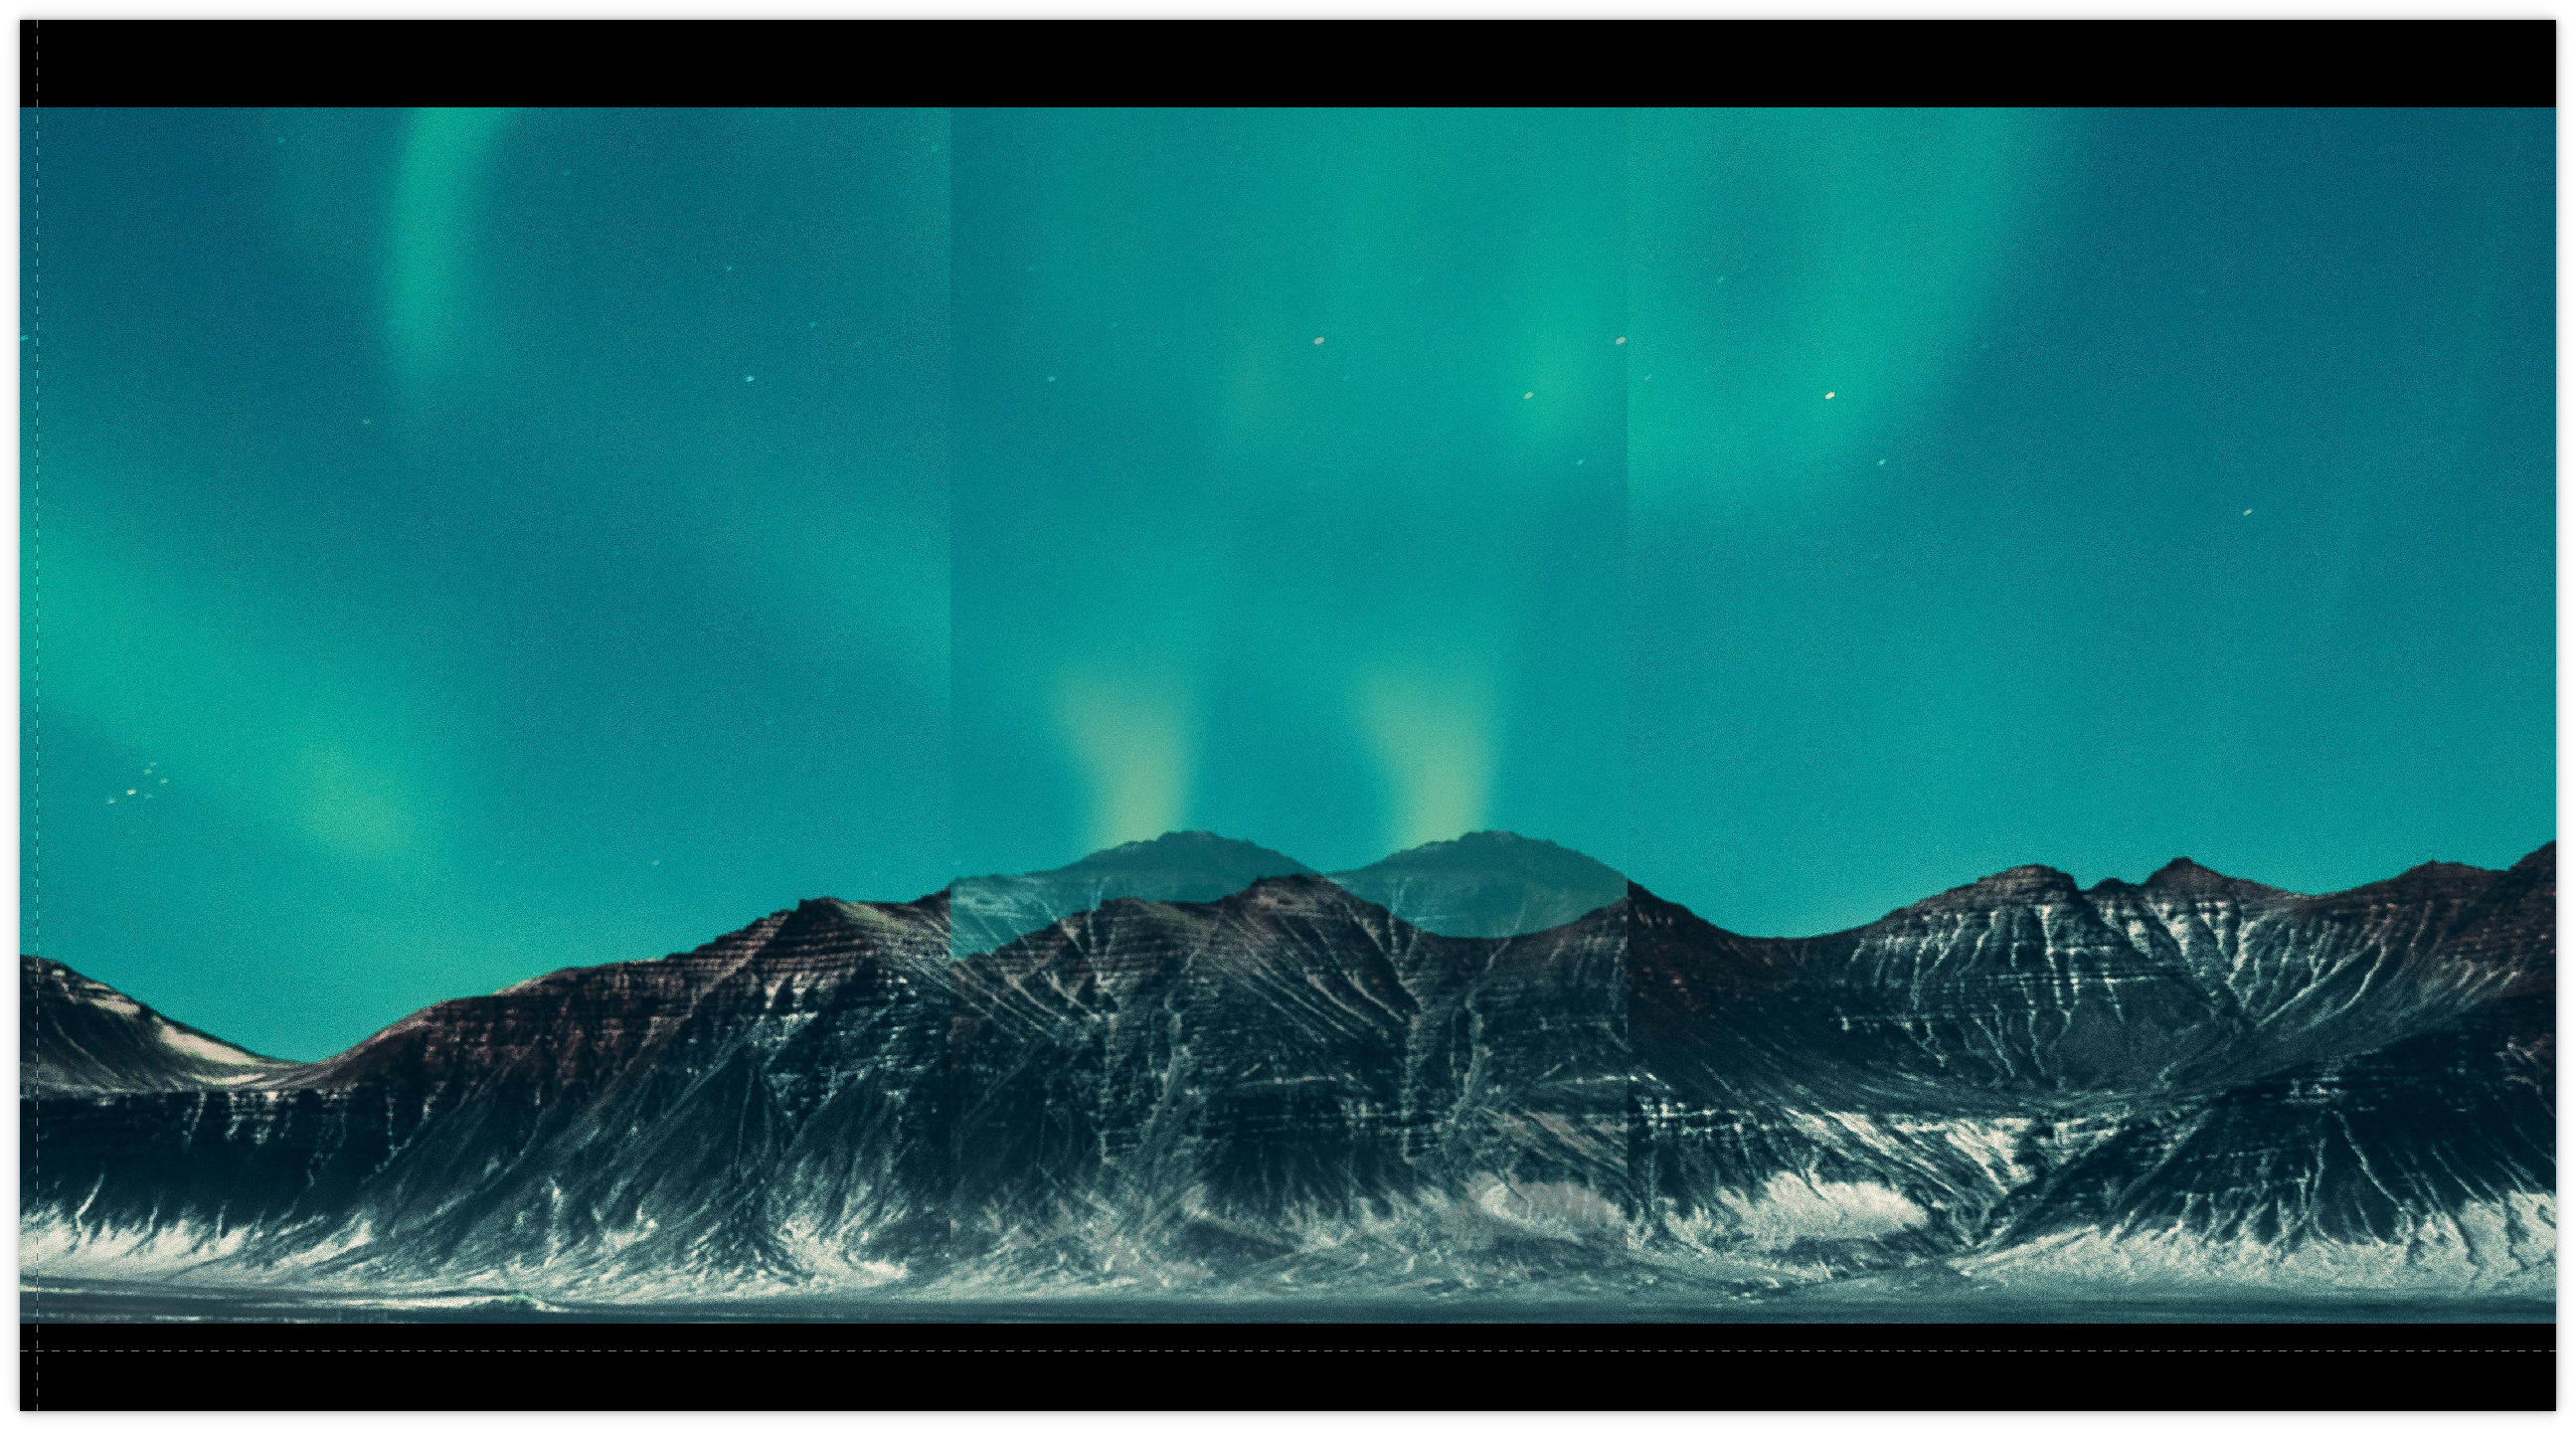
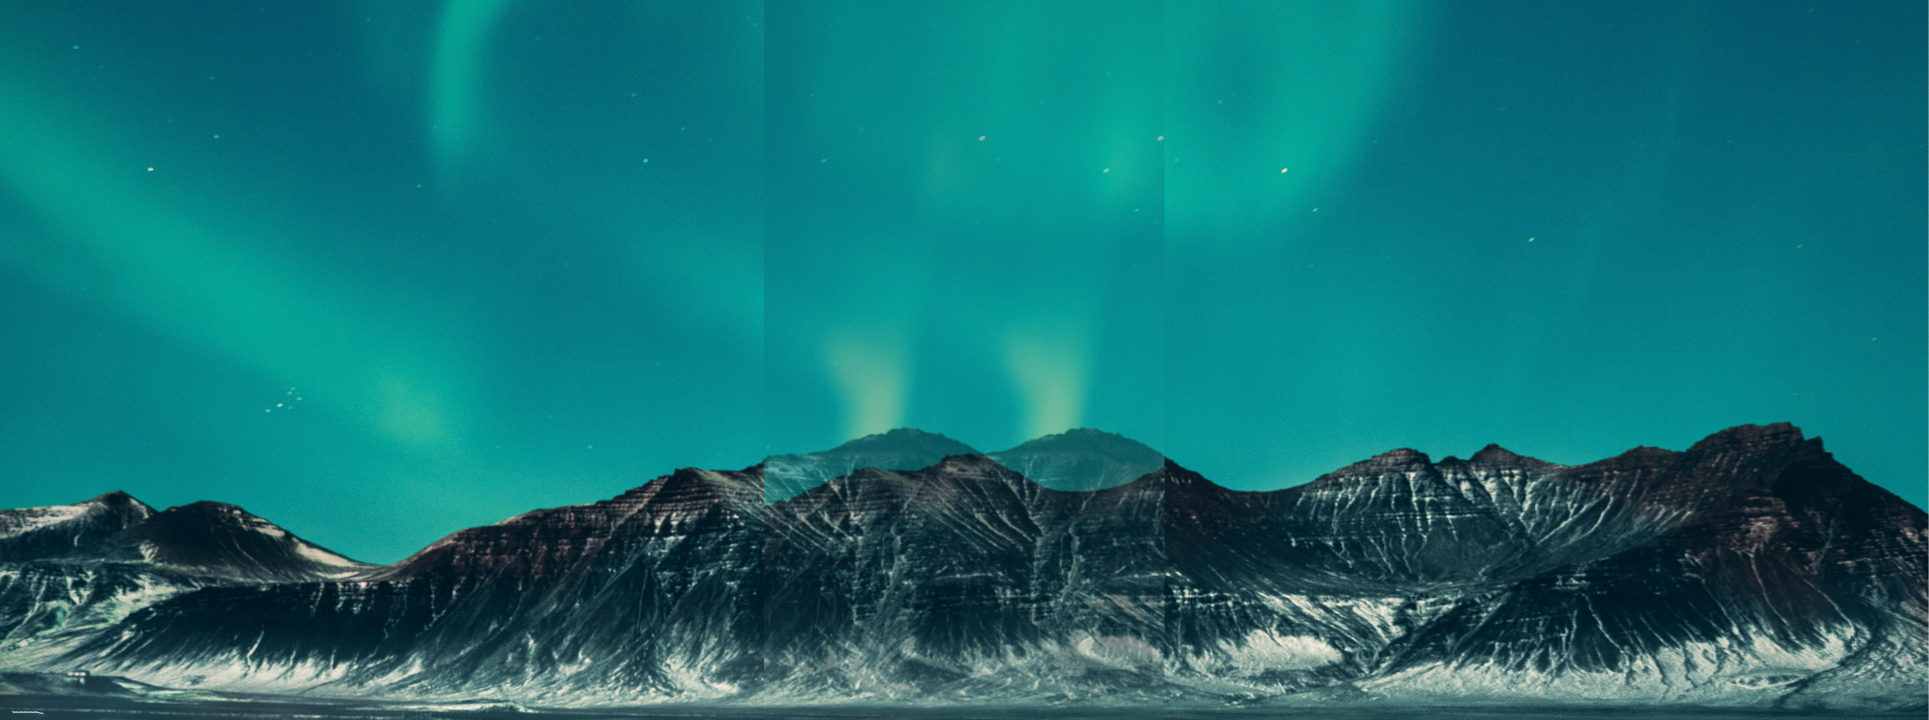
I want to get a correct preview of the result of a simple script. Unfortunately, the GMIC preview misaligned the image in the second layer. The first image is what I see in the preview and the second is what I get when I run the script. Is it possible to get the right preview even for large images? You can download test images here: https://drive.google.com/file/d/1mEwwW-7t0uuEMBN7Oent5hk4Bae7TfF_/view?usp=sharing
#@gui Merge Tiles: merge_tiles,merge_tiles(0)
#@gui : Blend direction = choice(0,Horizontal,Vertical)
#@gui : Overlap size = int(1200,0,2000)

merge_tiles:
  if {$!!=2}
    msg="This filter requires 2 input layers to work properly.\nYou have "
    msg.=$!
    msg.=" layers."
    gui_print_preview "Warning:",,$msg
    return
  fi

  direction={$1}
  overlap_size={$2}

  img_width={w}
  img_height={h}

  if {($direction==0&&$overlap_size>$img_width)||($direction==1&&$overlap_size>$img_height)}
      return
  fi

  to_rgba
  if {$direction==0}
     input {$img_width-$overlap_size-1},{$img_height} # Create empty image with width=width-overlap_size
     append[1] [2],x                                  # Append empty image to the first image along x-axis (to the right)
     append[2] [0],x                                  # Append empty image to the second image along x-axis (to the left)
     remove[0]                                        # Remove unused image
     +blend[0,1] alpha,0.5                            # Blend both layers into new layer
     +columns[-1] 0,{$img_width-1}                    # Crop left part of the blended images and put the result to new layer
     columns[1] $img_width,{1,w}                      # Crop right part of the second image
     append[-1] [1],x                                 # Append right part of the second image to the blended images
  fi
  if {$direction==1}
     input {$img_width},{$img_height-$overlap_size-1} # Create empty image with height=height-overlap_size
     append[1] [2],y                                  # Append empty image to the first image along y-axis (to the bottom)
     append[2] [0],y                                  # Append empty image to the second image one along y-axis (to the top)
     remove[0]                                        # Remove unused image
     +blend[0,1] alpha,0.5                            # Blend both layers into new layer
     +rows[-1] 0,{$img_height-1}                      # Crop upper part of the blended images and put the result to new layer
     rows[1] $img_height,{1,h}                        # Crop bottom part of the second image
     append[-1] [1],y                                 # Append bottom part of the second image to the blended images
  fi

  remove[0-2]
I gave up on the preview. The best way to tackle this would be to apply the filter and then examine the result in your host image editor. Undo if you don’t like it. It is a pain, I know, but you can undo and apply as you see fit.
The CLI display works too. Just keep in mind that when the full image isn’t being displayed it will normalize the values to [0,255]. You may toggle between on, channel by channel and off with the keystroke CTRLn. Also note that display shows the image in the literal sense without any smoothing or scaling tricks, so it will look uglier than a normal image viewer. In a sense, it is a good thing because it is more honest. One demerit is that display is not colour managed, nor is G’MIC.
The preview does not necessarily operate on the full image. It uses a cropped and/or scaled image depending on the preview parameters. That’s why it’s giving inconsistent results.
Thanks @Lawrence37. Is it possible to prepare images (e.g. resize, scale, crop) that are displayed in the preview only ($_preview_width, $_preview_height), not for final processing?
When working with layer positions/rotate/scale, I generally stick to percentages or fractions of the inputs. The most similar filter I’ve made is “Layer manipulation” - it’s partially broken just now, but it shows the general idea (I have a fix already, but not pushed due to large changes happening in 3.1.0 pre).
Edit: pushed that now, usually takes an hour or two to be available in filter refresh.
The way I do it is by restricting the preview zoom to show the full image and using relative units (percent of image width for example). It’s not ideal for your filter where pixel-level precision is crucial. I wish there were variables indicating the scale and crop. Maybe there are, but I am not aware of any.
I’m also with the idea of allowing full-sized preview, and I also would like new variables for gmic-qt such as $gmic_qt_image_width, $gmic_qt_image_height, so you can have something without needing the full-sized image itself. The second one would solve my issues with the Hitomezashi filter. It works mostly, but not ideal at all.
Thanks @Lawrence37 and @garagecoder. I used percentages with the full image preview and it works as I expected.
#@gui Merge Tiles: merge_tiles,merge_tiles(1)
#@gui : Blend direction = choice(0,Horizontal,Vertical)
#@gui : Overlap size (%) = float(1,0,100)

merge_tiles:
  if {$!!=2}
    return
  fi

  direction={$1}
  overlap_size={$2/100}

  width={w}
  height={h}

  to_rgba
  if {$direction==0}
     input {$width-$overlap_size*$width},{$height}  # Create empty image with width=width-overlap_size
     append[1] [2],x                                # Append empty image to the first image along x-axis (to the right)
     append[2] [0],x                                # Append empty image to the second image along x-axis (to the left)
     remove[0]                                      # Remove unused image
     +blend[0,1] alpha,0.5                          # Blend both layers into new layer
     +columns[-1] 0,{$width-1}                      # Crop left part of the blended images and put the result to new layer
     columns[1] $width,{1,w}                        # Crop right part of the second image
     append[-1] [1],x                               # Append right part of the second image to the blended images
  fi
  if {$direction==1}
     input {$width},{$height-$overlap_size*$height} # Create empty image with height=height-overlap_size
     append[1] [2],y                                # Append empty image to the first image along y-axis (to the bottom)
     append[2] [0],y                                # Append empty image to the second image one along y-axis (to the top)
     remove[0]                                      # Remove unused image
     +blend[0,1] alpha,0.5                          # Blend both layers into new layer
     +rows[-1] 0,{$height-1}                        # Crop upper part of the blended images and put the result to new layer
     rows[1] $height,{1,h}                          # Crop bottom part of the second image
     append[-1] [1],y                               # Append bottom part of the second image to the blended images
  fi

  remove[0-2]                                       # Remove unused layers

 , because in the CLI it works: