I’ve tried loading the history into darktable from the JPG I downloaded, but it just gives me the default history stack.
But then exiftool -a -u -g1 -ee -api RequestAll=3 *embed*jpg showed that it’s actually an ART image; I didn’t know ART would also embed the history, so made the wrong assumption.
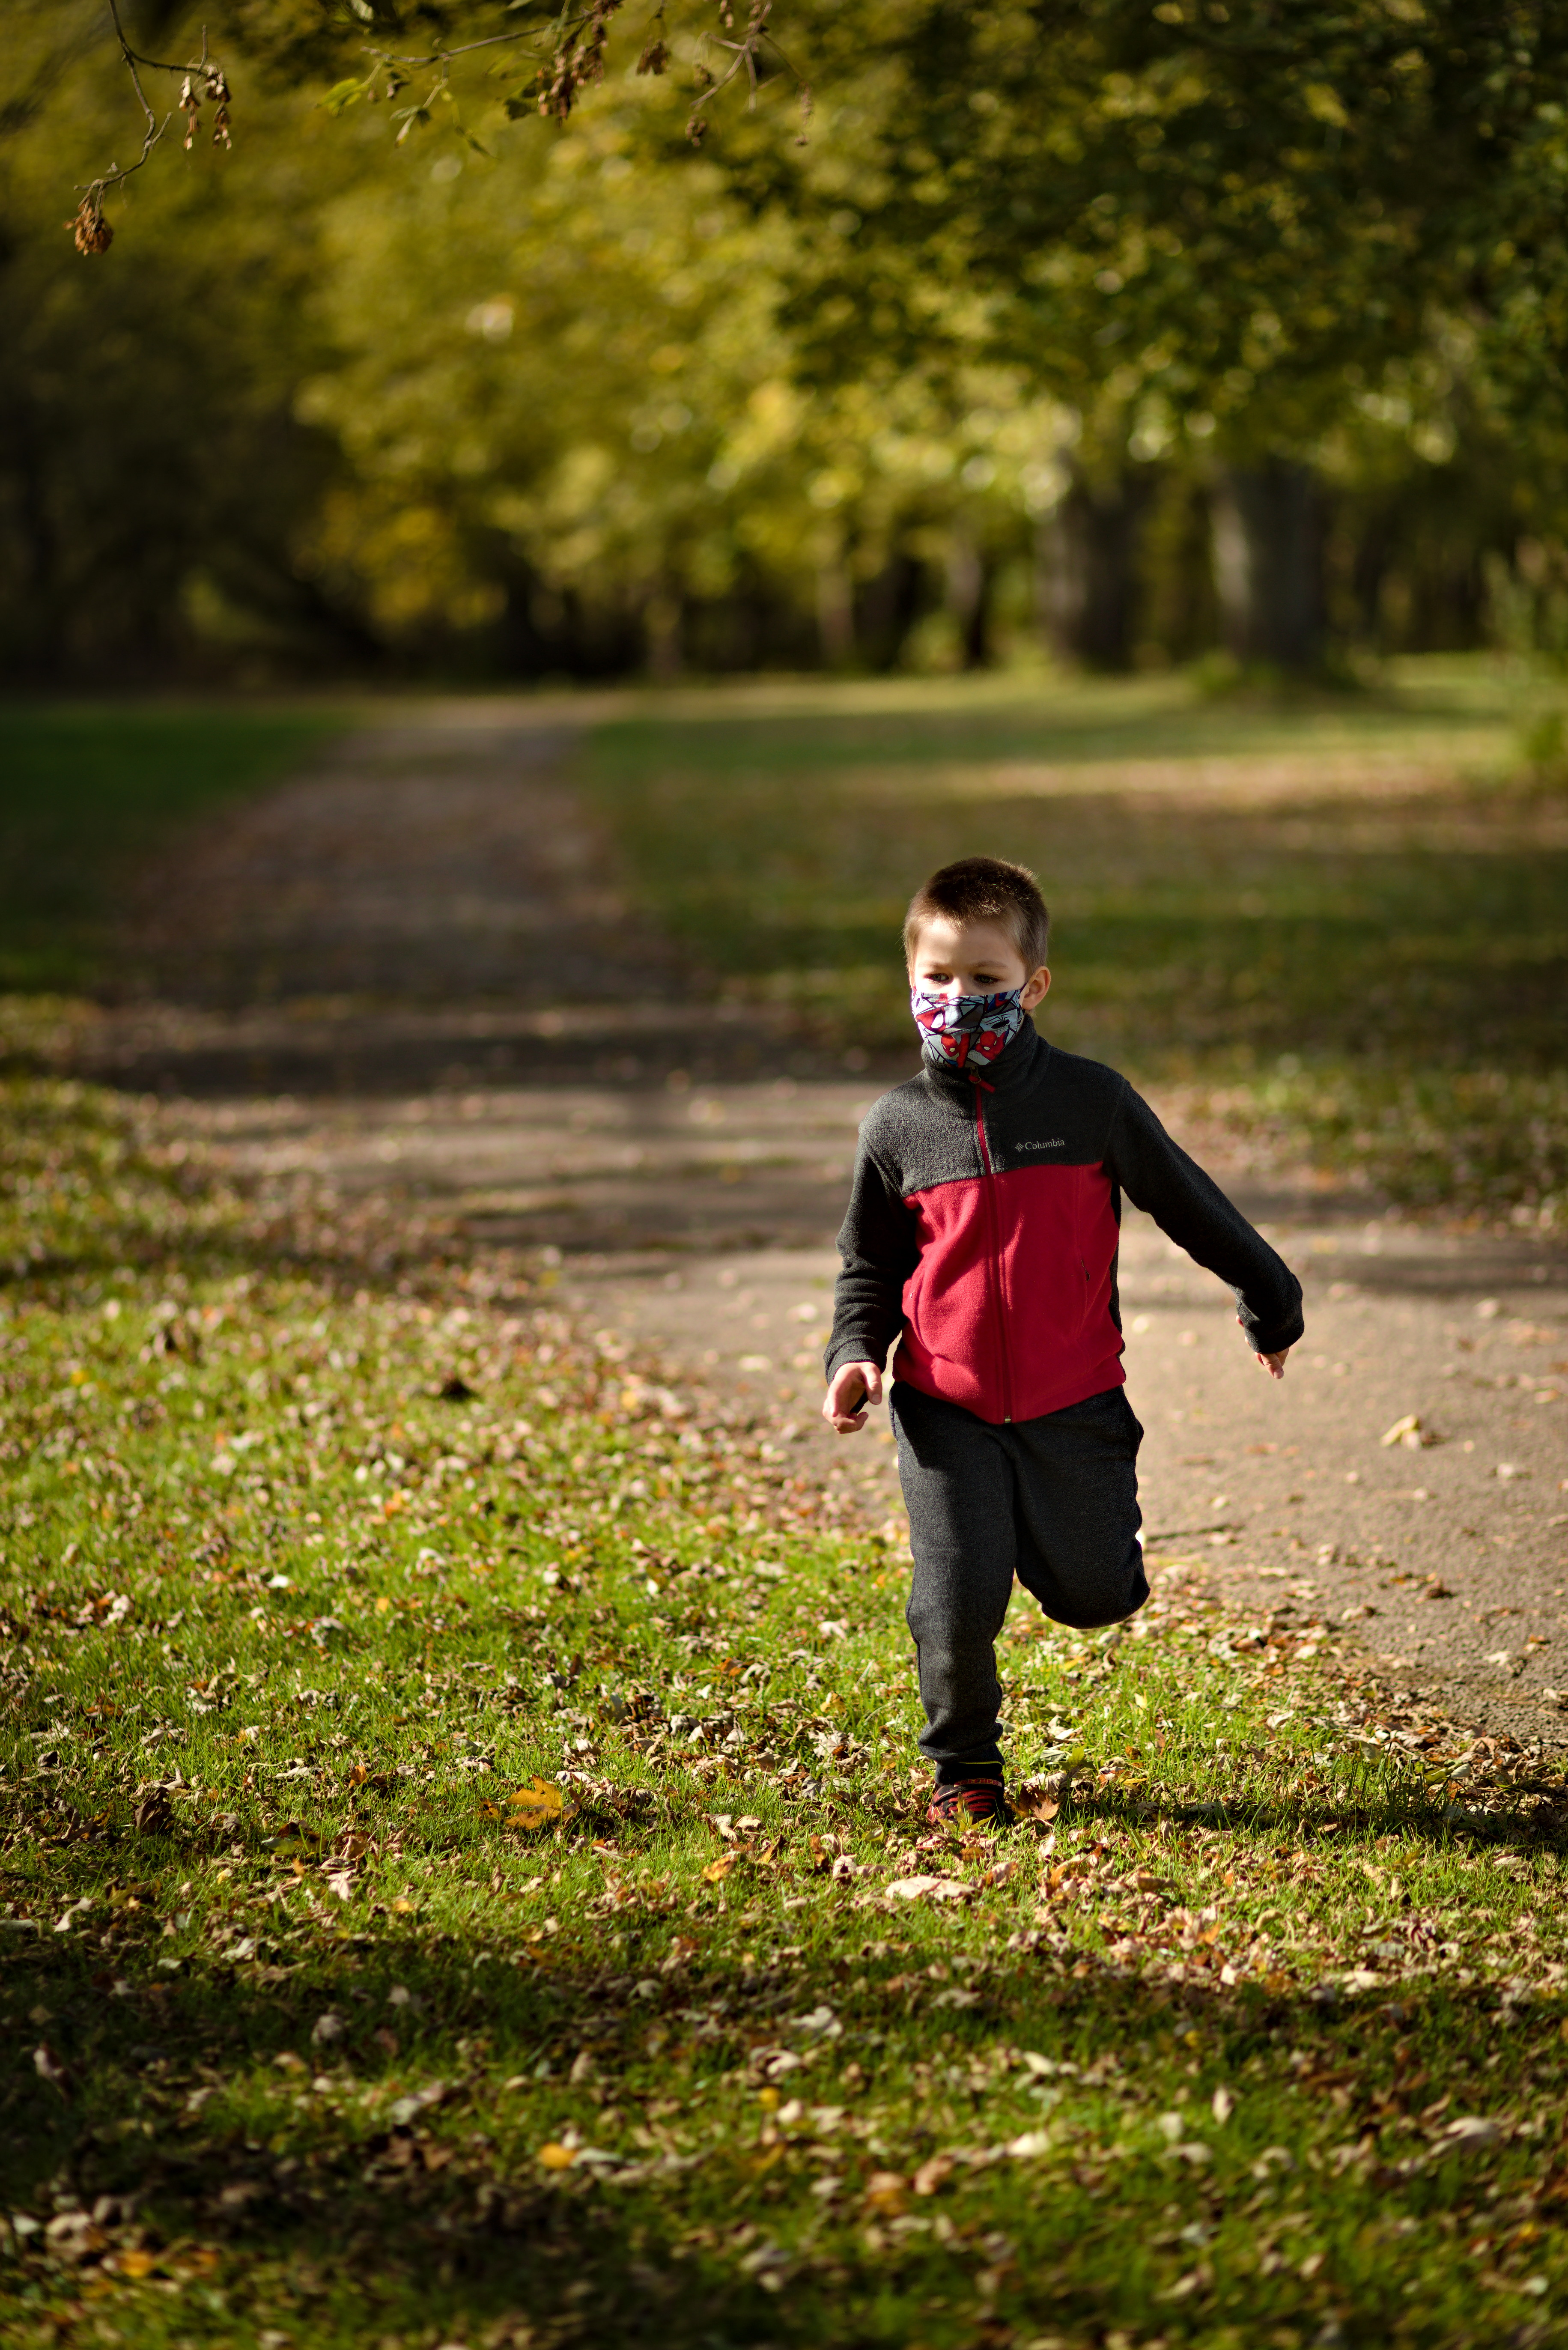
Graduated filter in RT from left to right, balances the background and affirms the precise focus and depth, I wouldn’t crop it the shadow behind achieves background separation successfully. RT colour temp was chosen as a sampled from the boy’s trousers, I’m not a fan of pumped up colours and since red draws the eye regardless I think the primary concern should be highlight reconstruction on the face.
Only thing I would do is put it through gimp to dodge the eyes to be lighter and possibly burn the hand a little. The fringing around the mask is an irrelevance when the whole image is dropped by 1/4 stop and as a “human” we look at eyes first and always think they are about 50% lighter than what is represented in a print. Everything is subjective, I would advise get the boy right with as much raw detail, put it through gimp or photoshop for the eyes and then mask the boy and pump the autumn colours up.
One more attempt. History should be in the files, but it uses a ‘Fuji Provia’ 3D LUT ('Fuji XTrans III from Fuji Film Simulation Profiles – Stuart Sowerby), so you won’t be able to use it directly. The only ‘trick’ was to use filmic with a ‘straight’ (that is, pure logarithmic) curve (a straight line when plotted with logarithmic x axis):
look
contrast =1
latitude=99% (to avoid desaturation; 100% sometime causes black artefacts in the brightest areas)
middle tones saturation = 0,
display/target black luminance = 0,
options
contrast in highlights = soft
contrast in shadows = soft,
and apply 3D LUT after that (Ctrl+drag to change pipeline order). Also, I applied the LUT in Adobe RGB (even though it’s a PNG LUT that is normally applied in sRGB), simply because it ‘looked better’ to my eyes.
Crop with the overexposed skin and problematic red sweater: