I don’t want to generalize but will stick to this particular shot and the crop.
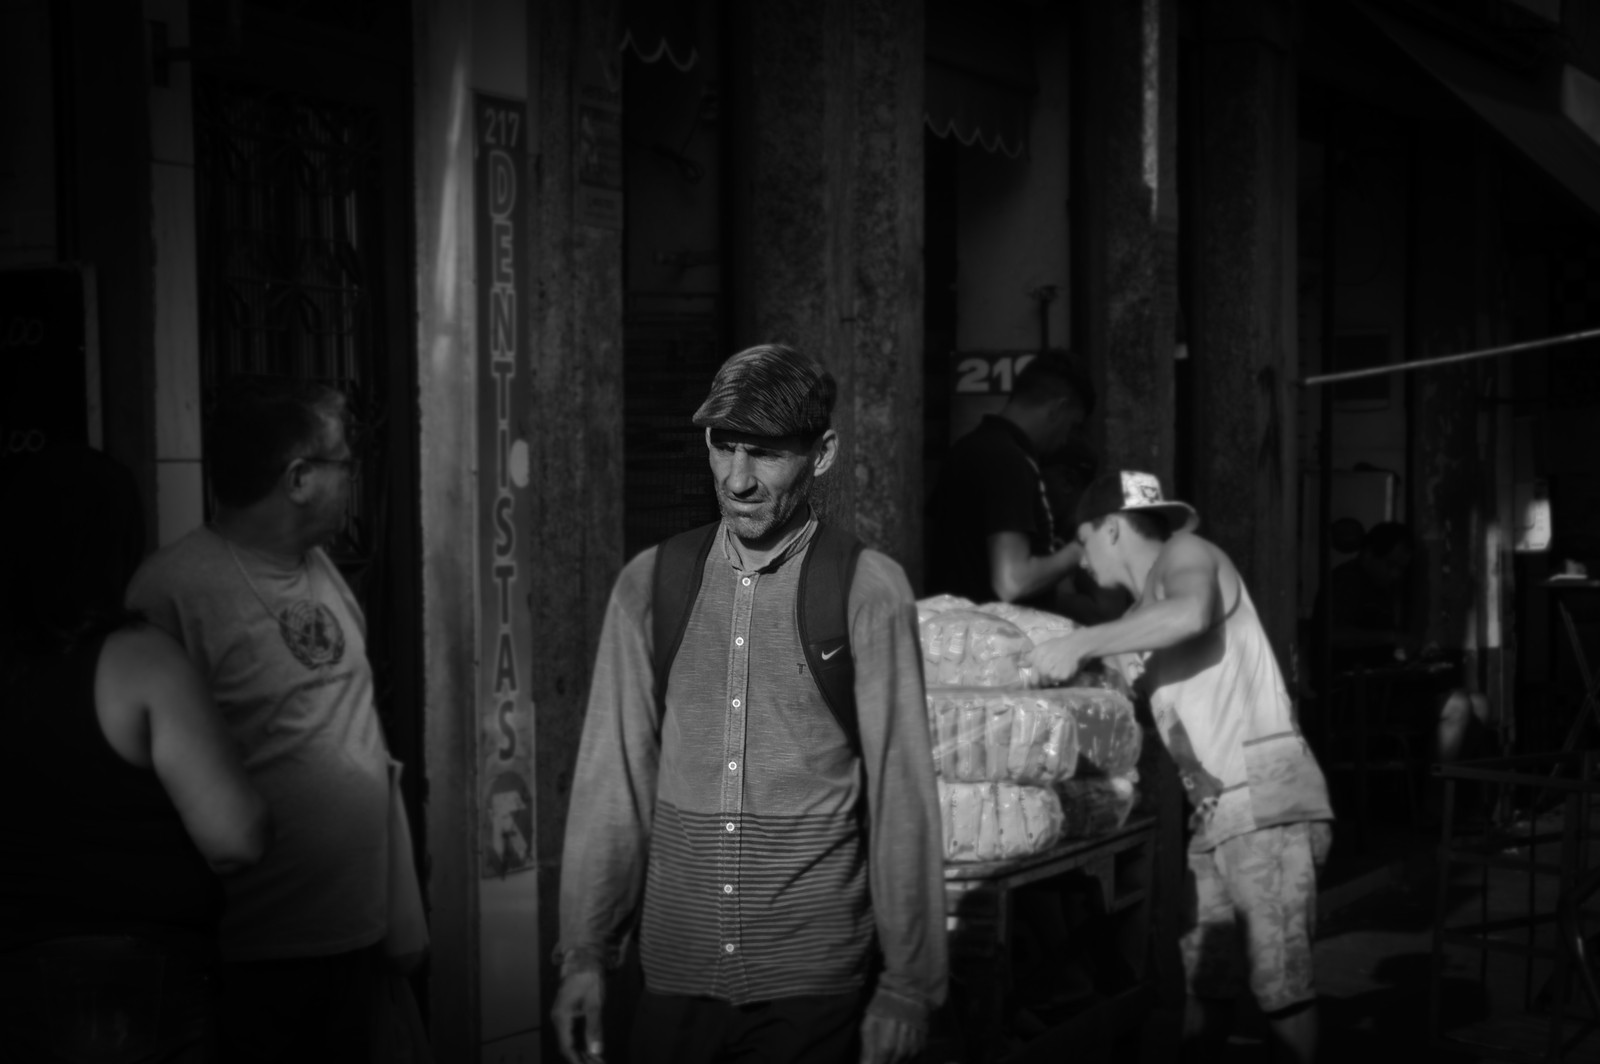
The point of the photo in the close crop would be the despondent look on the man’s face. Of course, the fact that the younger guy is oblivious to his predicament adds some drama but since his face is not visible, I think it is a old man’s photo. So it becomes a portrait.
On the other hand, wider crop has another face, namely that of the other man. Plus the woman is looking at him too so it is not just his photo but that of the interaction between these three under the dentist’s sign. A classic street shot.
There are many ways to interpret this photo, this is what I thought when I made the comment.
1 Like
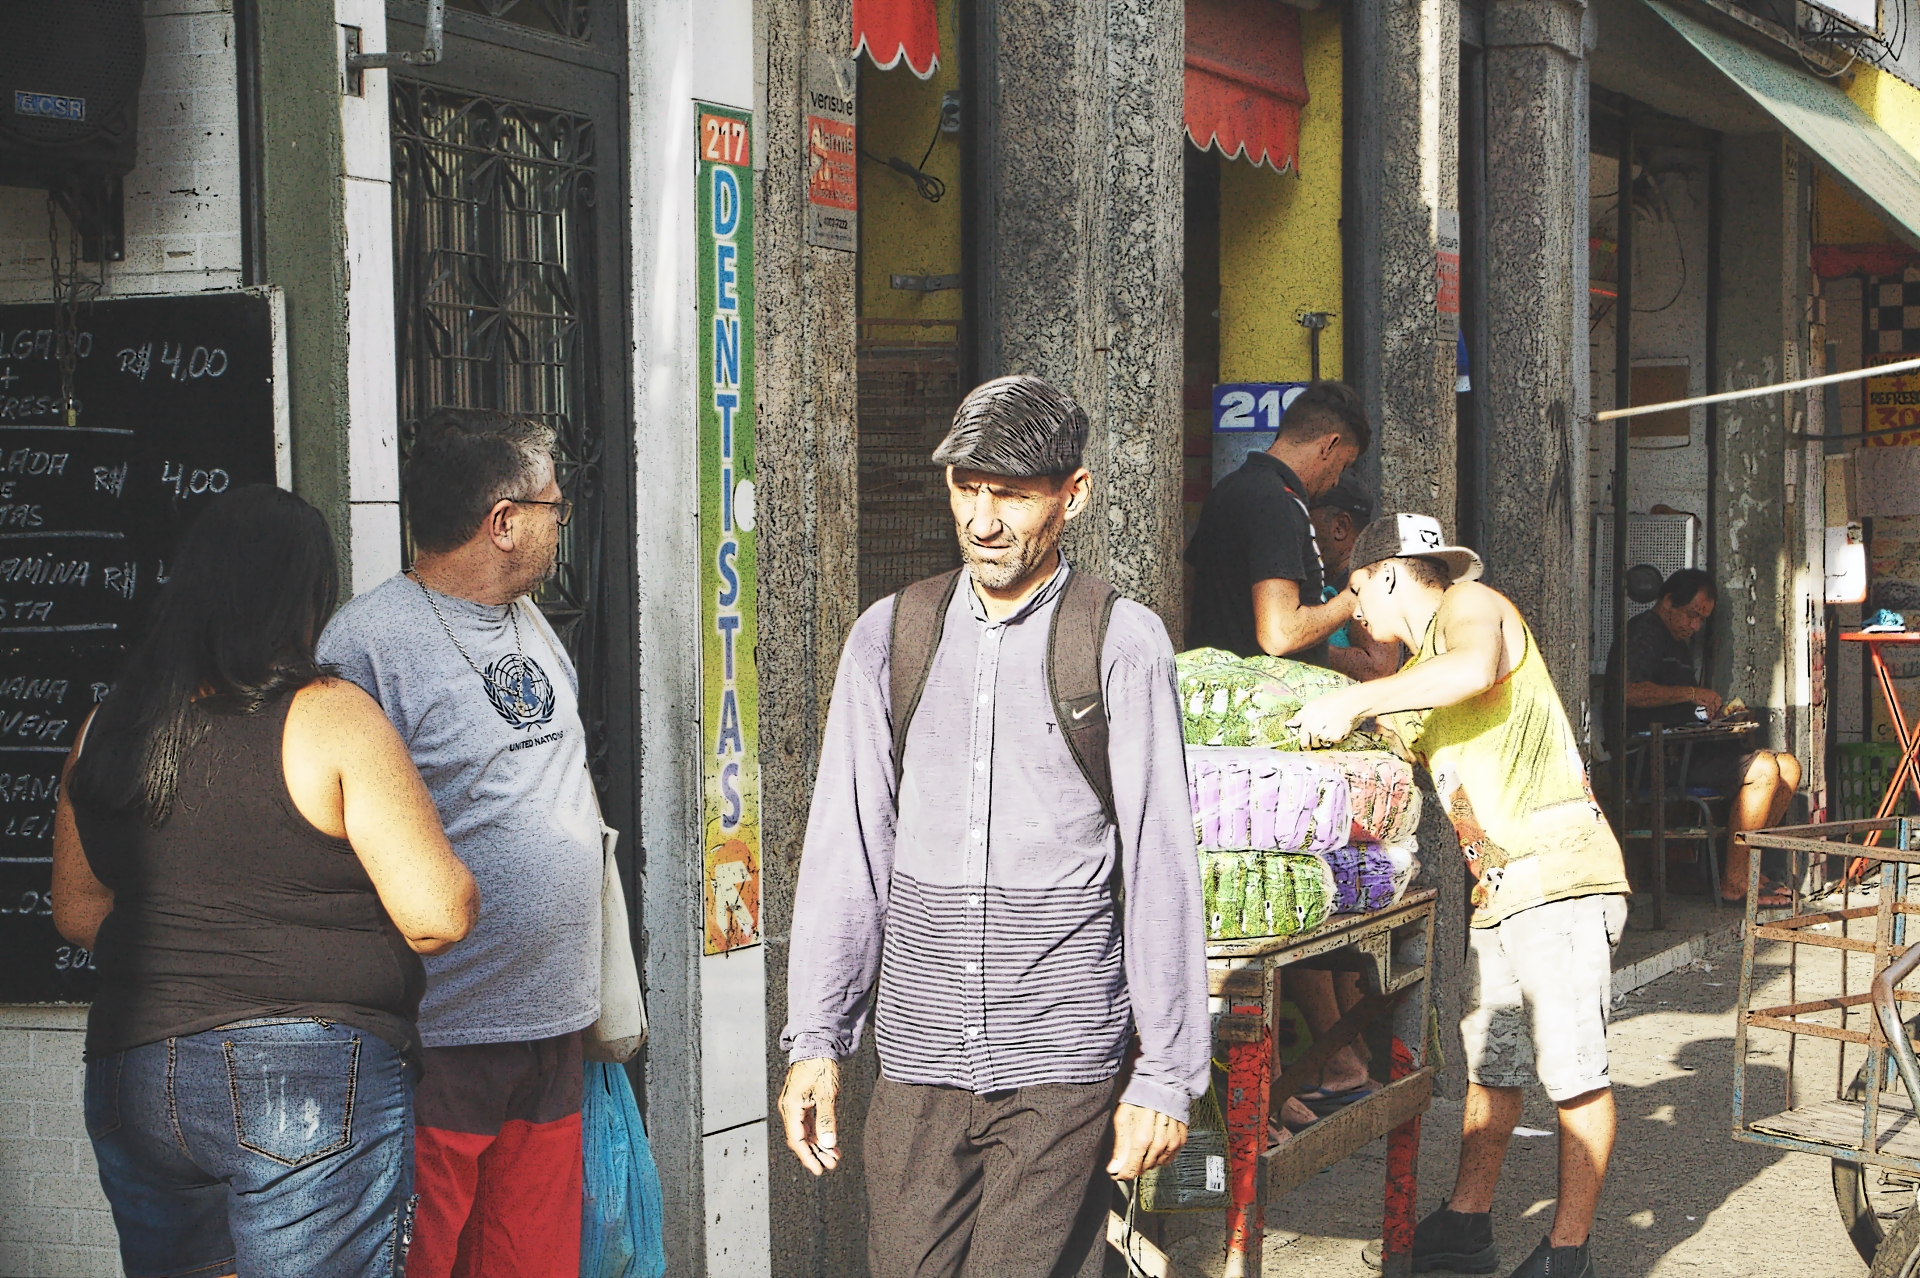
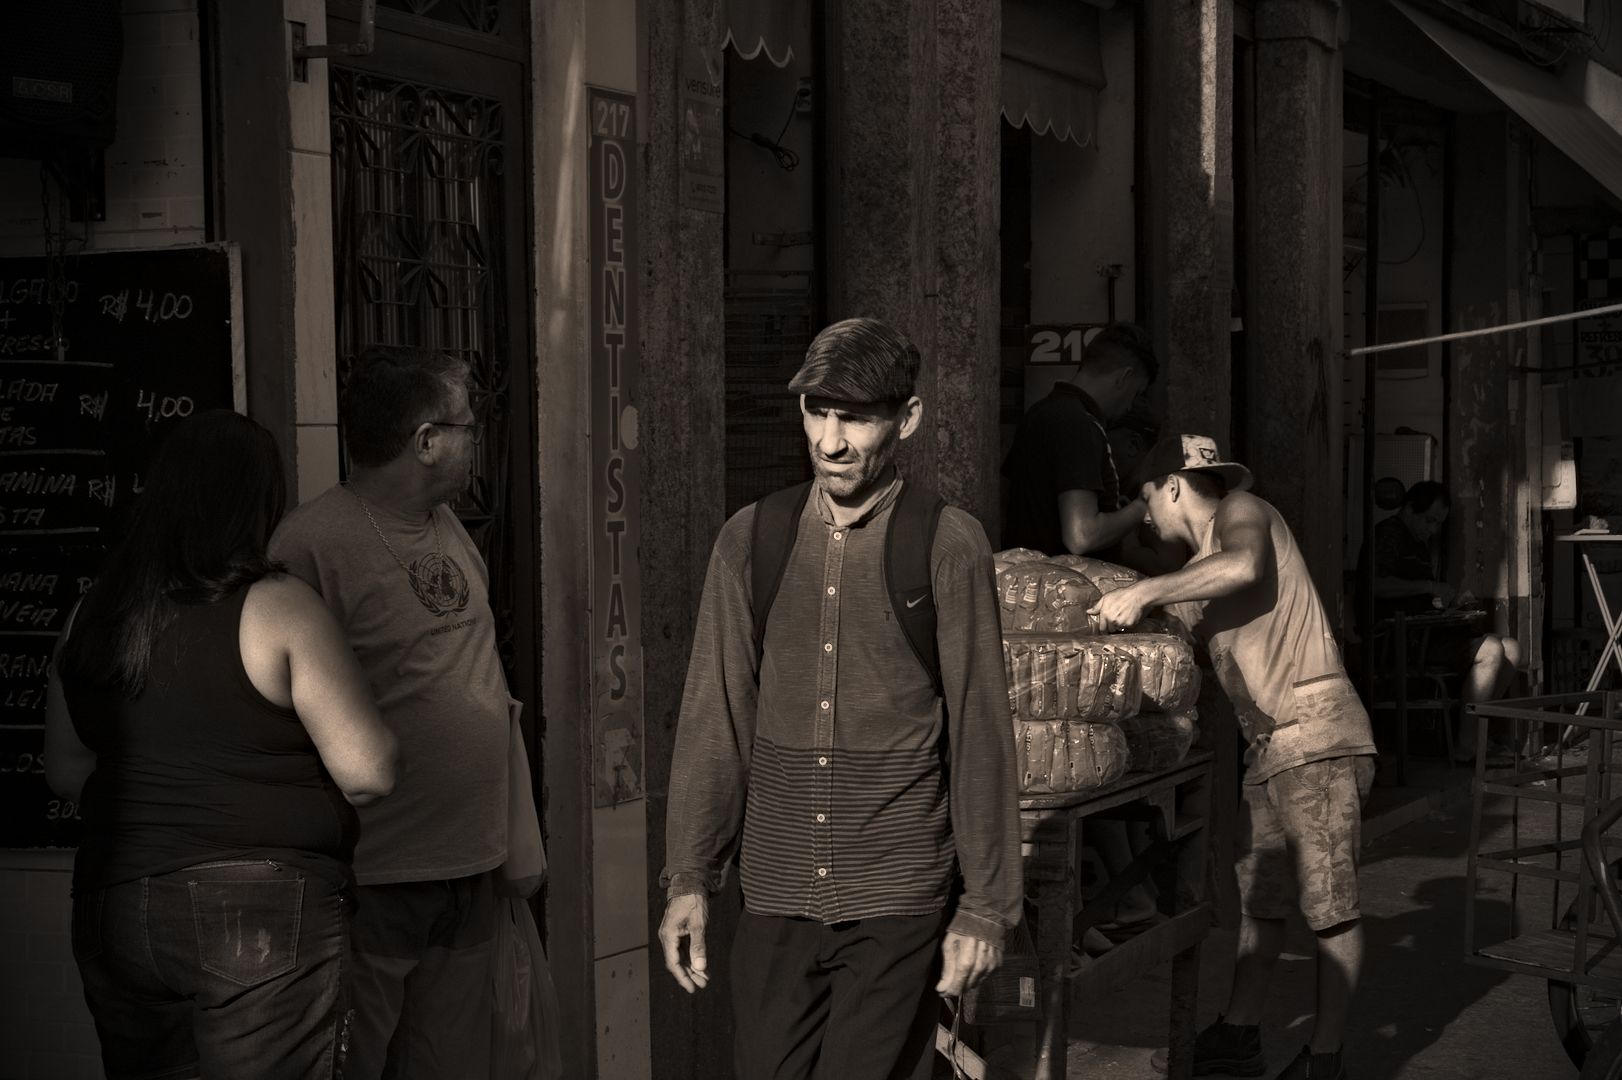
I hadn’t looked at the color rendition, but it is interesting how removing the color completely changes the focal point of the image. In color, I’m very much drawn to the bright green, purple, and yellow of the guy loading the cart, and almost miss the other man entirely.
2 Likes
Ok, it is a definition question which is street photography and which is potrait photography. The most important thing is how the viewer feels the message of the picture. I like my own crop, thats inaf to me. Feeling is very personal, though
1 Like
Personally, I wouldn’t crop the image. As a viewer, I enjoy allowing my gaze to wander and discover what is in the photo.
2 Likes
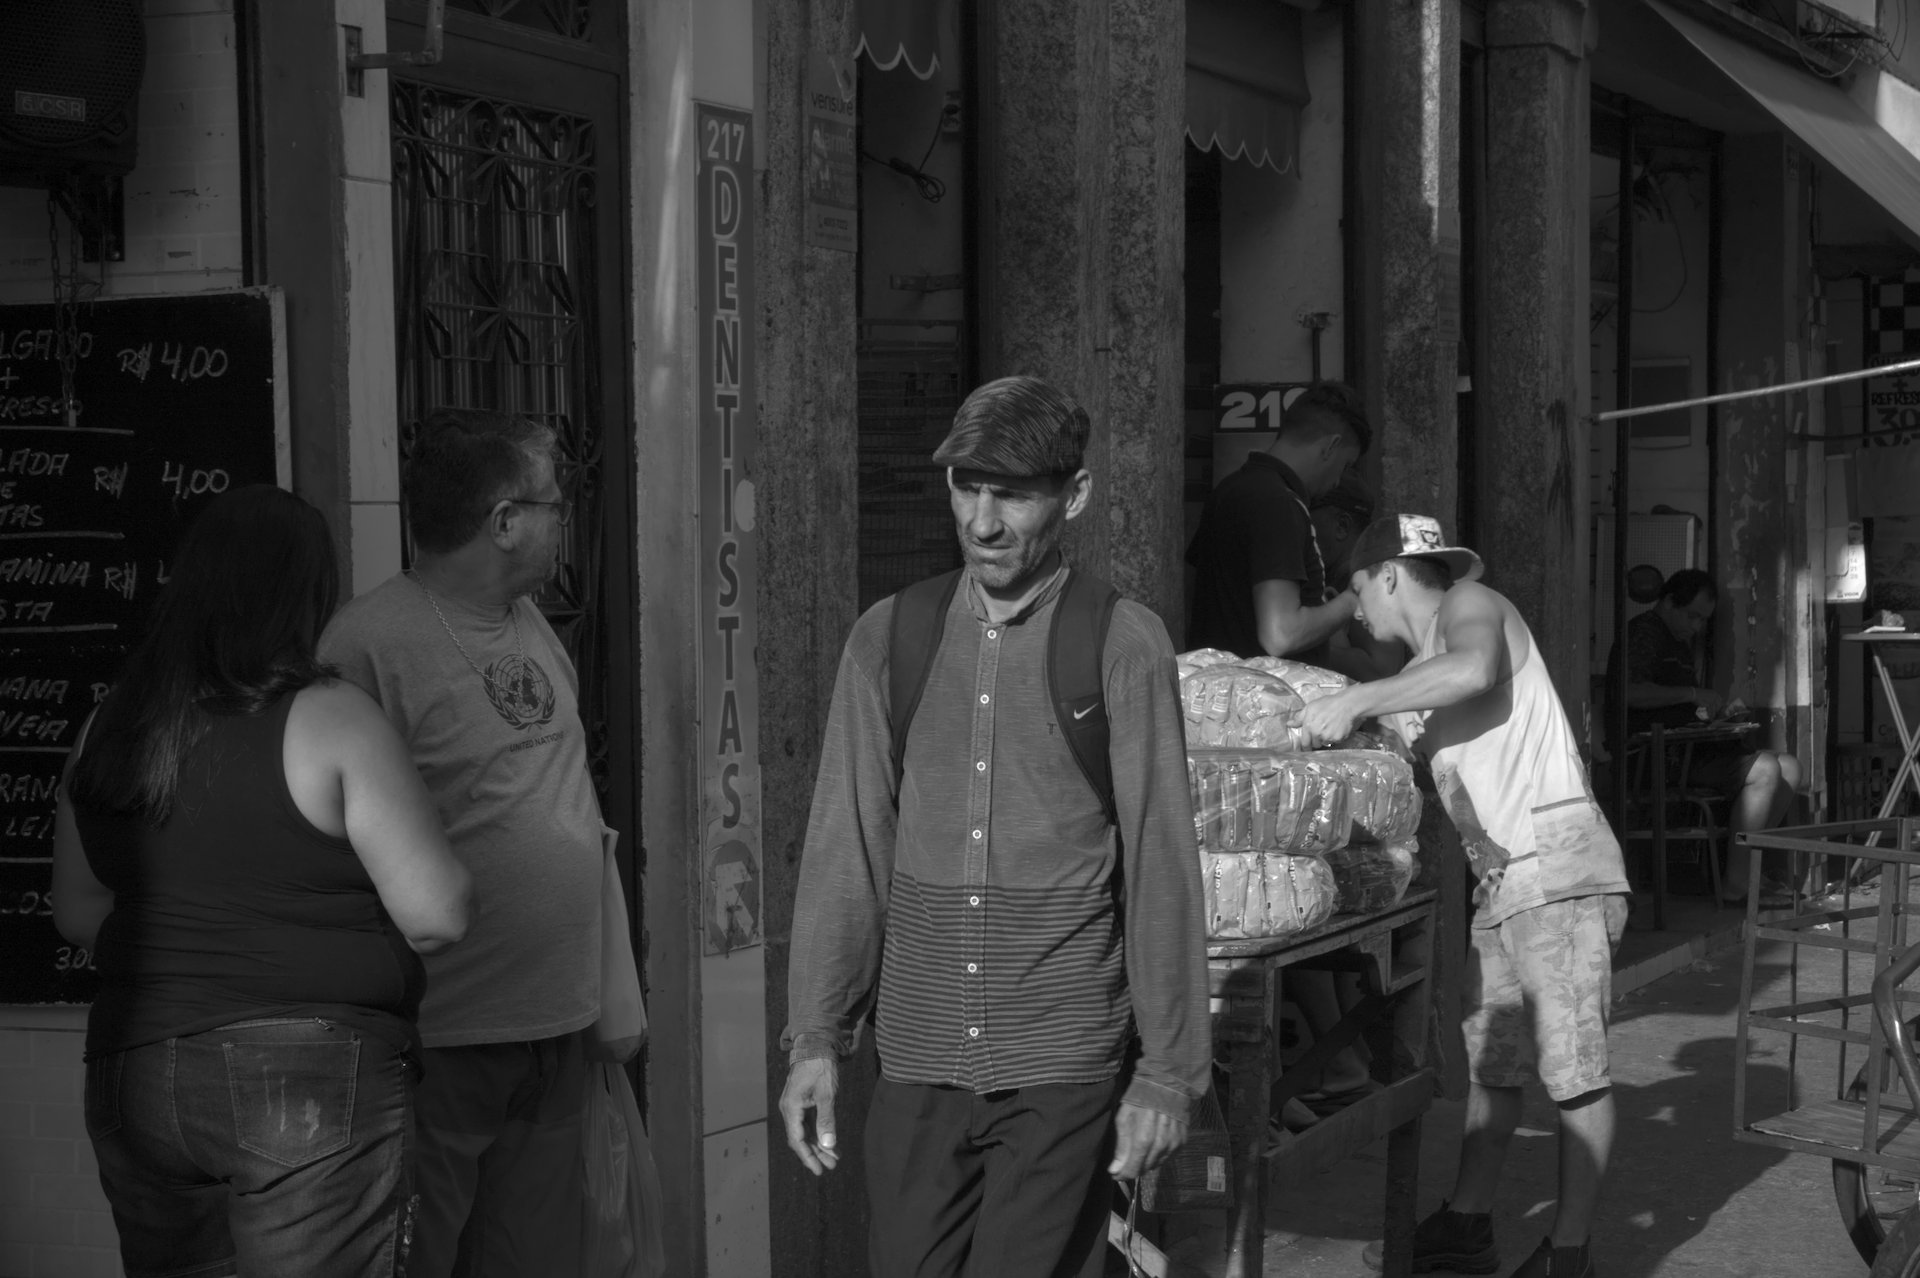
PhotoFlow Near-linear no-clip float.
gmic Filter pixels, 6 curves, afre_cleantext, multiply, rolling guidance, chroma, sharpen, resize.
Enjoy!
1 Like
I did! Nice colors and clarity.
But what are those dark blotches? (on the purple man right hand, on the woman’s arm…)
It was meant to look cartoony and gritty at the same time. I used a filter that is meant to clean scanned text, and the default settings at that. If I adjusted the values, I could probably get rid of those textures.
Here is my attempt at the colour version. To tone down the skin tones of the boy on the right and the woman’s arm on the left, I used two monochrome modules with graduated masks! Having fun with darktable.
One issue I am facing is that the xmp file is not getting generated for each image. I think that filename.cr2.xmp file is the only one that is getting updated. Any idea why is that? I hope that I am uploading the correct xmp file.
_MG_4993.CR2.xmp (12.8 KB)

1 Like
Nice!
Since the goal was to bring a surrealistic look, I don’t see the point in removing them. Besides, they’re only really noticeable when zooming in.
Hence, the zoom and enjoy statement. 
1 Like
Well, the xmp you’ve uploaded corresponds to the the posted image. Btw, very nice edit!
Didn’t understand. Do you mean duplicates? I have a bunch of duplicates for this image and each one has its own xmp file:

Very interesting image to play with. Thanks @gadolf!
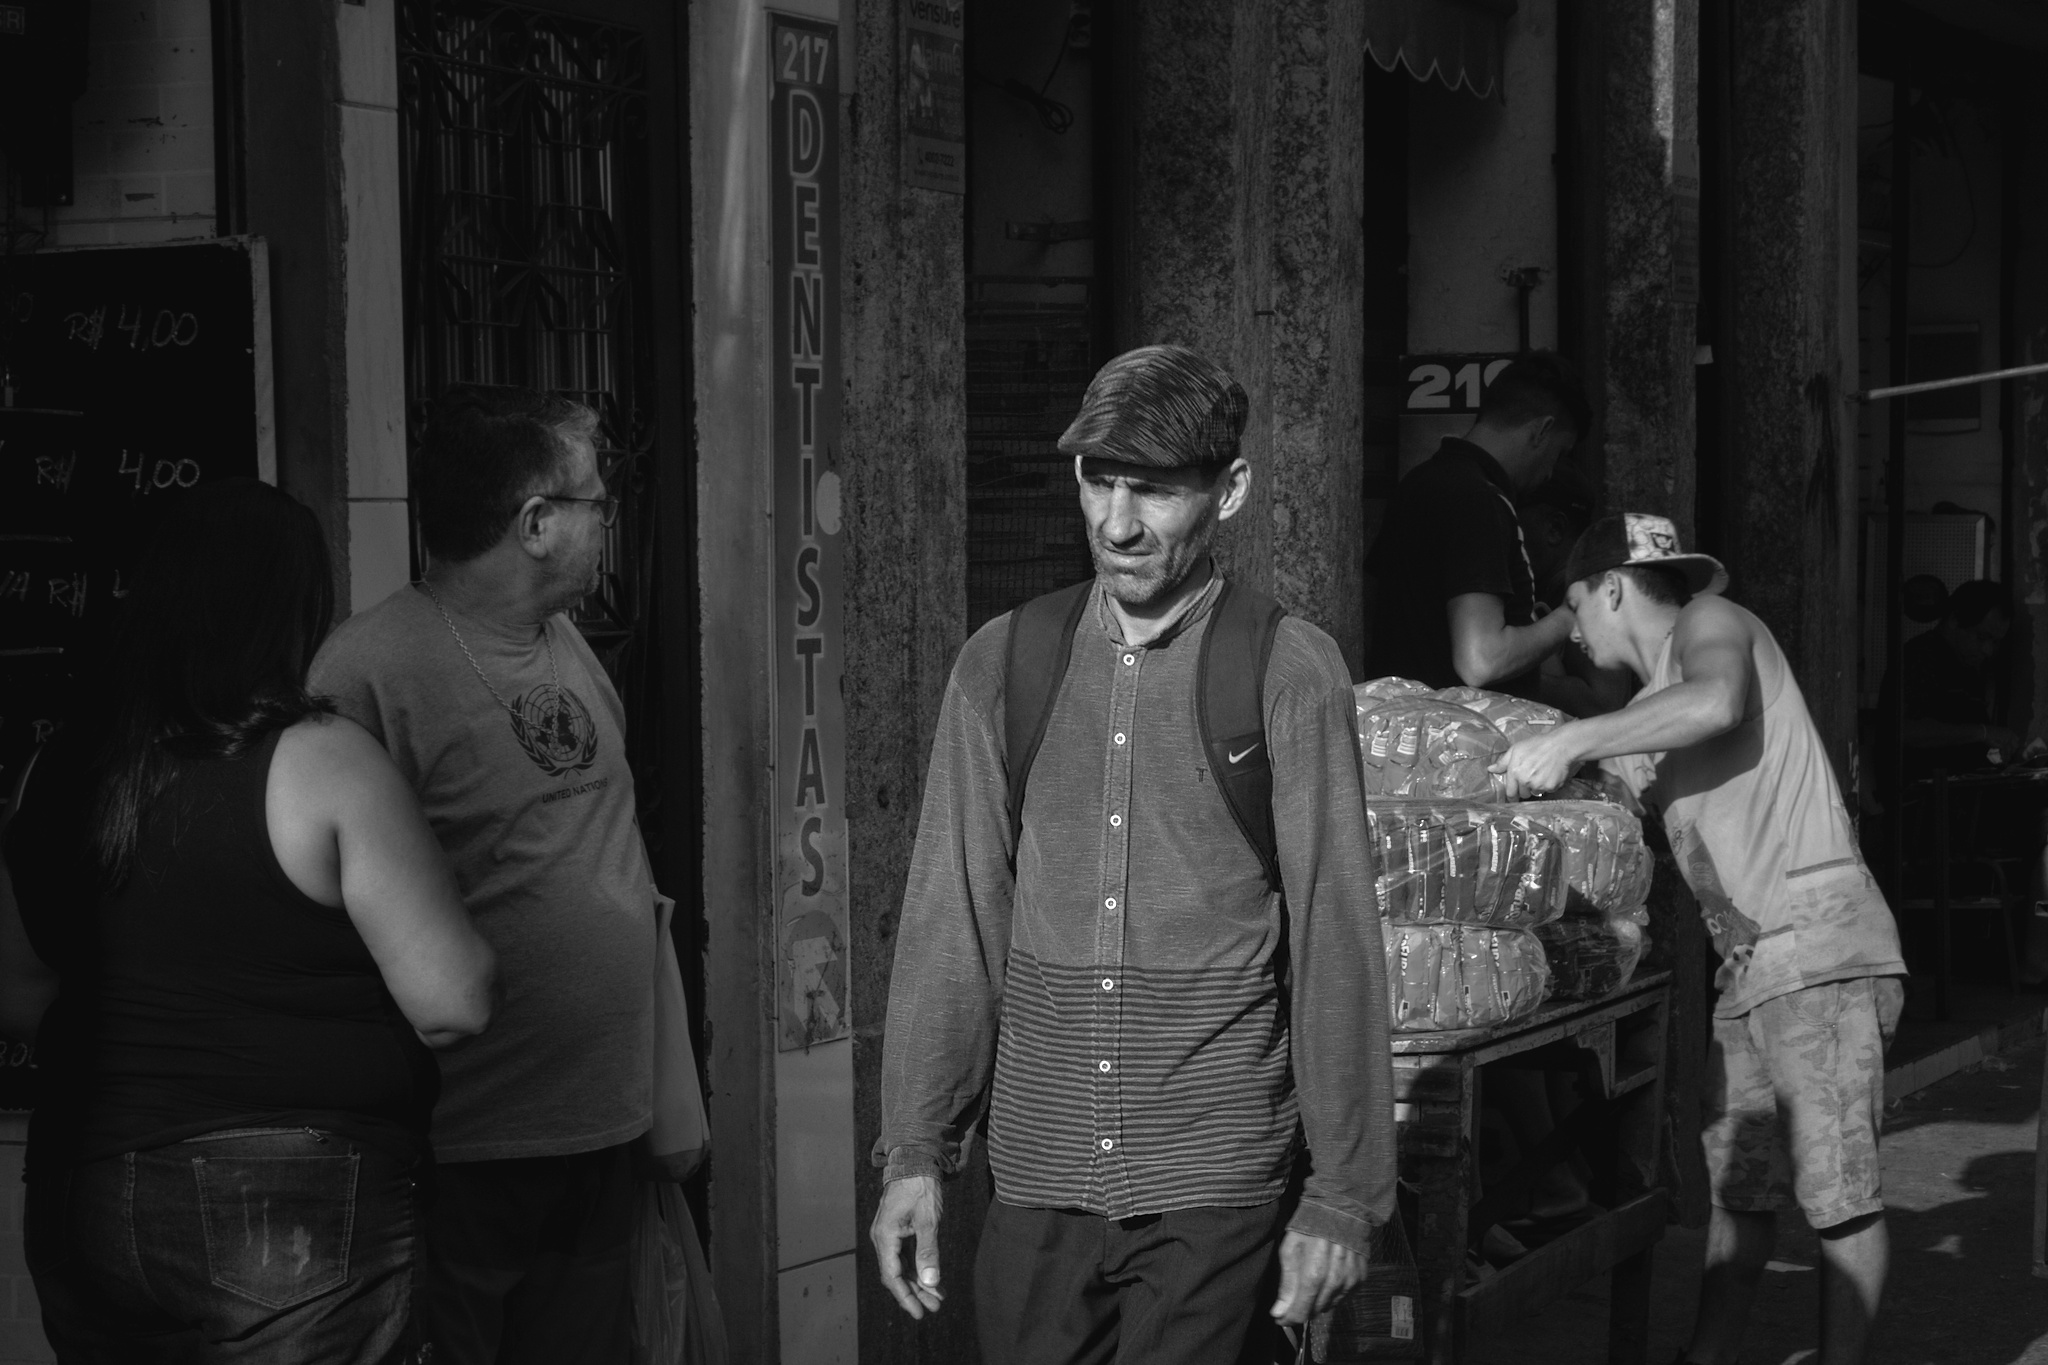
I have to go to the dentist tomorrow, so it seemed like a good time to have a bit of a dark mood and emphasize the guy with the pained expression walking past the dentist sign.
_MG_4993.CR2.xmp (5.9 KB)
1 Like
Exactly. I do not get separate xmp files for different versions. I think that this has started after I got the latest version from the link provided by @r3cov3r .
Strange… I did a quick test on a raw I hadn’t still edited: enabled sharpen, then duplicated, then on the duplicate, disabled sharpen and enabled grain. I got two xmp files as expected.

I am on windows 10. I just now tried to export a raw file after two different processing and I get different jpg’s with different file names but only one xmp file. Which is named as filename.dng.xmp. There is no .jpg.xmp
ADDED: BTW I have checked the box for Write sidecar files for each image (in the core options panel of the settings)
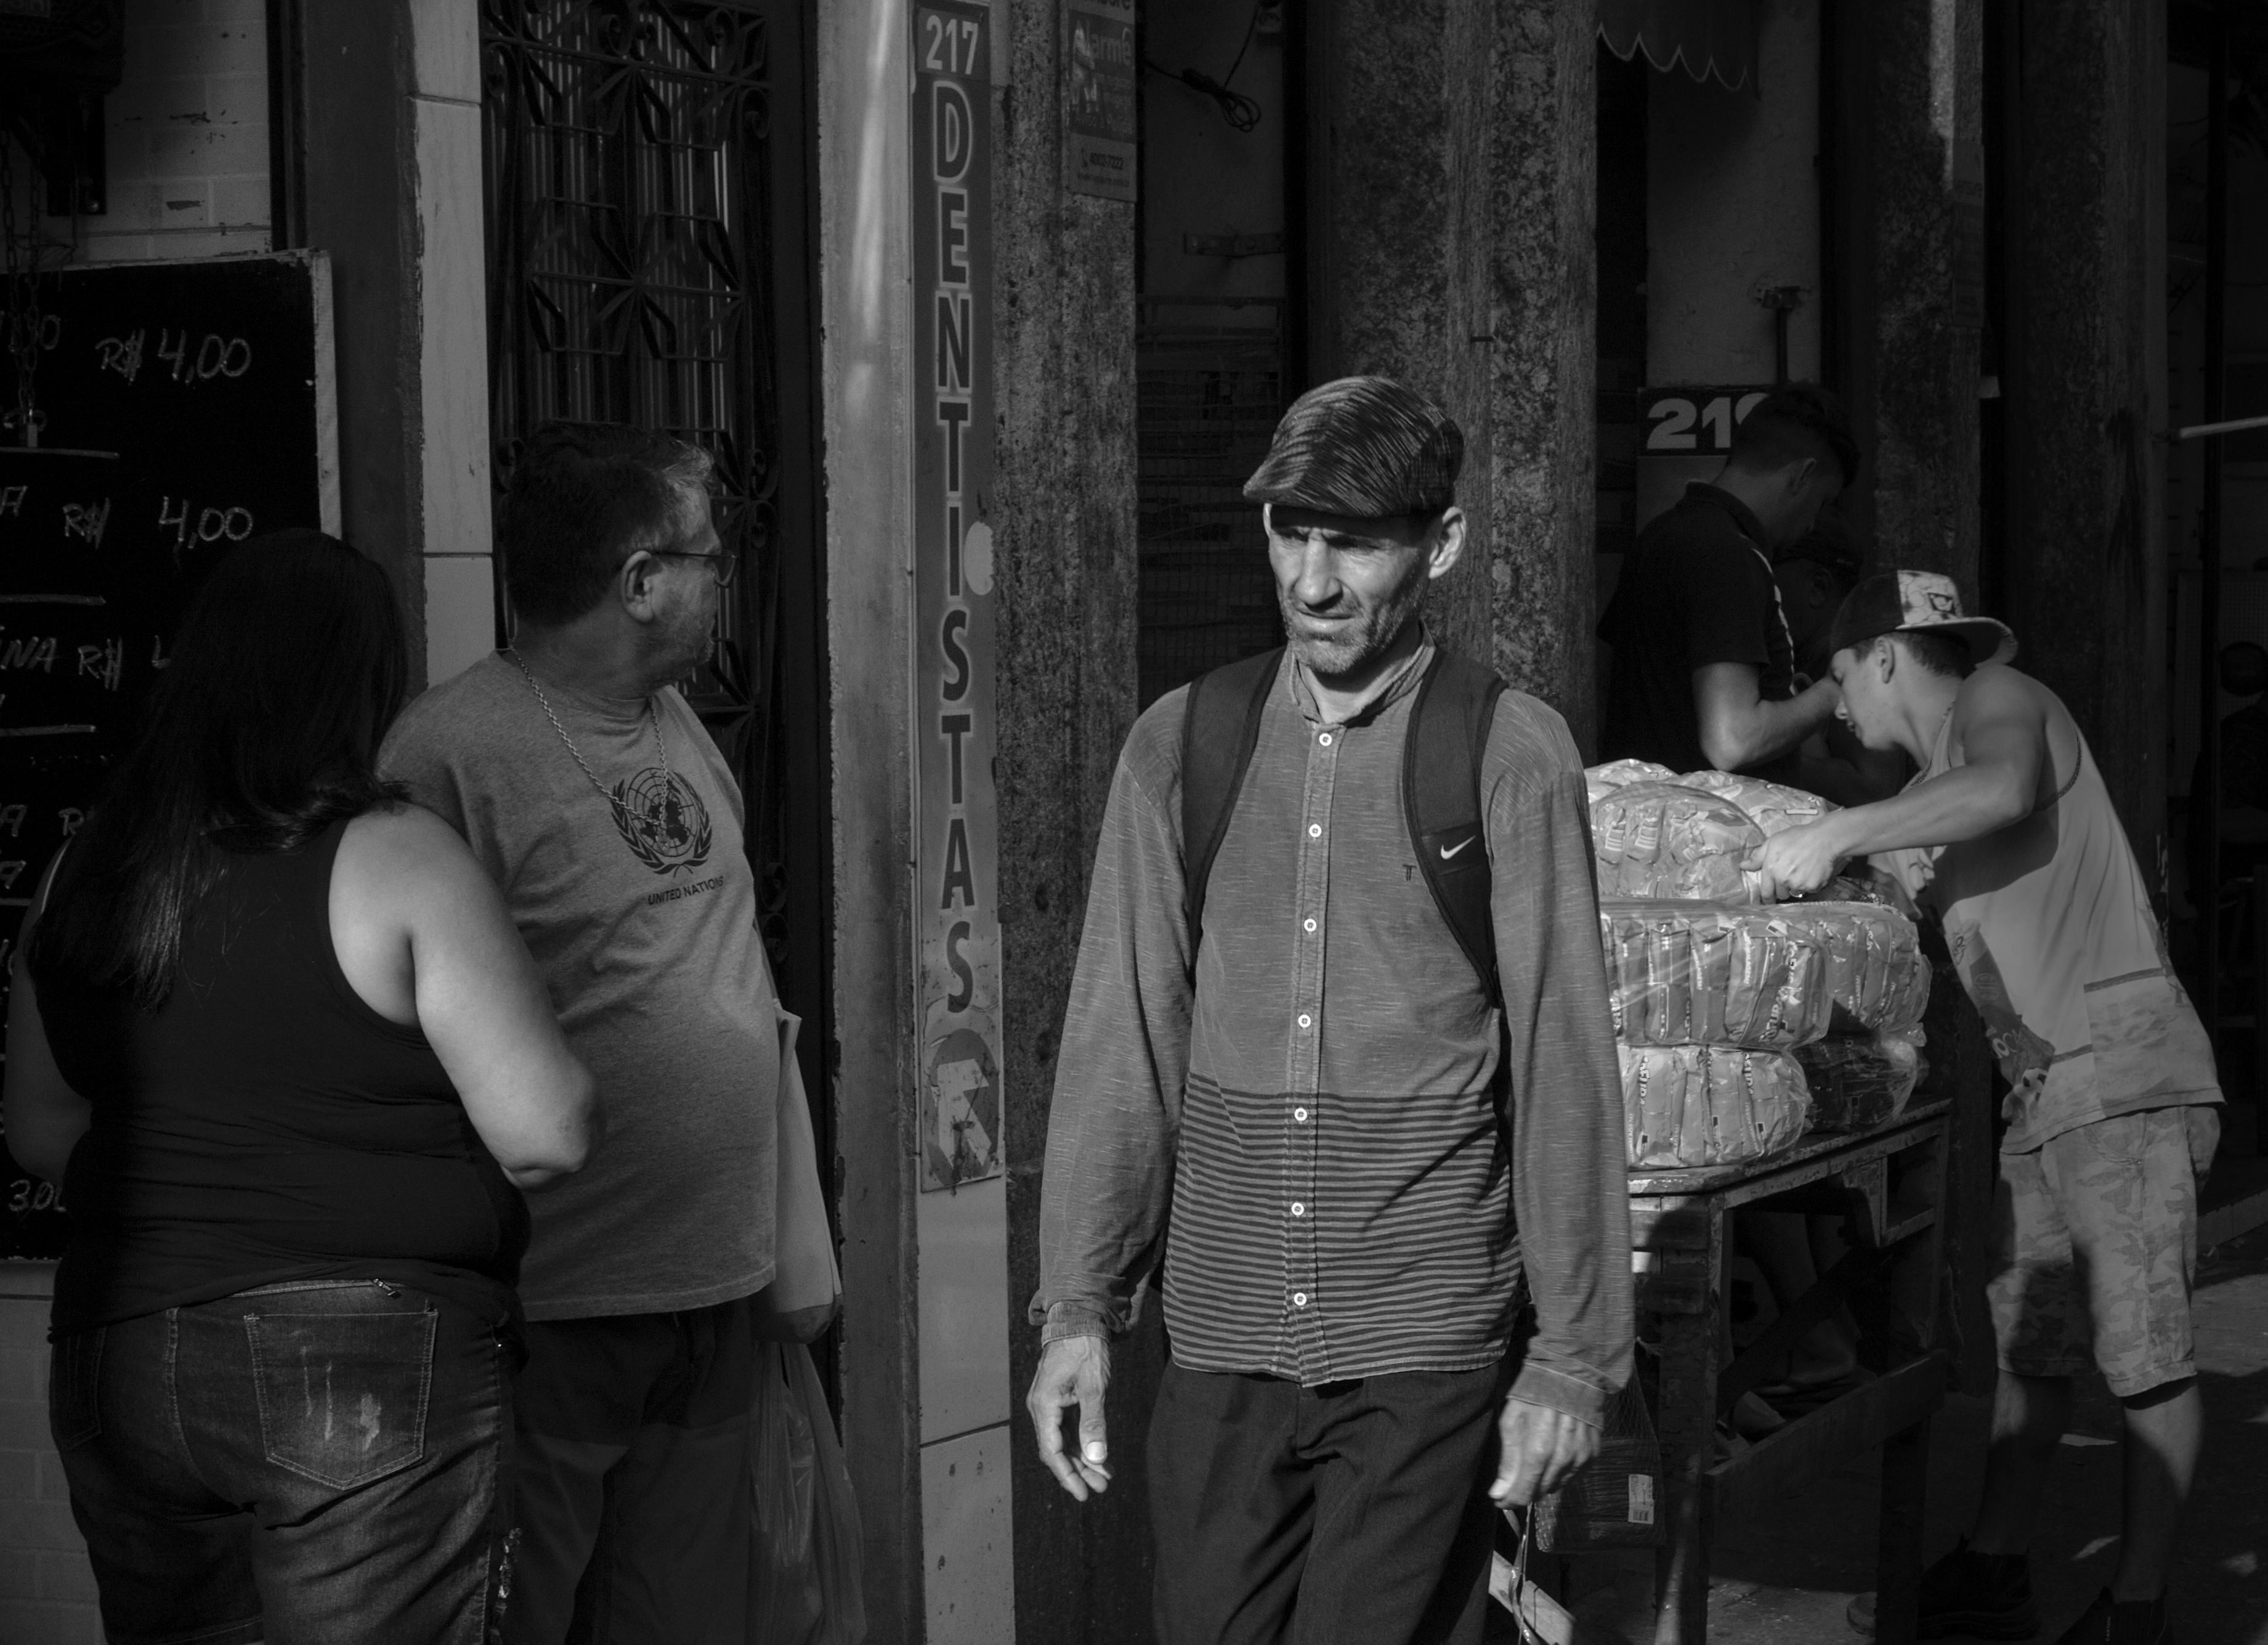
An oblong spot on the central subject affecting lightness, contrast, and an inverse blur. TMAX 100 sim, vignette. RawTherapee-Local Adjustments newlocallab branch.
1 Like
lol… I should have named the post as Going to the Dentist, or, After the Dentist.
Good luck!
This was actually quite fun and challenging. Just learning and never did black and white before.
My goal was to emphasize the main individual in the photo so that hopefully the eye goes right to him first. I think I got it but was really hard due to the harsh lighting coming in from the right of the photo.
The eye really likes to go right for the individual moving the packages. Using masks I emphasized the main subjects face a little and with another mask tried to tone down the package man without making the lighting feel fake.
Also added a little touch of B&W color grade to try and get a slightly more vintage look.
Hope you enjoy. Thanks for the awesome photo @gadolf
darktable 2.6.2: _MG_4993.CR2.xmp (8.0 KB)
2 Likes