here is a thing I am currently struggling to understand.
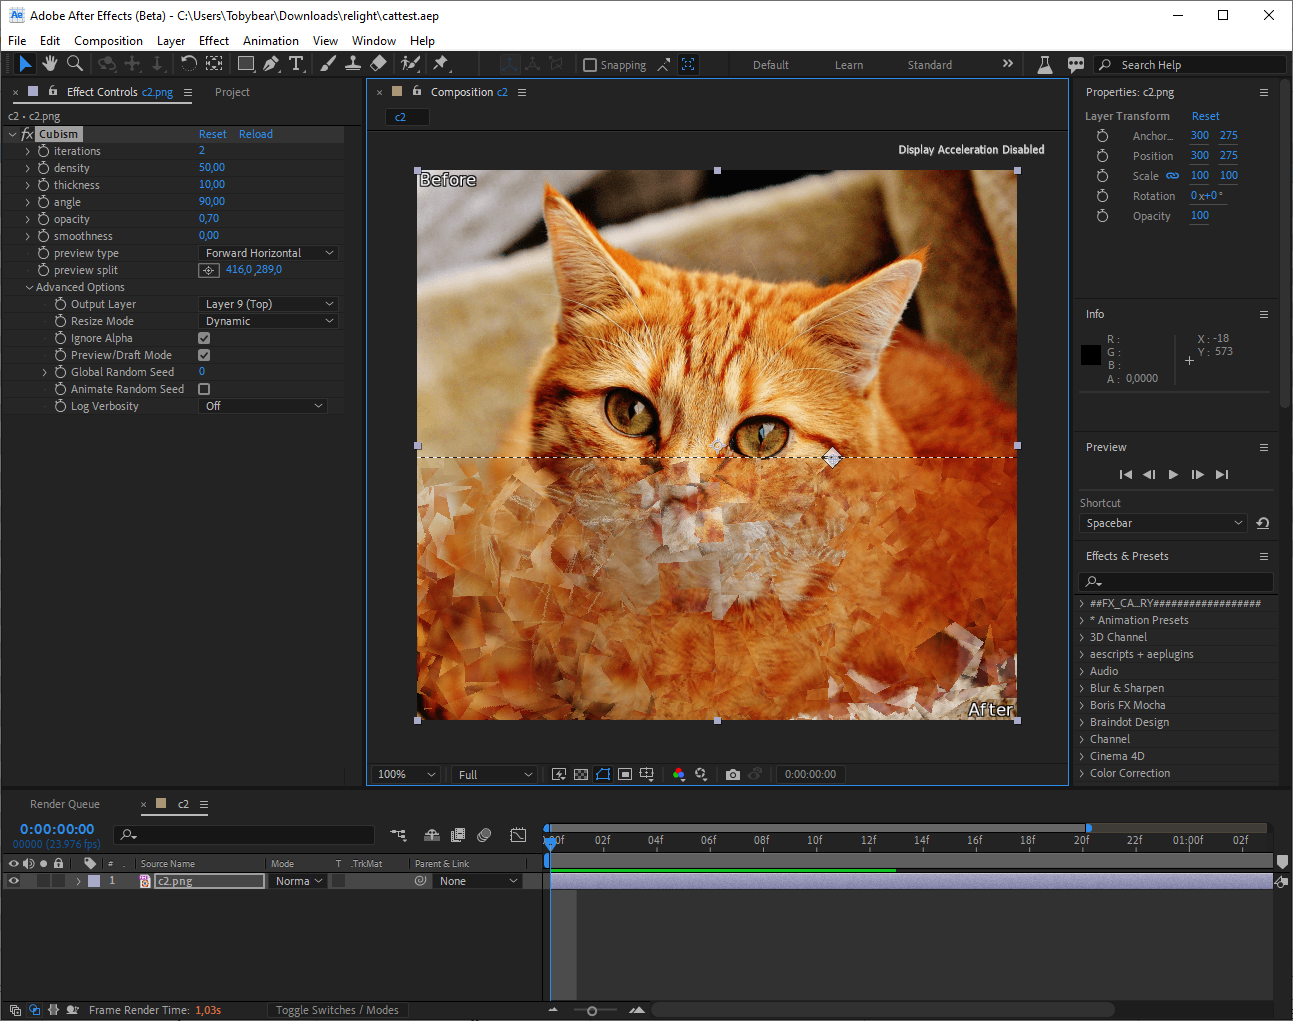
Given the following 3 commands, I can’t see why only the 3rd one produces the expected result (preview of cubism command, scaled down to 800x800 pixels. Can anyone enlighten me?
I thought the results should be the same for all 3 commands (image like the third one).
So no, the 2nd image is not supposed to be empty.
The quotes seem to have got lost for apply_channels while copy/pasting.
Here is the command I used for the 2nd image:
I wouldn’t use preview command as part of CLI code. Much less now that _persistent is a thing, and generation could be slow using it. That being said, commands like fill/eval/apply channels utilize string arguments for execution, and sometimes spaces may be inside it, hence the need for quote at times. To me, I don’t see a bug here.
It is actually part of a non-CLI applciation (my G’MIC filters for After Effects and OpenFX). But since preview parameters are included as part of many filters, but they all did not seem to work in the plugins any more since upgrading to GMIC 3.2.0, I analyzed the G’MIC commands my plugin was using internally and tested them on the command line - with the same result. Therefore I was wondering if I maybe misunderstood something.
I know about quotes and spaces when using apply_channels and other special commands, but usually if something does not match, a lot of errors get thrown, not like here where processing seems to happen ok, but the output has the wrong size or is totally empty for some reason.
It only happens with the dedicated “_preview” commands by the way. If I replace “fx_cubism_preview” in the above example with “fx_cubism”, everything works as expected, so I assume there must be some interaction/special requirements when using preview commands together with apply_channels or resize commands.
Often, dedicated preview command utilize the command gui_split_preview which access variables set by the preview window in GUI. That’s why they don’t work often for CLI command.
_persistent is a special variable for GUI filters in which it get loaded upon $_persistent when using a plugin. It can be used to retain results from previous iteration of filter application. It’s very much like storing data in memory for use later. That means, when code in GUI filters and wants to use _persistent to have best performance possible, that means storing all the possible images or variables and coding in conditions for how the filter will flow and utilize _persistent data. It can only be used by GUI.
Ok, so you also get a smaller output of the image when using the preview command. In older GMIC versions it was properly scaled, which now I can only achieve when removing the apply_channels command.
But for rgba in apply_channels you don’t get a blank image, that is weird.
I don’t quite understand the distinction between CLi and GUI apps that you mention. Even the GUI apps just call commands in the GMIC interpreter, right? So how would I use the preview commands correctly in my GUI app?
In any case, I can’t find any information on gui_split_preview and what parameters it uses internally. I guess that is where my problem is based.
Ok, I found the change in preview behaviour between GMIC 2.9.2 that I was using previously and 3.2.0 that I am playing with right now: it was introduced with GMIC 3.1.0 and described here:
Question is now for me, how can I define the proper $_preview_width and $_preview_height
settings to be the full input image dimensions again? My experiments so far haven’t been successful.
Unfortunately, these do not seem to work for me with 3.2.0. But nothing urgent, so maybe you find the time to investigate and reply when you have more time, no worries
However, when using the rgba setting for apply_channels, I still get an empty image, but I assume this is simply because I do not have an alpha channel in the input image:
Some additional things I can tell about your issue:
Command apply_channel will always keep the size of your initial image unchanged. In your case, you called it with a command that reduces the image size (command fx_cubism_preview), that’s why you get an image that is smaller, but embedded in a larger image (that has actually the same size as you input image).
Most commands named as fx_*_preview do indeed generate an output image which has a prescribed size (which is the size of the preview widget). In the plug-in environment, the global variables $_preview_width and $_preview_height are defined as the width and height of the preview area, the the fx_*_preview use these variables to set the size of the output image. But these variables are not defined elsewhere (e.g., in the CLI environment, or if you use the libgmic API).
That’s why one solution would be to set the value of these global variables in your G’MIC pipeline (to the dimension of the input image), before calling the fx_*_preview command, so that the preview command should generate an image with the same dimension as the input image.
If the variables $_preview_width and $_preview_height are not defined, the commands fx_*_preview generate an output image of (arbitrary) size 400x400. One better solution would be to generate an image of same size as the input, if these variables are not defined. That’s something I can do by modifying the current version of the stdlib. This would make sense.
That looks like a bug. The apply_channel command should output an alpha channel set to 255 by default if the command called generates an image without alpha.
That makes all a lot of sense, David, thanks for the detailed information. Since I already do resizing of the whole image before and after the processing as part of the command pipeline, I think I will simply set the preview_width/height variables to the w and h when preview is enabled (just like you suggested), I think that should do the trick.