Hello, I am in a student film production club and we shot a short film with a crew of 10-15 people, with properly defined production roles. I was the camera operator, sound mixer, and color grader. I shot the film with a Blackmagic Pocket Cinema Camera, and a set of three russian s16 lenses, MIR-11M 12mm F2, VEGA7-1 20mm F2, and TAIR-41M 50mm F2.
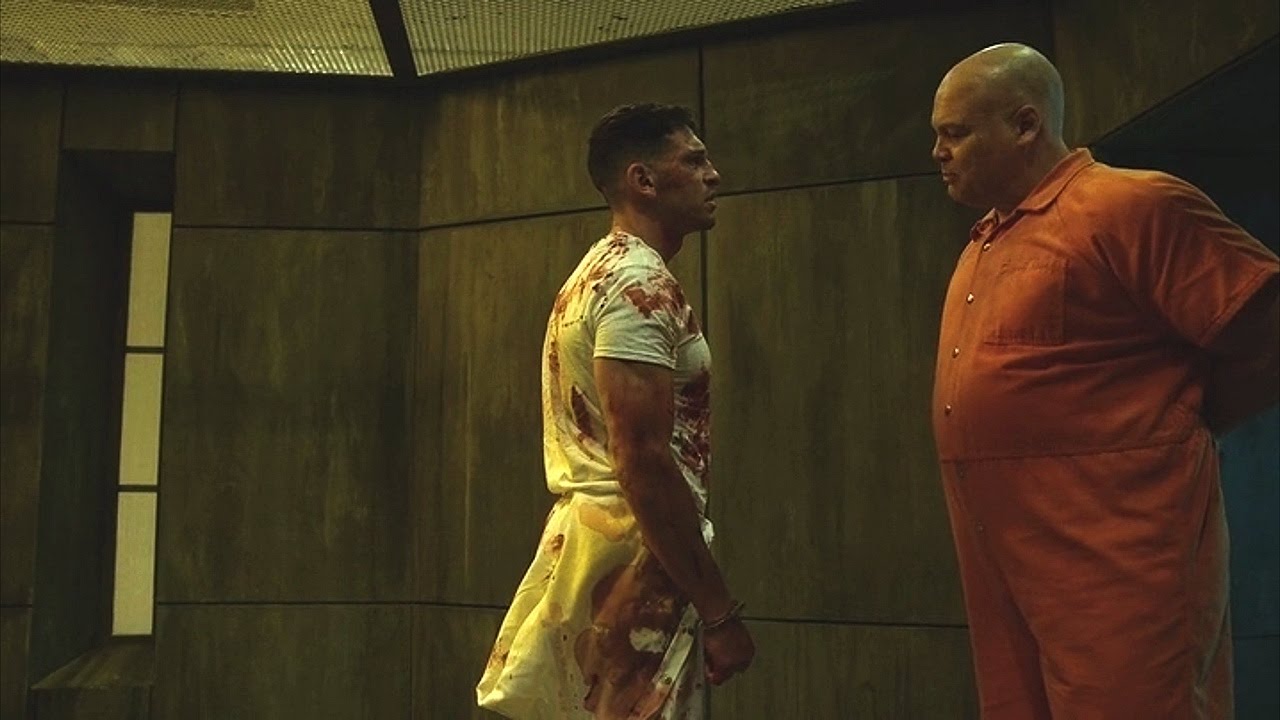
We decided to shoot everything in the bottom of the stairwell of a concrete building to get a decent prison set. Unfortunately, we had to reschedule, and so the second chance, we didn’t have access to serious studio lights, and proper audio recording gear, so we had to make due with in camera mics for diologue, and limited lamps and flashlights to light everything. So we ended up with pretty low light footage. As I will later explain, Rawtherapee helped me rescue our shoot.
For editing, I started out by using Davinci Resolve to transcode all the cinema DNG raw sequences into low resolution h.264 proxy files, and handed them off to another team member to cut and assemble onto a Premiere Pro timeline, as well as select sound effects. They also had the actors overdub and sync the audio. We met and they passed me the files and I exported the timeline to finish in Resolve. In the meeting, I showed the director a demo grade of a still frame from our project to get a general sense of what she wanted it to look like.
To start, I graded a middle frame from the first shot we did (wide angle of the whole scene, for the whole video), and exported it to a separate folder, so that I could use it as a color reference for everything else, then copy/pasted the processing profile across all the frames in the clip and sent to queue. After finishing, I deleted all the raw files and .pp3 sidechain files, so sorry, I have nothing for y’all to play around with (85 gigabytes was a lot of space on my hard drive!). Found out I do have some raw stills and a sidechain file. See reply below for link.
I had to push the exposure in RT about 4.5 stops, (effective ISO 20,000 for an ISO 800 native camera), and from there I drastically lowered the color temperature, decreased the saturation and added contrast, tweaked the tones with a filmic curve, boosted the greens, and desaturated the highlights in the Lab color module. I used LMMSE demosaicing because of the high noise (not possible in Resolve/Premiere), and hot pixel filter because the BMPCC has a crappy sensor with lots of hot pixels, which the RT hot pixel filter did beautifully without artifact (Not Possible in Resolve/Premiere). Another gift the benevolent sensor gave me was a lot of line noise artifacts, which a setting of 3-5 on RT line noise filter got rid of nearly all of the line noise artifacts (Not possible in Resolve/Premiere and has been a common complaint of the BMPCC that Rawtherapee solved effortlessly). For sharpening I did RL deconvolution with a high contrast mask threshold, which looks much better than the old and I’d say obsolete dampening filter, which gave me good sharpness in details, with a more natural rolloff into not affecting the flat noisy areas than would be possible in Resolve/Premiere. I then used impulse noise reduction to even out the noise better, and then did Lab noise reduction, lowered the gamma to make the noise reduction work harder on the noisy shadows an midtones, used the lightest chroma noise reduction settings necessary to do the job, set the luminance NR to slider at 100%, and dragged the detail recovery up until I started seeing noise. I then turned the luminance NR to curve and brought the level in the highlights to zero, and the blacks to 15-45%, depending on how much exposure gain was used in each shot. I was able to seemlessly recover most of the upper mid frequency/ lower mid amplitude detail that was eroded by noise reduction but still had good signal to noise ratio with the edge sharpness wavelet feature. The new auto chromatic aberration correction in RT 5.5 did an excellent job correcting the excessive chromatic aberration in the wide angle Russian s16 lens (MIR-11M 12mm F2). Manual vignetting and distortion correction worked in a pinch, but I suppose I should stop being lazy and make lens correction profiles for my Russian s16 lens kit.
It took my modestly powerful editing PC (AMD - Ryzen 5 1500X 3.5 GHz Quad-Core, 16 Gb of RAM, and Seagate BarraCuda 1 TB 3.5") about eight hours to process the 45,000 frames, and more time on that doing the actual editing, but it was worth it. The overall result was, Rawtherapee enabled me to turn heavily underexposed footage from an outdated and small (less than µ4/3) sensor, into modestly grainy, but organic and film like looking footage, not clean but pretty good as a film aesthetic. It just looks so good to me, compared to what I see on Youtube of people doing low light tests with the BMPCC.
The video is viewable as an unlisted Youtube video linked below, and as a google drive link to the original high quality final rendered file below. Note: to actually view the original file in high quality, download the file in the google drive folder, do not just use the online video preview function.
Google Drive link:
https://drive.google.com/open?id=1xVxpNCH9MySKy1xOv9_sDt6QRlig5xxy
Youtube link
One thing that could be improved would be a scale to fill crop feature in Rawtherapee. For correcting barrel distortion, using raw edge pixels is helpful in reducing the amount of scaling needed, but in setting the raw border to the intended standard video resolution output, the edge pixels are not used when performing the distortion correction. If I use the composition tools to to fix this, I end up having to have the image unnecessarily re-sampled a second time, once to do the distortion correction, and another to get the proper image size. This could be solved with A, allowing the user to set the auto scaling in the transform tab to the crop dimensions, or B, have the edge pixels shaved off in the image border in the Raw Border setting be processed and available for use in the Transform tab.
Another feature that would be helpful for video work (correct me if this is already available), is to be able to assign processing profiles to folders, so that they apply to all the still frames within said folders, editable by editing any file in that folder. Also sending folders and included images in said folders to queue without loading all the previews to RAM would make the workflow more manageable.
TLDR version: I helped make a student video (linked above), and used Rawtherapee to raw process/color grade. Workflow was cumbersome, but the results were incredible.
Edit: Turns out I do have some sample raw files and a .pp3 side chain file. See post below.


