Any interest in a "film negative" feature in RT ?

Indeed, thank you for the tip! I’ve tried and, while I still like the Working one better, with 3200k the FilmNegative indeed becomes much better.

What’s good with the Working one though is you can easily teach people “set main WB from sampling flat field, then don’t touch it”. And with this FilmNeg method you would have to first find out that 3200k from somewhere, so it widens space for searching/error.

For completeness, here are the remaining conversions:

FilmNeg with main WB@3200. It could be great if not the sky, the Working one has better skies, I think I shot it with a polarizer so here they look too bleak compared to the Working one:

“Camera” one. Like it less than Working:

So if I were to rate the available options I would place them in this order (of decreasing appeal):

  1. “Working” with main WB set at flat field (light source) - 5500 in my case
  2. “FilmNegative” with main WB@3200 - leaving much room for failed tries in case person doesn’t find this “3200” correctly.
  3. “Camera”.
  4. “FilmNegative” with WB set at flat field (light source).
1 Like

Thanks again for your testing!
Yes, you’re perfectly right. I have just re-processed an entire roll using the “Working” setting, and compared it with the output i got earlier this week using FilmNeg.
All pictures are much more straightforward to balance, and the results are way better. Only now i realized that most of the previous output pictures were affected by a weird color cast, that i didn’t catch the first time (unfortunately i have a terrible “eye” for color balancing :sob:).

When testing with my color checker shots, the FilmNeg profile seemed to give slightly better results compared to the working profile (which defaults to ProPhoto in RT) … but with “real” pictures that’s not the case. I’ve also re-processed other samples from other users in this thread, and indeed the “Working” setting is much better overall.

So, i agree “Working” should be the default. Moreover, since “FilmNeg” is much more critical to get right, and we’re regarding it as the “advanced” setting, i think i should remove it altogether from the combo.
After all, the current “FilmNeg” setting is just a redundancy; an advanced user, willing to experiment a bit more, can simply add a custom working profile, and use that with the “Working” setting. The result is exactly the same, actually even faster because it has two less colorspace conversions to do :wink:

Initially, i decided to hard-code the FilmNeg profile, as a shortcut to give the user the best possible setting without the need to fiddle with working profiles.
Now, since we observed that it’s actually harder to get a good result, i think a “shortcut to hell” is not a very desirable feature :rofl:

Ok for removal ?

guys, I think I need more (MOAR) coffee to understand the various alternatives.
Maybe if I read it ten times, I’ll be able to figure it out :smiley:

this is where I got lost.

And, to be honest, I jumped from the version with “pick film base color” to this one, so (with all that’s been debated over the last few months) right now, I’m no longer sure I know how to use the tool :cry:

Please don’t, let’s just not make it a default. Now that I know your trick with using it with 3200 I actually find it can give a bit better results for some indoor tungsten-lit frames, maybe this also explains why you obtained better results with it for test patterns - maybe you shot them under low temperature light?

So, the rule ‘use WB of light source’ as main WB seems to not be always right, it seems to be good when you shot the film under conditions it was tailored for, i.e. daylight for daylight-balanced film. When you shoot a daylight film under tungsten light without color conversion filters you push it into wrong territory, it seems special conversion rules need to apply and here converting it with WB@3200 + FilmNegative is handy.

Also, I can easily switch to an option in a dropdown while I’m totally lost when said to use my own color profile, I guess it’s so for most users.

Example of improvement I see when using 3200 main WB for conversion instead of backlight’s temperature of 5500:

Main WB3575:

Main WB5500:

Both have their moods but I would say the first one is closer to the reality.

Almost as before, I use these steps:

  1. Pick WB from flat field.
  2. Apply flat field to a frame where you can sample greys from
  3. Enable film negative, sample the two greys
  4. Pick white point using FilmNeg’s button, not using main WB picker.
  5. Use the two curves as always to correct brightness distribution
  6. Use FilmNeg’s color tint buttons to find best tone if needed
  7. Repeat 5&6 until happy. Then copy the settings to other frames, repeat 4-6 for them.

The problem is that the 3200K trick is completely un-scientific, i found it by chance, so it might work just for one camera, input profile, or shooting condition. We can’t use it as a general rule on how to use the program, since we ourselves don’t know why (and when) it works in the first place :rofl:

No, unfortunately. I shot it under my usual flash ~6000K … so, nothing makes sense :sob:

I’m afraid my FilmNeg profile is just conceptually wrong. Maybe choosing the primaries based on the wavelenghts of peak sensitivity was a good idea, but what about the distance from the center? I’ve chosen primaries on the spectral locus just to try something, but i wasn’t sure about that. I made some tests and got some good results, but then after more samples, we discovered that it doesn’t always work. So, it’s hard to sell this as a “feature” now.
Also consider the maintenance burder of adding some option that goes into the processing profile. Let’s say that 1 year from now we make some progress and find out that the current FilmNeg profile is garbage, we shoud use a totally different matrix. At that point, we won’t be able to change it in the program, because in the meantime, users will have tons of negatives already processed with the current “bad” FilmNeg, and we’ll have to maintain backwards compatibility, ending up with two options in the combo “FilmNeg (legacy, bad, don’t use)” and “FilmNeg (new, good)”.

This might very well be a lucky coincidence, we can’t find any theoretical basis for this…

Really? Consider that we are regarding FilmNeg as the non-default, advanced feature; i think an advanced user can afford to open a text file, and copy/paste some text from the wiki :wink:
(of course we would publish the FilmNeg matrix ready to use).
Or, even better, maybe my programming effort would be better invested in making the profile selection more user friendly, either in the Color Management tool itself, or in the Film Negative tool with a “Custom” option in place of “FilmNeg” :thinking:

Well, maybe you can also get a similar result by changing the main WB with the “Working” setting… in fact, i’ve had a cool idea to evaluate the effects of changing the main WB.

I’ve just pushed a very very dirty hack on the filmneg branch, which basically resamples the reference input values on every edit; it does it by saving the coordinates of the reference spot, so when you change something upstream of the negative inversion (like the main WB or even the input profile), the calculation is adapted so that the output of the reference spot is still fixed to the user-chosen values.
This way, it’s much easier to find these mysterious sweet spots for the main WB values: just move the main WB sliders across the ranges and see what happens.
Now, this version is a dirty hack for us to experiment, but maybe it could also be a good feature for the regular user. Not knowing exactly whether the “balance for the backlight color temperature” rule really holds or not, and for which working profile, one could just move the sliders and quickly eyeball the result…

1 Like

here are the main changes in this version:

  • in the combobox, the user has now the option to choose whether the inversion is performed before the input profile (hence in Camera colorspace, as in the previous versions), or after (hence in Working space).
    The “FilmNeg” option was a shortcut to perform the inversion in a dedicated color space (instead of the currently selected working profile, like ProPhoto), using a hard-coded color matrix. This seemed promising at first, but after more testing is proving worse than ProPhoto, so i’m leaning towards removing it.
  • the “film base spot” has been replaced by a more flexible “reference spot” concept: the user can sample any spot in the picture. By default, it is assumed to be neutral gray; if it’s not, the user can use the bottom sliders to assign a different output color to the sampled spot. In the end, two RGB triplets are saved in the processing profile: RefInput and RefOutput. This way, we can achieve stable multipliers across multiple frames by imposing that RefInput must yield RefOutput after inversion.
    So, now you can use the tool without having any film base visible, or even without having any gray spot, since you can choose any output color you want using the sliders.

The price of all the above, is that you can’t use the normal WB tool anymore (since it works before input profile conversion). You should set it to the backlight color temperature and never touch it again… although we’re not 100% sure about this rule yet. The dirty hack described above might also relax this fixed rule and make it easy to eyeball what the best value is :slight_smile:

… hope i’ve not confused you even more :rofl:

Ok, I now agree with you, it’s seems safe to remove as I found the secret was main WB, not the FilmNegative profile per se.

Today I’ve spent the whole day elaborating my theory that rule “set main WB at backlight temperature” is not universal, and it’s just one ‘normal’ case into which some more general rule collapses into under ‘normal’ conditions. The reasoning is this:

Most films are balanced for 5500K daylight. When we photo under tungsten light (2800K) or when we photo under blue winter skies or in shade (7000-11000K) we push the film into significantly different “modes” than the one it was built for. As I’ve noticed that if the film frame was taken under low temperature light, then it’s best to set the main WB slider to low temperature as well, it moves the inversion engine into “better” territory where you can find better overall colors.
Then I’ve extended that idea to frames taken under high light temperatures, i.e. the ones taken in the winter. Here I must say I’ve shot one very stubborn roll of Fuji Pro400H at the beginning of the year, in January, which I have been struggling to invert ever since. I shot the same Pro400H before but in the summer and found it quite stable and easy to invert. So how come all my efforts with the winter one always gave me bad results? Today I connected the dots and thought “maybe if for tungsten light we need to drop RT main WB, then for the winter/snow shots, where light temperature is typically higher than 5500, maybe the secret is to increase RT main WB?”.
So I was proving it, reconverting the winter shots with main WB slider at RT set at 9000-12000K and I’ve come to the definite conclusion that it really helps!

So the conjecture is the main WB in RT should follow not backlight’s temperature but the temperature of the light you shot the film at! So in this case for ‘normal’ summer daylight shots this converges to your simple rule ‘set main WB to backlight’ - in this case both the backlight and the scene are ~5500K. But as the real scene temperature changes while digitization backlight stays the same, the inversion params must change.

And after the day of my fiddling you’ve comitted this super helpful change and I’ve played with it now too and it has only further confirmed my theory for me! Indeed, low temp shots benefit from low WB, high temp shots benefit from high WB.
I like the new “hack” very much and would like it to stay! Before this, it was tiresome to always resample white spots after changing main WB. Now it allows to semi-automatically find the “best” value by sliding it and looking. So it was a very nice idea of yours!

Here’s an example of a shot that benefits from increase of main WB (basically, like almost all winter/snow scenes).

With your recommendation “main WB at backlight temp”:

With my approach “higher shooting temps require higher main WB in RT”, main WB@12000:

I like the last one more, the 5500K one has “magenta dirt” which is hard to correct while staying at 5500, while it goes away at 12000K

1 Like

Hi folks, and as always, thanks for your amazing responsiveness :slight_smile:

So with your recommendations in mind, I’ve done an inversion on a supposedly not too hard yet common picture (taken on a sunny summer afternoon), in “street” conditions.

Film stock in Fujicolor Superia 200. I too digitise with a nikon D750.

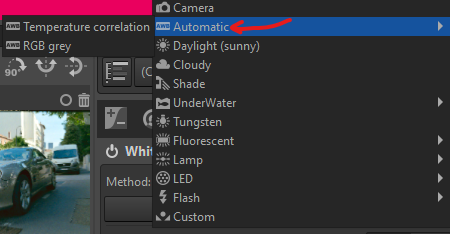
  1. First things first, auto rgb grey on flat field (@Ilya_Palopezhentsev, note I’m not performing flat field correction, though) :arrow_right: gets me (5686, 1.066) = (temperature, tint), which I replicate on my scans.
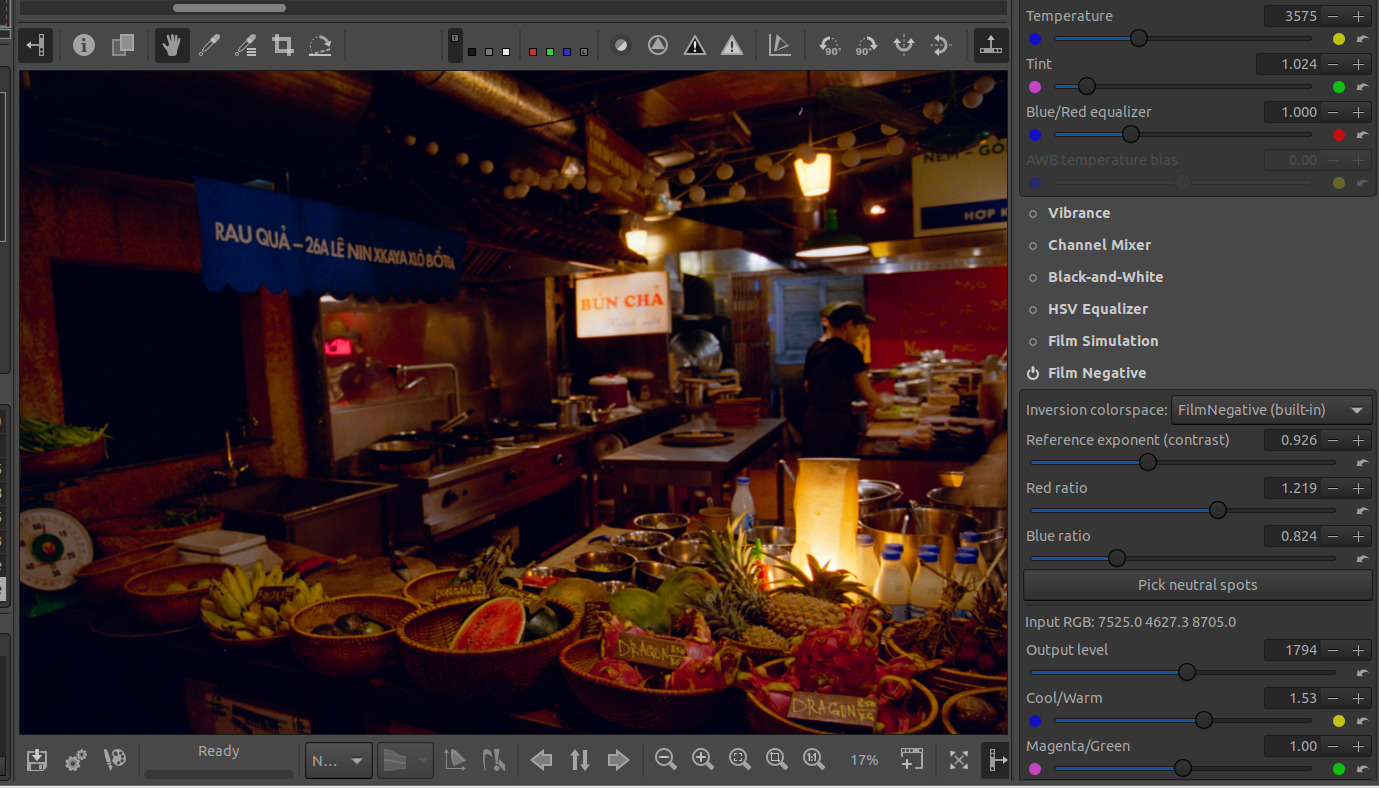
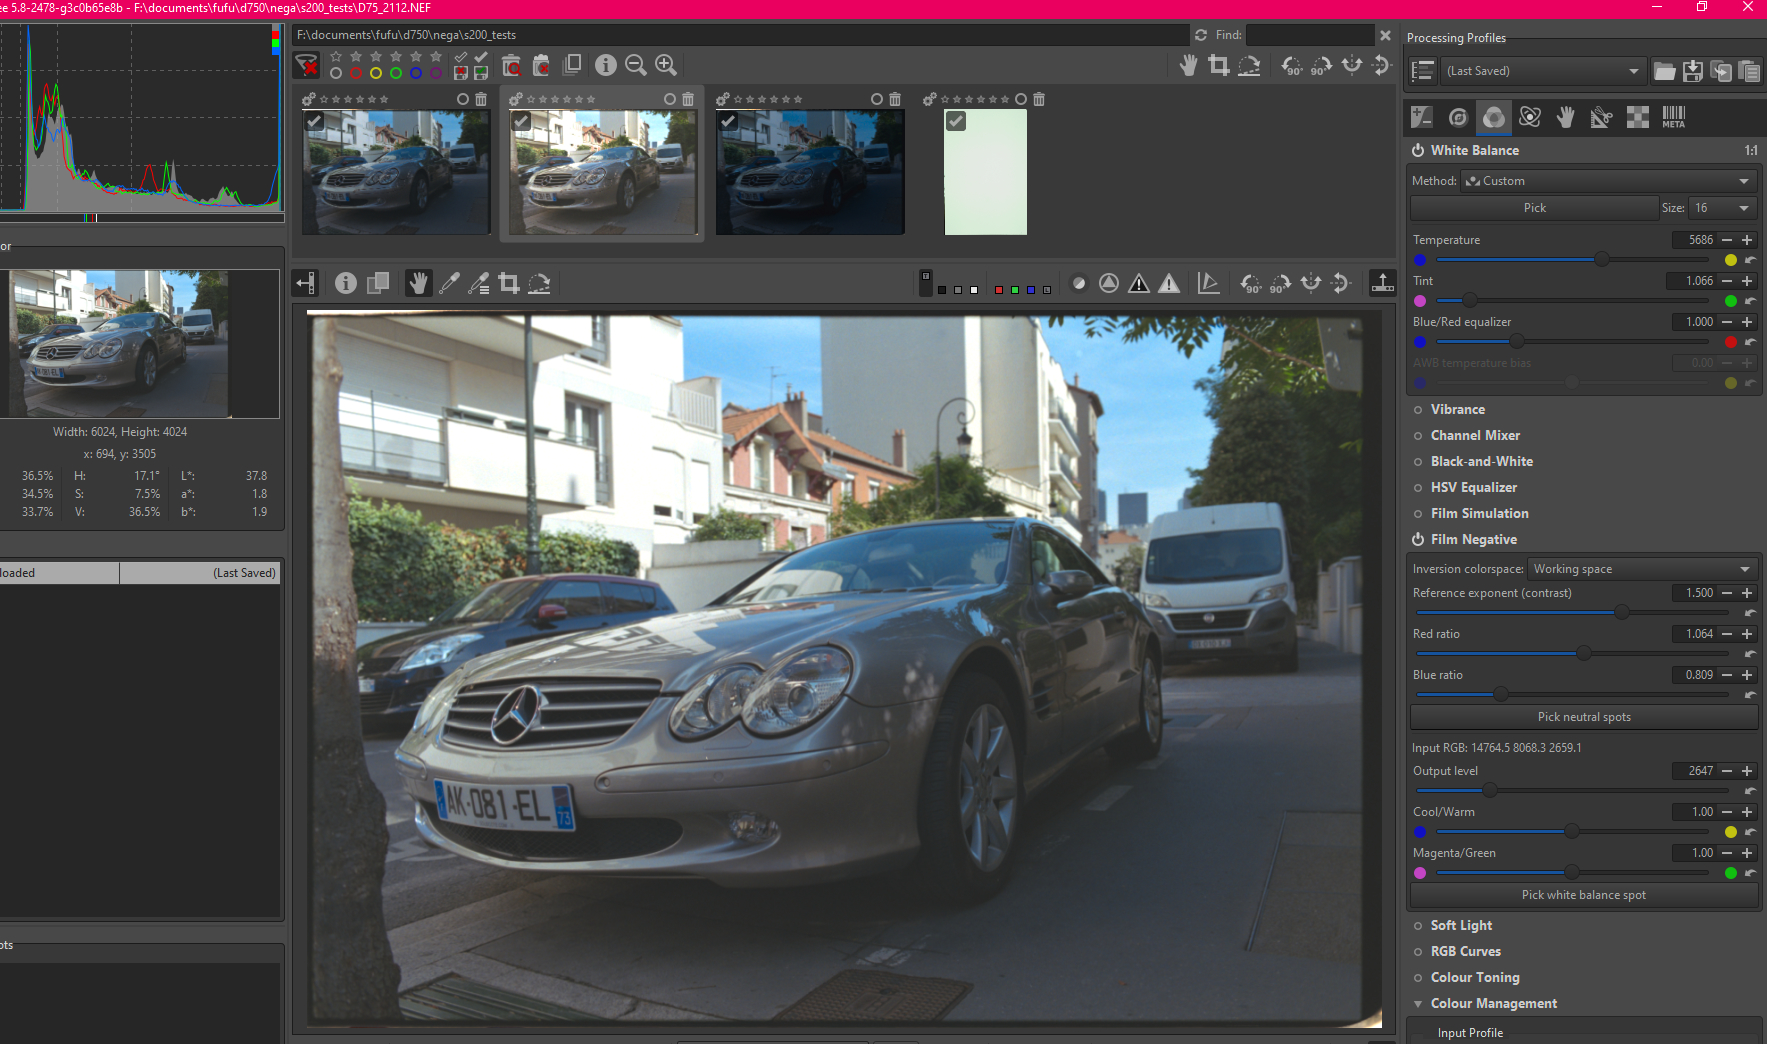
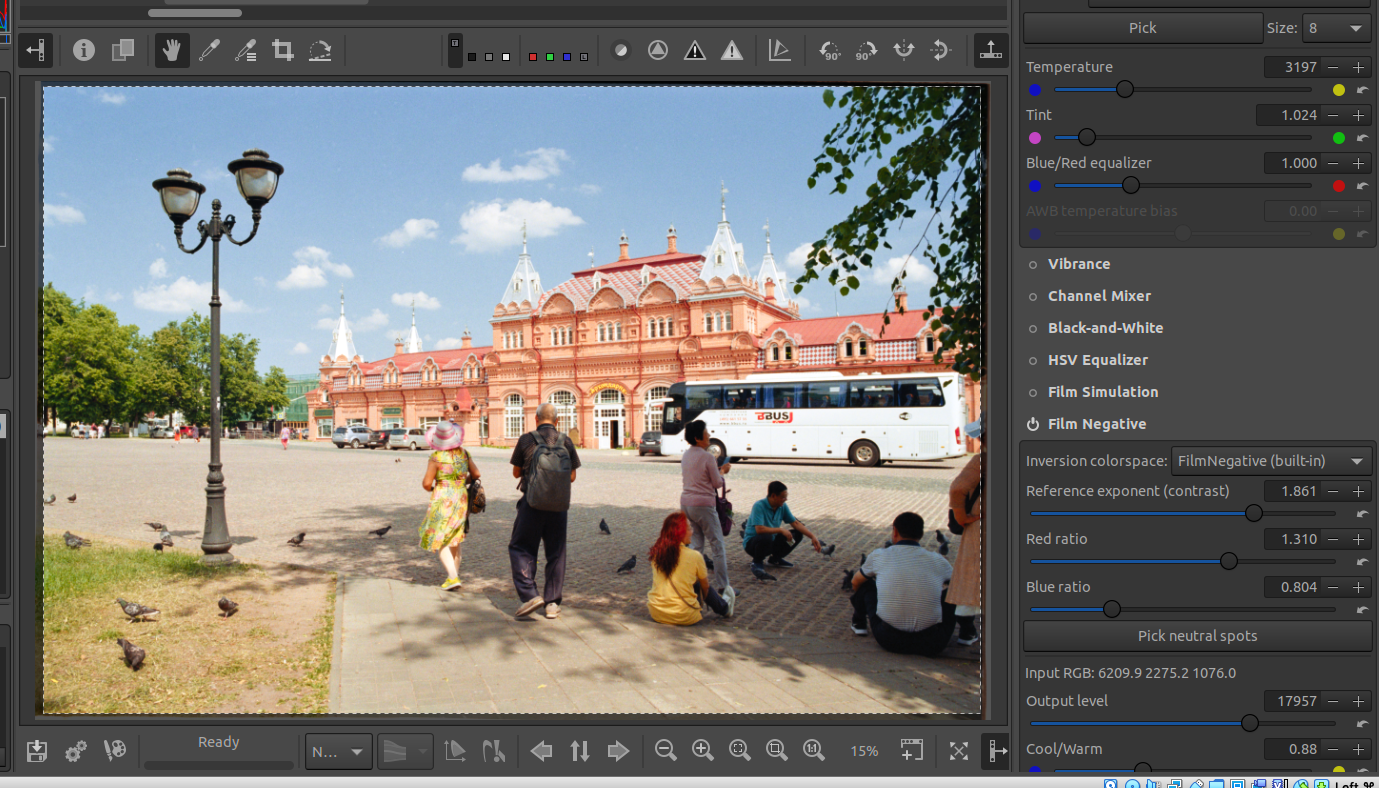
  2. Activate “Film Negative” module,
    a. select “working space” as inversion colorspace;
    b. pick neutral spots: blacks on the license plate letters, whites on the blurred out window shutters in the background;
    c. “Pick white balance spot” on the license plate, as a mix of letters and white background (in the final L).

This is what I get, with no curves (I’ll explain why I haven’t set them, later).

:arrow_right: seems “right”, from a colour perspective.

Have I forgotten any obvious step?
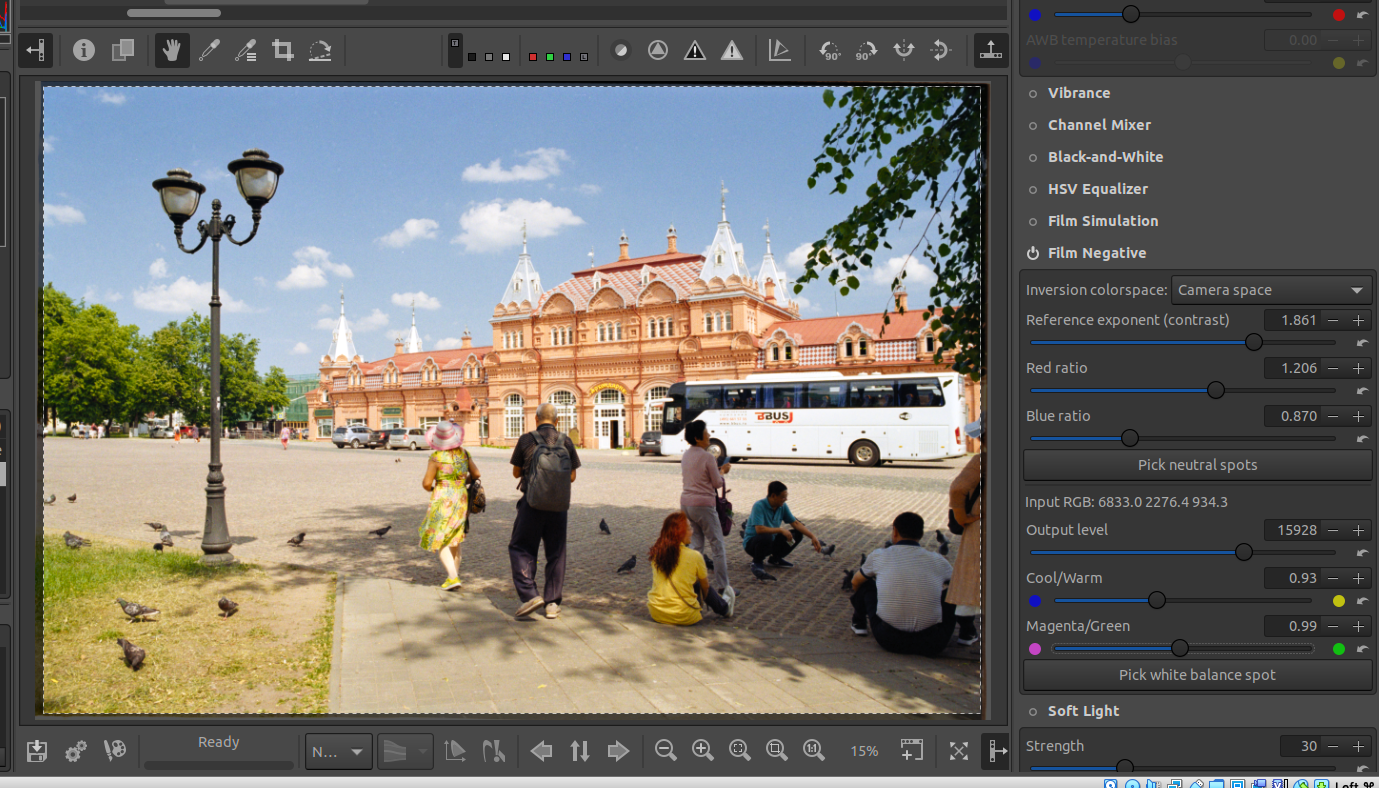
From your previous comments, I’ve understood I should refine my settings with the new sliders (cool/warm; magenta/green).
Pertaining to the output level slider: @rom9, any advice on how it compares to histogram contrast stretching using curves?

This is the perfect transition: I shoot using the Expose-to-the-Right + UniWB method (as a way to maximise signal-to-noise ratio).
:question:Is it expected that a frame that contains (more or less) the “same” information gets very different levels upon inversion, depending on the exposure used for digitisation?

I thought it would work differently: it would stretch the histogram to a similar target, yielding almost identical inversion.

As you can see in the ribbon, I’ve done three exposures for this frame. None are clipped.
I’ve used (f/14, {1/50s, 1/100s, 1/25s}). Technically, the 1/25s shot is supposed to give the best canvas for inversion (unless I suffer from some amount of clipping, which will affect the shadows of the output final image).

Note the work was done on the 1/100s shot and pasted on the other two (so I guess I can’t work like that, in this example, due to the way the inversion parameters are pasted, right?).
image
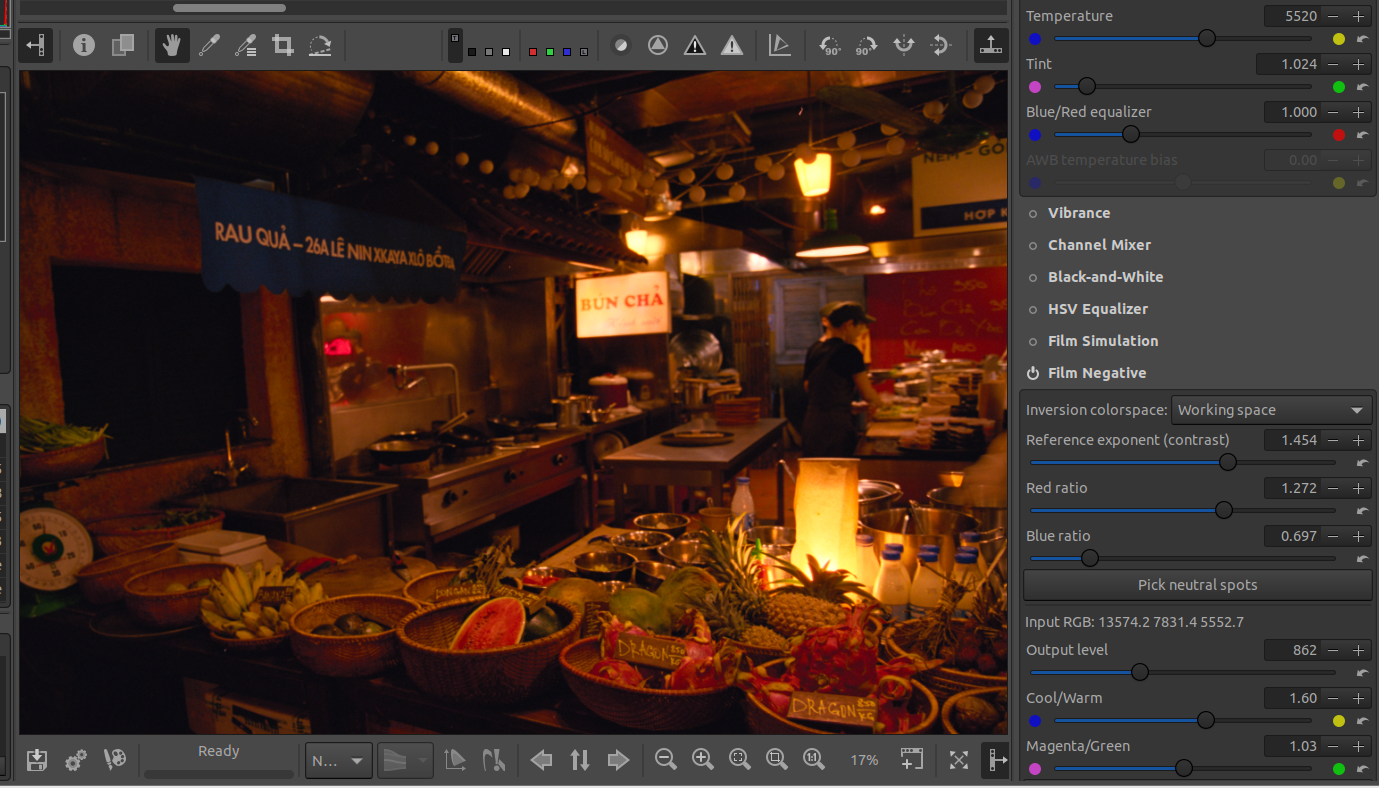
Output level is 2647, here. The frame that is, in reality, the most favourable exposure for scanning the negative and getting clean highlights also appears to be the densest once inverted :frowning:
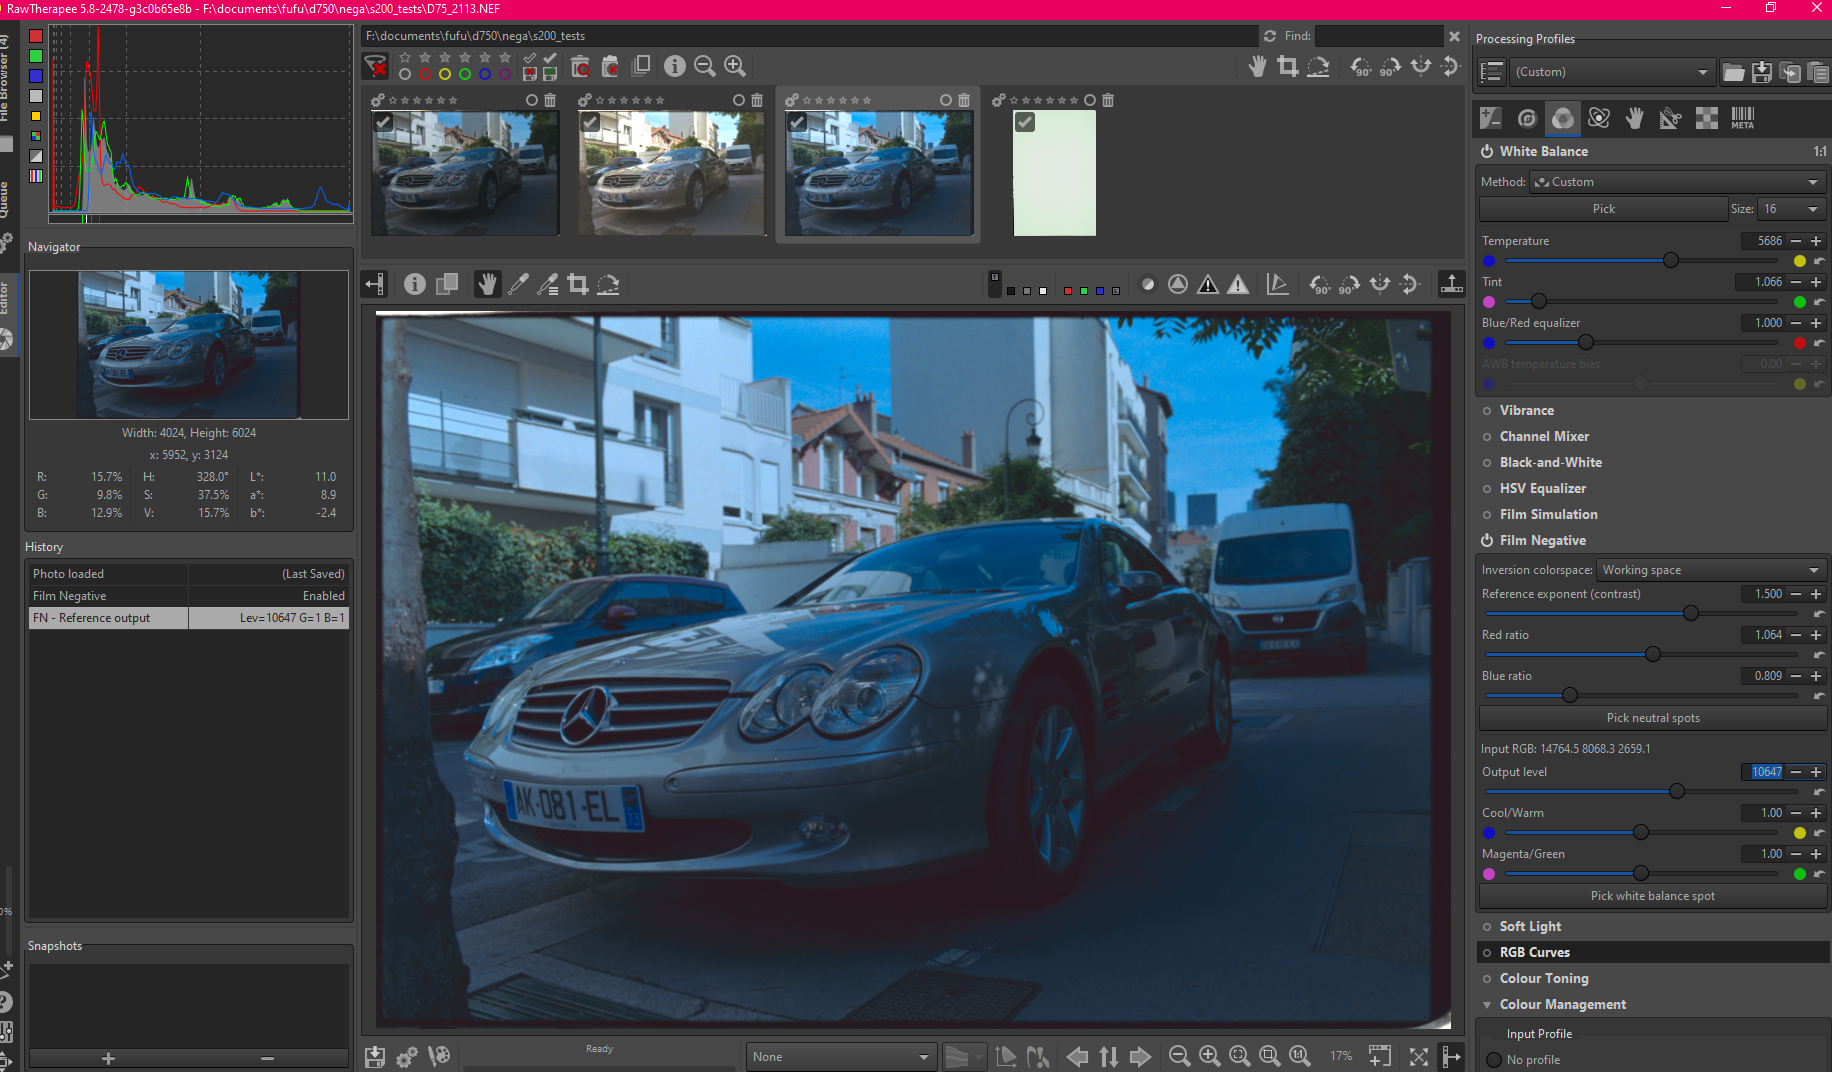
(and if I tweak the output level all the way to 10647, I really get something different from the frame captured at 1/100s)
See.

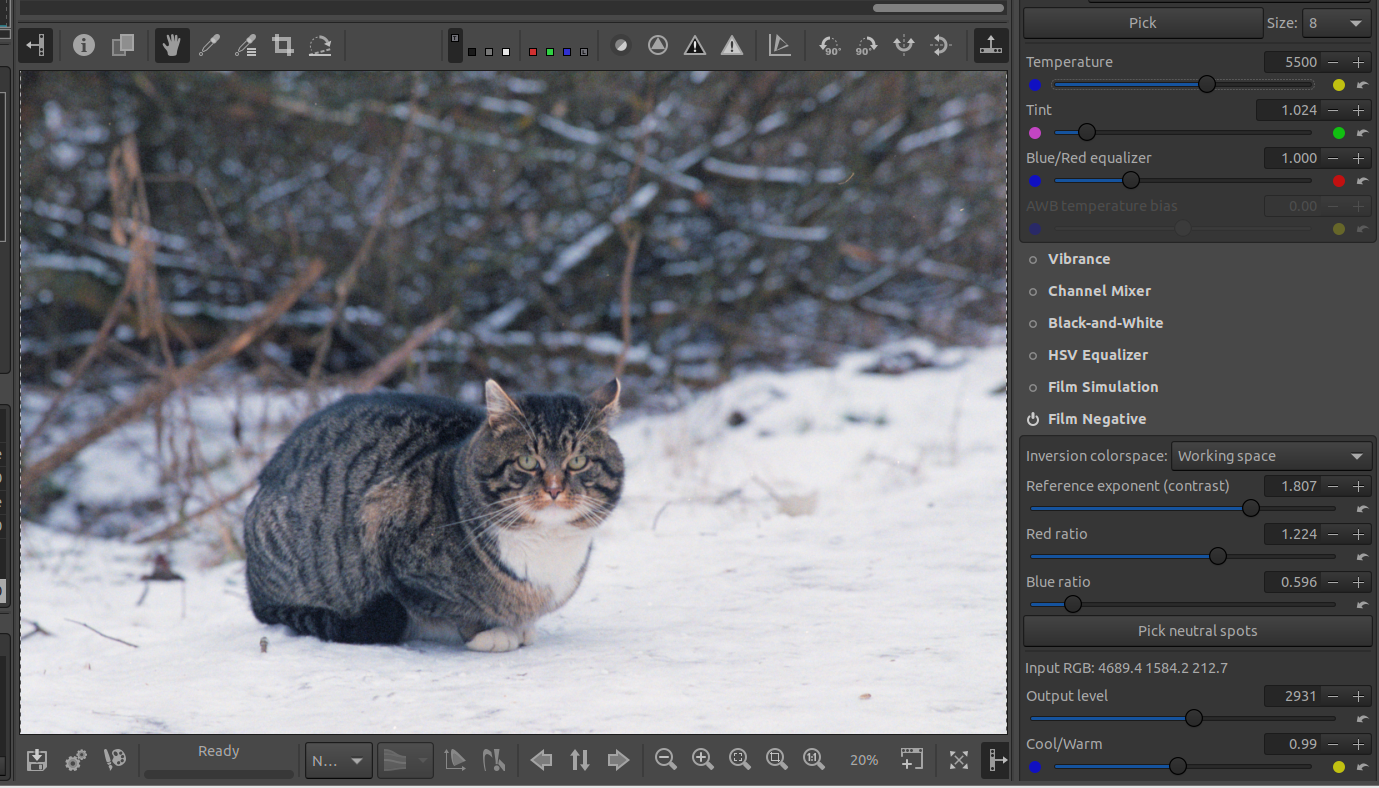
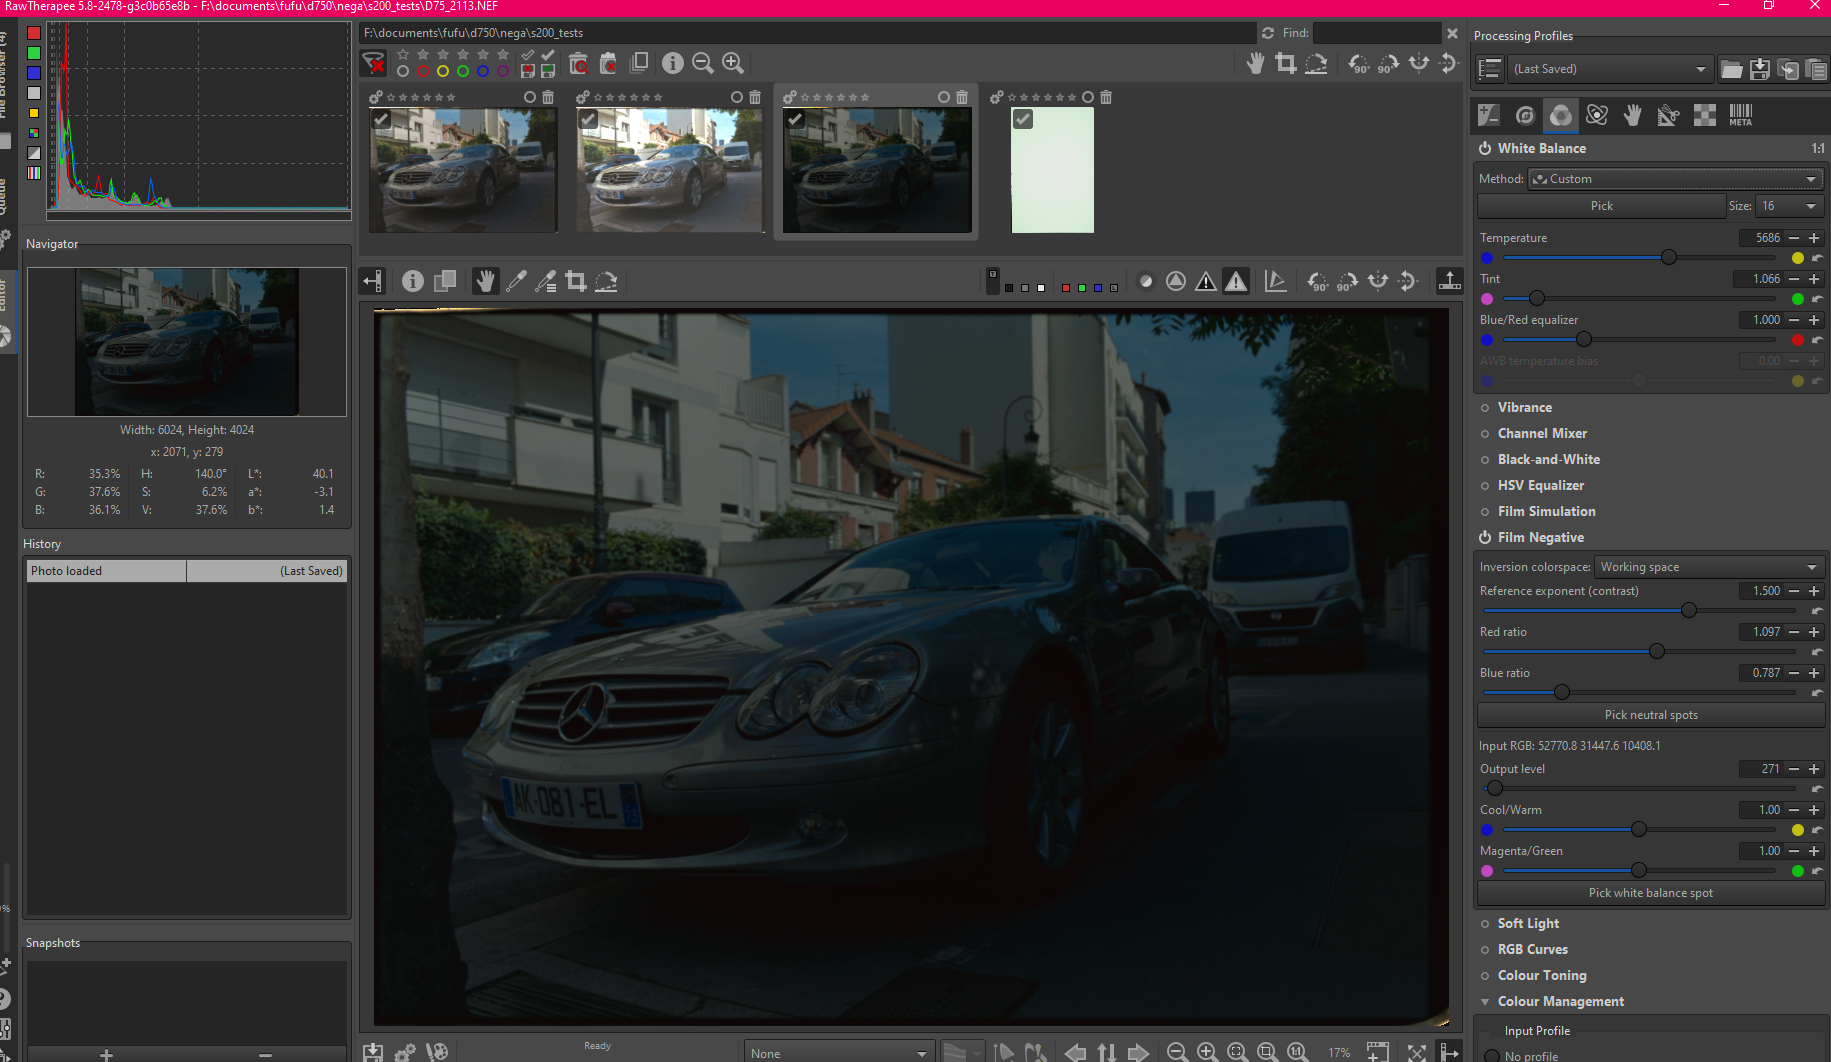
So, if I rework this frame manually (i.e. start the inversion over again):


I get something that looks more like the center shot, except it’s still very dense…
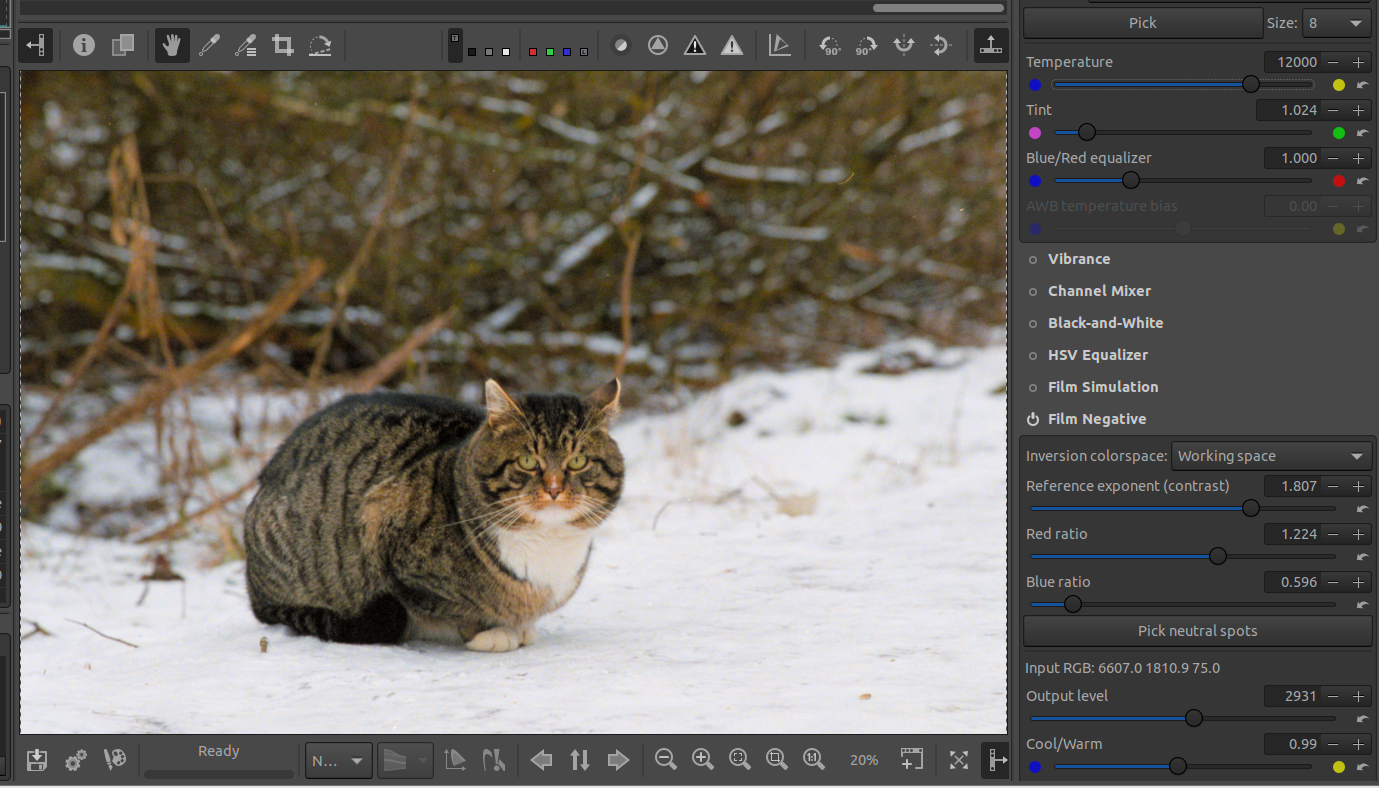
Not sure how I should proceed to get it back to appropriate output levels. (Curves, directly? or “output level” slider first?)
Fiddling with the “output level” slider gives, at some point, weird shadows (do I have some clipping already :smiley: ? possible, as the 1/50s seems to be better suited, which does hint at some clipping indeed)

Let me know if my post does not make sense x_x

Thanks!

EDIT: google drive link (2111, 2112, 2113): RT_discuss – Google Drive

@rom9 would it help if someone could shoot actual color targets on film under different lighting conditions and supplied the negatives?
Ping @ggbutcher who I think would have all the tools available.

(Disclaimer: I’m not capable of providing those shots)

1 Like

i’m afraid it wouldn’t, unfortunalety. First of all, in order to derive a correct ICC profile from a digitized negative of a target, we would need to hack into scanin/colprof to somehow “insert” the negative inversion calculation (or write a similar tool from scratch), which is waaay above my abilities.
Second, even if we could finally get a perfect profile, i doubt it would be generally applicable to all users, having different backlights, different cameras, different input profiles… and also consider scanner users.
And we couldn’t ask the users to create their own profile via a very complicated process.

I think for now our best bet is finding a way to quickly eyeball and adjust the result.

Now i’m trying to get a clean hack out of the dirty WB hack described in previous posts. Let’s see how it performs…

it doesn’t do any stretching, it’s just a multiplier acting on all channels. It has the same effect as the normal Exposure Compensation slider.

yes, absolutely expected, this was also true with the old “film base” version. The reference spot links an input (negative) RGB value to an output (positive) RGB value. So, copying this setting on multiple frames works as long as the backlight and exposure settings stay the same.

no, trying to evaluate the histogram is too hit-and-miss, because you can’t anticipate the influence of the border: some users have tiny borders, others have huge borders, others want the sprocket holes, others don’t use a holder at all and let light pass all around… getting it right would probably require some AI, it’s not worth it IMHO.
If you want to use different exposure settings to maximise dynamic range, you’ll have to group your pictures by “digitization” exposure, and copy the parameters by group.

yes, because the inversion is not linear. Each channel is elevated to a different power, so if you multiply your input by the same amount on all three channels (by exposing more), your output will get three different coefficients in the output. There’s no way around that :smiley:

well… that might be due to the dirty WB hack above … please wait while i try to cleanup that mess :smile:

Thanks for testing!

My intention for having a negative of a color target was not to actually profile it, but as a tool to debug or fine-tune the inversion process. For a color target you would know how it should look like, if the inversion process is done correctly. If your algorithm, or the chosen color space, or anything else, somehow fails, you would immediately notice.

Maybe I’m pointing something obvious, but I think it was not explicitly mentioned in this thread before. To be clear, I’m not a color scientist or anything, and know not more than any of you guys, so take it with a grain of salt.

With the recent developments it seems the backlight WB setting was pretty much ejected from the process. This may be justified, but the backlight characteristics should not be discounted completely. With the WB we are making a specific color (or a set of colors) become neutral. This may not do enough to precisely correct the remaining non-neutral colors. The backlight has its own spectral function which, even with decent light sources, may have peaks, and generally is not a close match to D50 (or whatever illuminant the film was balanced to).

When the sensor captures the image, it receives the combination of the spectral distribution of the backlight passed through the colors of the film, introducing a non-linear (and random between the users) deviation. The captured image is then interpreted according to the sensor’s own spectral response which is eventually governed by the camera profile.

The straightforward way to compensate for the backlight imperfection is to create a camera profile of the backlight using a color target. While it is not going to fix the tungsten-lit scene on a daylight-balanced film, it could help to avoid a hard to fix (and understand) color variation.

The bottomline is the camera profile should be tailored to the backlight, and that’s up to the end user to ensure. While filmneg already caters for the camera profile, the end user should probably be properly instructed about the backlight implications specifically.

1 Like

Understood. In the so-called “old” film base version, I had not performed the comparison, but I was already very surprised, as I do ETTR, by how dark the initial inversion is. As you mentioned to me, this level of “darkness” is not supposed to be a problem (f.i. a source of posterisation) since the module uses 32-bit floats (or something like that?)

I see. You know, as long as we don’t get into posterisation territory, I’m happy :smiley: I mean, for me, the whole point of doing ETTR+UniWB is to have the best possible canvas for inversion, yielding the best achievable colour nuances (I realise this sounds silly as I don’t have an RGB tri-chromatic setup, or an easy way to debayer my sensor, yet)

I’m not merging my shots for dynamic range just yet (not sure how I would go about that, though and not sure it’s worth exploring in my rudimentary setup, due to bayer sensor crosstalk anyway). I’m merely trying to optimise exposure, especially for dense frames.

OK :slight_smile:

Pleasure! Would love to be able to do more.

  • Time for feature requests :innocent:
    • how tough would it be to port the auto rgb grey WB setting into film negative module? image
    • same question for temperature correlation (though I haven’t really found it useful, but that’s just my experience)
    • since we’re dealing with film, which is noisy by nature, we already have a sampling tool that’s set to a relatively big area. How hard is it to make this configurable (8x8, 16x16, 32x32, 48x48)?
      • extra: what about the denoising of the sampled area? is it an average? could it some other method (median?)?

Thanks :smiley:
And thanks for your work. (I haven’t followed up on darktable, how’s negadoctor doing?)

Oh, in this case, yes.
Whoever can provide more samples, from different camera models, especially of a known color target and with a measured backlight, is surely welcome :slight_smile:

@Ilya_Palopezhentsev : maybe i found what’s happening when we change the main WB.
Did you use “Auto-matched camera profile” as the input profile with your latest tests? If so, for the D750 a dual illuminant DCP profile is chosen. If i understand correctly, the input matrix is adapted to the current WB setting, so when you change the main WB you are in fact modifying the input matrix.
If you switch to “Camera Standard” (which uses a simple matrix), the change is less evident as you move the main WB slider.
Can you also try selecting Rec2020 as your Working profile in the Color Management Tool, and setting the main WB to backlight color temperature?
To me it seems to give better results than ProPhoto, testing with different negative shooting conditions (sunset, shade, sunlight).

Yes, that’s exactly what i did. I profiled my camera using my flash as the light source, then used the same flash as the film backlight, and processed the negative using my custom input profile.
But, still a question remains… what should be the color space in which i should perform the inversion operation (aka the exponentiation of the channel values) ?
I came up with my “FilmNeg” color profile by making some wild guesses about the primaries, just to try something, and it seemed to give some good results, but not in all cases, even of my own samples, shot with the same camera, same backlight, same custom profile.

Absolutely. Everything purely float, no matter how big or small values are, the precision is still there :slight_smile:

Very tough, because the average/median would be confused by the border, sprocket holes, etc. I could instead let the user Click+Drag when picking the gray spot, in order to draw a rectangle and autobalance on that. It’s up to the user to not include any border. How does that sound?

that’s waay above my abilities. Keep in mind that i can’t use the existing WB tool, but i would have to re-implement it inside the film negative tool.

Regarding the spot size, i know, sorry, i had a todo in the code since the beginning :smiley:

@rom9 Alberto, when this is all done, you should prepare a PP3 profile “Film negative” which we can ship like the “Unclipped” one. There are so many switches to take care of for the best result, that should be bundled somewhere as a starting point…

1 Like

As I said, I understand very little about profiles so never touch them so I was using whatever defaults the RT has. But if you tell me where to look, I’ll be happy to confirm.

Maybe, the file would be helpful for you:
The flat field/The cat:
Dslr0333.NEF (25.1 MB) Dslr0361.NEF (27.2 MB)

To me, an auto rgb grey feature should be always based on current crop (it’s not the case, in RT-5.8), so your proposition to have a resizable click-n-drag sampling box to be able to freely determine an RGB grey goes exactly in that direction. :smiley:

OK, I understand. Well, not having looked at RT code, I have no idea how modular it is; that’s why I was asking about the potential challenges.

Your idea of making a profile based on the peak film sensitivities sounds very reasonable. Could you send some sources on the data you got the primaries from?

Although, what is the reasoning behind selecting a tight color space, specifically bound by the film primaries? Isn’t it enough that the film gamut fits inside whatever working space is used?

Also, can the exponentiation result in out of gamut values for the film-specific color space? Maybe this is the reason for inconsistent results between the samples?