Hello @apostel338
Okay, I’m starting to understand more and more. The whole module: Tone Equalizer works with masks that selects certain ranges (from Black to Whites). And Regularzation determines how soft (4) or hard (0) the mask is.
Pirma, now I understood the whole Tone Equalizer. I like it very much.
Can you roughly say that the Tone Equalizer does nothing different than the curves, only here you are sure not to bend any curve so that unnatural effects are created?
I think the tone curves have a little more stuff going on under the hood than just than just brighten and darken several areas. They also have impact on colors and saturation. In their default mode Film-like they want to emulate the behaviour of analogue films.
And yes, the Tone Equalizer is great and for me an absolutely mandatory tool in ART.
I don’t use automatched tone curve, but the standard tone curve preset. I have no need to ever change this.
I first use exposure compensation to set the global brightness of the photo.
Then Tone EQ to work on dark and bright areas.
In White Balance if needed (or wanted by me) I set the color temperature (I like sunny photos to be warm). With artificial / indoor light, I always let it as shot. Of course it depends, if your camera makes a good whit balance. I’m happy with my Nikon.
And in Lab Adjustments I set the global contrast and chromaticity.
This is basically my default workflow. I have also local contrast active, but there is hardly any need to change its settings. All other stuff like lens correction, rotation, perspective etc. depending on the need.
1 Like
Hello @apostel338
Does the profile fit for all tasks?
I will copy your text and work through it bit by bit. I want to understand the process.
But I see that you don’t do everything only with the Tone Equalizer, but start classically with the Exposure compensation. Do you also use Black point compensation? And then you do the details with Tone Equalizer.
If you still feel like it and have time, could you show me how you would develop my example that I uploaded at the beginning?
Maybe in two or three steps? Then I can better understand the way you go.
Ok, I see you can’t learn ART in a day. I’ll keep at it and with your help I’ll soon be able to make my developments as safely as before with RT.
This is how I would do the photo.
Fürth(1).jpg.out.arp (11.7 KB)
.
Something went wrong with saving my default settings. this one should be correct.
def0.arp (11.7 KB)
I use this for absolutely everything. There is also no rocket science in it. It’s pretty standard.
.
Do you also use Black point compensation?
No. Only the exposure compensation.
This color takes some getting used to - but it gives the image a strong mood. Yes, it often doesn’t make sense to do a perfect white balance in indoor shots, it takes away a lot of the athmosphere.
Thank you very much, I will study your settings carefully and certainly learn a lot.
Thanks
I guessed the light was impacting and so I went neutral… the subjects skin I used 80 70 60 rgb … I find in strange light and with people I just try to set the skin and see where the image goes…
I am likely way too neutral where I ended up…

I would guess this one is probably more natural. Of course it’s hard for me to judge the accurate colors of the scene. I’m used to getting quite good WB results with auto-settings of my camera so that I hardly ever have to care about that. But this combination of natural and artificial light can be tricky.

Fürth(3).jpg.out.arp (11.7 KB)
Hi,
that’s a very open-ended question.
ART is pretty neutral regarding workflow, and supports many different editing styles (or at least that’s the claim ![]()
A simple strategy could be to use exposure compensation to set the average brightness of the picture the way you want it, and then tweak the contrast and tone mapping with the tone curve. In many cases, this might be all you need. You can then use the tone equaliser to tweak the balance between shadows, midtones and highlights. For trickier situation with harsh lighting and/or high dynamic range, both dynamic range compression and log tone mapping can be of use.
HTH
In your version, the face tone looks very good. But the overall impression of the image at this setting is, as you say, neither neutral nor pleasant.
I would be very interested to know where or how you set the 80?
In video editing, this is done using the vectorscope to get the skin tone right.
You don’t need to know the actual colors of the scene unless you do documentary photography.
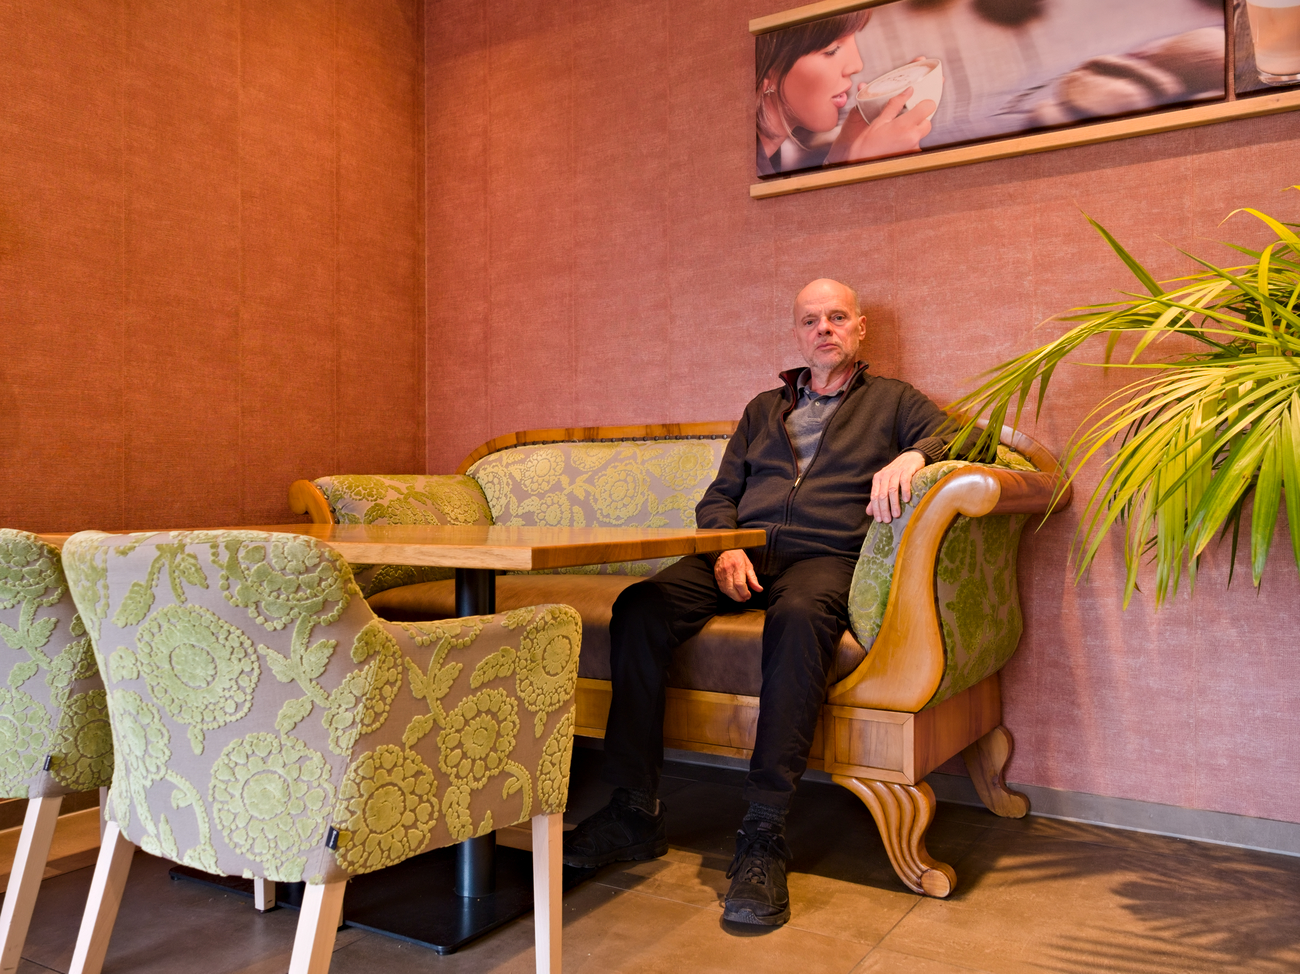
The scene is strange anyway, something artificial. Why is the man sitting here, has nothing on the table? The coffee is only in the picture in the background in the hands of the woman who is decorating the room.
So here in this photo is not about a truth content from the real world - but it is an image, an artificial creation, which is to create a mood, possibly a statement.
Which colors, which color cast is the right one? That fluctuates, depends entirely on one’s own mood. But this example of @apostel338 fits quite well.
Here is the finished image that I had processed three years ago with RT and Gimp.

Good, so you also use the classic modules: Exposure comprensation and Tone Curves. The others danan for subtleties and not at the beginning of the processing.
With Tone Equalizer you can wonderfully correct the tone values - but what is the difference to: “Tone curve 2: with Prarmetirc”?
Three differences, basically:
-
The tone equaliser works on unbounded data, the tone curve clips at 1 (or at the selected white point)
-
The tone equaliser preserves hues, the tone curve might introduce different kinds of hue shifts and/or perform different kinds of gamut mapping depending on the selected mode
-
The tone equaliser preserves local contrast (to a degree controlled by the regularisation slider), the tone curve does not. If you use the latter to increase contrast this doesn’t matter, but if you try to raise shadows or pull highlights you will notice
HTH
3 Likes
No wonder tone equalizer is so popular.
Thank you for the info and especially for ART.
In this case just the a and b Lab curves…
Could you please explain to me what this means? I do not doubt this statement, but I do not yet understand what it means, because your sentence was too short, for me.
Do you know what the lab color space is…if you google it it will be obvious…
Yes, I know in something what this Lab* color space is. But my question was: In which case happens what in the a and b Lab curves…
(Unfortunately, it is also a language problem, I have to translate everything on the Internet.)
NO problem. I just adjusted the a and b curves in the midtones to get approx the numbers I mentioned in the picker.
1 Like