To help me better learn this amazing tool, what buttons and sliders does everyone make the most use of in AgX? I’m going to map some of them to my midi controller for easy access.
How about reading the documentation and/or watching the video from Boris?
2 Likes
Hello,
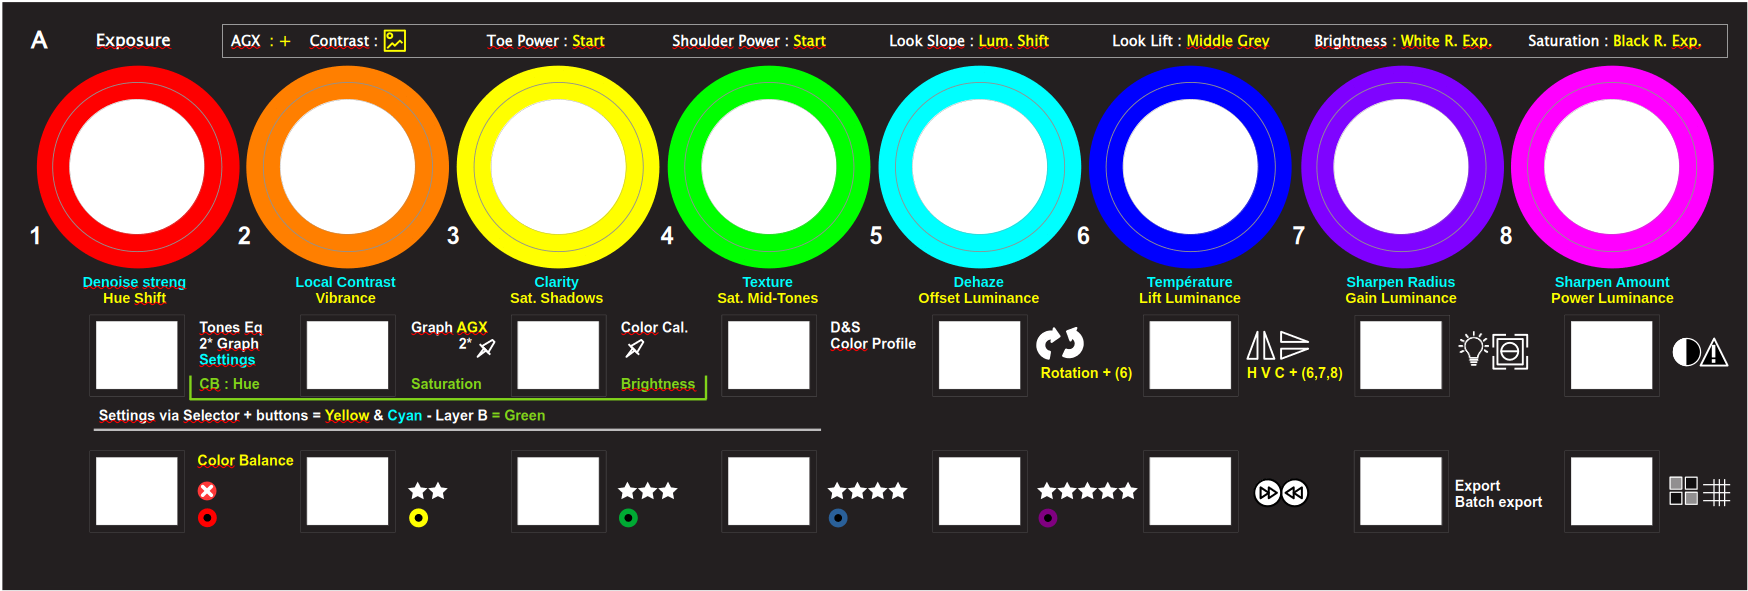
I am also busy remapping my MIDI controller (Xtouch mini), and I have selected them in order of use.
This is just my initial thinking, and any ideas or advice are welcome.
Here is the LibreOffice Draw file.
Darktable Xtouch-mini overlay botton v2.odg.zip (141.7 KB)
I have changed two slider names:
Lum. Shift = pivot input shift
Middle Grey = Pivot target output
When they are finished, I will share the shortcuts and presets that are used.
Greetings,
Christian
6 Likes
I’ve already done that, but there’s no substitute for experience and there are a lot of experienced people here.
I don’t have a midi controller, but I have several keyboard shortcuts where
- I hold down a button while moving the mouse to adjust a setting
- I double-tap the button to reset the setting
- I single-tap the button to open the setting’s adjustment window
These are inspired by Capture One, where the first four settings, Exposure, Contrast, Saturation, Brightness are mapped to the first row of the keyboard Q, W, E, R. The second four, Highlights, Shadows, Whites, Blacks, are mapped A, S, D, F. And Clarity and Texture are Z, X.
In Darktable, I went through various iterations on this. The current set is based on AgX: Contrast, Saturation, Brightness are obvious. Highlights and Shadows are either toe/shoulder power. Whites and Blacks are Offset and Lift.
For completeness, Clarity and Texture are the Contrast EQ and Local Contrast. They both are enabled by default with presets, but are mixed with 0% opacity. Z and X modify their opacity. I have an additional button for auto-setting the AgX black and white point, for setting the Color Calibration point, cropping, retouching, and for rotating the image.
With this system, I can edit most images without touching any sliders. I essentially only touch the sliders for local adjustments.
4 Likes
Could you provide the shortcuts with a shareable file?
I have a very similar general setup with some additions. I mostly assigned one key to a module (f = filmic, b = colour balance, w = colour calibration, s = sigmoid, c = crop, k = lens corrections, j = chromatic aberrations, z = colour equalizer, n = contrast equalizer, x = diffuse or sharpen.
single key: Show Module (e.g.w= colour calibration)single key + mousewheel: Adjust a parameter within that module (e.g. e for exposure). c for contrast in filmic.double key: Brings up a picker (ww for white balance picker, ff for auto adjust levels in filmic, zz for the colour picker) or activates a preset (xx for “local contrast” in “diffuse or sharpen”,alt + key: resets the corresponding module (e.g. alt+w resets colour calibration, alt+f resets filmic, alt+h resets the history stack)
6 Likes
Yes, how is this accomplished?
I am a vi user and I really like sequences of keys. For example, I would like to use “t” as a prefix for toggle, and then a different suffix for each module. E.g., “tlc” (toggle lens correction), “ts” (toggle sigmoid) etc.
Is this doable in DT? I read the corresponding manual section but I am still very confused ![]()
Have you tried to assign a key sequence to something?
Yes, what I get is multiple keys assigned to the same action. In the above example, I would end up with “t”, “l” and “c” all toggling lens correction, with the added problem that “t” is already assigned to “thethering” and “l” is already assigned to “switch to lightroom view” so I would also get a warning asking me whether the shortcut should be dropped.
And when I move the pointer to click on the dialog, apparently the movements of the pointer are also recorded with the new shortcut, so I get something weird like “move left” to toggle the module as well.
I am sure I am doing something wrong, I just don’t know what it is.
I think toggle is part of the shortcut process so if you press the same shortcut twice in a row or at least I think it can be configured that way you can toggle things on and off…

I think you can do also sequencial key presses but only for the same key …I dont think you can do say a t and l as a combo…but I could be wrong…
This part is a bit confusing for me:
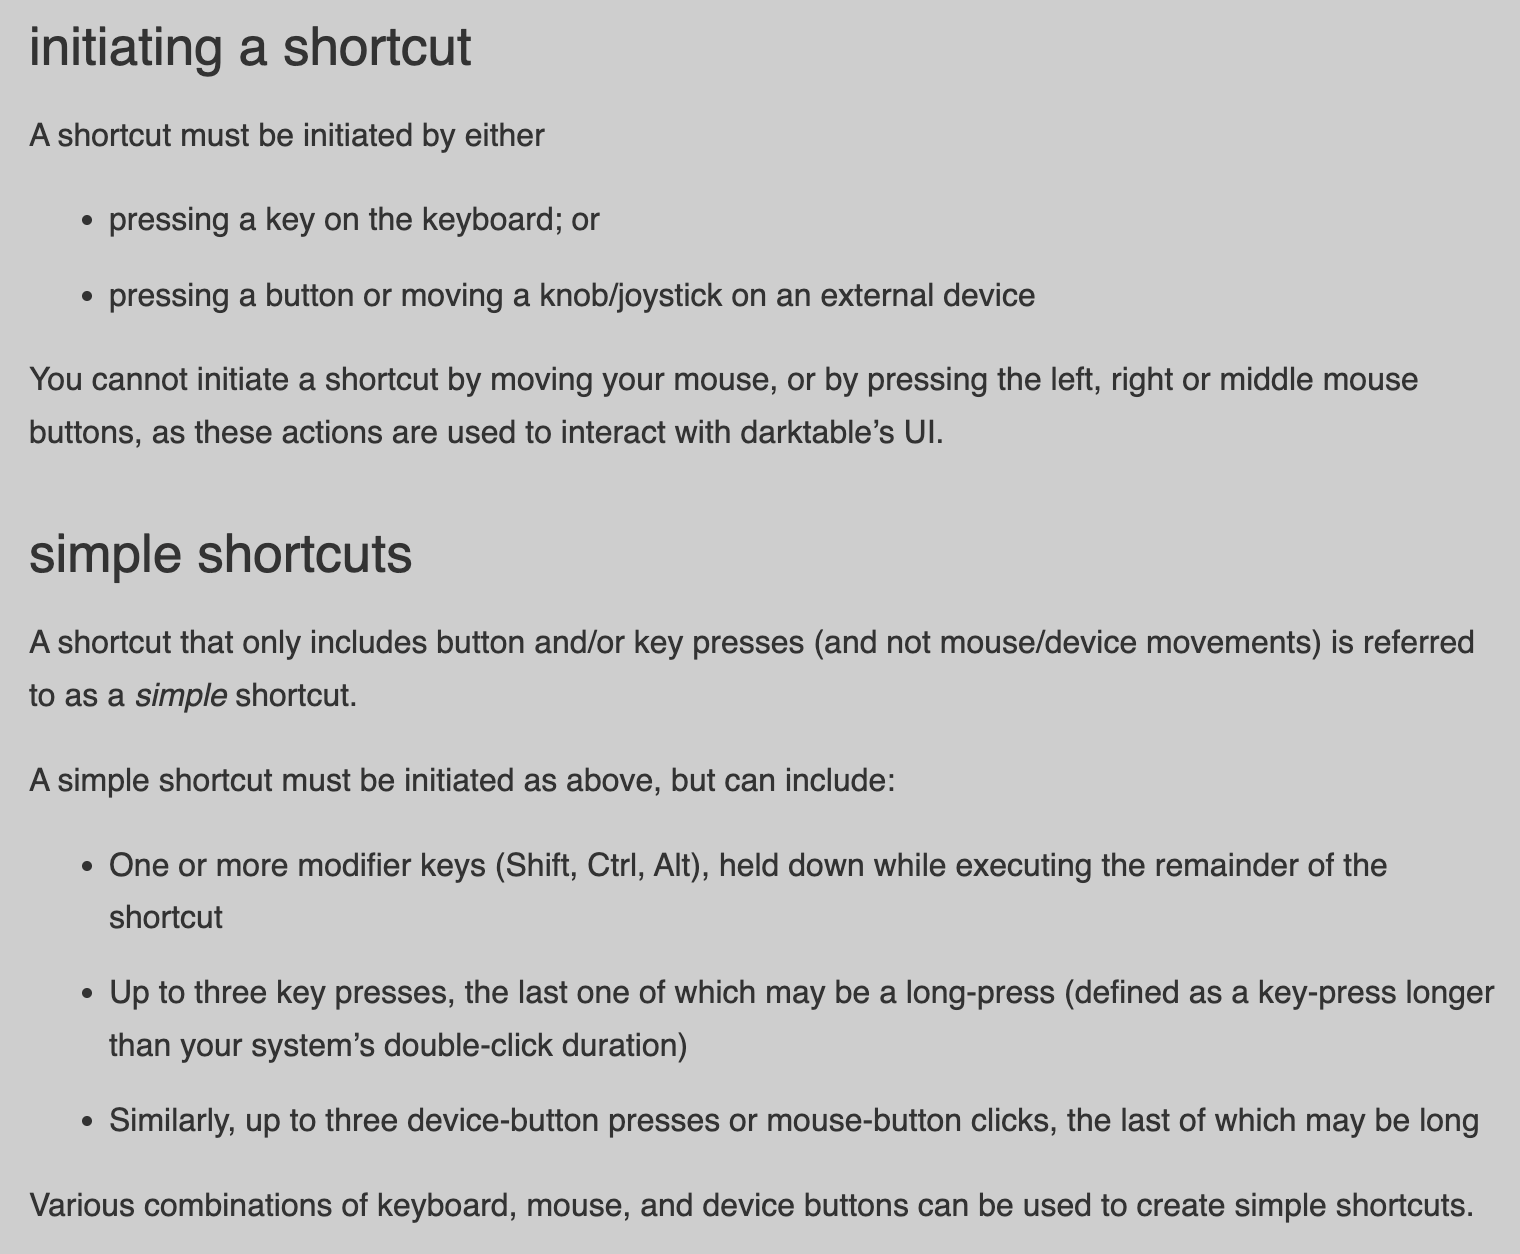
Because it says that a “simple shortcut” is initiated “as above”, i.e., pressing a key or a button, BUT can include one or more modifiers and up to three key presses.
I am not sure how to interpret this combined information. I think that key sequences are only possible while holding down a modifier, but this contradicts with the notion that a shortcut can be initiated by a key press.
You can do Strg/Alt/Shift + a key, you can also do multiple presses of the same key. But as far as I know and tried it: You cannot combine different letter-keys into a single shortcut. Sadly :-(.
Maybe we could take this discussion to this new thread to keep this one on topic.
I’ve gone a bit different route with my x-touch.
If no module is actively toggled, the knobs are configured for my most commonly used quick settings.
Each button toggles a module, as long as that module is active the knobs correlate to sliders within that module. In AgX I used both Layer A and B. A few of the buttons activates presets for AgX.
1 Like
Just another praise for AgX’s performance with gelled flash lights.
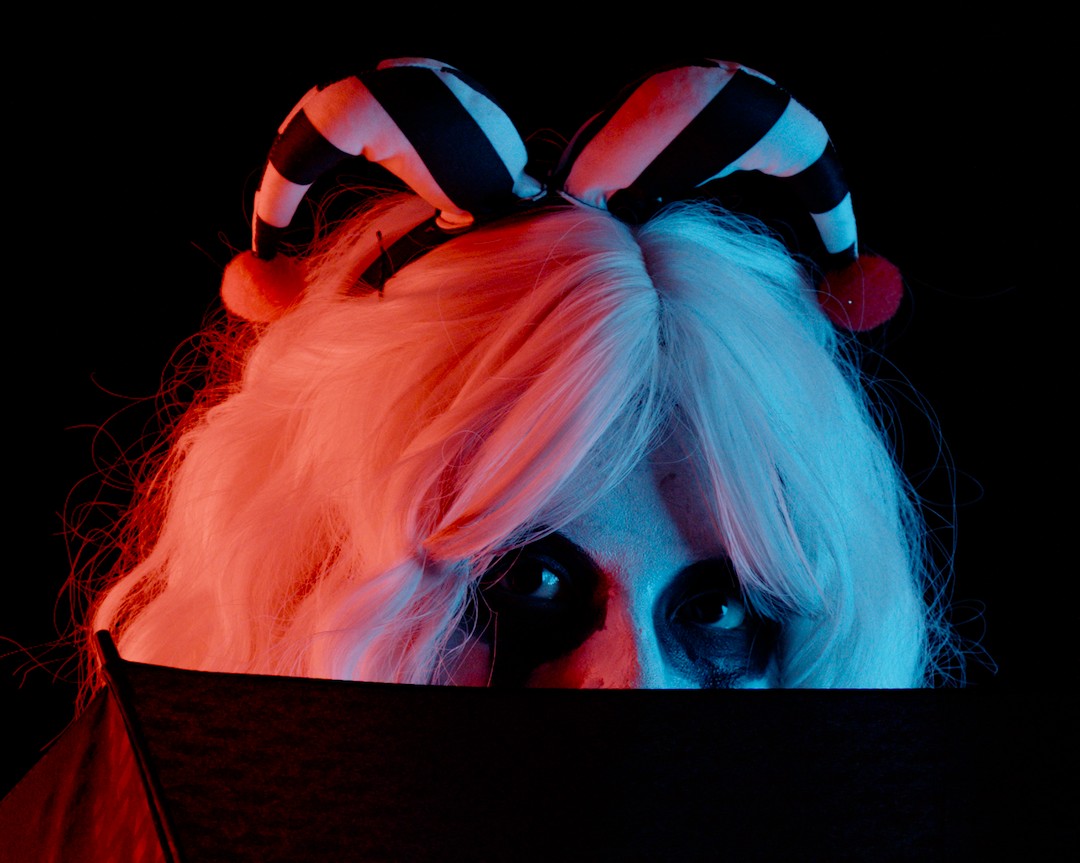
A different commercial software rendering:

Night and day difference from a perceptual and filmic standpoint.
Cheers and thank you again @kofa
16 Likes
A small annoyance, perhaps it was discussed before. When I use “pick color from image” in “pivot input shift” I would expect it to be equivalent to moving this slider. Instead it sort of resets both the input and output, which make it difficult to make incremental changes.
Why don’t you use the sliders, potentially setting up a key + scroll shortcut to change them?
Yes, it has been discussed, and is even documented.
A color picker, placed next to pivot input shift, is provided to pick an image area. The pivot input shift and pivot target output values will be adjusted so that the average value of the selected area is mapped to the current average output, avoiding major shifts in brightness.
(dtdocs/content/module-reference/processing-modules/agx.md at agx · kofa73/dtdocs · GitHub)
Conceptually: you pick the input (x) point around which the curve is built, normally, the point of highest contrast. You pick the input shift. The pivot y value, output luminance/brightness/whatever is adjusted so average brightness of the selected area does not change (by much).
1 Like
I still think the color picker for the input slider should act on the input slider only. If some kind of auto-calibration feature for both sliders is needed (frankly, I’ve never found this feature doing anything useful) it should be placed somewhere else (auto tune pivot?)
This is the specific use-case I find annoying:
- I have edited an image and I came back to it for minor corrections
- I see the subject is a bit over/underexposed.
- I could just move the output slider but to double check the pivot was set correctly (e.g. on the face of the subject) I reach for the color picker
- Boom! The input slider is indeed adjusted slightly. But the output slider jumps to a random location (e.g. from 30% to 3%), completely changing the exposure and I now have to set it again eyeballing the result and comparing it with the previous versions.
Not a big issue if this is a single image but I have just been editing hundreds of them. Apologies if my frustration shows. On the positive side, after many days of using AgX this was the only issue I found worth reporting.
1 Like
I think we just have to wait and see when it gets to wider use…For me its a perfect tool. I use it as suggested and select where I want the most contrast. Sometimes I try one or two different spots. After that I find then I am only tweaking the contrast slider…sometimes the shoulder power and then I do a final tweak in the look section to finsh the contribution of agx to the edit…and primaries if need be. Im sure I could fiddle with more sliders and troublesome images might warrant that but for the global tonemapping and look it works fine for me as it is now…
3 Likes
It usually works well for me, but I will experiment, review the code etc.
What would be helpful is a reproducer:
- with this image (attaching image + sidecar at this stage) + screenshot
- when I pick the pivot from this location + screenshot
- then look, there is a sudden change + screenshot
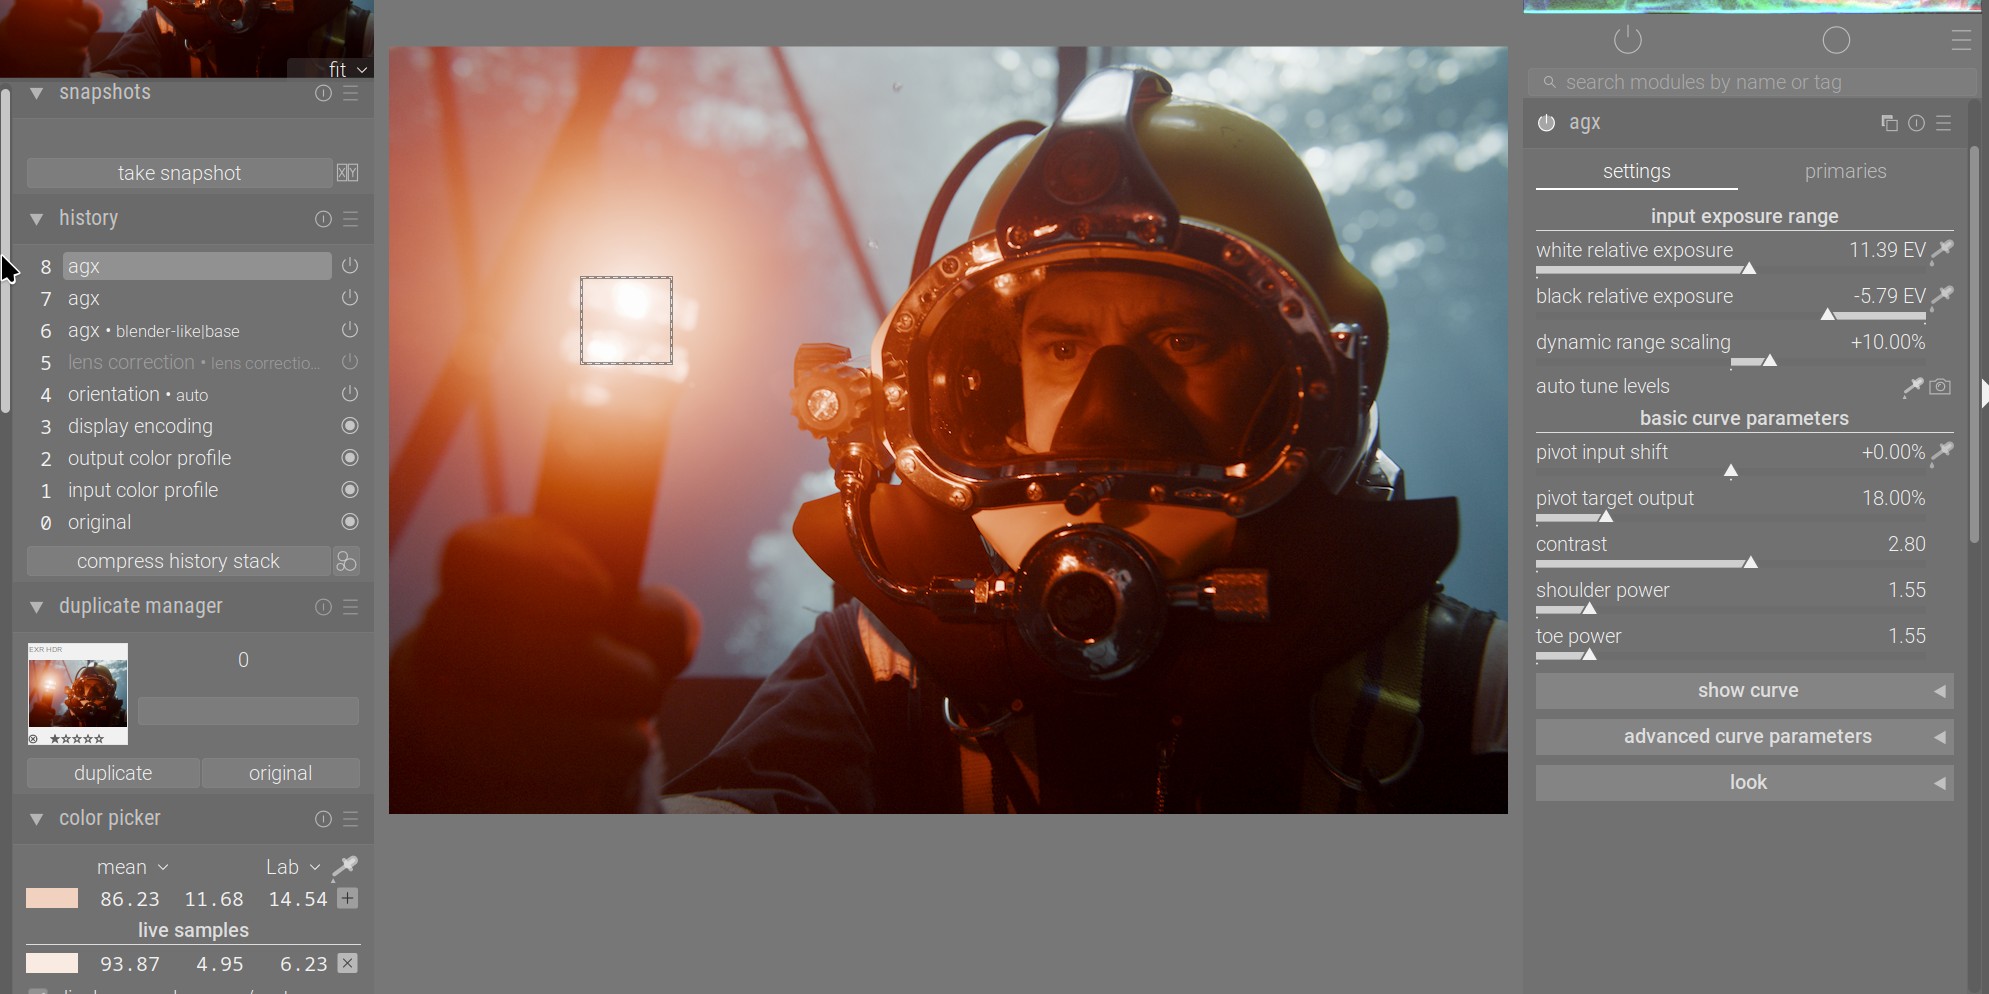
Here is a fairly high dynamic range test image, starting from default mid grey pivot. Note the global colour picker on the helmet; it shows a Lab reading of L = 24.42.
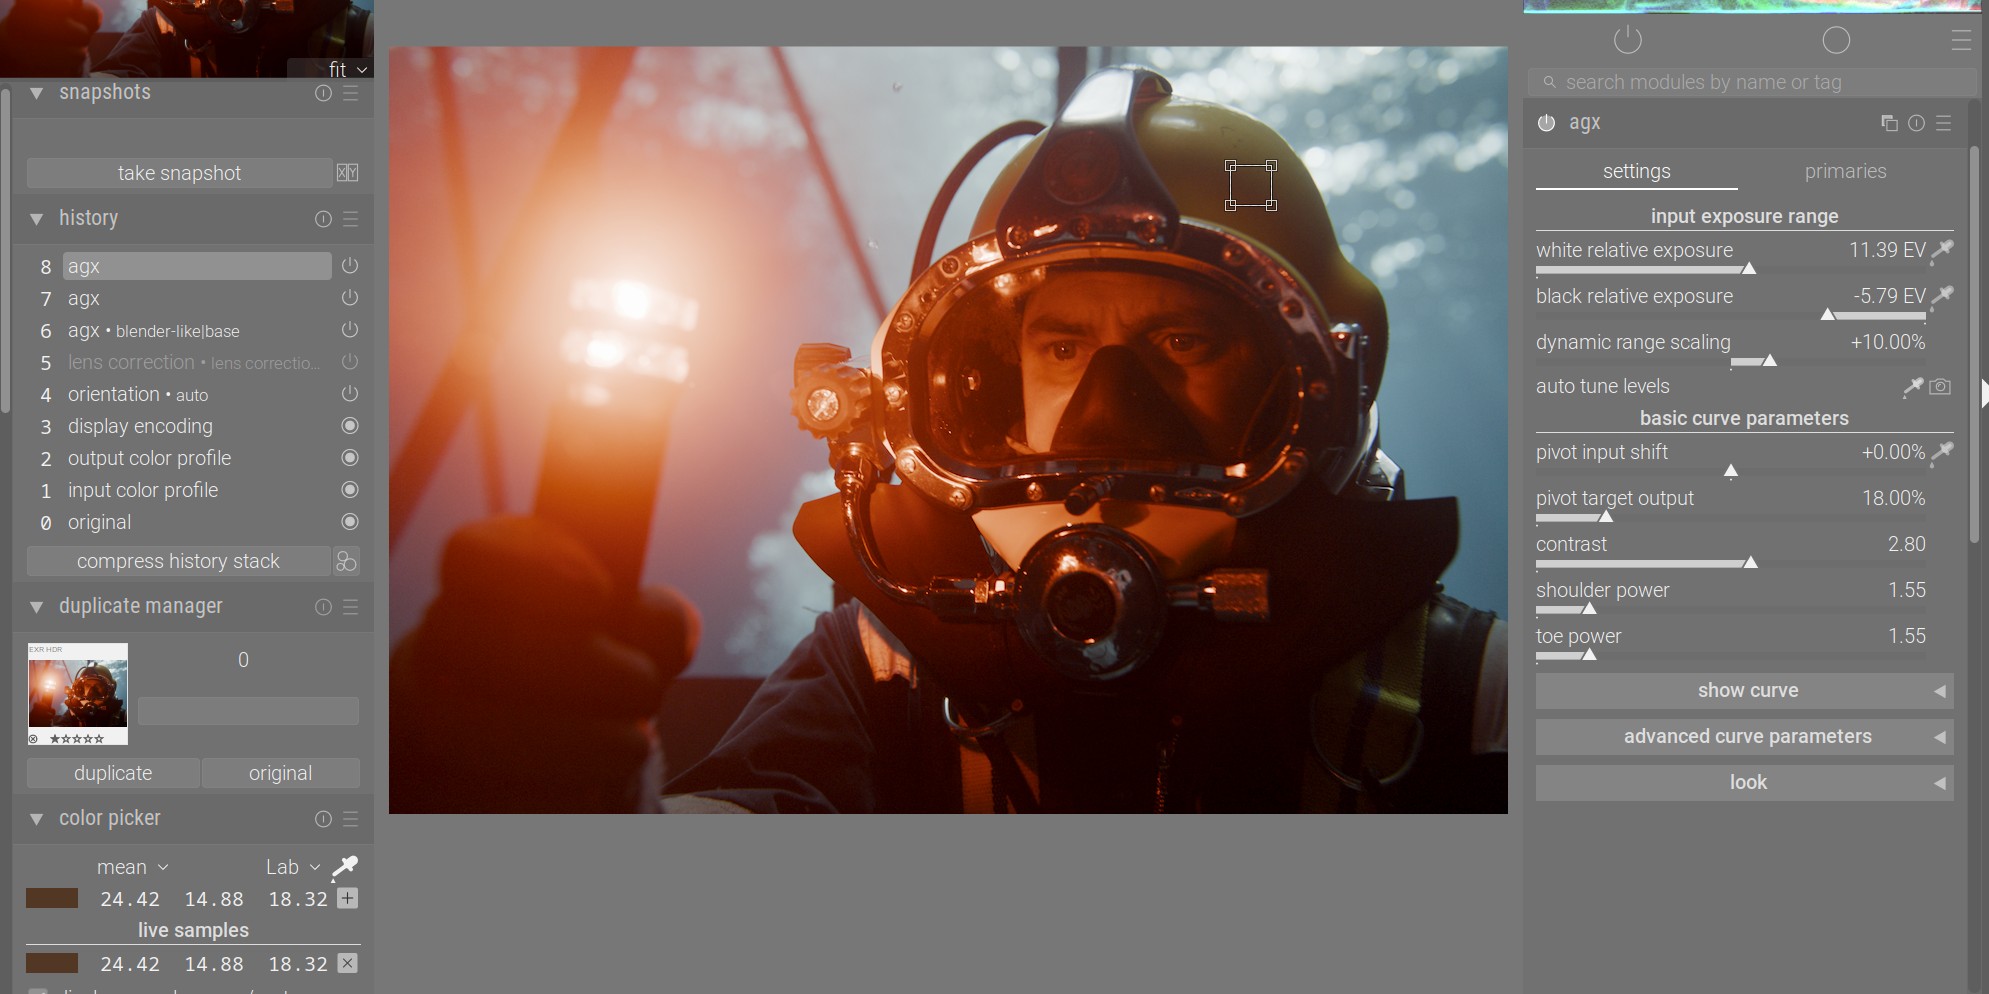
I will now pick from that area:

The L value changed to 24.18, so the change is minor.
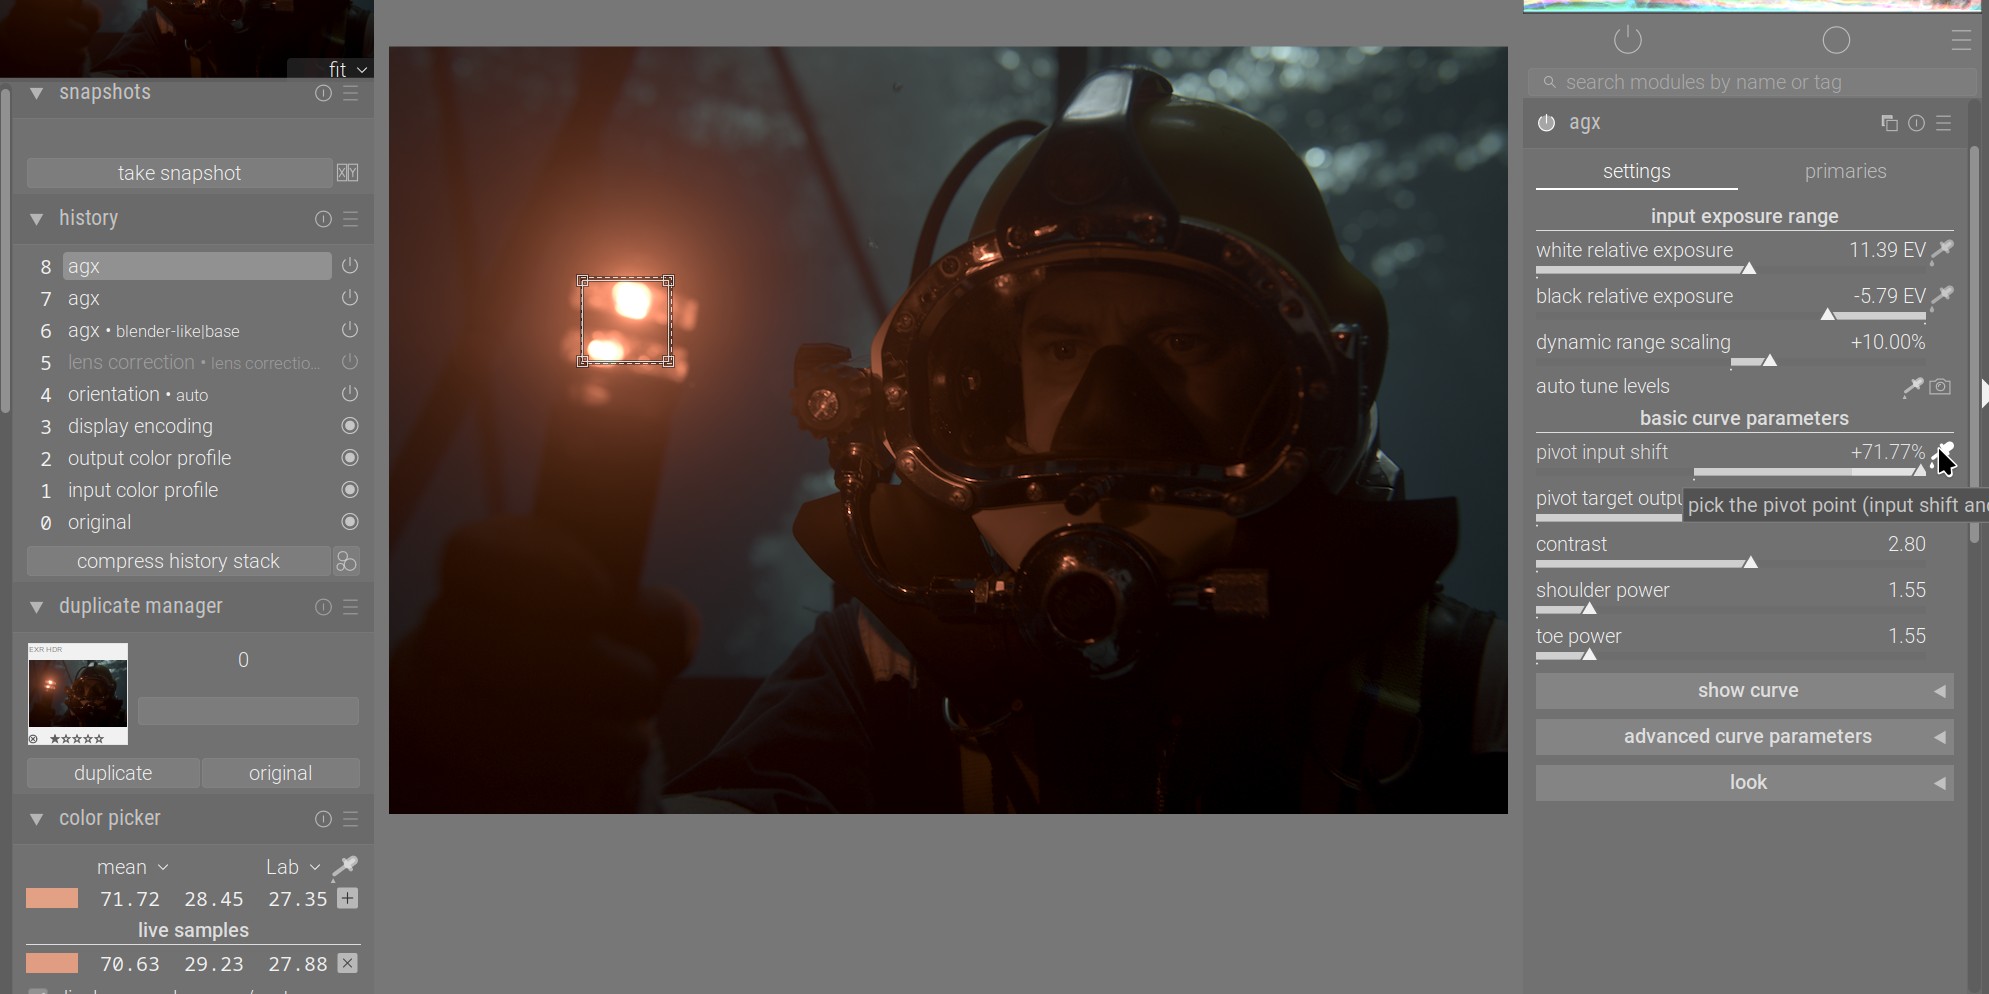
Next, I will pick from an area that is at one extreme of the brightness range, and is very far from homogeneous. Before, the global colour picker shows and average L of 93.87:
After: L = 70.63. This is indeed a big change.
However, it is not necessarily wrong. What we did was check the average of the area (in RGB, according to what darktable gives the module), and calculated values to make sure that (RGB) average remains unchanged. The picker shows L, which is a non-linear representation. It is possible that, when using a very inhomogeneous area, the average of the processed pixels is quite far from the processed value of the average input pixel.
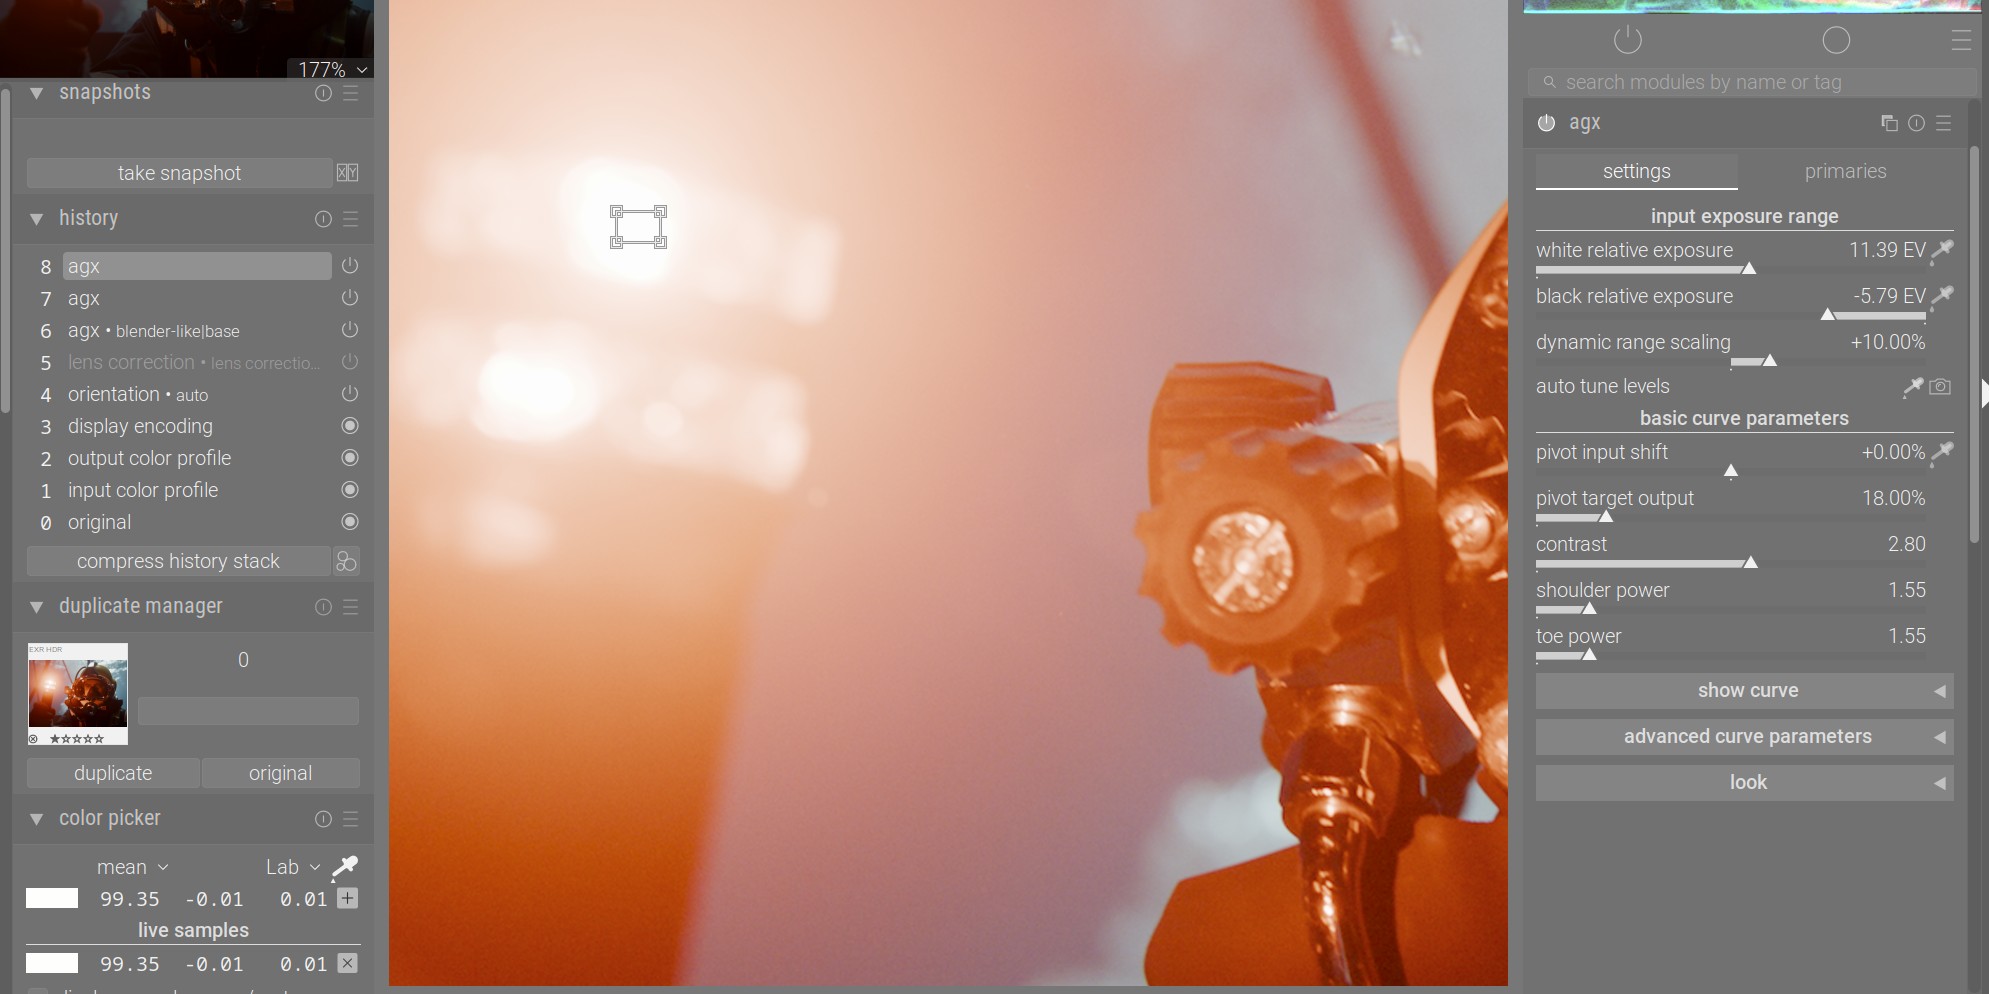
If I repeat the experiment with a homogeneous, bright area, L goes from 99.35 to 99.34:

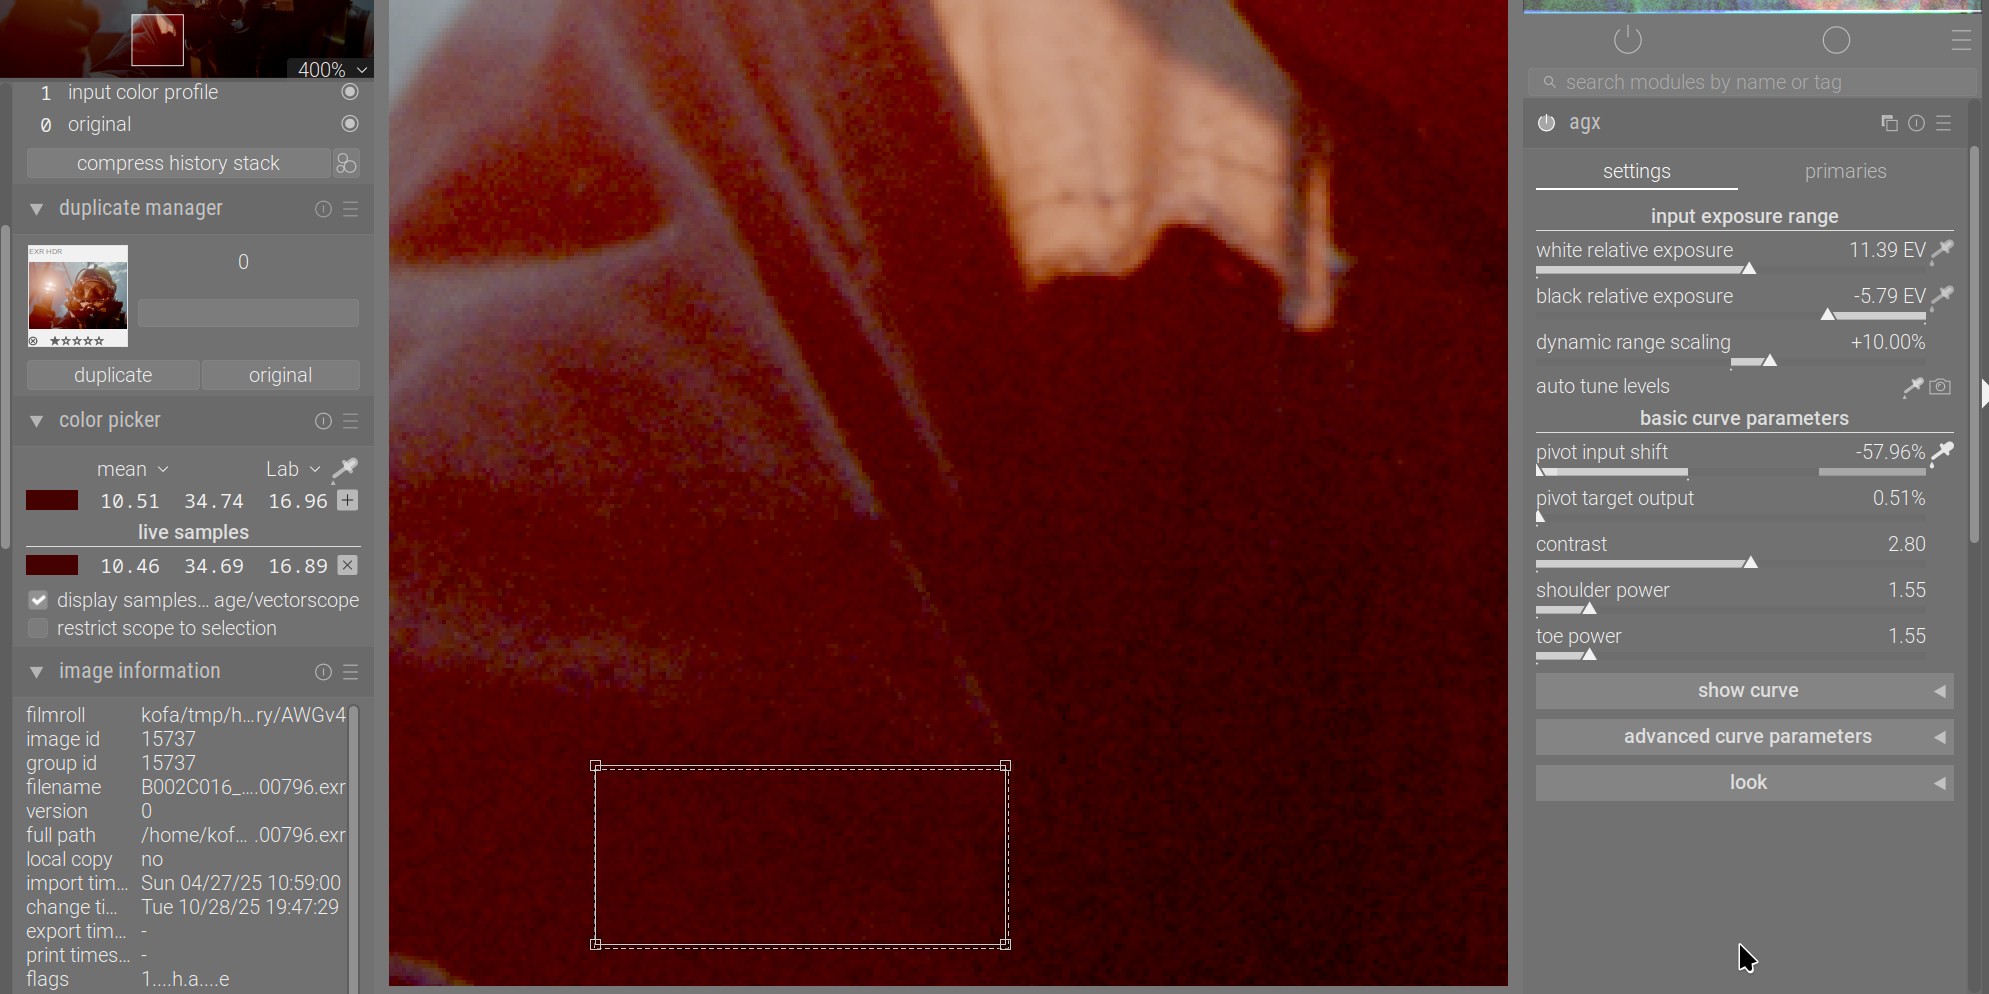
One place where the change is surprising is this. I picked the pivot from his well-lit face (picker is still visible), and also sampled a dark area, which ended up with L = 6.29.
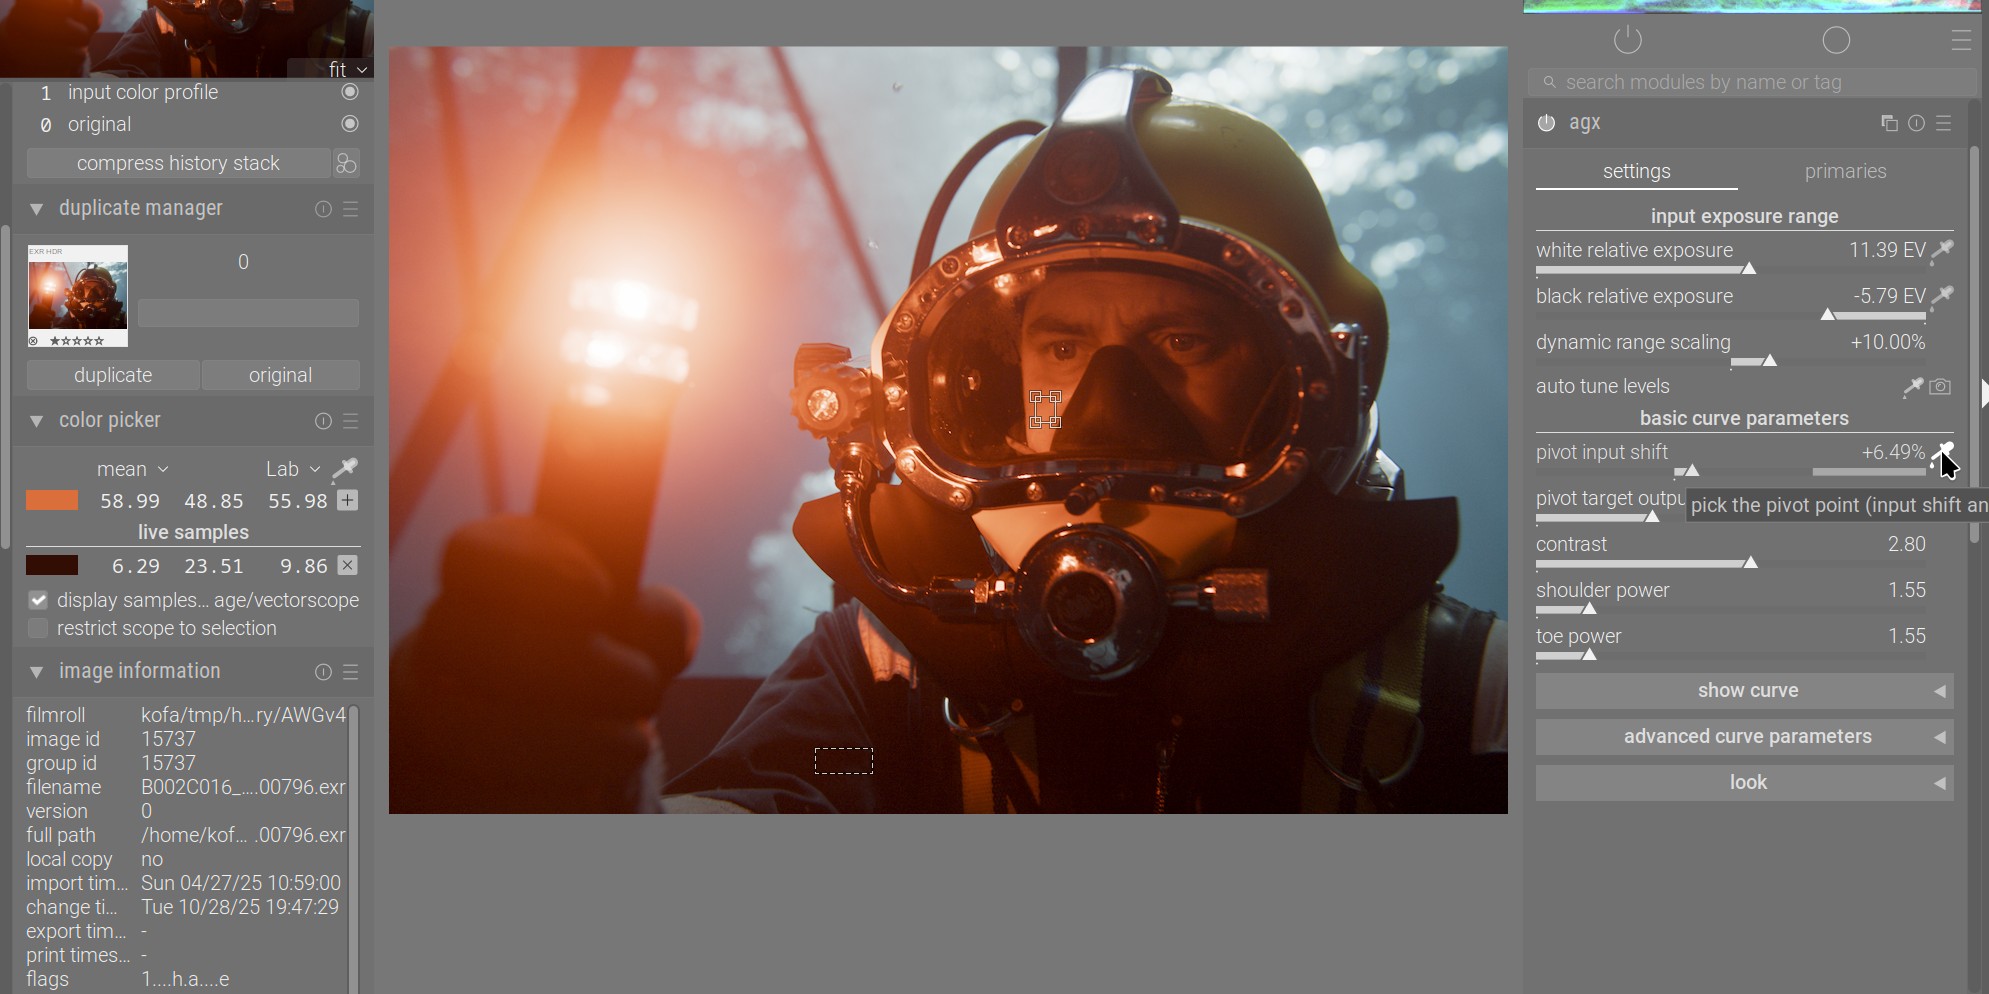
If I now pick the pivot from the same area, L changes to 10.46. This is a smooth area, to our eye, but maybe the noise causes issues – you can see that it is, in fact, quite noisy.
But I’ll look into it, just not today. It would be great if you could provide a solid reproducer.
2 Likes