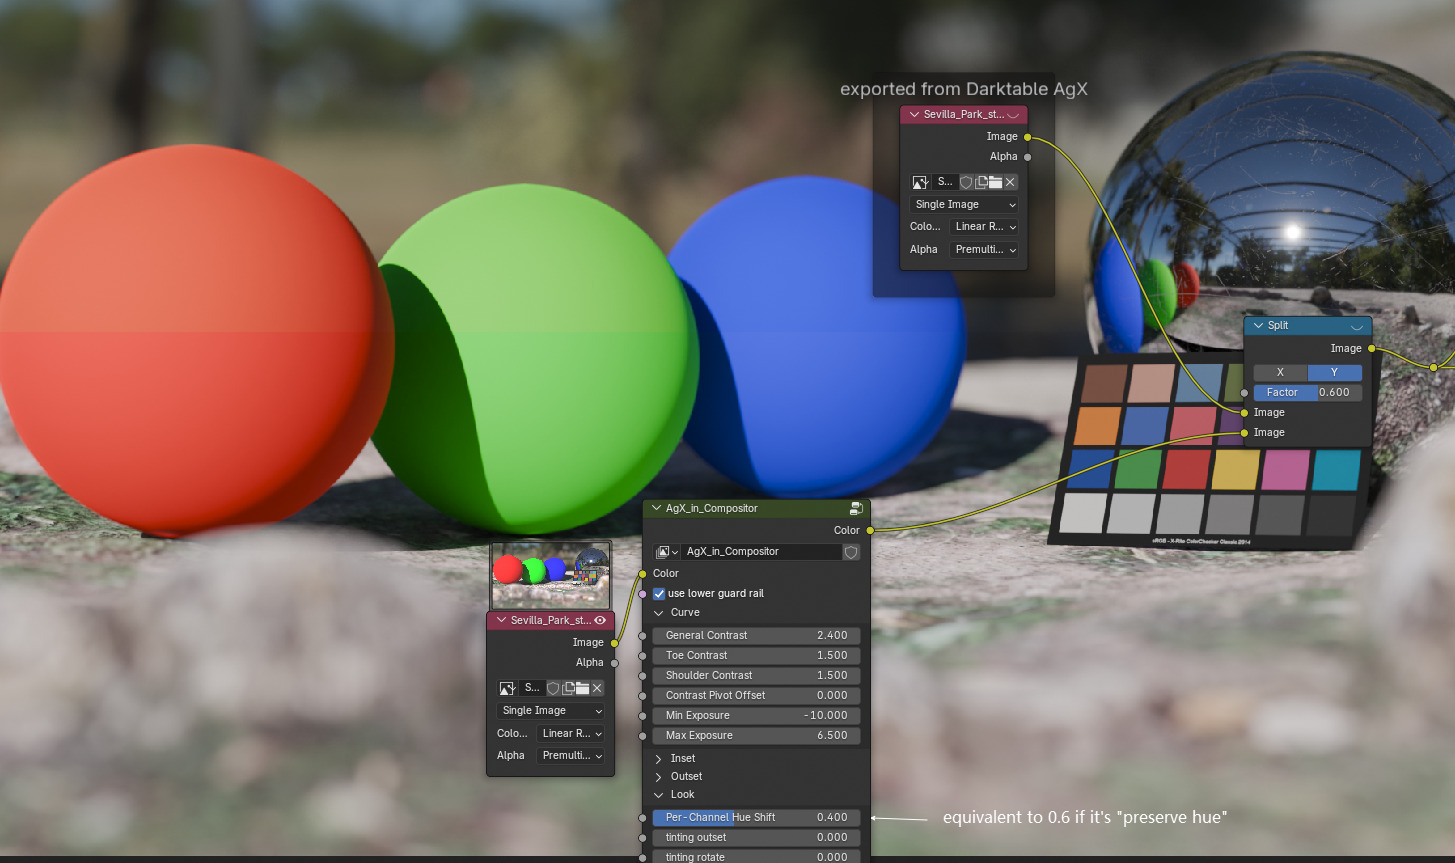
I was roaming around today in Troy’s github page and I found that there is a tinting option included in Agx. Anyway, I remember that I’ve read a reply by @kofa about implementing a tintin option as a creative effect in the module, but as you may read here you can see that tinting has a rotation too ! so it has a diffrent impact when compared for example to tinting via the rbg primaries module.
@kofa are you still concidering this ?


Also a question to everyone, have you tried tinting the image after the tone mapper ?
it has a sort of more predictable results and a stronger impact, the same happens with offset, I don’t want to go out of our topic here but it made think if we really should do all of our adjusments in the linear domain, well at least when aiming for a “creative” effect.
No, I no longer plan to add that. I can be convinced, but is there really a demand for it?
3 Likes
I think it’s clearly a nice addition to the module as I’m sure it works a bit diffrently to other tinting oprions at least with the rotation as it sais in the description. Maybe @Eary_Chow could answer this. And for convincing you… I think you did more than enough so far, so it’s up to you.
I don’t have strong opinion on this.
I think I already mentioned how it works previously in this thread, in case you are interested:
1 Like
I missed it. I didn’t know the the outset takes place after the image is formed, but it makes total sense.
A new build:
- I’ve added ‘dynamic range scaling’ from filmic rgb. The default value is 10%; please experiment and let’s see if some other value works better. If you have presets, those may have been broken by adding the new parameter; if not, they will bring 0% (as the option did not exist previously), please delete/update them. And, ‘of course’, past edits are now invalid, again.
- I’ve rearranged the exposure sliders, swapping black and white, so they are in the same order as in filmic; maybe those used to filmic find the order more natural. However, if you feel this is wrong, I can revert that change. Please try it for a while; unless the the general opinion is against this, I’d like to keep it in line with filmic rgb.
- If you set the agx workflow as the default (preferences → processing → auto-apply pixel workflow defaults), the blender-like|base preset should now be applied automatically if opening a new image (existing ones won’t be changed). If presets are acting up (e.g. you have created an auto-applied preset as a workaround), you’ll have to fix or remove them. As a last resort, you can use the following commands in darktable’s configuration directory to ensure built-in presets are completely recreated (please quit darktable before trying this):
> sqlite3 data.db
SQLite version 3.46.1 2024-08-13 09:16:08
Enter ".help" for usage hints.
sqlite> delete from presets where operation='agx' and name like '_builtin%';
sqlite> .quit
If you leave off and name like '_builtin%', you can delete all agx presets.
The code includes all changes from master up to and including 952d604a.
https://tech.kovacs-telekes.org/dt-agx/Darktable-5.1.0%2B1108~gc74a95ef9b-x86_64.AppImage
@priort , @Dave22152 , @MStraeten , please update your builds.
9 Likes
Thank you for the new version.
I have a question regarding:
What is the advantage of blende-like as default setting?
I have permanent gamut clipping regardless of which color space I choose:

I always have to adjust recover purity down to keep the colors in gamut, which leads to strong overall desaturation:
That’s an issue that I’ve had with gamut clipping in general, so I tend to ignore it and live with whatever artifacts exist in the image. Usually the clipping isn’t too noticable and is less objectionable to an excessively desaturated image.
Executable for the Win 11 version of AgX under Build 1108:
1 Like
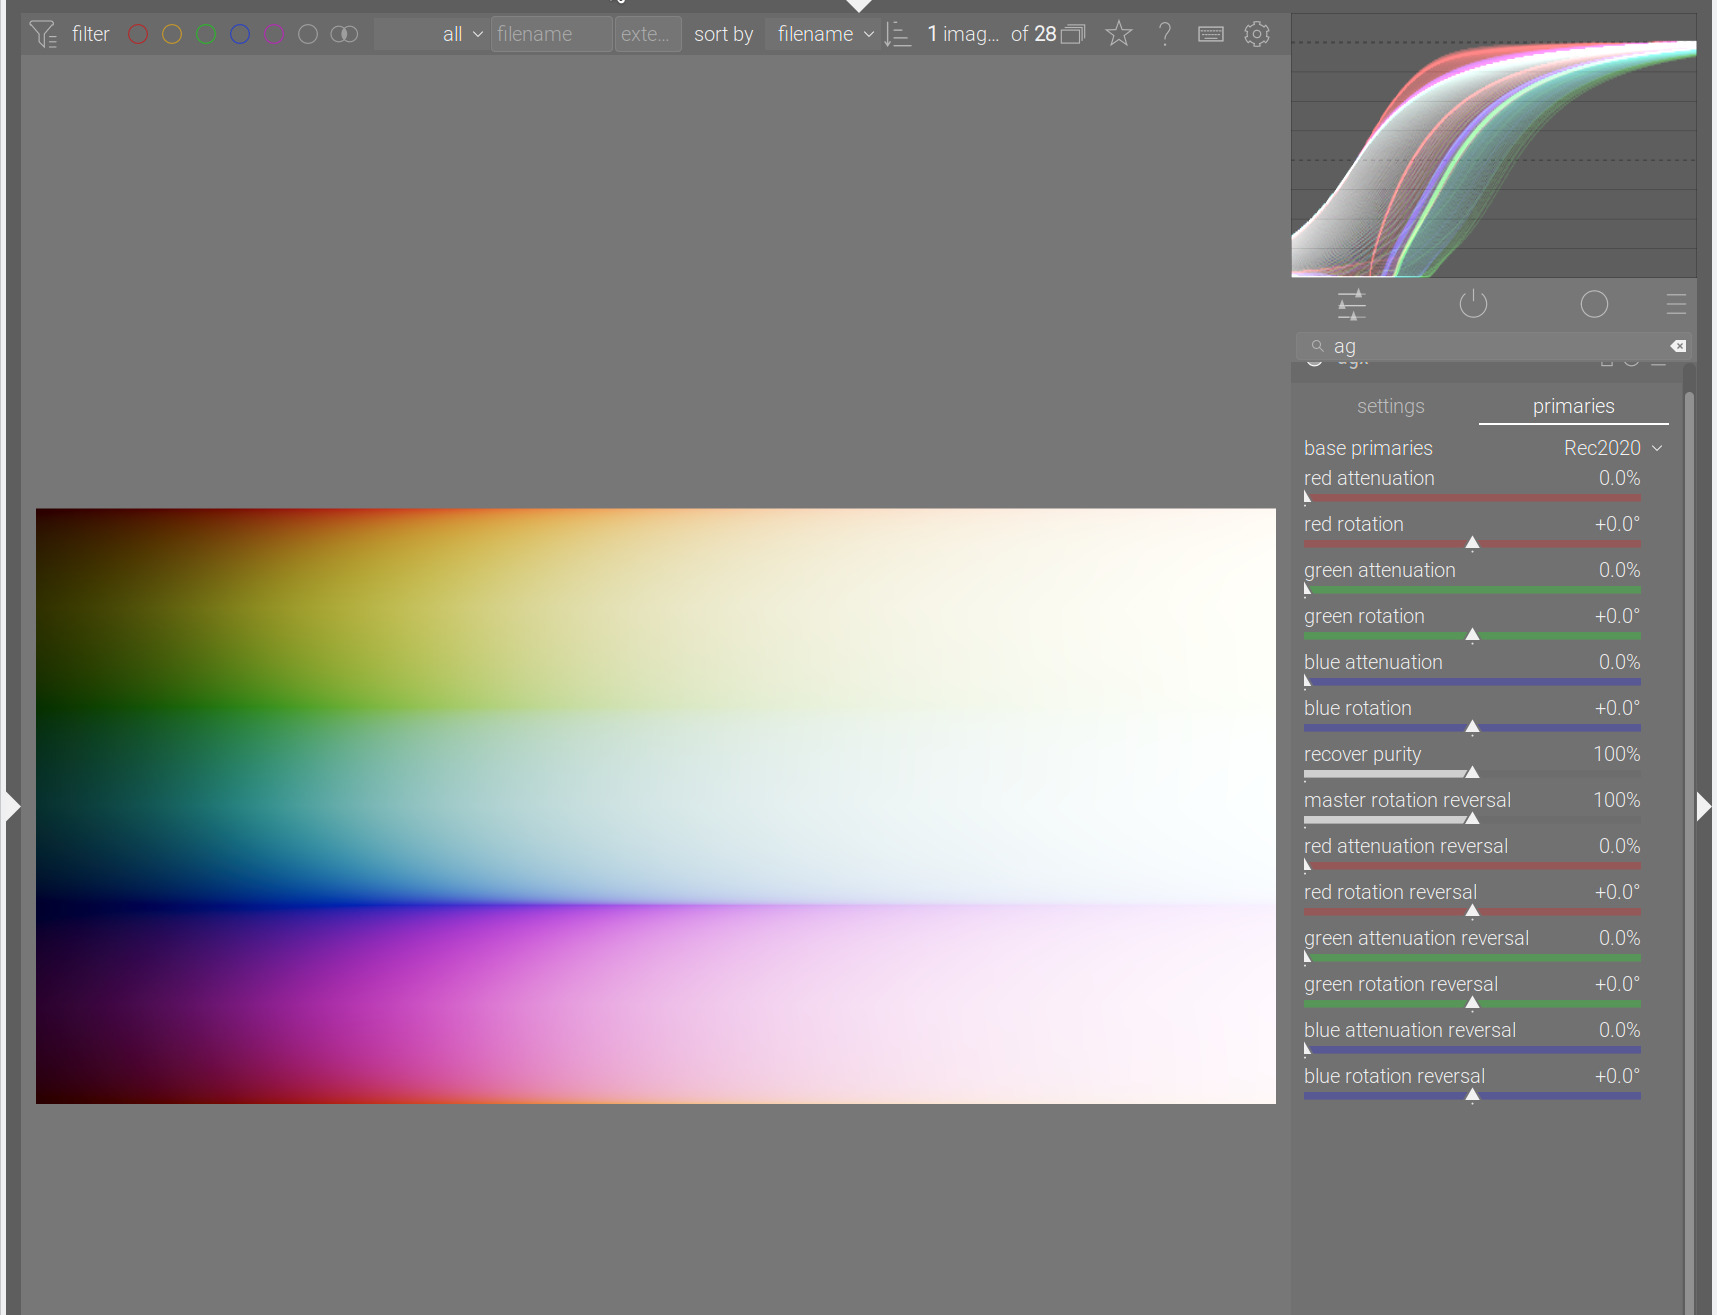
You can control this very well in AgX if you don’t touch the primaries. So far, I have only used the attenuation and rotation of primaries when necessary, when I have to deal with difficult lighting conditions.
This is what the scene looks like without touching the primaries:

And there is no gamut clipping here.
1 Like
I was trying to address the concern that it’s called agx, it supposedly comes from Blender, but does not act like it.
I will double-check the matrices again.
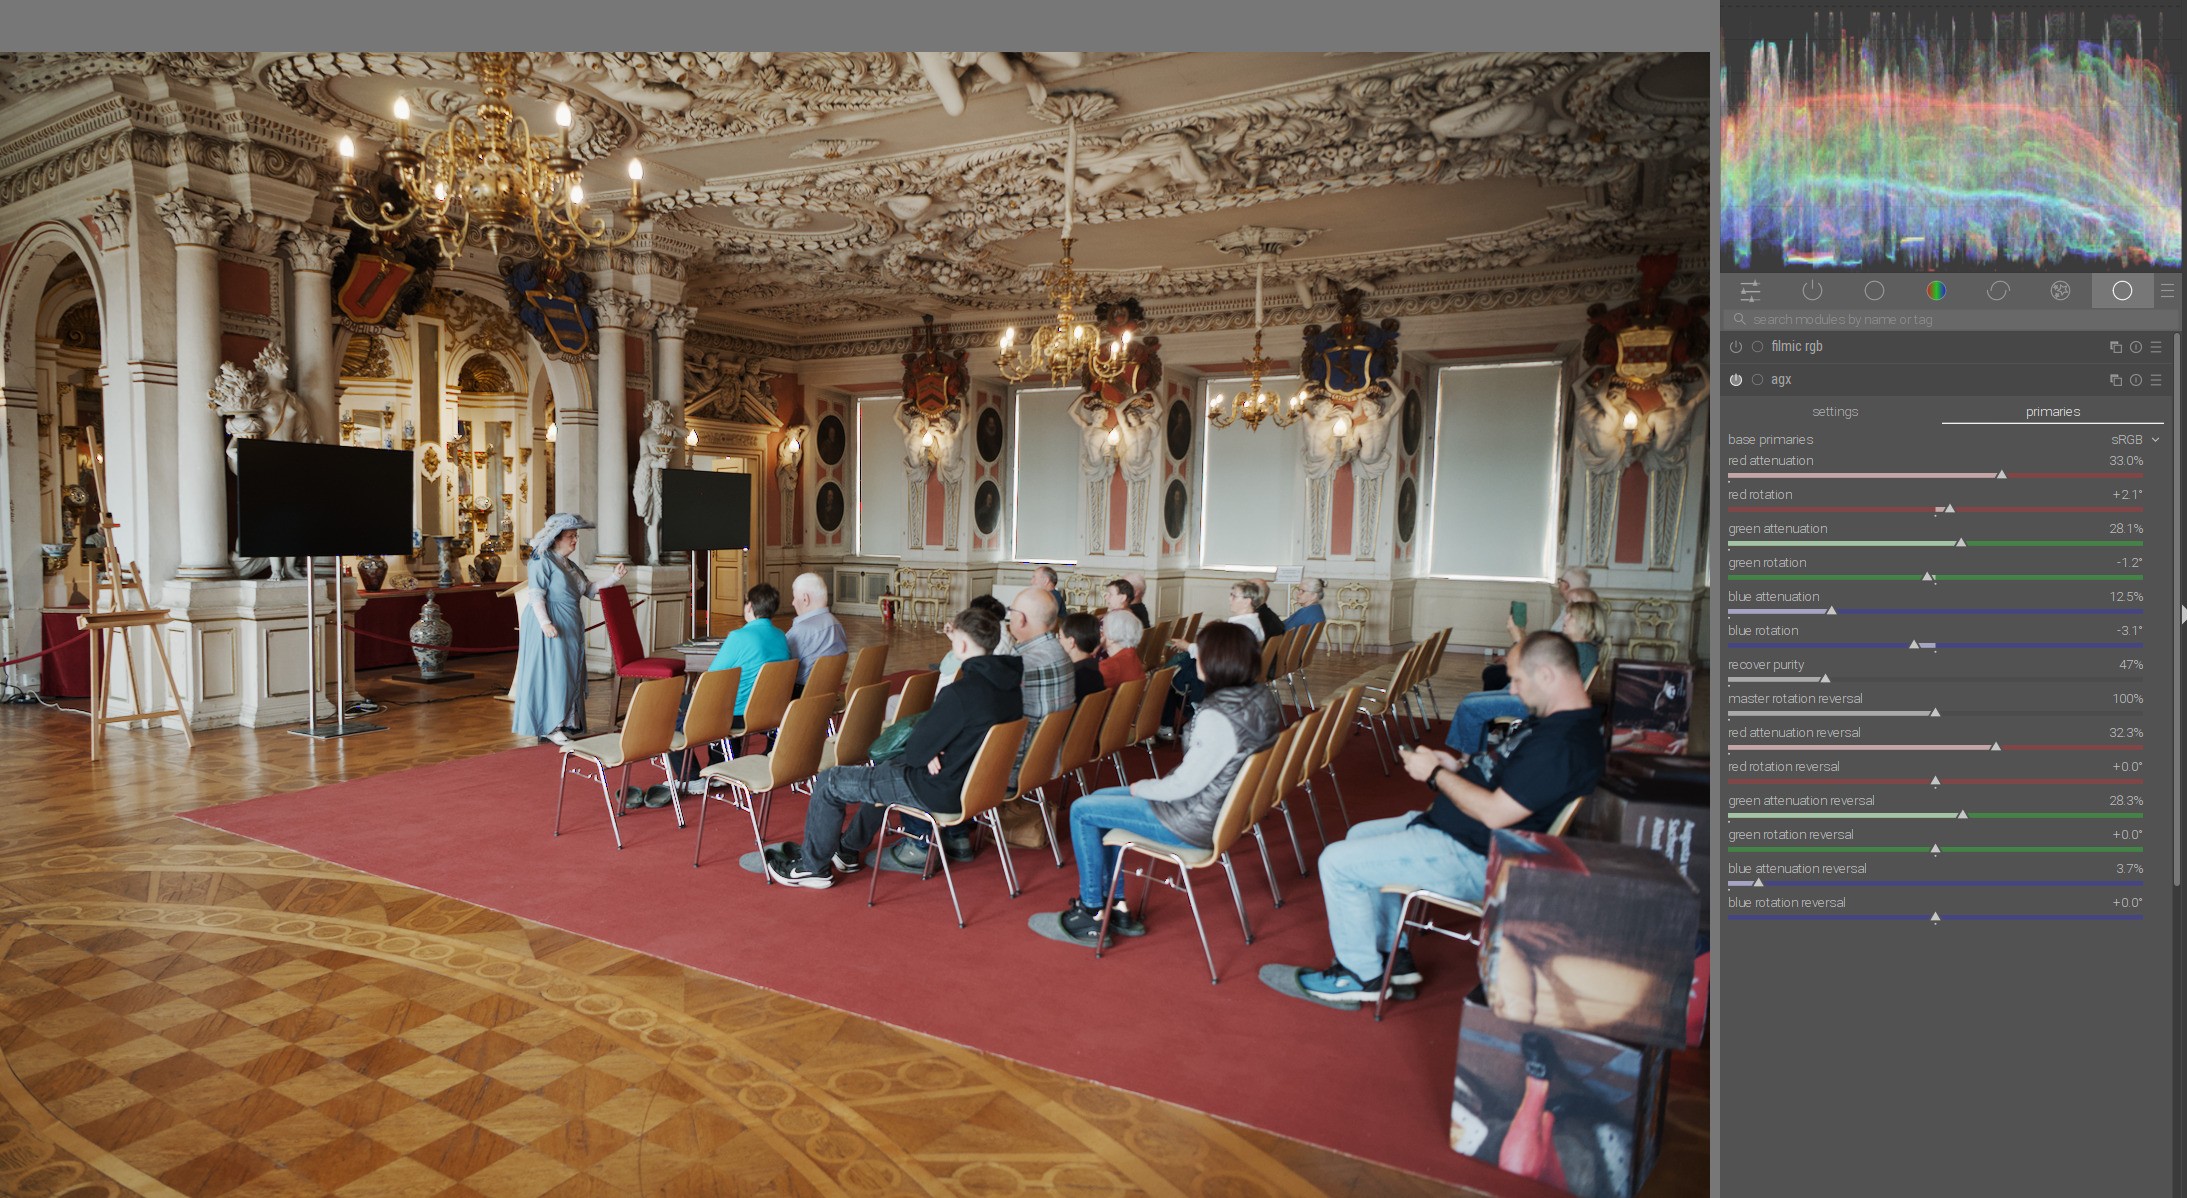
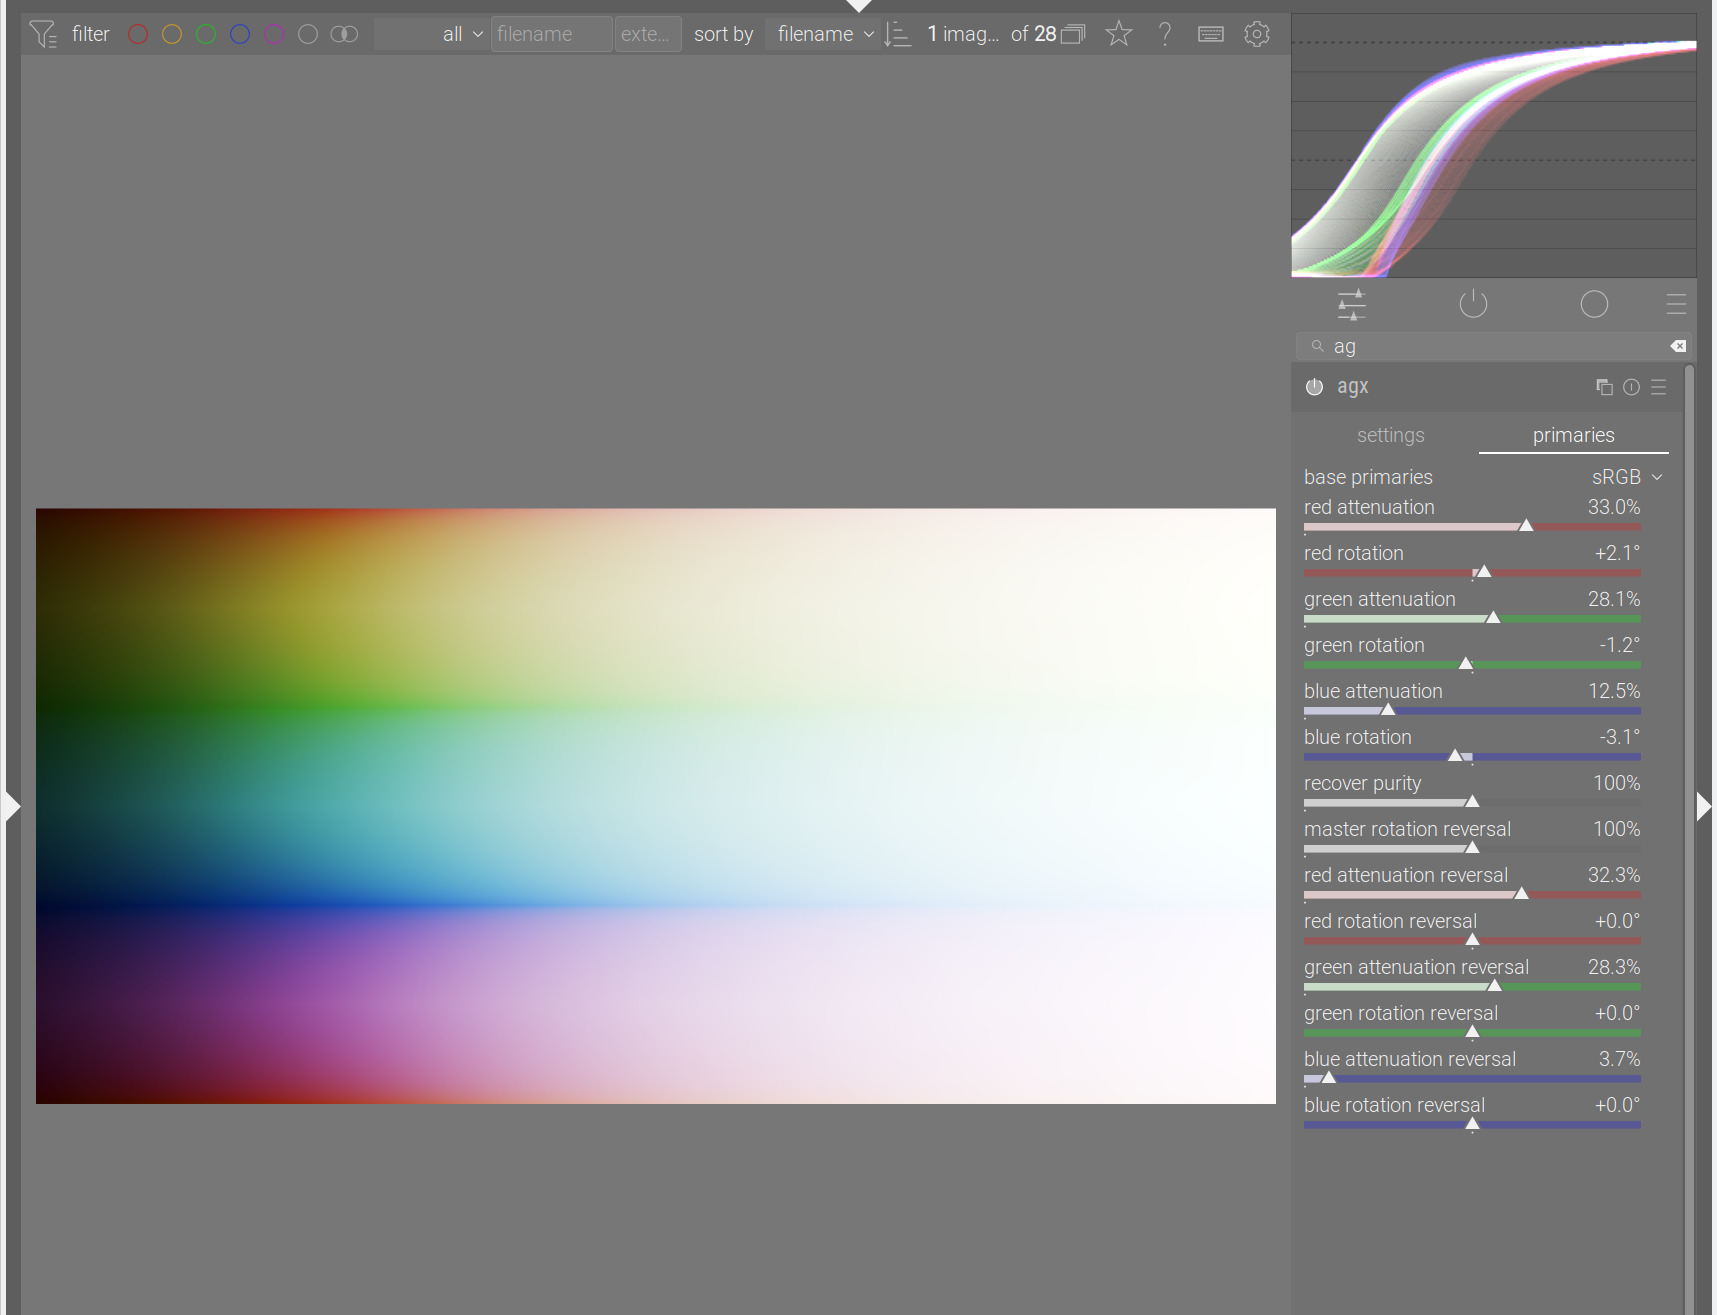
The red attenuation is 33%, reversal is 32.3%; for green, 28.1% and 28.3%; for blue, 12.5% and 3.7%. It is strange that you get strong gamut clipping indication. I may have broken something. I’ll try to double-check.
1 Like
Note that today I had a very strange experience: the same version of darktable, using identical gamut-checking settings (thresholds, histogram profiles etc) produced very different gamut clipping warnings and also visually different output.
Once I synced the darktablerc files, those disappeared. I’ll try to look into it later.
1 Like
Are you talking about the “O” toggle? It seems to give me permanent red patches even if I just use Filmic RGB or Sigmoid. I even tried opening an EXR that is strictly clamped to [0.0, 1.0] range, and it would still give me large portion of red patches.
There should be clamping or equivalent operations in place in the AgX processing chain, this doesn’t quite make sense.
Anyways, it’s the visual result that matters, again, it’s forming an image, written with visual grammar. If you don’t see any banding or posterization or visual discontinuance where it should’ve been smooth, it’s all fine.
If the primaries tab is turned off, then it’s just a simple curve, and it’s not AgX anymore.
1 Like
Something is wrong, darktable with Blender-like|base is a lot paler than Blender. I’ll try to check tomorrow.
We do know that the matrices darktable calculates are not the same (because of the D65 vs D50 difference), but I don’t know if that would explain the difference, or if I recently broke something while working on cleaning up the code.
2 Likes
Yes.
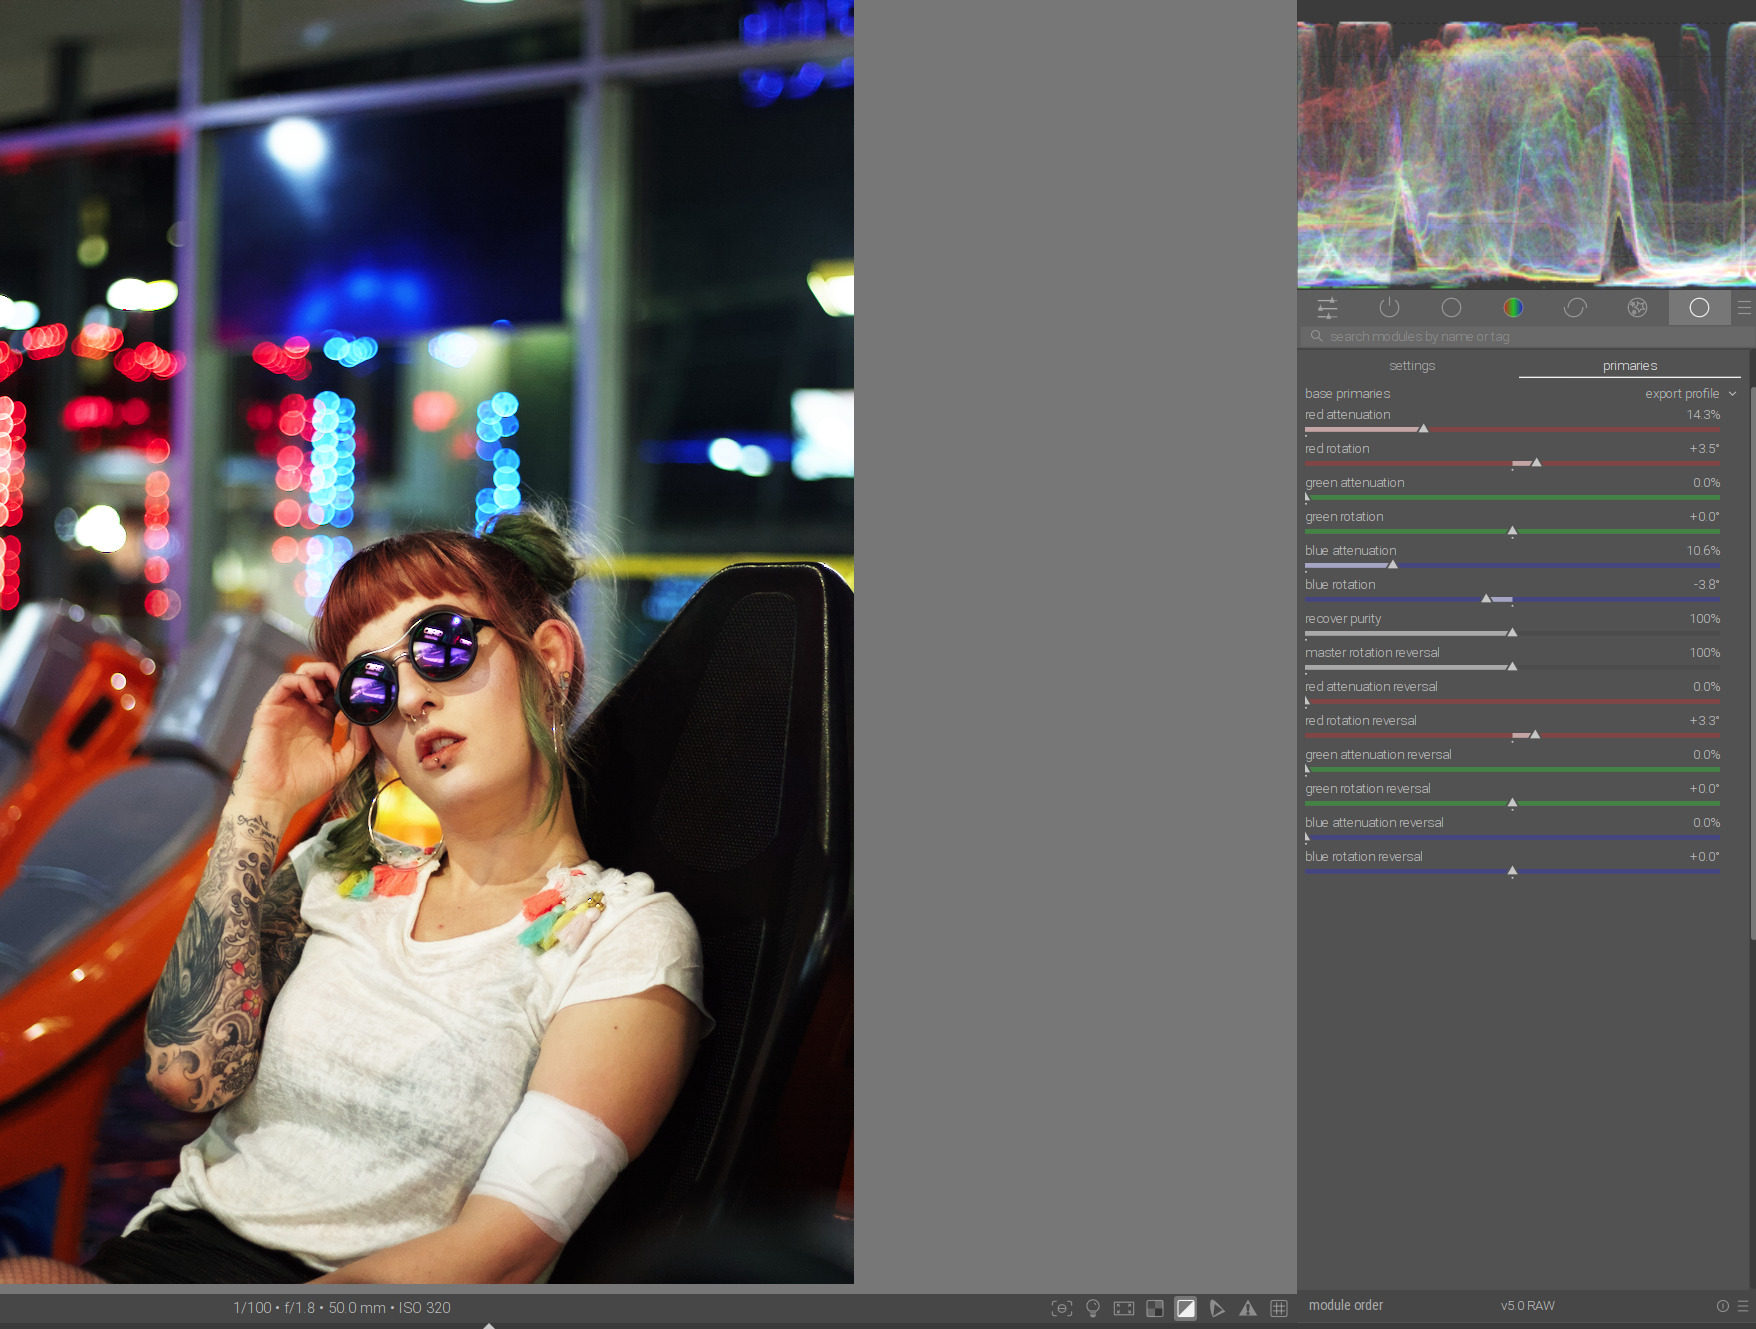
Perhaps someone in the know should take a look at what is happening. However, this doesn’t just affect red. Here is an example with red and blue:

The photo is from Signature edits and can be downloaded here:
I think you’ve already very nice formulated the most important thing yourself:
I can’t speak for blender, but I think the biggest advantage we have with AgX module in darktable so far is the ability to customize the primaries exactly to the scene.
This scene can be adjusted wonderfully with manual attenuation and rotation of primaries without clipping:
As long as it’s attenuating to white, it’s AgX mechanism in the work. What I meant for “turned off” was when all primaries settings are 0.
1 Like
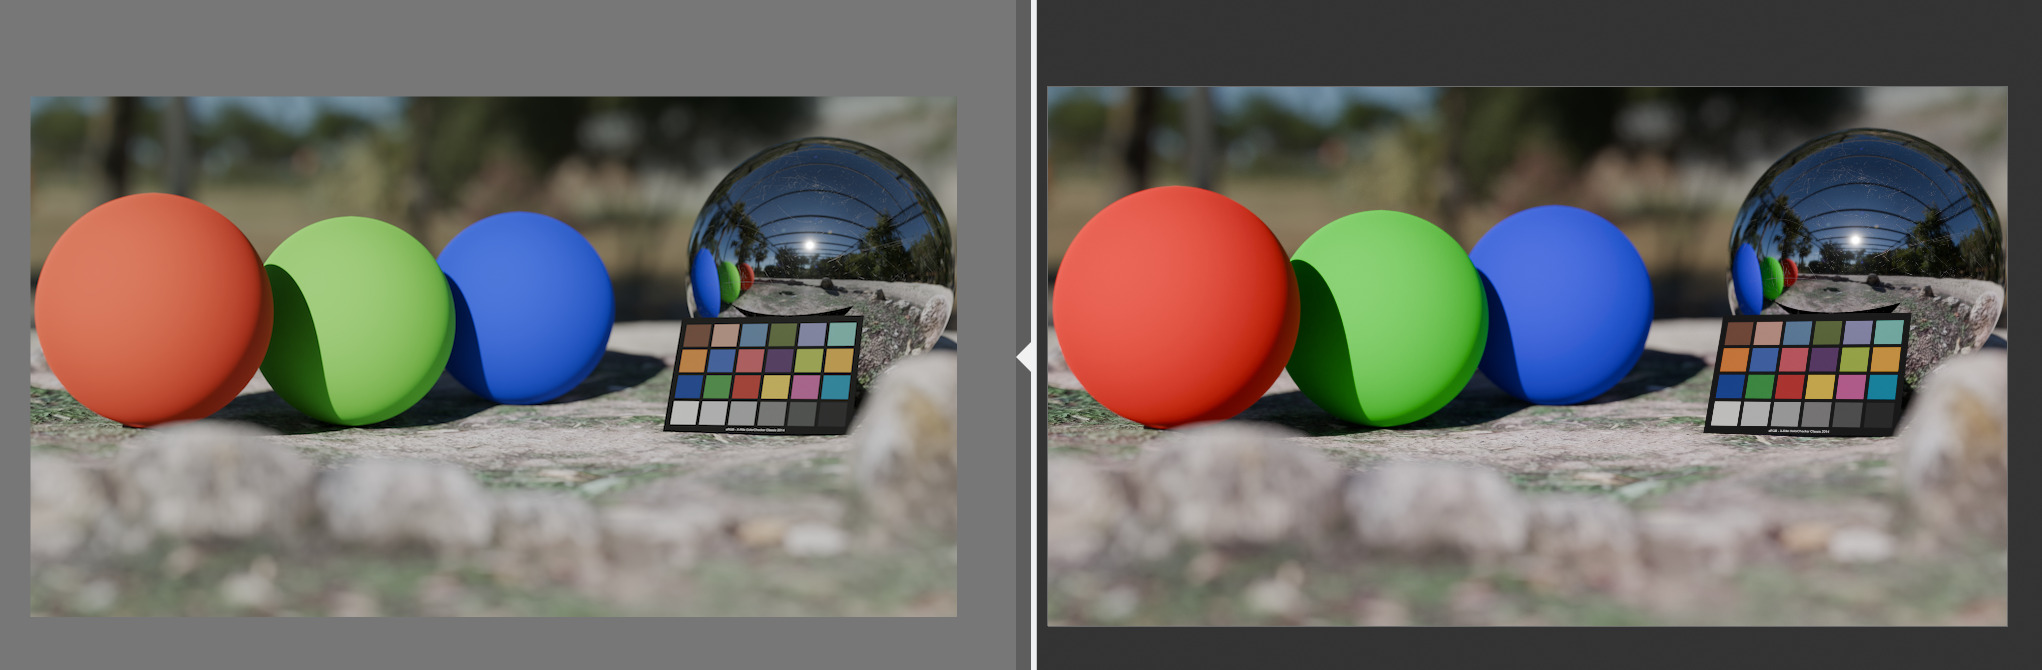
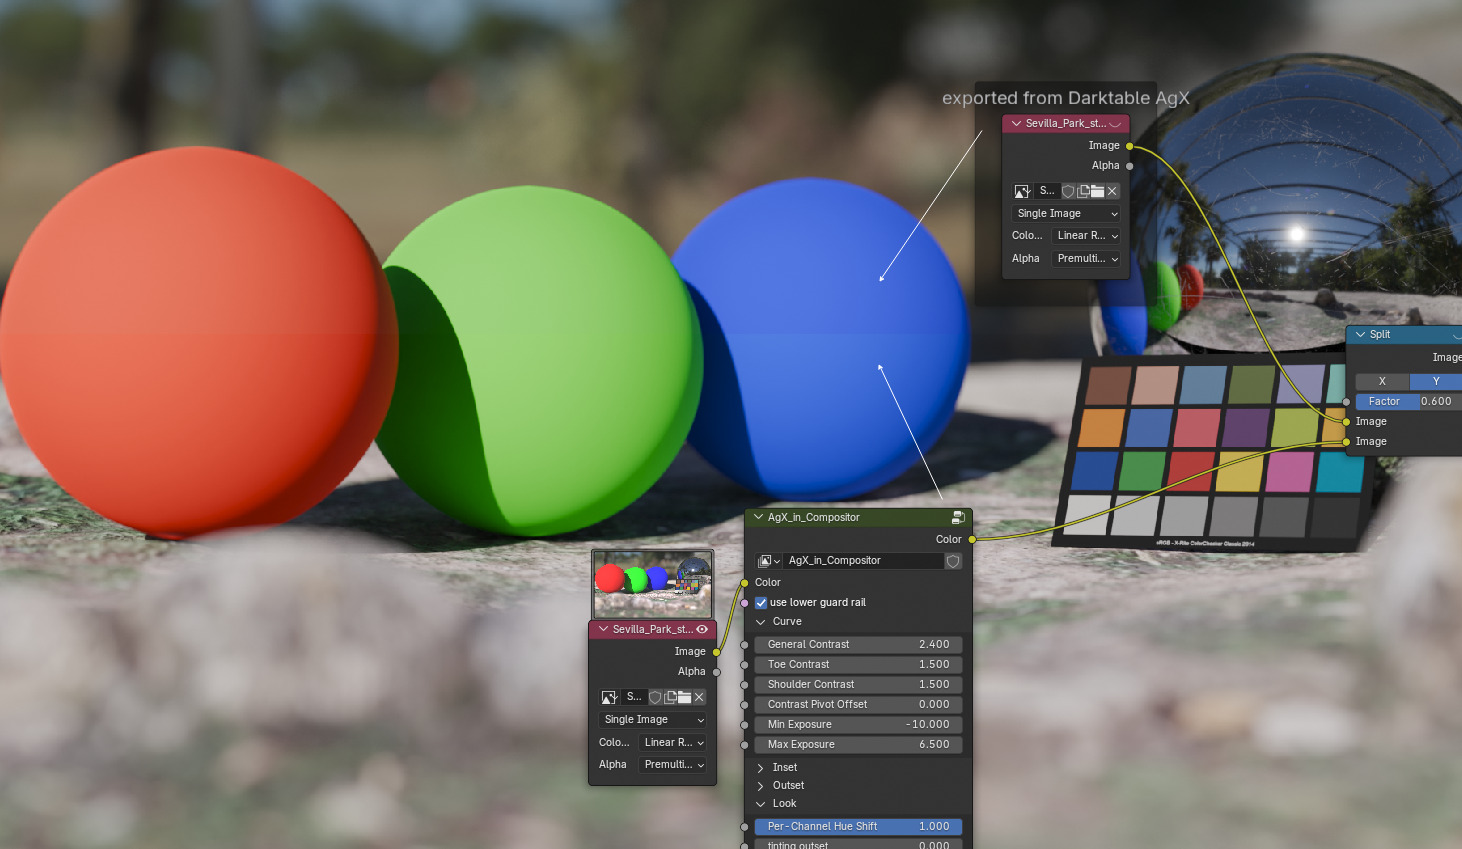
Not sure what’s happening on your end, but it’s actually not that different on my end:

Note that Blender doesn’t use ICC system. The output display device is manually set here:
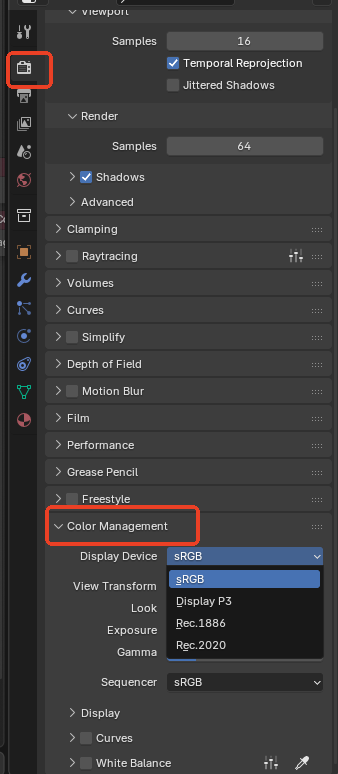
But note in MacOS the OS always assumes Blender to output sRGB, the same situation is in Windows as well if you turn on Windows’ auto color management. The situation is a mess.
1 Like
Ignore if you know this but DT does a couple of things…when using the overexposure for gamut warnings there are several setting for the parameter used to create the overlay and this is based on the histogram profile… The standard gamut checker that is a couple of icons over uses the softproofing profile rather than the histogram profile and finally the DT pipeline has an issue that data runs through the display profile before being passed to the histogram profile so some display profiles can create issues that make the gamut indication in accurate… Setting your display profile to rec2020 or making sure it matches what you have for the histogram profile makes sure that this is bypassed for accurate gamut warning…your display of the image will not look good during this check but the gamut warnings will be accurate…and if doing this does show changes in the indicated gamut from when you are using your actual display profile then it is one of the ones that will lead to inaccurate warnings…
Just a mention of some nuances to make sure all these comparisons between individuals are apples to apples…
Thanks for checking. It was a screenshot, with my display profile loaded. If I set darktable’s display profile to sRGB, the difference is much less noticeable. With that setup, using out_sweep.exr, and overlaying the screenshots in Gimp, I don’t get huge differences:

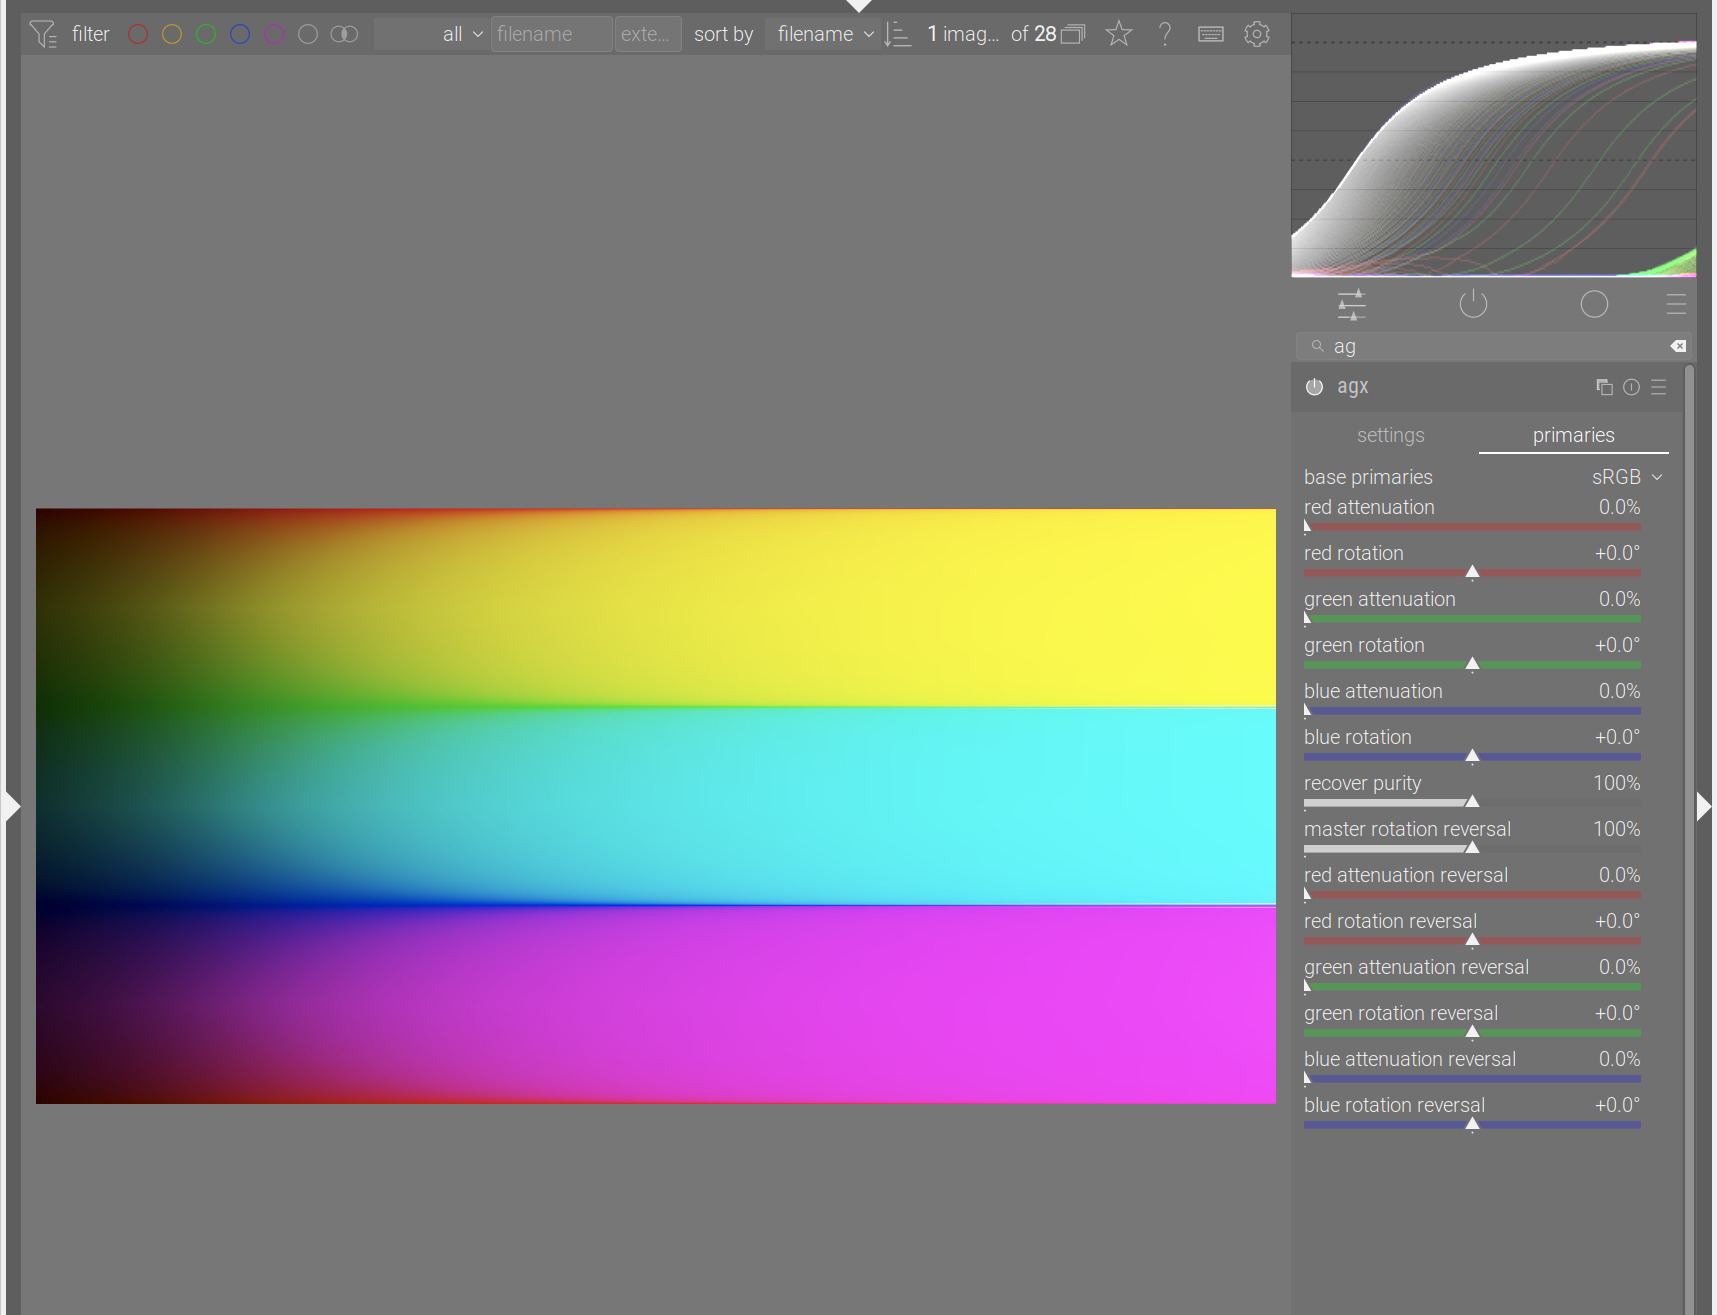
BTW, @s7habo, this image shows that ‘path to white’ (Blender-like|base with relative exposure levels picked from the image):

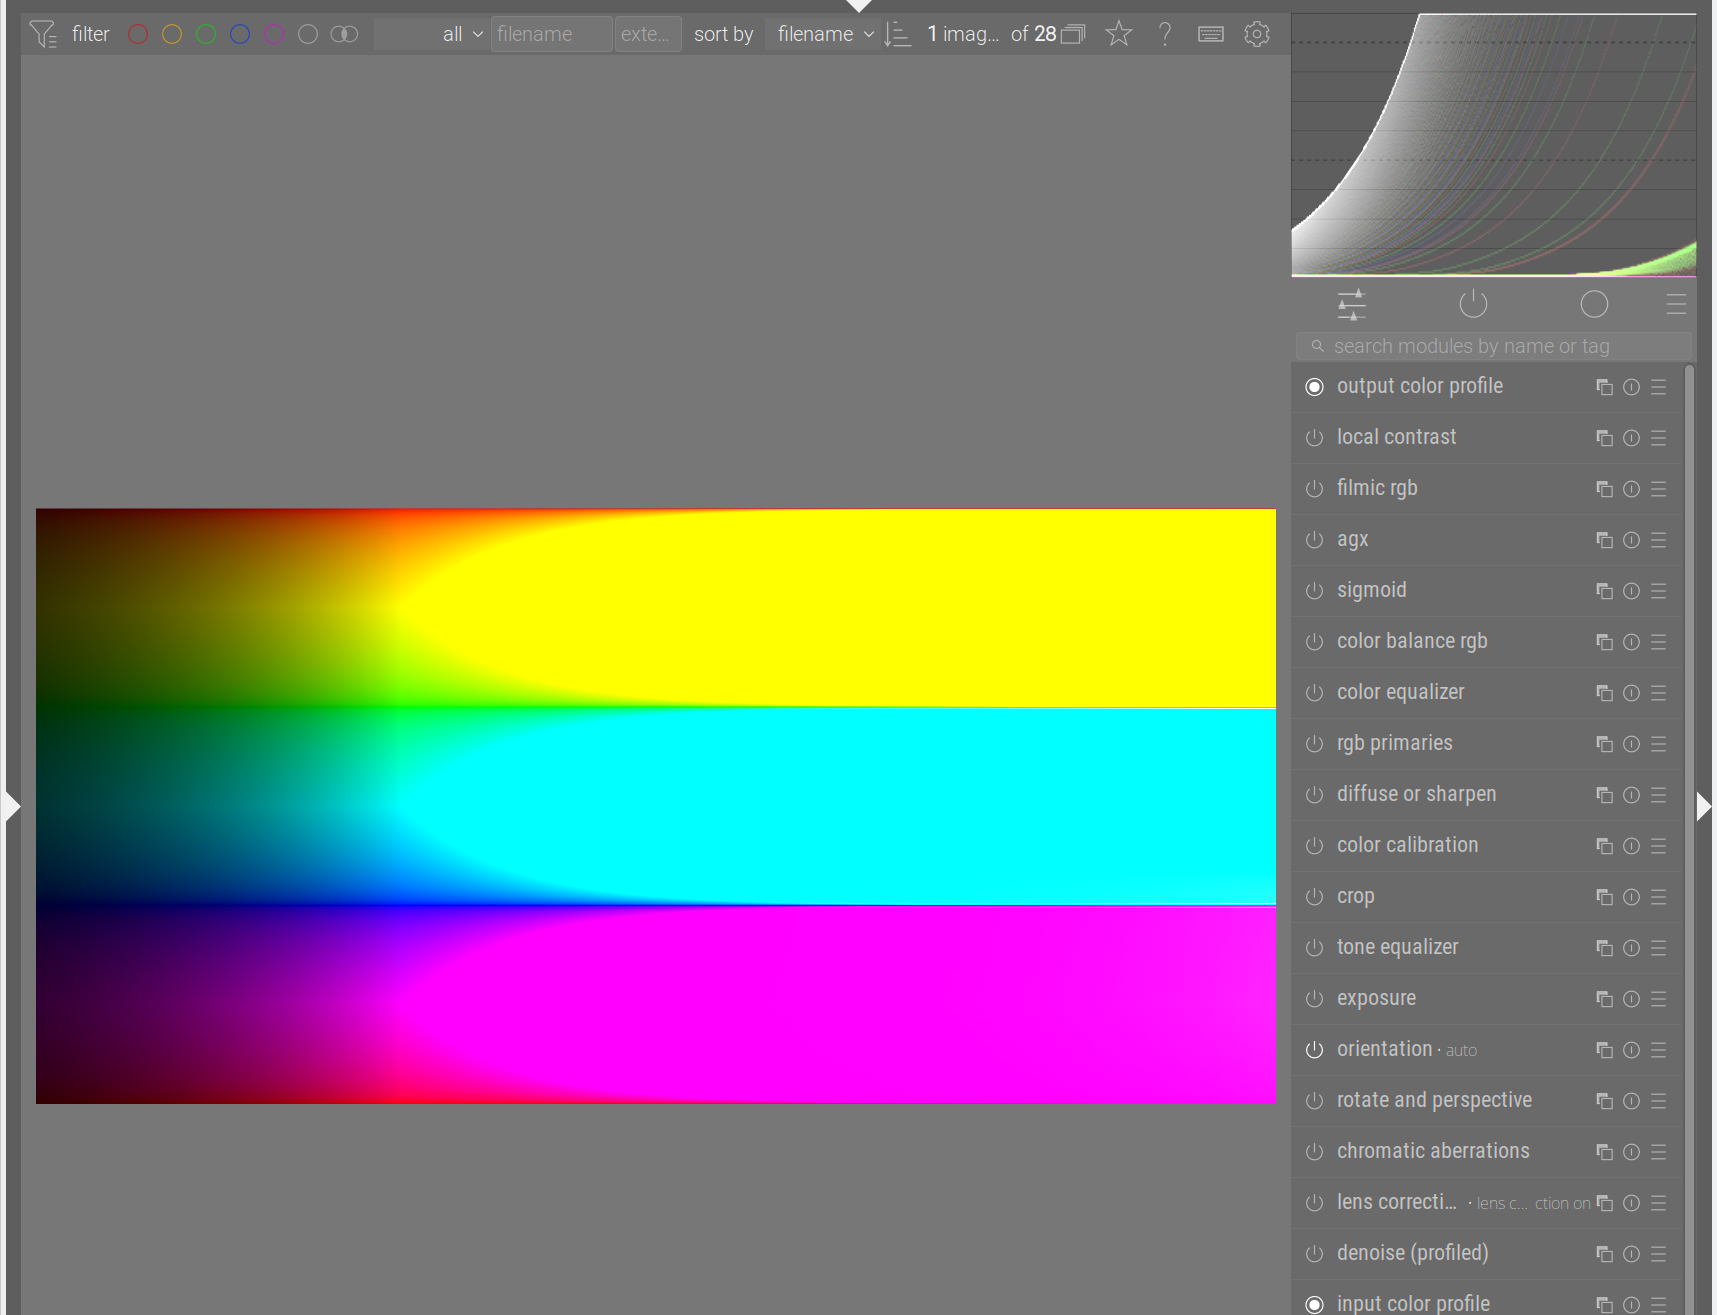
Same, without the primaries, you get the ‘Notorious 6’ - the thin lines of primaries, with the secondary colours in between:
It is much more noticeable if you try with sRGB:
Blender-like|base with sRGB:
Same, without the primaries, sRGB:
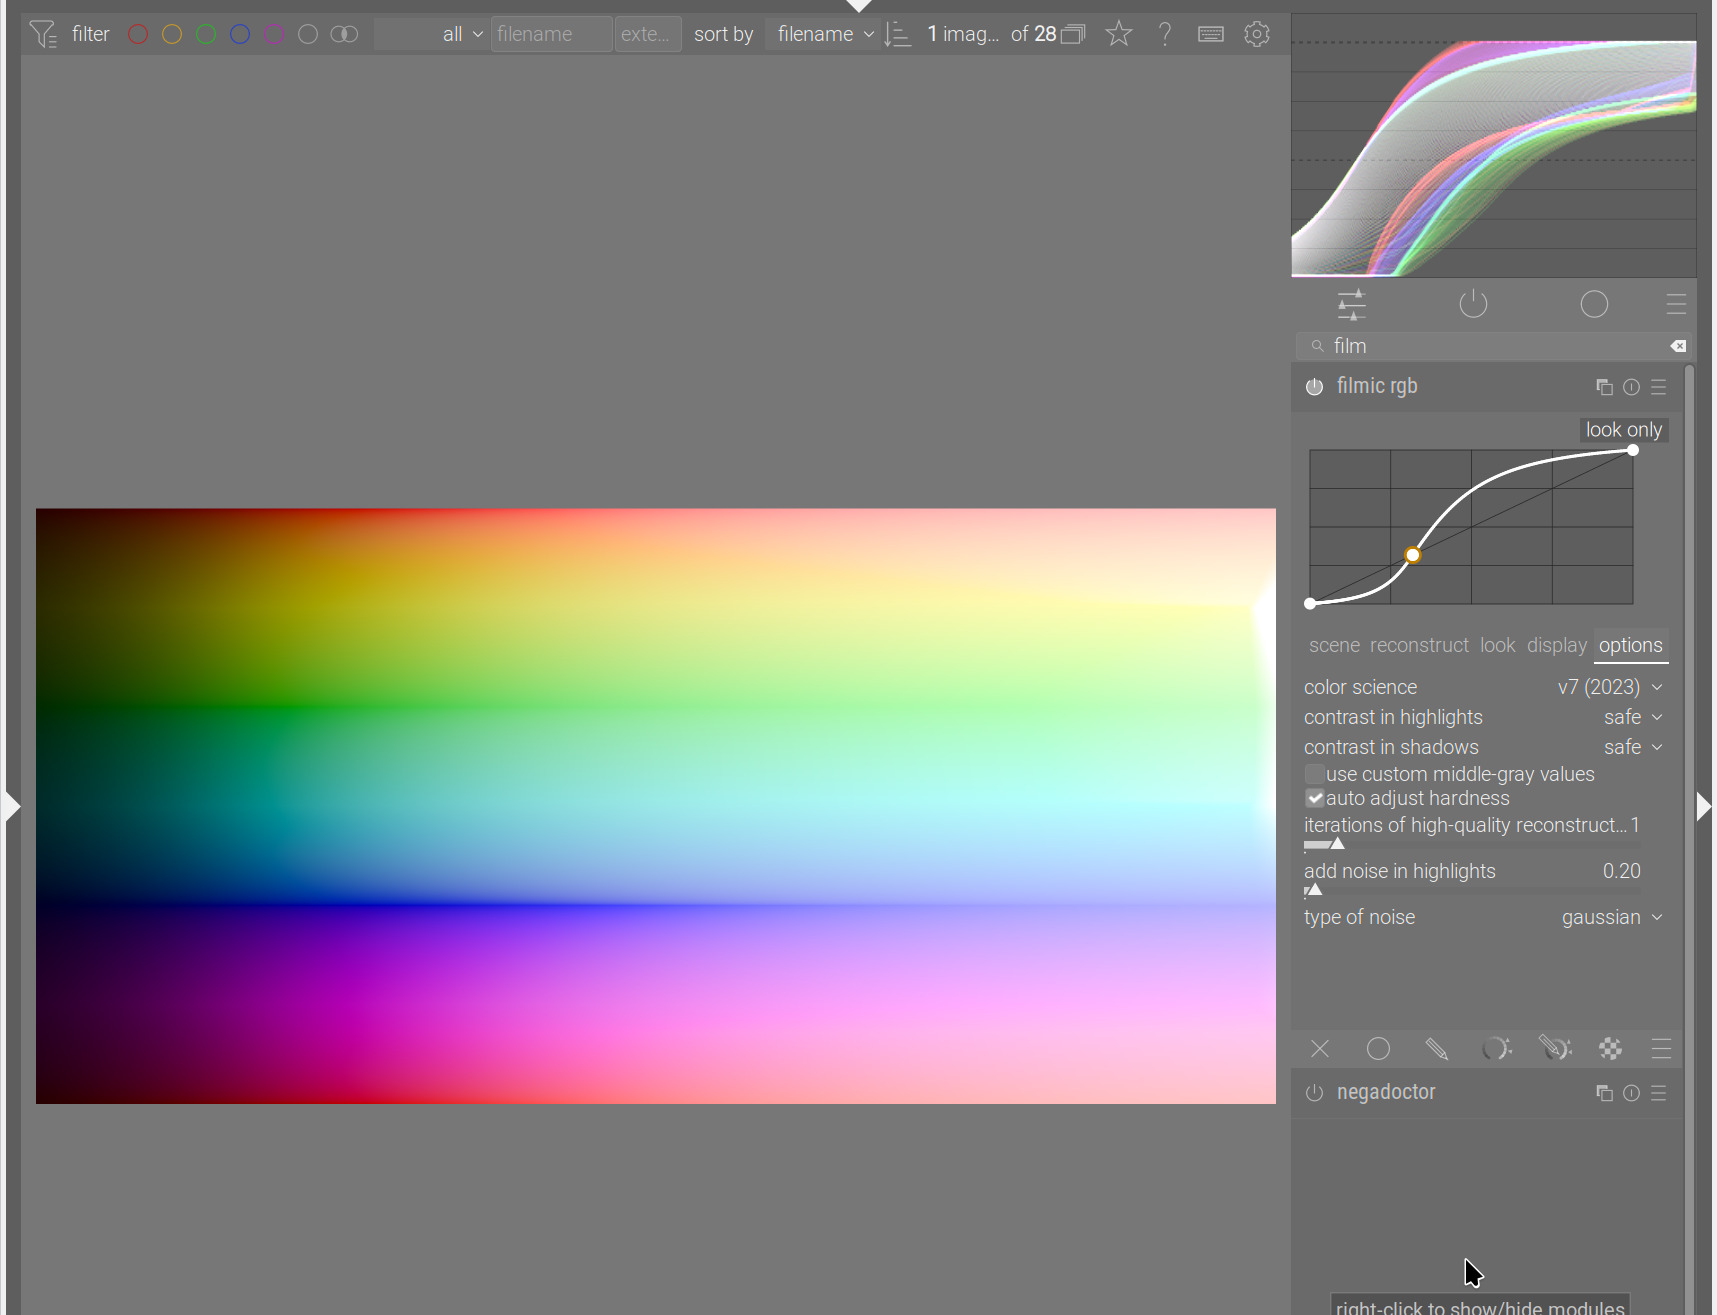
And without a tone mapper:
Filmic (v7):
1 Like