Well, it’s a less-than-3-minute video about a rather capable module.
Half of the playtime is about the trivial things: 3 tabs and what they do.
Select by area and the colour pickers are covered between 1:12 and most of the explanation is over by 2:15.
This is what the module looks for one of my shots (the shot itself is not important):
According to the colour picker’s tooltip, I should be able to select an area, but no matter if I clicked with Ctrl on the picker, or with Ctrl on the the image, I was unable to do so. And what would such a selection actually achieve?
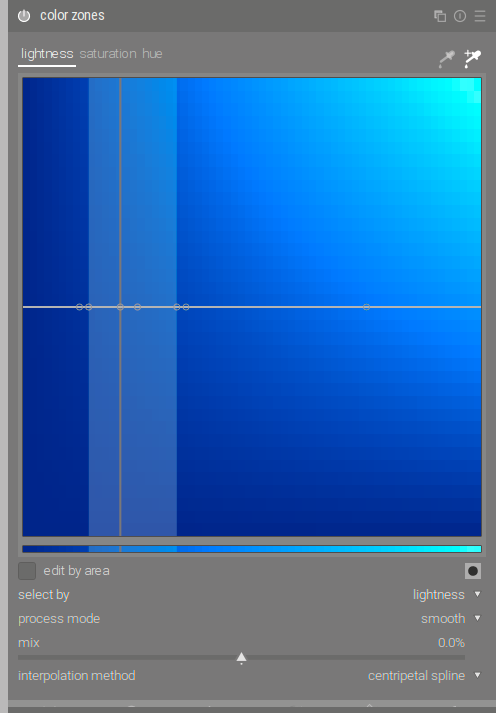
For the next screenshot, I switched the module into ‘select by lightness’ mode and switched to the lightness tab, as the point is more visible. Selecting with the ‘create a curve based on an area’ mode, I see that new control points are defined.
If I use Ctrl or Shift while selecting an area, I get a curve which will be positive or negative at the mean(?) value, respectively, but otherwise looks quite weird:
Then comes ‘edit by area’. If I Ctrl+click, I don’t just get a point: I get some value assigned to it, I have no idea based on what (I clicked where the pointer is visible):
What do those light grey ‘envelopes’ represent? They can look quite weird, just look at Rico’s video at 1:35.
the general usage is explained at https://youtu.be/FY8-KhfVXJQ for the former implementation. The major change is the handling of the curve (and the histogram in the background)
Instead of a fixed number of controlpoints you can define as many points you need to frame the changes you want to make. The behaviour of the curve can be modified by selecting the interpolation method. For a centripetal spline you need a few points to keep the curve in ranges with no change linear. If you change to monotonic spline only the area between left an right control point is affected. (at least with 3.1)
Picker and ctrl picker just indicates the hue range of the selection; the +picker is used to set a couple of control points to frame the hue values of the selection.
Edit by area allows to increase or decrease the area where the change should occur (this is indicated by the grey area - you can change this via scroll wheel). This also depends on your setting of control points. If you defined a couple of control points (ctrl click on the bottom frame of the curve frame) the gray area shows which control points are also moved …
What you show looks like a shift modifier applied to the range from your box and performed under the lightness tab but note that you have the module set to select by hue so it has dropped the Lightness for the 3 main “hues” that it found in your selection box…at least that is what it looks like to me…if instead you move the box a bit to the right and make it smaller maybe there would just be one downward peak on the curve…so in the end you have 3 tabs that are the parameters that you will alter using color zones but there is also the option to change what is used to select as well ie hue which maybe the most common but you can also select by saturation or lightness as well…so for example you could select by a range of lightness and then choose to modify the saturation …or any combination of the above…if that makes sense…
Thanks. Sorry, I did not phrase my question clearly: I was interested in the pickers. I’m familiar with the module but have not used it since darktable 3 came out.
maybe system specific, at least on osx and windows it’s correct with darktable-3.1.0+2548 (current master + some performance stuff).
You’d better file issues at Issues · darktable-org/darktable · GitHub - thats the playground of the devs
 ]
]