3 posts were split to a new topic: is there a tool that mimics RawTherapee’s soft light tool
I was posting some images this morning using this workflow as a template, when I realised that it doesn’t reflect my total workflow.
I wonder if it needs topping and tailing?
The very first part of my workflow, once I have uploaded my images is to tag them. Perhaps an introductory paragraph might be useful, especially since this tutorial could be used by beginners.
Once you have uploaded your images, the first thing to do is tag them. The tags you use are very much a personal choice, you might want to use places, activities, content, or a combination. The aim is to allow you to easily find particular images in a couple of years time, without having to remember the dates and times that you took them.
Once I have finished processing the image, I then add a ranking and a status.
Now you have finished processing your image, you might want to rank it, or use the color buttons to indicate its status. Like tagging, how you use the buttons is a personal choice. You might want to use one color to indicate that processing is complete, and another to show that the image is ready to be exported for use on a website or to be included in a photobook.
1 Like
@epeeist with respect I feel if anything was added to this excellent introduction it would detract from its purpose. I see it as a simple lets get a beginner started on an initial edit. Later they can consider all the other great features DT offers including tagging and rating.
Personally I feel this is the best beginners guide I have seen for DT because it is not overwhelming and it doesn’t get side tracked. ![]()
4 Likes
For the processing of an image, I agree with you.
If @raublekick doesn’t want to include my suggestions, then perhaps the title could be changed to make it explicit that this is purely the darkroom workflow.
Great guide! However, I have a question. Wouldn’t it be better to use the denoising module at the very beginning, before capture sharpening ?
It can depend on how fast your GPU is. Before I upgraded my GPU I used to enable it just before export because it slows things down. Now with a faster GPU I enable it automatically on import so I can more accurately see what I’m getting as I make changes. So long as you don’t mess with the pixel pipeline, it gets placed in an appropriate position in the processing order no matter when you enable it.
As noted by @Toast , unless you mess with it…denoise comes after CS in the pipeline as it is part of the demosaic module so withholding it shouldn’t impact CS only the current preview and performance but to your point if the image is noisy and your computer can handle it I would think it would be best to work on the denoised version…I think some autopickers and the color picker work better as well so really the only reason not to use it would be if the hardware is really challenged…
1 Like
I probably won’t be updating this article but I appreciate the feedback. I wouldn’t mind tackling another similar write up about importing and some of the DAM functionality in darktable.
I found the basics of darktable’s importing and ratings stuff straightforward enough that it wasn’t an issue when I was learning and I didn’t really think about it when writing this article. But all the more advanced stuff I came across improved things for me in a big way, like tag hierarchy, collection filters (maybe I could come up with a few recipes), lua scripts, and so on.
4 Likes
This is a fantastic tutorial. Thank you for taking the time to thoughtfully write it.
2 Likes
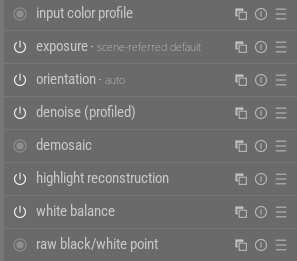
As you can see, denoise comes after demosaic in the pixelpipe, so CS isn’t impacted by it.
Now, as @priort mentions, there are some auto-pickers (color calibration CAT, in particular) that work much better if the image is denoised first. Color calibration can read substantially different illuminant colors depending on the amount of chroma noise.
1 Like
This is a little off topic, but does address a point mentioned in the article and is a beginner question - so I hope it’s not out of place.
I find the ‘capture sharpen’ tick box in the demosaic module to be an obvious, immediate and universal improvement for my photos. However, I understand that when it’s ticked, a computation is run to determine it’s parameters - therefore I get better results if I manually click it on each of my images individually rather than create a style for demosaic module with the box ticked.
Is there a way for me to easily set darktable up so that each time I load a new image into darkroom, it’s automagically capture-sharpened?
Thank you
I think the setup is not ideal at the moment. Set the radius and contrast sliders to 0 and save as a preset. Then set the preset to auto apply. It will do the calculations for that image. The manual explains this in more detail.
3 Likes
I have created a style with the capture sharpening already ticked. Sounds like I am letting myself down by doing this.
Does it work to tick the reset option in the style?
Just make sure both radius and contrast sensitivity are set to zero. This is explained in the tooltips.
I think I have done. But it so quick to recalculate that I’m never sure if “0” was saved in the preset!
BTW… Are the settings calculated per sensor rather than per image? If so, then those of us that (mostly) only use one camera don’t have to worry.