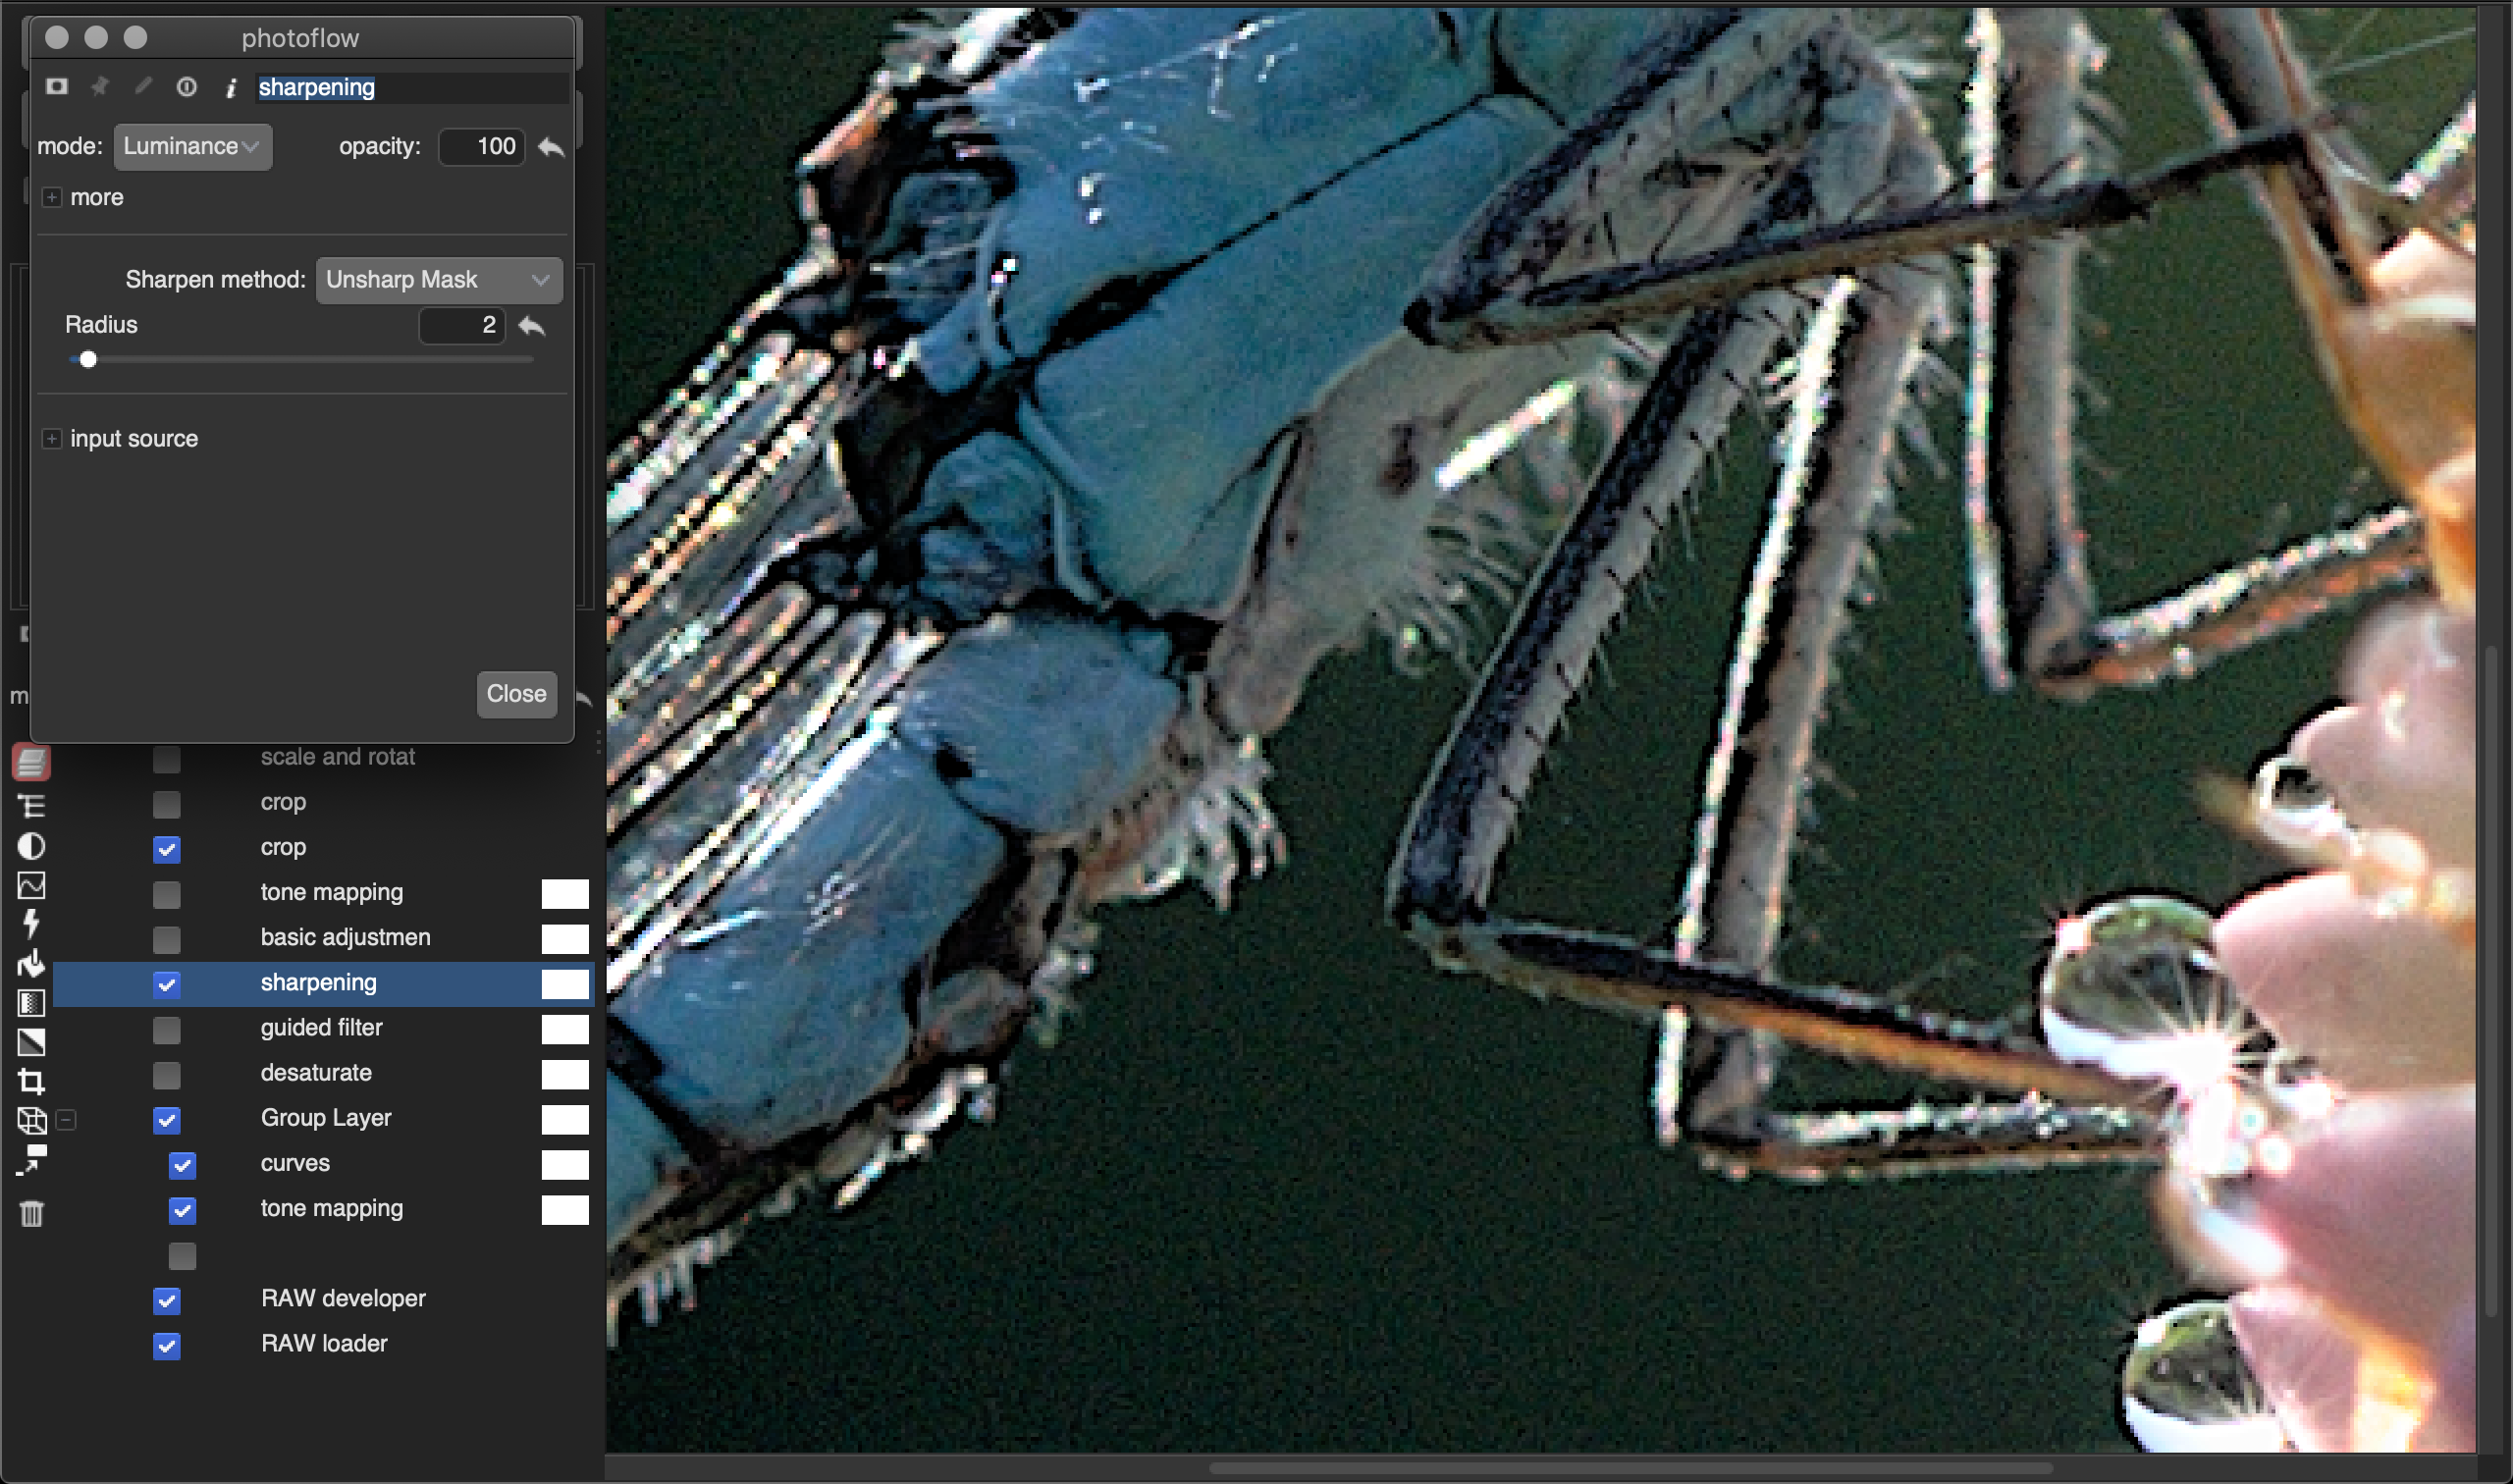
I have further updated (and hopefully improved) the “enhanced USM” sharpening method.
The new code takes a simpler approach, a consequence of the fact that I realized that the guided filter boils down to a simple linear combination between the input and blurred images, at least when the input and guide images coincide. That means that by swapping the input and blurred images in the linear combination it is very easy to obtain an “inverse guided filter” that blurs strong edges while preserving fine textures.
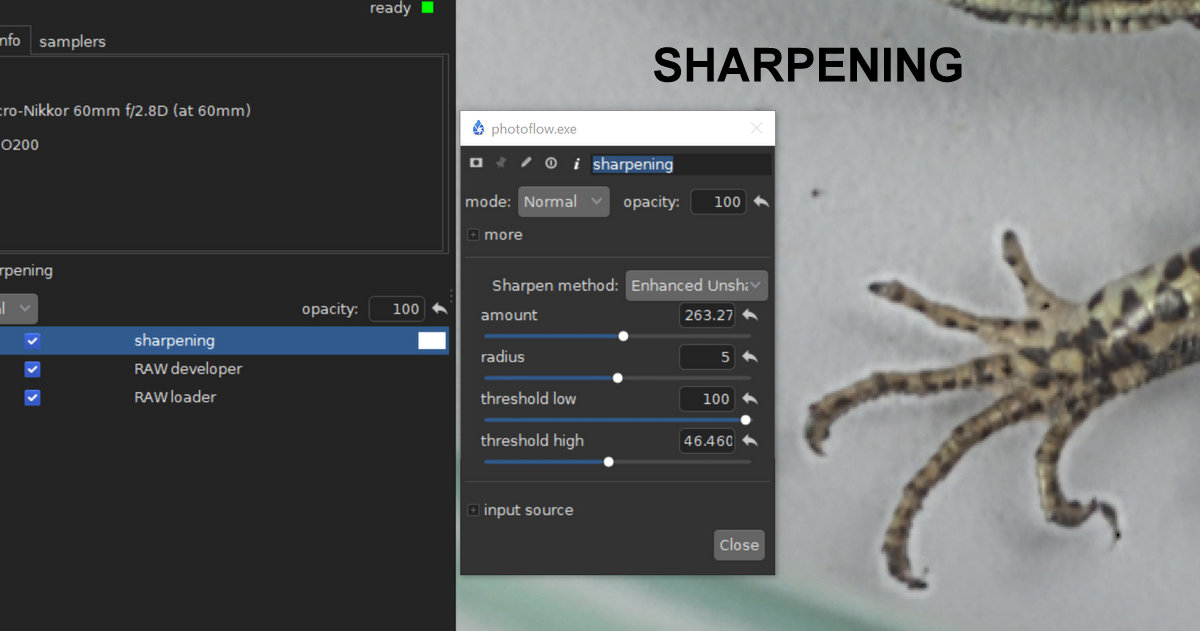
So the new code works like this. I create two guided filter images, one inverted at low threshold to avoid blurring the noise, the second one with an higher threshold to avoid blurring the very strong edges (which would otherwise lead to the typical over-sharpening of standard unsharp mask). The second guided filter takes a log10-encoded input for better control over strong edges.
The two guided filter outputs are then combined such that areas that are not blurred in either output will also be preserved in the combined one.
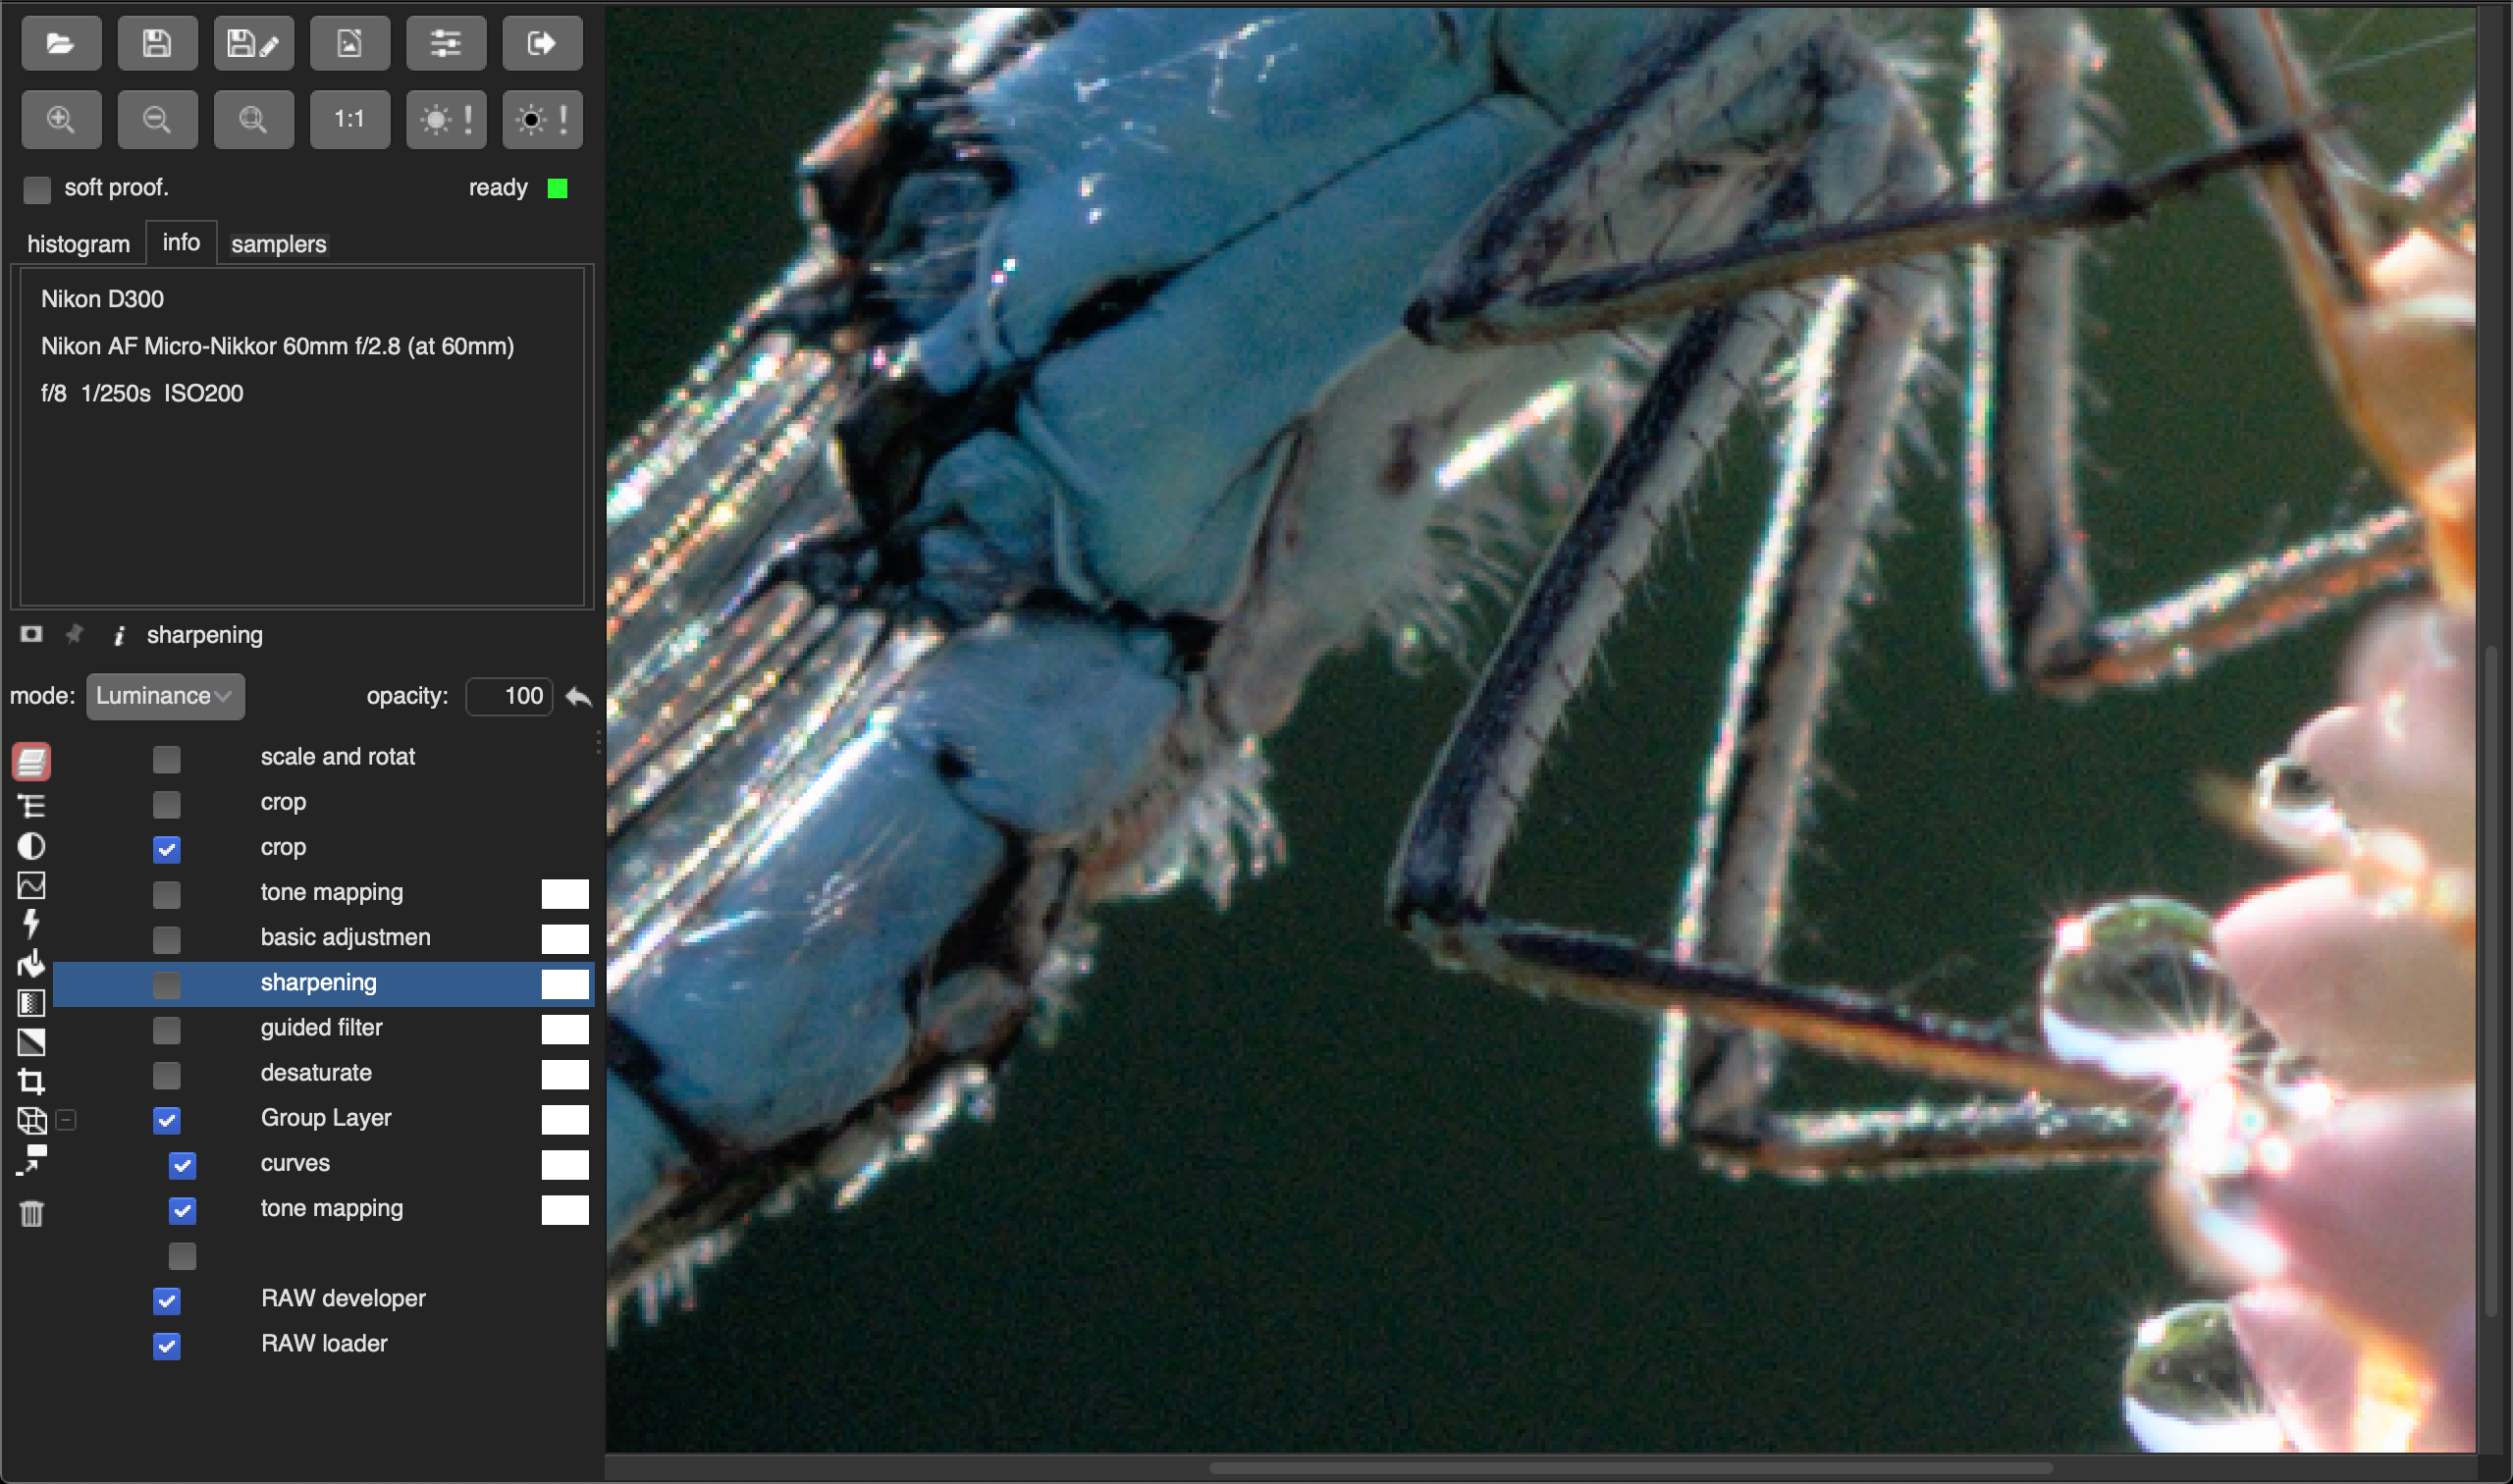
Here is an example of a macro shot that show quite well the drawbacks of standard USM (noise enhancement and strong over-sharpening of sharp edges, with an unpleasant very dark halo on the dark side of the edge).
I am personally very much satisfied with the result, but it would be really good if others could stress-test the algorithm on different images, to see if an optimal setting can be found in all cases and if the result is always satisfactory…
The build is in progress, new packages will be available from here as usual.
Thanks, it looks much better than the previous version, specially regarding noise.
And clever algo!
In this particular image, I struggled a bit to reveal detail in the stone of the bridge pillar. The low threshold seems to do the job, but it was a bit hard to prevent the rest of the image getting that standard usm look. As for the high threshold, I didn’t quite understood it.
when the low threshold gets smaller, the noise is less “protected”
when the high threshold gets higher, strong edges are more and more sharpened
Start by putting both sliders in the middle of the range and the amount at the maximum, then lower the first one until the noise starts to get sharpened (zoom at 2x to better see the effect). Next increase/decrease the high threshold until the over-sharpening disappears. Finally, adjust the amount to taste.
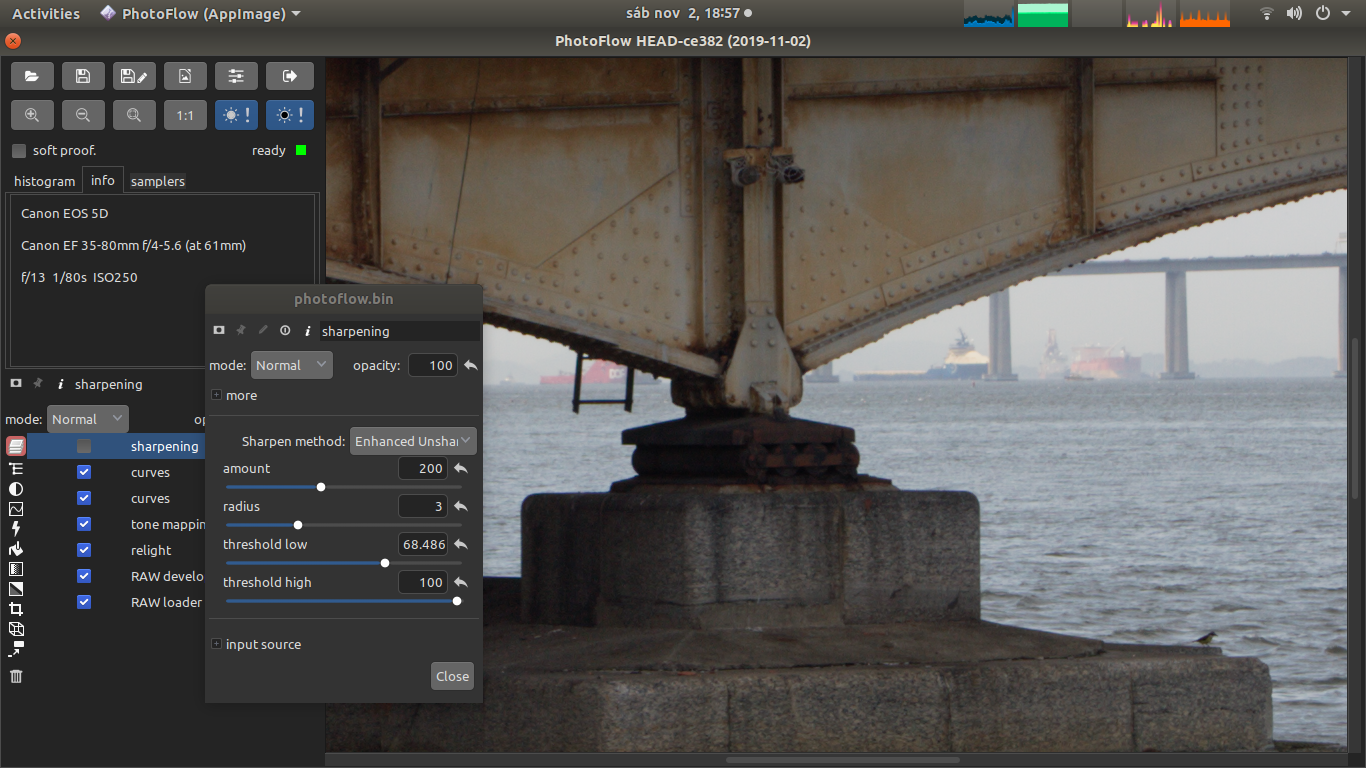
Just tried the new algorithm on Windows 10 (photoflow-w64-20191102_2121-git-enhanced-usm-ce38236b53b4fc8490ea1d3d74daeb86bea50d7b).
Overall it works great as far as the noise is concerned.
As regards the haloes around the sharp edges I don’t understand how I can reduce them.
I have tried to keep the “threshold low” slider at the maximum amount but they are still present.
I suppose you can not entirely avoid them, right?
Here is an example (NEF - Nikon D700).
Take a look at the lizard “fingernails”:
I noticed that the halo is reduced if the sharpening goes after the raw developer layer.
But then dark edges seem to get stronger (look at the bridge pillars in the background)
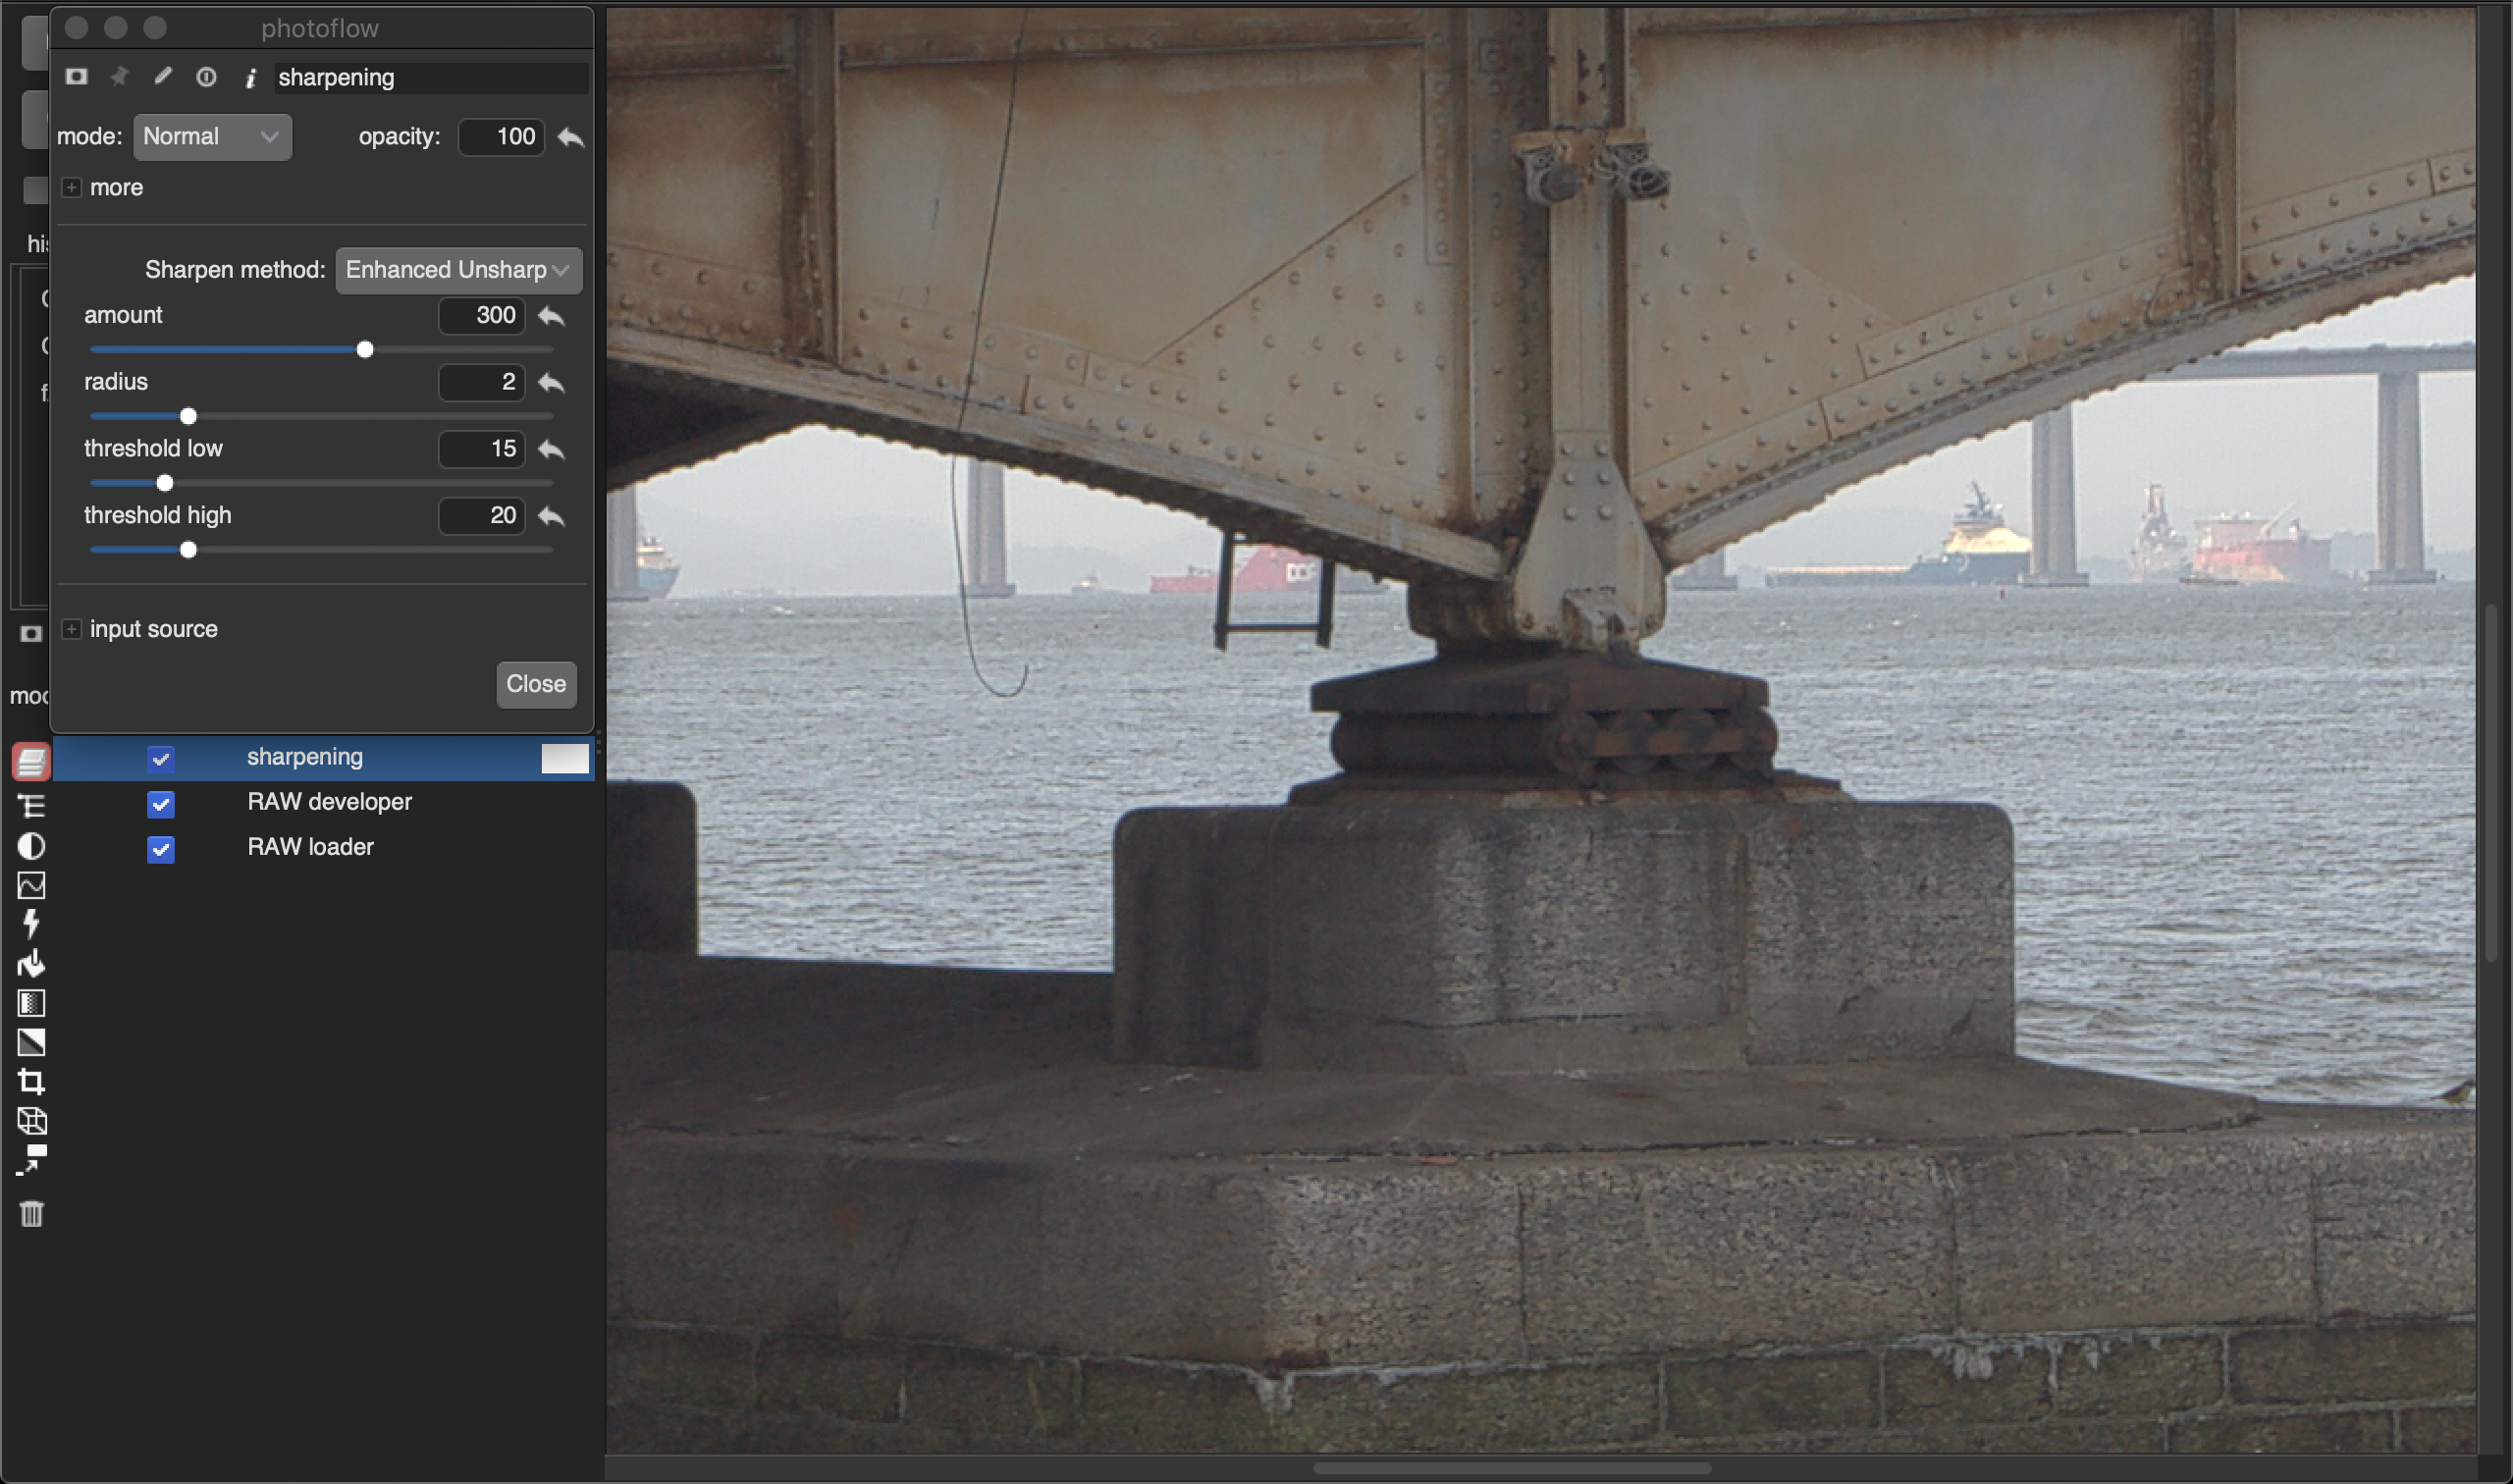
I did some comparison between your edit and my new code, to see the differences in sharpness.
Left is my version with radius=1, amount=400, threshold_low=10 and threshold_high=50. The input image is the RT output without sharpening.
Right is your RT version (I have used a build from the current RT dev branch).
My feeling is that your sharpening produces crisper details, on the other hand my version, while slightly softer, has smoother transitions between sharpened and non-sharpened areas.
All-in-all this is only visible when pixel-peeping at 1:1 or more, while already at 1:2 the two versions are practically undistinguishable…
As a RT user I have to say that despite loving the new sharpening methods in RT I think the main downside is the grainy transition between sharpened and unsharpened areas. In the example above it’s barely visible but can occasionally come out stronger. I think the vulnerable scenario is transition zones between in and out of focus. ping @heckflosse
To my eyes the RT version above is a fair bit sharper without affecting the noise.
Do you observe that only when using a dual-demosaicker or also when using plain amaze/rcd?
Btw: capture sharpening works best with rcd or pixelshift. When using amaze it often sharpens the amaze diagonals too much.
I tend to use dual-demosaic all the time now. I did start looking into whether it was the dual-demsaick (like that word better) that was the issue but got interrupted before forming a conclusion. Will do some experimentation when I find the time, perhaps I can find a good example image.
I’ve done some quick tests of capture sharpen oof “dither” now. Is this the place to upload or should i start a thread in the RT forum?
edit: may as well link to filebin from this post Filebin | nofwa4edaqoreb80
Look at the transition from petal to white background above the central diagonal stem. Album view works well in filebin.