I haven’t used sigmoid yet, but my initial reaction would be to use tone eq to lighten the shadows.
Yes, that can be done, but then the simplicity of sigmoid is no longer there.
Thanks for the test and comments. I think besides the highlights a big difference is the face. If you look at the area around the cheek and eyes while flipping between esig and efilmic you see how filmic and to a lesser extent sigrgb changes, sort of flattens, the appearance of the face. Making it closer to one block colour.
I think that when examining images with sigmoid and filmic there’re two distinct macro “variables” in the system to consider:
-
The tone curve
-
How it’s applied to the rgb channels:
- filmic
color science+preserve chrominanceoptions) - sigmoid
color processing+ (preserve hueforper channel color processing) or (the unique available normforrgb ratio color processing).
They can both affect the perceived differences in contrast, highlights/shadows etc…
Theoretically one should implement the sigmoid “color processing” inside filmic and the filmic “color science” inside sigmoid and then only the “tone curve” and how it’s controlled will be different between the two (that’s one of the reason in the main sigmoid thread there was a proposal to implement sigmoid changes inside filmic).
If we could do the above and being able to fix point 2. it’ll be easier to compare only the effect of the tone curve.
Maybe a general note to people talking about 'crushing highlights ’ or loosing highlight details.
Both modules roll off the highlights at some point. Which causes the highlight data to be closer together. So details are there , they are just not as visible.
I think in both cases , you can play with local contrast after the module to try to increase local contrast in highlights . This will bring details 'more visible ’ back that are still there .
Maybe it can help make sigmoid more usable for some people , or the other way around.
1 Like
I don’t think people are that interested in comparing just the tone curve.
They compare the workflow and how simple or hard it is to get pleasing results. From what i read , this is what people seem to like about it. Maybe filmic can get better results , but people find it harder to get them. Sigmoid will ‘loose’ sometime , but if it’s easier to get safe results , it’s not really about the results , is it ?
1 Like
I think you haven’t understood my intention. I wanted to add some notes on how they work and which are the variables involved that could be helpful to “some” people. I could also be an hint for future development as @jandren asked.
There’re people interested in the end results that they can obtain with less steps or by moving the sliders at (semi)random and other that wants to know the difference between the various options and why they obtain different results between sigmoid and filmic and I just tried to explain the two main variables involved.
I personally like sigmoid because I prefer “per channel” color preservation and how it can be tuned than norm based color preservations and not available in filmic (but could also be implemented in it) and that the tone curve is not dependant on image “white relative exposure”.
1 Like
Since pixls are a combined user and developer forum people will come with different “goals”. I agree that filmic and sigmoid appear significantly different in other ways than just tone curve. As a user the robustness (how hard it is to get poor results) ui, and overall results are most important. In that sense they are valuable even as just two different ui’s (I understand they differ under the hood as well)
Anyone tried combining filmic and sigmoid?
- filmic: auto set white and black relative sliders, have a flat curve (no contrast)
- sigmoid: placed after filmic in the pipe.
It is my understanding that filmic is never flat: the ‘flat curve’ is a curve indeed, one that applies logarithmic tone mapping to produce the display-referred, non-linear output.
sigmoid was developed to process linear, scene-referred input.
1 Like
The below comment will not be news to most of you I’m sure, but…
Whatever global tone range compression is used, you’re guaranteed to lose contrast somewhere. That’s the main problem. Other related issues are colour changes and gamut clipping. Filmic/sigmoid both try to fit a (possibly much) larger tone range into a smaller one. You just get to choose which tone are affected most.
Example, if you try to make an image fit into half the display brightness. The “obvious” way is to multiply luminance by a fraction, but that reduces contrast in the darker areas (see the middle image). A very basic solution to that is to use a power curve (sometimes called “gamma”). Either way, the best you can hope for is that it looks perceptually reasonable.
From the top: original, multiplied, power curve:

3 Likes
Sure. All those tone mappers just allow us to make different compromises.
2 Likes
Yes filmic is essentially applying two curves, one is logarithmic (dynamic range), the other s shaped (contrast). I was talking about making the s shaped curve flat. The way one would if you were combining filmic with base curve.
1 Like
That’s probably not the best idea. Since local contrast only works with Lab and display-referred data, it’ll essentially act as the tone-mapper (by simply truncating out-of-gamut data, I suspect) and the actual tone-mapper (filmic or sigmoid) will not get the kind of data they expect (RGB, scene-referred).
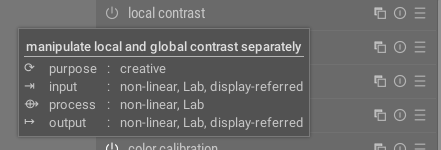

That’s a good point, in fact, the Darktables manual has a note about this.
filmic rgb tends to compress local contrast, so after you have finished adjusting settings here, you may wish to compensate for this using the local contrast module.
I personally apply a local contrast preset that someone post in this forum, and for these cases the results are great, both for filmic and sigmoid.
(sigmoid just need to push the values a bit further)

2 Likes
That’ll be me ![]()
2 Likes
One thing that needs to be remembered is that blanket assertions about what filmic does vs what it does not do as compared to sigmoidal need to include experimentation with the range of settings… The nice thing is that sigmoidal is pretty simple… and the options are in one panel. You have only two color pres modes and only one has a slider so you can pick between this or that and dial one in. Then tweak skew and contrast… Most of these settings with the exception of changing the preservation mode don’t dramatically impact what is going on in the image wrt color and the initial “look”… However with filmic you also have the safe soft and hard shoulders , you can have zero latitude or no linear part for the curve , this part when linear can be shifted and the big one is the color preservation modes and even extending this to using v5 with its set of controls over saturation vs v6… So when discussing it we also need to be clear what settings are in play. I know that they are in the xmp for those that include it but again I could configure filmic in one way and someone else another and the results will be substantially different and we could both be calling them “filmic”… I think this maybe outlines the strength and weakness of filmic… Sigmoid gives an initial look and then you basically push and pull that a bit whereas filmic with its various buttons and knobs can yield quite dramatically different results…
The example above of the child’s face is a good one… The result provided for “filmic” for that cheek would be very different depending on the preservation mode or if v5 was used and the latitude size position and midtone saturation were used… and some of these changes might be the defaults for other users and define “their” filmic look.
I guess my point is a good comparison for sure is to start with the current defaults for both. Then optimize both and finally assess the result and how hard it might have been to match or exceed things with one or the other under a variety of situations.
I think there is a lot to learn from others as to how they edit these images so it would be nice to keep them coming
2 Likes
Meanwhile, I’ve tried two of the images where I had trouble with filmic:
- Magenta highlights vs raw clipping indicator vs filmic white level - #7 by kofa
- filmic v6 loss of contrast
sigmoid handled those rather well; with filmic v6, I had to switch to Luminance Y as the chroma preservation setting.
(sigmoid defaults)

(slight tweaking)

6 Likes
Nice…this mad me think of two things…one did you try the new HLR and filmic v6 still had to change chrom preservation??
Two many of the recent issues with the blue highlight etc were the interaction with filmic and the until recently default HLR mode of clipped highlights…
If you doing a retrospective edit sigmoid being new might start with the new defaults and so it may not be apples to apples… so just confirm… for those not following the HLR issues… clip highlights is big contributor to that blue with the math in the newer v6 filmic…new inpaint method is much better in that respect…
