Great. Thanks for sharing.
Just a comment. You have kept the base curve module (inactive) inside.
As I have not found the way to import image without it, the first thing I do is remove it on all images. And it comes back :-).
This said, that’s easy to remove it from your files with a text editor.
There’s an option in the settings to turn off auto-application of base curve and sharpen
Sorry for necro-posting this thread. This week, I spent hours editing DSC_0856.NEF (the backlit ladies), and had a real problem coming close to… er… Lightroom.
What helped me in the end was shadows and highlights, a module I’ve always had trouble with.
DSC_0856_07.NEF.xmp (53.5 KB)
Without shadows and highlights, the background was much paler than in Lr. Left: without, right: with.
Without, with:


With Lr, it was just dragging a few sliders (yes, in the end I recovered a bit more of the highlights in darktable, I’m too lazy to fire up the Windows VM with the Lr trial on it to see if I could do more there).
Interestingly, if I pixel-peep, it seems Lr’s demosaicing is really bad:
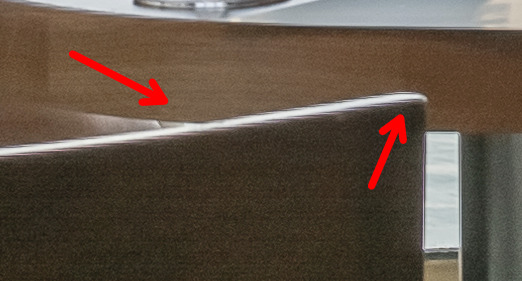
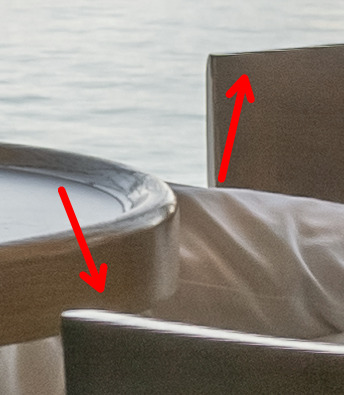
I do admit I sometimes will use it with good results too… I was looking at your edit and you could also expt with dropping the radius and compression even to zero for compression and maybe even get more out of it… When I do use it I adjust these 2 sliders to dial in the effect…
I always use FilmicRGB as my first choice. If it gives me a screwy rendition that I cannot tweak out, I will switch to Sigmoid.
Here, neither worked, the dynamic range was too high. Normally, I can work with tone equalizer rather efficiently, but I had a really hard time with this one (the bright background was washed out). Not necessarily bad, but I preferred the Lr result, especially how easily it was achieved. (I’m preparing to present FOSS tools at our photo club, so I tried to find some photos that were hard to process.)
I have to admit, I do enjoy a lot of aspects of these old modules. I know they often have haloing problems and don’t fit into the scene-referred workflow, but I like the easy-to-use controls and more specialized nature. Other examples are the Bloom module, where you have 3 sliders to control the bloom, and the Lowpass module with its 4 sliders to control blur/brightness/saturation. Both of those modules have effectively been replaced, but I like the fine control they offer for their specific purposes (and creative purposes). The replacement tools are more robust, but you often need to jump to other modules or know blending tricks to replace all the effects from the more dedicated modules.
For beginners especially, the Shadows and Highlights module is much easier to grasp than the Tone Equalizer.

