It works great to give you a great look in medium tones and with default parameters.
But when I have skies with clouds with billiant lights (and a bit overexposed in some places) I don’t get very good results. It tends to make skies dull and I want a bit more dramatic effect.
It is understandable to some point as any S curve or contrast curve will give you contrast in midtones at the expense of compressing highlights and darktones.
But It was easier for me to expand lights previously using curves or other tools.
With filmic I do not find easy to do that even if I am using color balance to expanse highlights (and apply it only to them with parametric masks).
There are many options in filmic, it does lots of things at the same time and I cannot understand all that technical stuff (even if I have read it several times in the last year, from version 3 of filmic, but it is getting more and more complex each version).
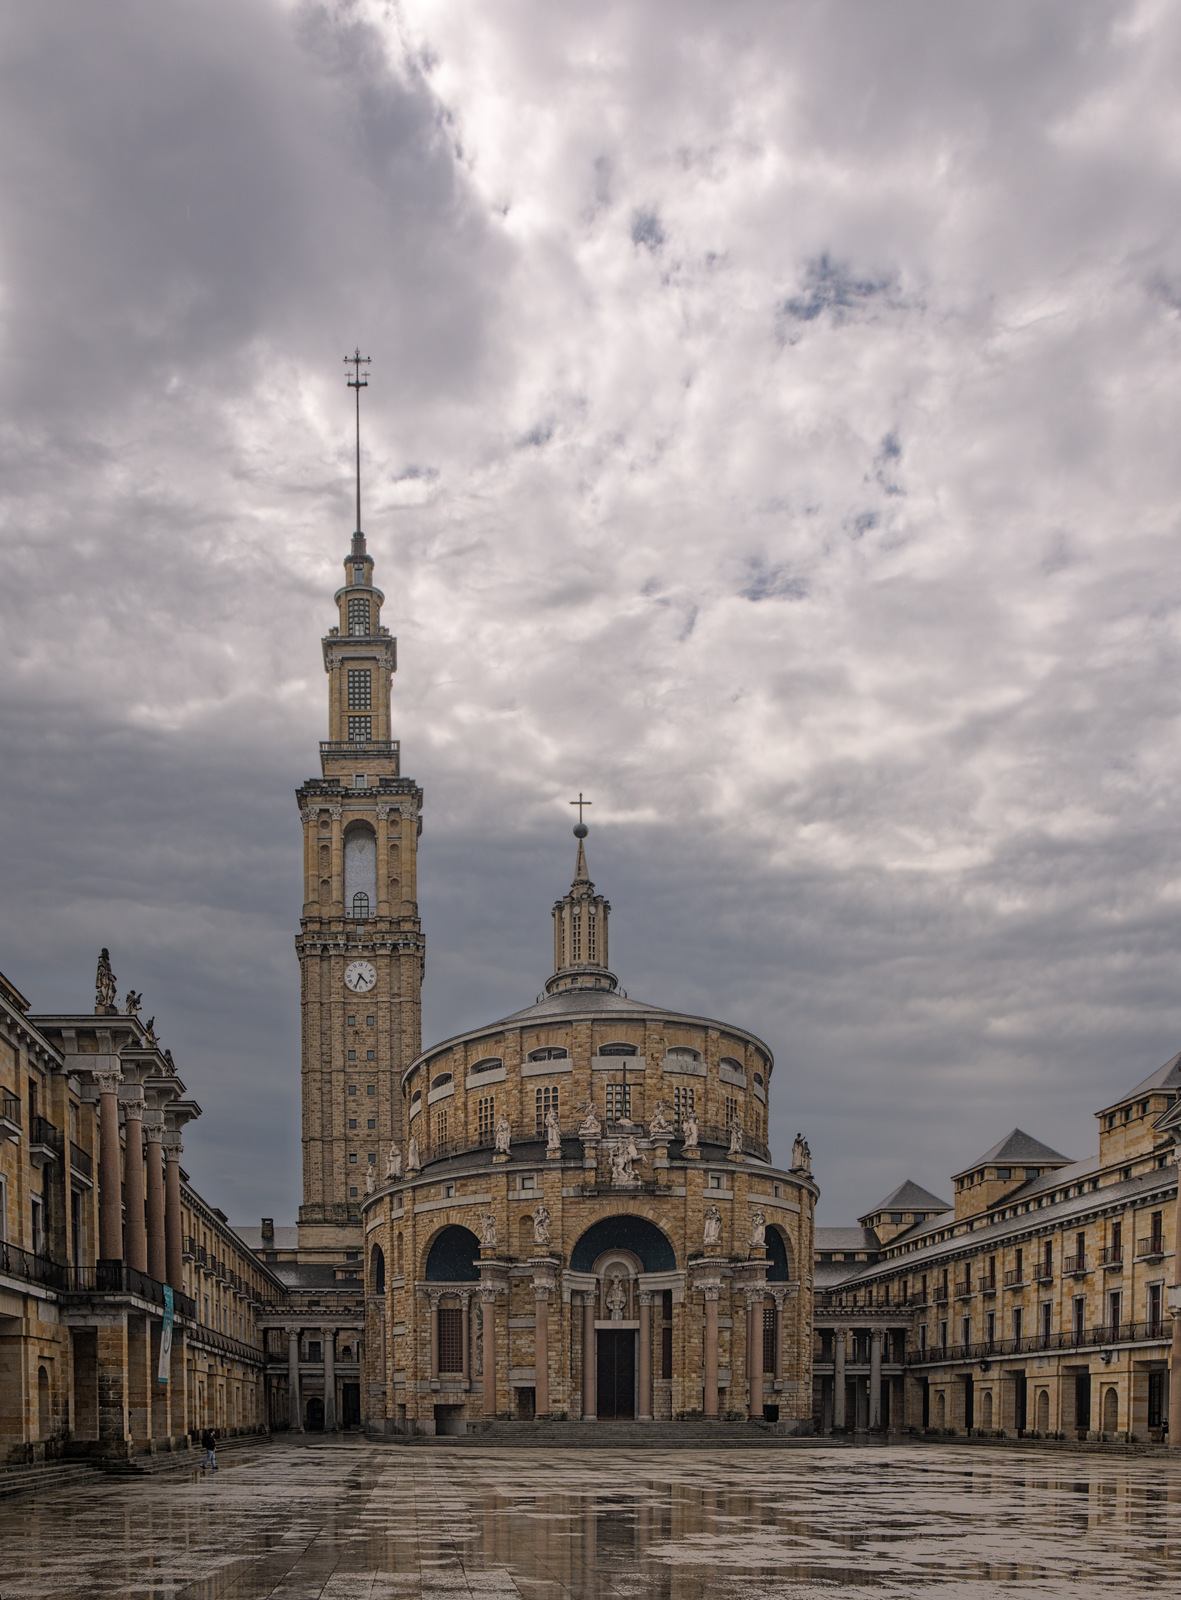
Here is an example with a raw photo of mine.
I have used color balance to tweak highight, midtones and darks separatly, some local contrast, contrast equalizer, and so.
I have upgraded the edit to use filmic v5.
to darken highlights and to work out some structure i use local contrast. sometimes several instances. with the detail slider you can work out the structure quite well
"global tonemapping does the best job for brightening and darkening in my opinion.
Maybe it would be helpful if we know what kind of dramatic effect you want to achieve, I think different people have different interpretations, a reference image would be nice, that’s what I often do when I edit my image, especially when trying new things, of course, have an understanding about how the module works is important too (i only used dt for about a week btw).
First of all thank you both for your interpretation.
You are right, @adrs
Indeed I have used a term not too appropiate I think.
I use to look for natural feeling in my photos.
Other interpretations more dramatic and artistic would be wellcome any way (you always learn from others interpretations).
But in photos like these, when you see the sky you receive a high impact in your retina, with all that tones in sky with many gradations and details.
When I use filmic many of those gradations are lost. I tried to recover them using color balance and was successfull to some extent, but with quite effort and tweaking.
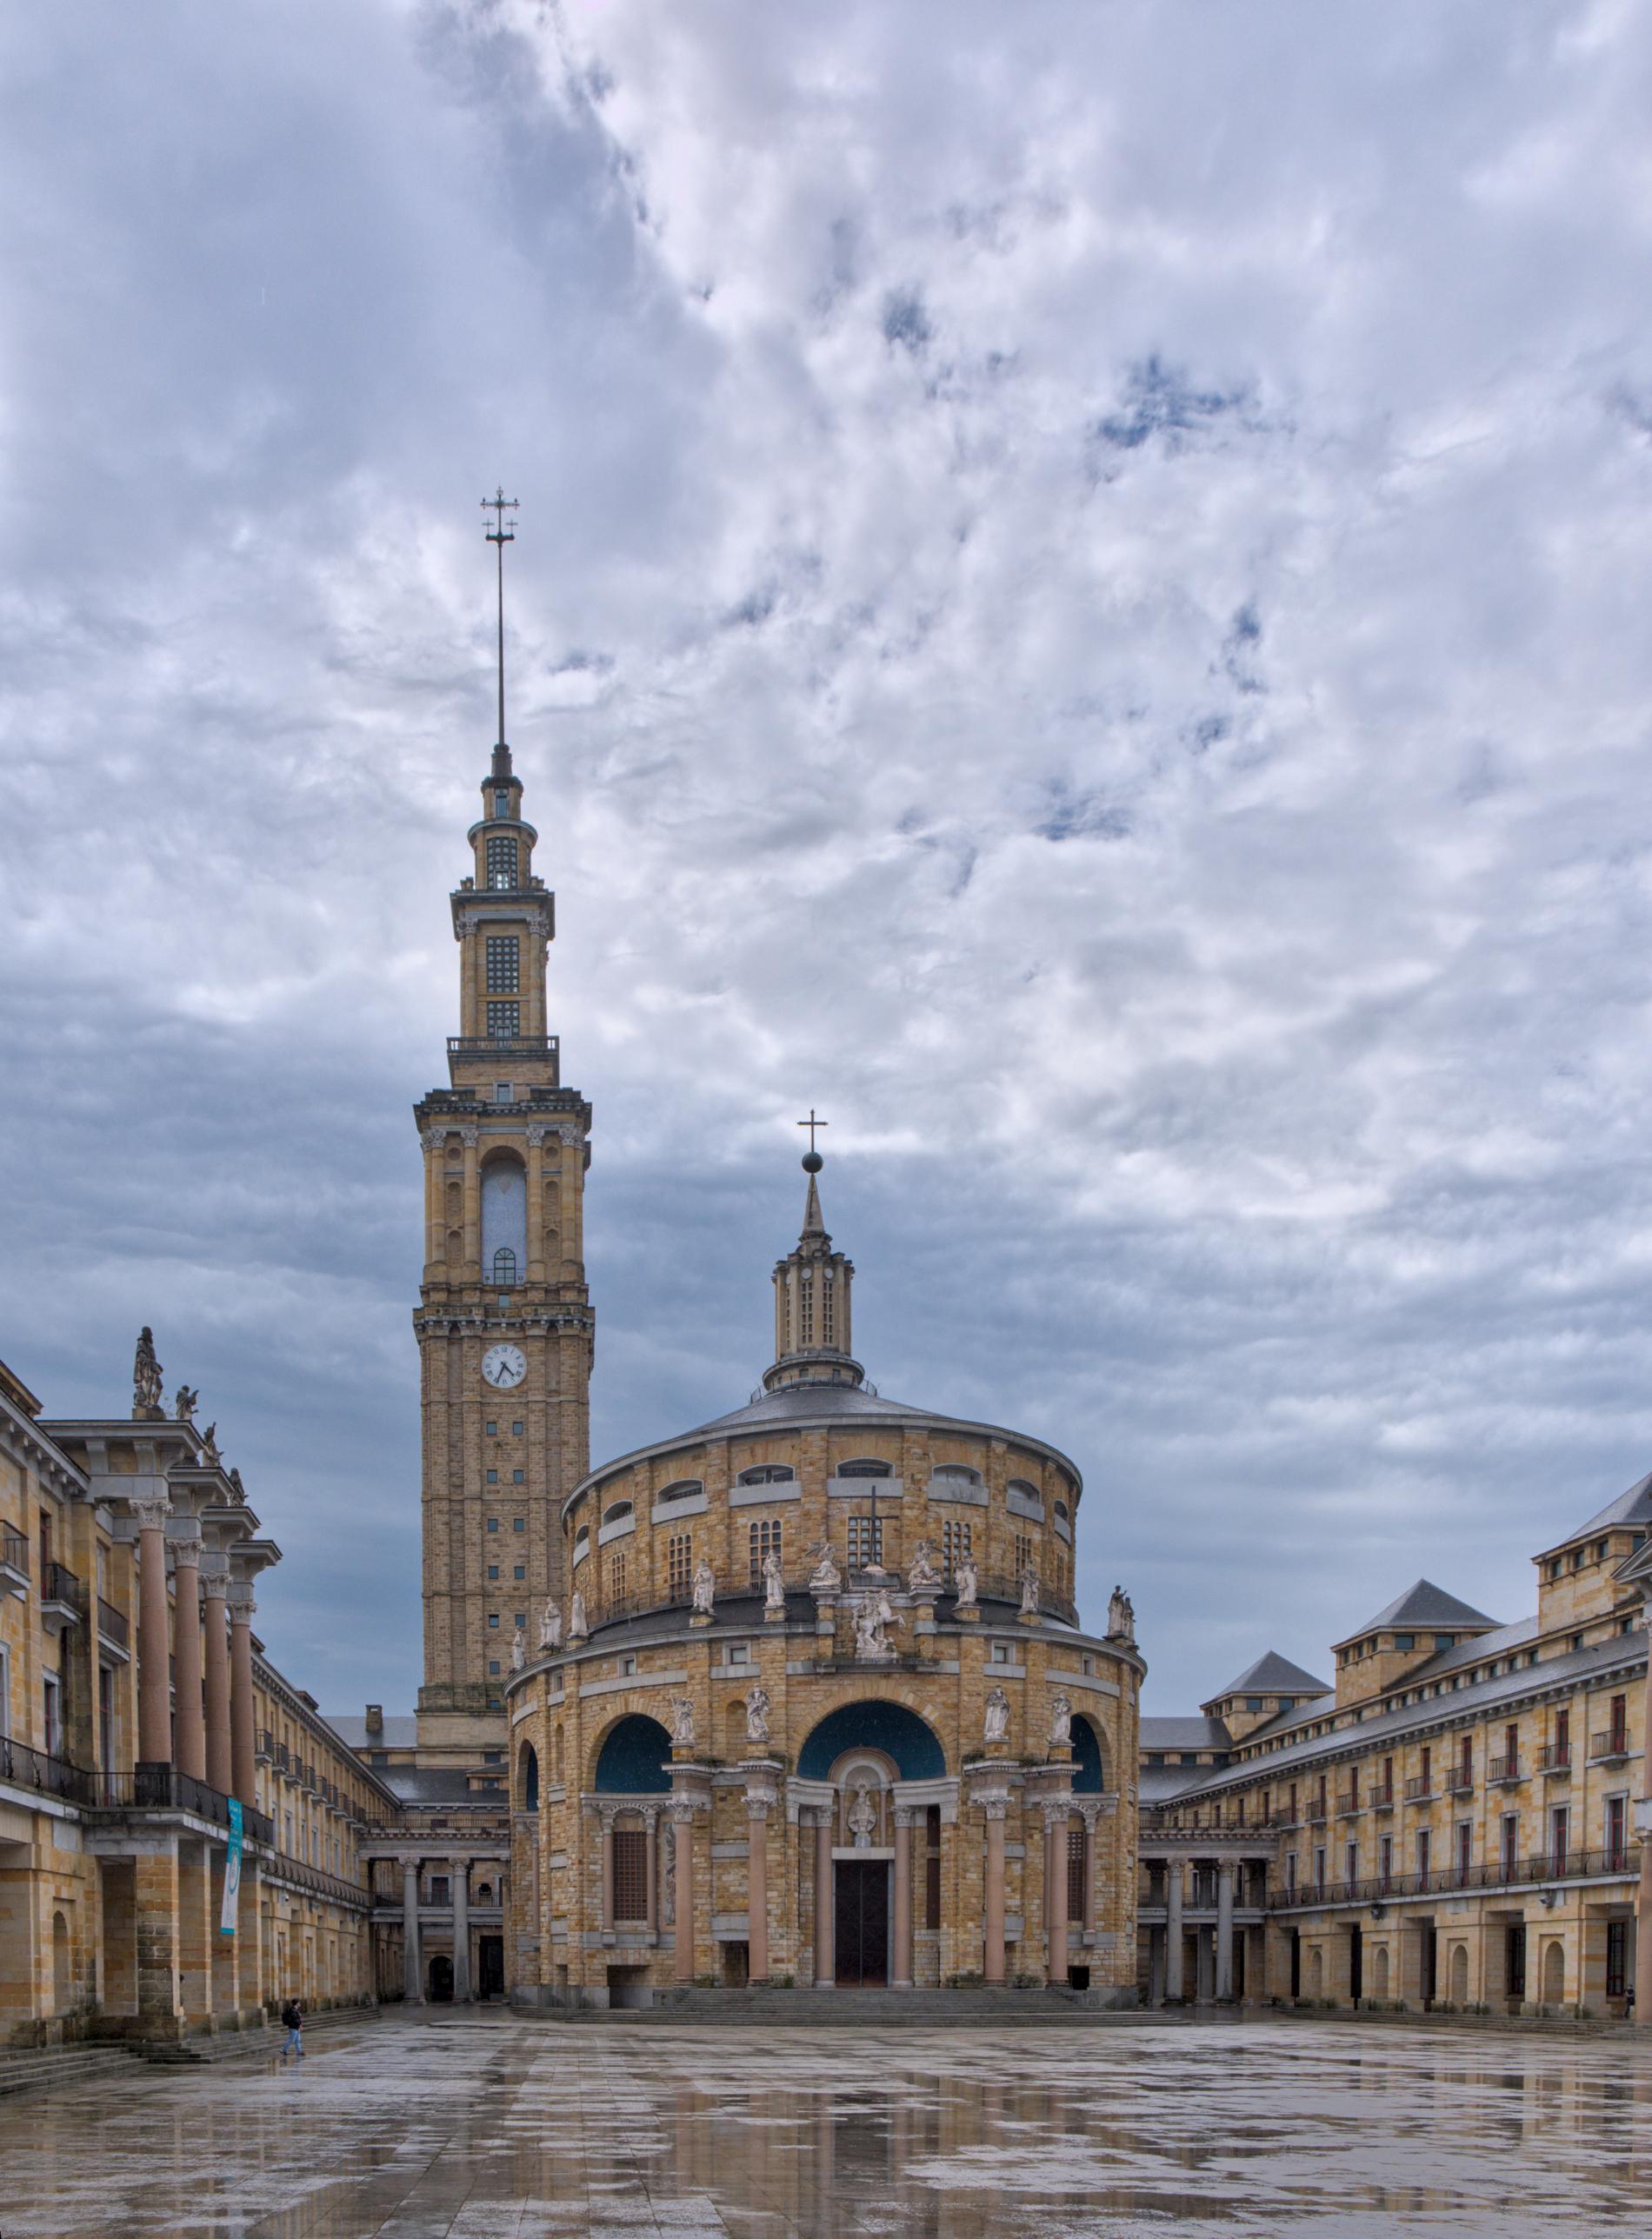
I find your sky way better than mine.
I was looking exactly for that, enhance tone gradation while looking natural, and with not too many steps.
I have to take a look are your edit.
May be I woul exagerate a bit more contrast an correct the blue cast in sky (a matter of taste or moods) but in general I find it quite was I was looking for.
If you have used no parametric mask and few modules, that is exactly what I was looking for.
It is clear I have not found the way for my edits in DT, it is not easy the transition from LR or C1 to the linear scene refer process in DT (even when I am sure it is the best way to go).
Whoa, i didn’t mean that term is not too appropriate, it’s just too broad, ahaha, sorry, English is not my native language.
Happy that my adjustment helps, I’m a C1 user too (already using it from v8), if you’ve got any questions, I’m happy to answer about the reason/adjustment on individual module because the adjustment is not always in a linear fashion (at least in my case), the modules order is flexible enough depends on my needs, especially the “Color Balance RGB - Grading”, and “RGB Curve - Tonal Tweak”.
And yes, I shifting a lot of Hue’s there (personal taste), if you want more neutral colour, just tweak/disable the “Color Zones - Color Tweak” and “Color Balance RGB - Grading”.
Basically, this is what I found helps me when I’m editing in dt:
I found it is easier if you set the contrast first before going to filmic (Color Balance RGB - Contrast & Saturation), after that use the Filmic RGB to set/restore clipped highlight and shadow level.
For the (clouds) local contrast, I used the Local Contrast module in reverse multiply, basically, the detail and highlight slider controls the amount of contrast, opacity controls the shadow density, and blend fulcrum controls the white points.
I think it wouldn’t overwriting the original version, i’m using duplicate manager feature there, that’s why it got an _01 suffix, maybe you can just place it beside the original xmp, but please be careful, i’m a newbie too in dt.
Yes, colour balance is applied before filmic by default, but i think the default order is for colour cast correction, if you want to grade your photo using it, placing before filmic will keep the highlight fairly neutral and tamed (because of the filmic curve roll-off), if you want to tint the white or lift the highlight more, i suggest placing it after filmic, but i found it easier to tint the highlight using curve, but still, it depends on the look you want to achieve. I used both method.
I normally leave filmic as it is except contrast set to 1,35. In this case, I also fiddled a bit with the reconstruct tab and highlight reconstruction (reconstruct LCh).
Separate exposure for the building (maybe a bit on the HDR side, adjust to your taste via opacity). Contrast and colour with colourbalance rgb.
wait, isn’t filmic default contrast is set at 1.35? or is it different from camera to camera? or is it me messing around with the default value.
I agree that it is easier to adjust contrast and saturation in colour balance RGB, and it also helps for determining the middle grey value when adjusting exposure because the pivot/fulcrum is already at 18% grey. In my case, I set it as the default adjustment for every picture.
btw, the building looks great! I don’t realize that there’s a blue/cyan colour in the arch on the middle building. Maybe I’ve missed it because I like to set my shadow deep early.
Nice edit. I went totally HDRish on my edit just messing around with trying to add some color to the stone. So this one for sure has a large range of possible interpretation. The original if I recall was quite dark and stark but that can also be a look if you go dark and moody. I really need to calibrate my screen. Looking at my edit now on a different computer is seems far more "yellow " than I recall making it…