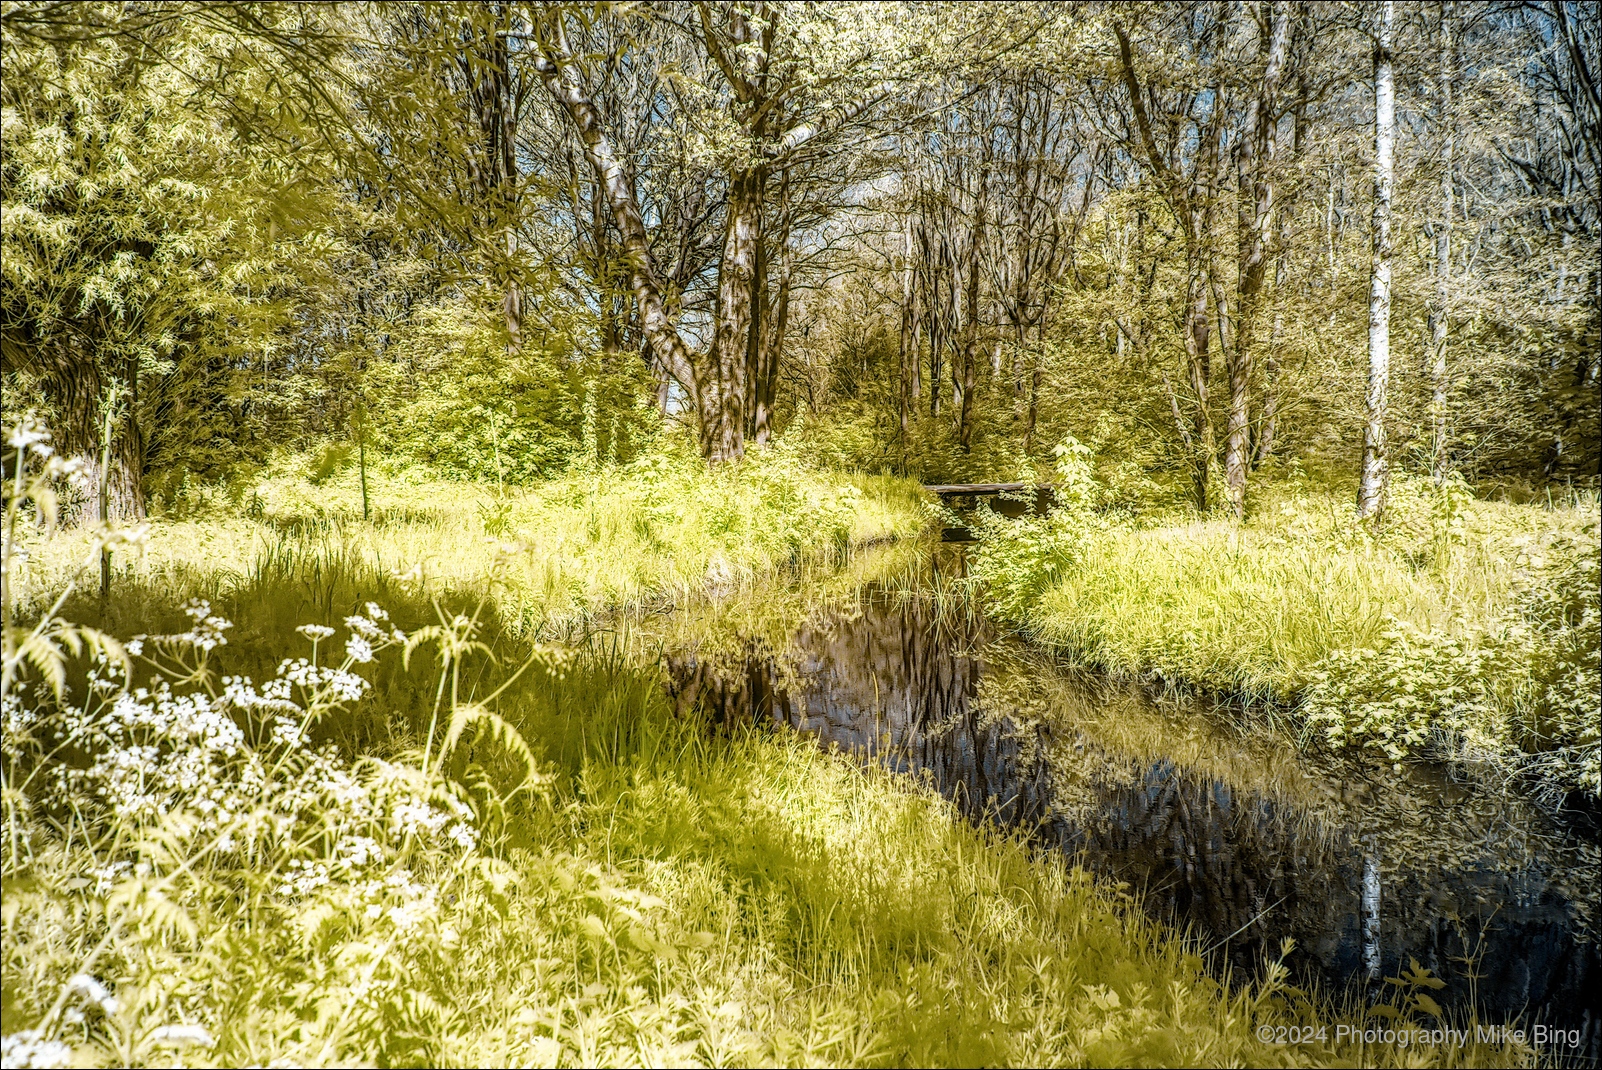
Here’s an image taken on a full-spectrum Pentax K-3 with a 550nm filter on the lens. The resulting raw was converted with Darktable (channel swap RB split G and some manipulations in the color zones module) which resulted in blue skies and orange vegetation. I used Gimp to pull the vegetation more towards a Kodak Aerochrome red using the Hue/Saturation tool to change hue on the yellow shades in the image more towards the red.

14 Likes
Hi.
This looks very interesting. Like from a horror or sf movie.
Hi, have you try to use filters to restrict wavelength and shot multiple raw with different restrictions ?
I’d be curious as well to know if it’d be possible and interesting to have a custom demosaic module/method that’d take 3 different raws (shot on a tripod with restricted fullrange converted camera) and demoniac those to be processed as a single pic.
Anyway, I’d really much would like to get a cheap converted just to see for myself and try ![]()
Not quite sure what you mean by “restrictions”, sorry. But if that answers your question, I always shoot raw but I never shoot the same scene with different filters.
Again, not sure I understand. I use the exact same demosaicing method (RCD) on most of my raw whether visible light or infrared and all of my cameras.
Nice reds!
I have similar from a Sigma DSLR with it’s UV/IR blocking filter removed and the full-spectrum raw X3F opened in RawDigger, no channel-swapping needed:

In the GIMP, Color>Map>Alien Map can be fun … here it is at default settings applied to the above:

Having sold my Sigma DSLRs, I now have a converted Panasonic DMC-G1 - not so good on the IR because they left the CFA in place but WOW it is so good to have live view thereby cutting down prior guesswork. ![]()
This whole thread is feeding an idea I’ve had for some time now and was discussing with the owner of the company that converted my cameras. I had some time ago ordered a hot-mirror filter from STC Optics (the clip-in type that sits in the lens mount) and he is kindly providing me with a 2nd-generation coated 72mm hot-mirror screw-in filter.
The idea was to do some detailed comparison at various apertures and focal lengths using my trustworthy 16-85mm lens which to my surprise turned out to be a decent performer on an infrared camera. After that, I’d write an extensive blogpost on the conclusions of clip-in vs lens filter.
I now have an idea to set up the camera on a fine sunny day and shoot the following series for comparison:
- visible light image using clip-in hotmirror filter
- visible light image using lens-mounted hotmirror filter
- infrared channel-swapped image using a 590nm filter from Rocolax which I ordered on AliExpress
- infrared channel-swapped image using a 665nm German Heliopan from Foto Mayer in Germany
- infrared channel-swapped image using a 720nm cheap (dHD brand) filter from Amazon
- infrared channel-swapped image using a 720nm filter from Hoya which I purchased in a local B&M photo specialist store
The purpose would be to not just grade how the colours turn out but also whether any filter is more prone to hotspotting than the others and primarily, to judge the effect on corner/edge sharpness and overall clarity and contrast.
No science TBH but just seeing all of the results side by side should be interesting.

3 Likes
I had a similar idea with my Sigma DSLRs which had a removable hot-mirror filter in the lens-mount. I tried various lens screw-in filters but encountered obstacles:
A B+W 486 dichroic filter with a response similar to the Camera’s was indeed close but gave a horrible green vignette with wide-angle lens.
So onward to dyed glass types such as the Kolari ‘visible’ and others with various IR/Red roll-off curves. All of them had no vignette but did have a pronounced blue cast; fixable in post, but inconvenient.
In the end I lost interest, put the proprietary filter back into the lens mount and sold the filters.
Here’s a series of images I shot using a cheap 590nm filter a few days ago. This is the kind of scenery I would aim to do the proposed filter comparison on. The 590nm is quite easy to manipulate into various colours as you can see mainly by using the [color zones] module in Darktable after a channel swap.


3 Likes
What wavelength is the last “green” one? Or is the green shifted in post?
590nm as I stated above and color manipulated in the color zones module of Darktable.
1 Like
Sorry, I had in mind an experiment to be done with de-bayer full range … it does not really have a sense with the bayer on…
Like in astro photography where you can selectively capture certain wave-lenth then recompose an image with artificial color to represent the combination of the data.
1 Like