Local Lab newbe - BASICS

Hi,

I use RawTherapee and it is great.
I want to extend my abilities - using local lab.

Below are my experencies first using local lab in RT. I really apreciate the work - just use my story as a some sort of first user experience with this new feature.

Decided to do an easy thing to start - I want to sharpen left half of the image and not sharpen the other half with smooth transition.

I expected that I can do this using local lab. Played with version “RawTherapee_newlocallab-win64-5.7-1785-g46d40f734_WinVista_64”.

But I cannot find how to do it - it seems that it is designed to something different, and such a simple thing is impossible :slight_smile: There is interesting sophisticated algorithm with 10 settings to select some things and not select another things in this little circle. I read this complicated guide about some strange spots here Local Lab Controls - RawPedia. But I want to start with something simpler :slight_smile: and leave the sophistication for later …

Please guide me - maybe it is not a task for local lab ? Which branch to use to perform such a task ? Or maybe the local lab is only for those people who knows some other software - there are some references in the forum to NIK - I did not use this.

Treat this entry as an user experience first impresions and expectations of local lab.
And really - I will appreciate for an answer weather I can do this simple thing with sharpening :slight_smile:

Thanks in advance !
Regards !

@nullnull
Hi,
I don’t know if you know but:
To start you should know that when a module has 1: 1 on its right:
Sharpen1

the changes you make will only be seen when the image is 100% enlarged
Sharpen2

(edit) See: Editor - RawPedia

That’s why maybe you don’t see any change
Regards.

@nullnull ANother thing you should consider is the little word “local” in the name of this branch. Local means you define an area where things should haben. To identify an area you set a spot and a shape …

@nullnull

First of all welcome :slight_smile:

Difficult without an example, an image, a pp3.

For sharpening, you have the same settings as in main (algorithm used is RL deconvolution)

The only additional slider is “Scope” which materializes the “range” (in terms of color) of your modifications

Others settings are in “Settings” and defaults must be good in most cases

In fact, it is very simple, and as says @arturoisilvia , first you must be at 100%

After, just put the RT-spot where you want to “sharpen” and play with sliders “sharpening” (radius)

If the center of the spot is in a sky, and you want sharpen a building, you will believe that it does not work, because there is a big “Scope” (deltaE) between sky and stones

So the center of the RT-spot should be on the subject you want to change, if not you must change “scope”

By default the transition is at 60%, that is to say, that 60% of geographical area wil be concerned with full change, after there will be a progressive smooth.

The reference to Nik software that you evoke, is an example I give to explain…Nik is used by NikonCapture NXD and Dx0

I hope this help.

Jacques

Hi,
Thank you for your answers - I really appreciate it,

now I understand that my example is hard because it involved sharpening, which have to be watched in 1:1 - 0k.

To make things simpler - as you suggested - here is my example picture - suppose I want to sharpen the center, or only the upper half.

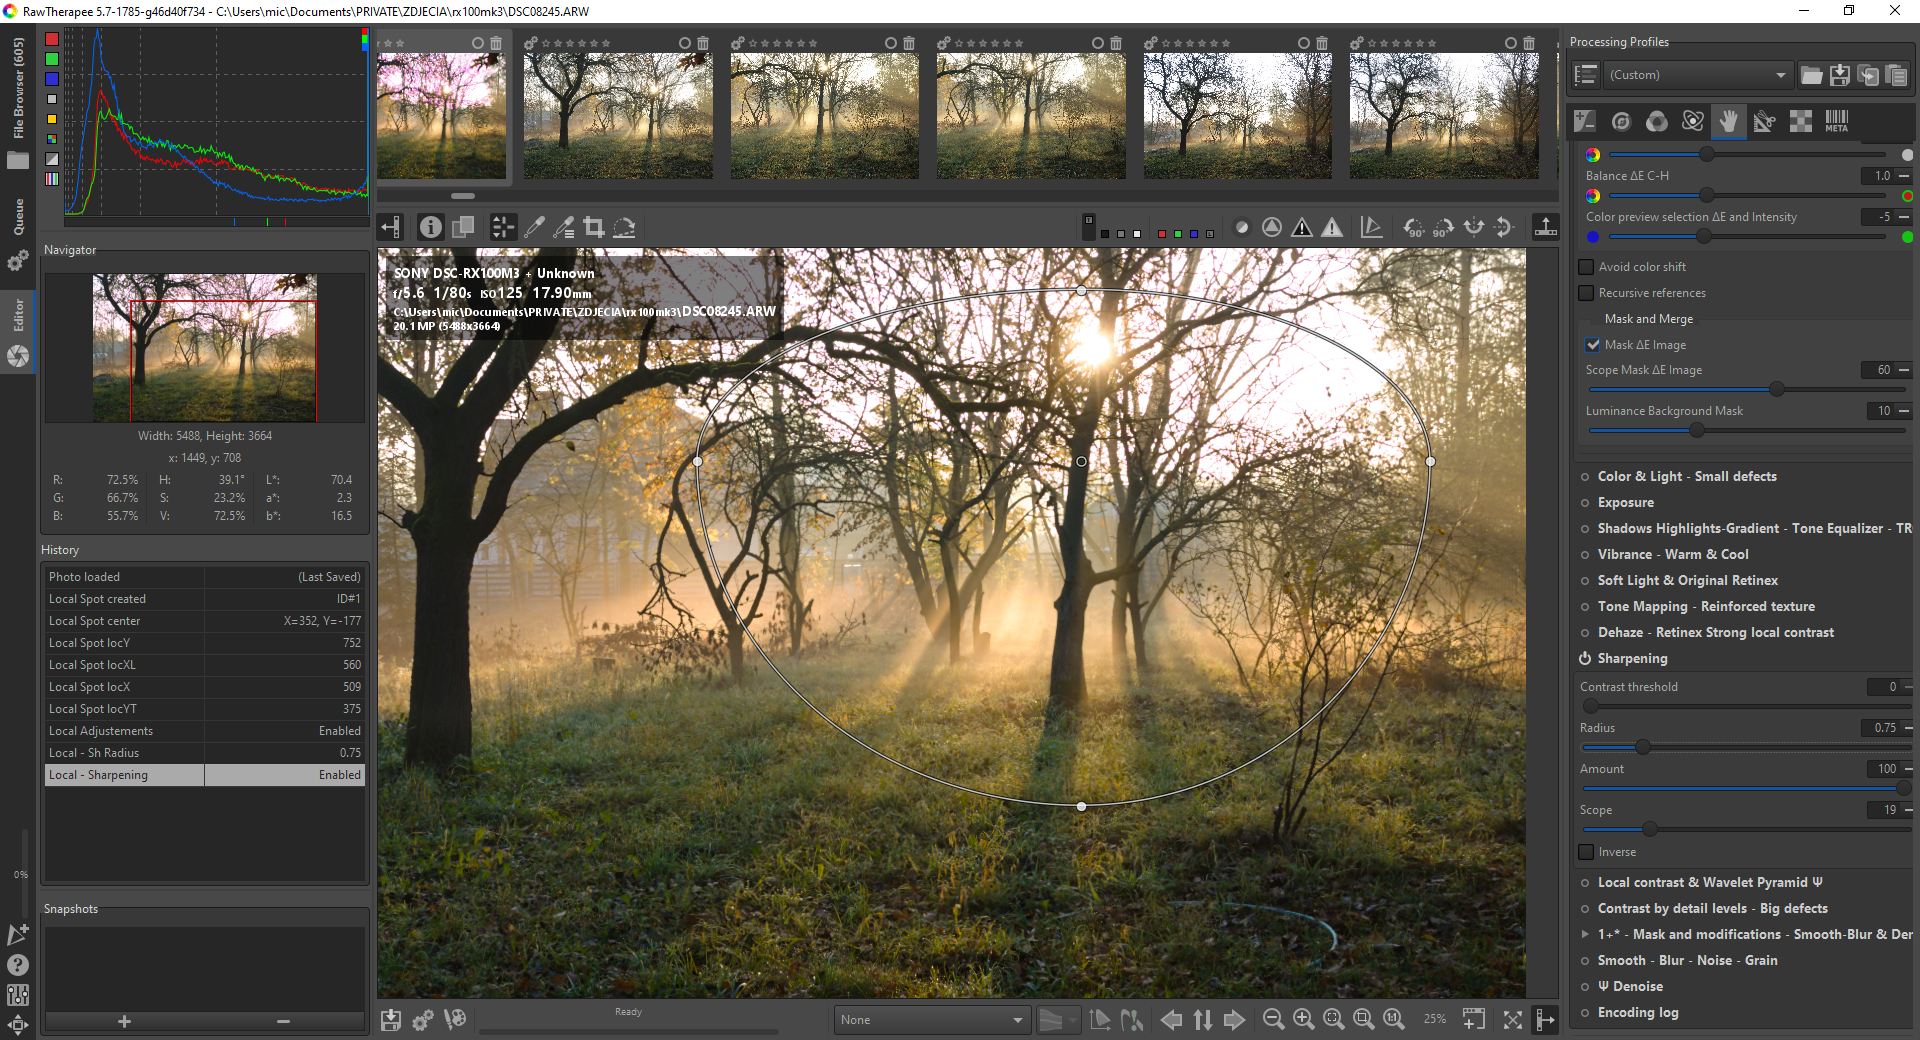
I understand, that I cannot just sharpen the entire elipse - I have to select tree, grass, and background (3 spots) each time and provide sharpening for this 3 spots ? Don’t get me wrong - I appreciate this “smart selection” algorithm, and I see many applications for me -e.g. sky. But I also want/expected straight “just perform changes in the entire elipse”. First time user of local changes (me) expect this as a first choice, and then whan you know how it performs - that advanced smart selection algorithms :slight_smile: Or maybe there is such an option I haven’t found yet.

regards

If you want to sharpen all elipse, change “scope”

At 100% all color will be taken into account in the same way.

it’s a matter of choice, depending on what you want to do

In this module (sharpening) there is not “Mask and modifications” …to simplify…
But to see the interest of scope, go for example in “Color and Light” - enable of course - acts on nothing…open “9+* Masks and modifications - Masks LCH & structure” - “Preview selection deltae” and play with “Scope”, you will see the areas concerned by “scope”

jacques

OK,

Thank you for suggestion - I will play with “colour and light” and check what Masks and modifications does and will report back.

I will also test “scope”.

OK, but to be clear

  • In your case, “Sharpening” - Scope should satisfy you

  • Preview selection deltaE (as Show modifications) does not use any work mask, it is only “visualization

Test well :slight_smile:

Hello again!
Allow me two suggestions about your image.
Since you want to focus attention on the center of the image:

  1. In the ellipse you already have, activate “Smooth - Blur - Noise - Grain” and set:
  • Radius: 15
  • Scope: 100
  • Inverse
    You have to go down in settings “Transition value” to a very low value (from 2 to 8)
  1. In Exposure tab (Shortcut Alt-e): Activate Vignette Filter and set:
  • Strength: 2

Look to see if it looks better.

Greetings.

Ha ! “Preview selection DeltaE”

Now I SEE !

thanks @jdc

Lot of fun, thanks @arturoisilvia !

last photo, before some admin will tell me to stop uploading …

OK. What I learned today …

  1. All tools in local lab has its “scope” to control its auto-detecting feature.
  2. The detect feature can be previewed by deltaE (remember to turn it off, because it will not show you your changes even when “Colour & Light - Small defects” is disabled.
  3. PLENTY OF TOOLS AND LOTS OF FUN. Still much much to learn…

Thank You for your glorious support with my questions.
You have 1 more local lab user here.

Have a nice day.

1 Like

That’d be pretty counter productive…

@nullnull

I added (commit 6e3fd50) to “sharpening”

  • a) show modifications
  • b) Preview selection deltaE

You must be at 100% for a) and b) (it is a diffrence with others modules)
For “show modifications” I have “turn” luminance variations (sharp feeling) by "chroma differences in “b” channel (L* a* b* ) or “blue - yellow”

Jacques

@paperdigits Treat my comment with good intentions - I think now that I was self-restraining myself from uploading photo after photo during my session of “having fun with local lab” when things started to work :).

Thank you, I will try it when will be available in nightly windows local lab build.

PS What I didn’t write, but also searched for was this preview button (preview deltaE functionality) here:

obraz

@nullnull
This button you show above, in preview, is not a preview deltaE functionnality, but it shows the focus mask

jacques

I was aware what it does - I was wandering whether it would be beneficial to provide such a new button for Local Lab. For me seing is believing - and seeing the local lab “auto object selection” has shown me what is going on

OK

But it’s incompatible with the concept of “multiple spot”
Each Rt-spot has its own settings, here each spot have individual “scope”

That’s why we find settings for each spot : sliders, masks, modifications, curves

But for each Rt-spot and each module (except 1) there is at least 2 or maximum 6 ways to see the changes or the apperance of the change, or the conditions of the change, or the steps of the change

jacques