But where did you (or rather dt) get that value for the white level?
16383 == 2^14 - 1, so the largest integer value that can be stored in 14 bits. As it is an integer field, in principle all values are valid. It looks to me when dt cannot read a value from the image metadata, it silently uses the maximum possible value for the bit depth of the raw…
And yes, if it happens, it happens for all images from that camera body. I use a Sony, and it has the same issue (solution: auto-applied preset…).
Like I said, in the particular image from this thread, it doesn’t matter, as all pixels are below the lower of the two values. If it does happen (in other images) an indication is a magenta zone that’s not recognised as clipped (and doesn’t react to the highlight reconstruction module)
@priort i think someone else has posted about this issue already. I think Sony decided to claim the white point to be the full range of 14bits, even if the camera is not using it. The makernotes seems to be the accurate value to use. The issue needs to be fixed in rawspeed for it to look at makernotes for these cameras.
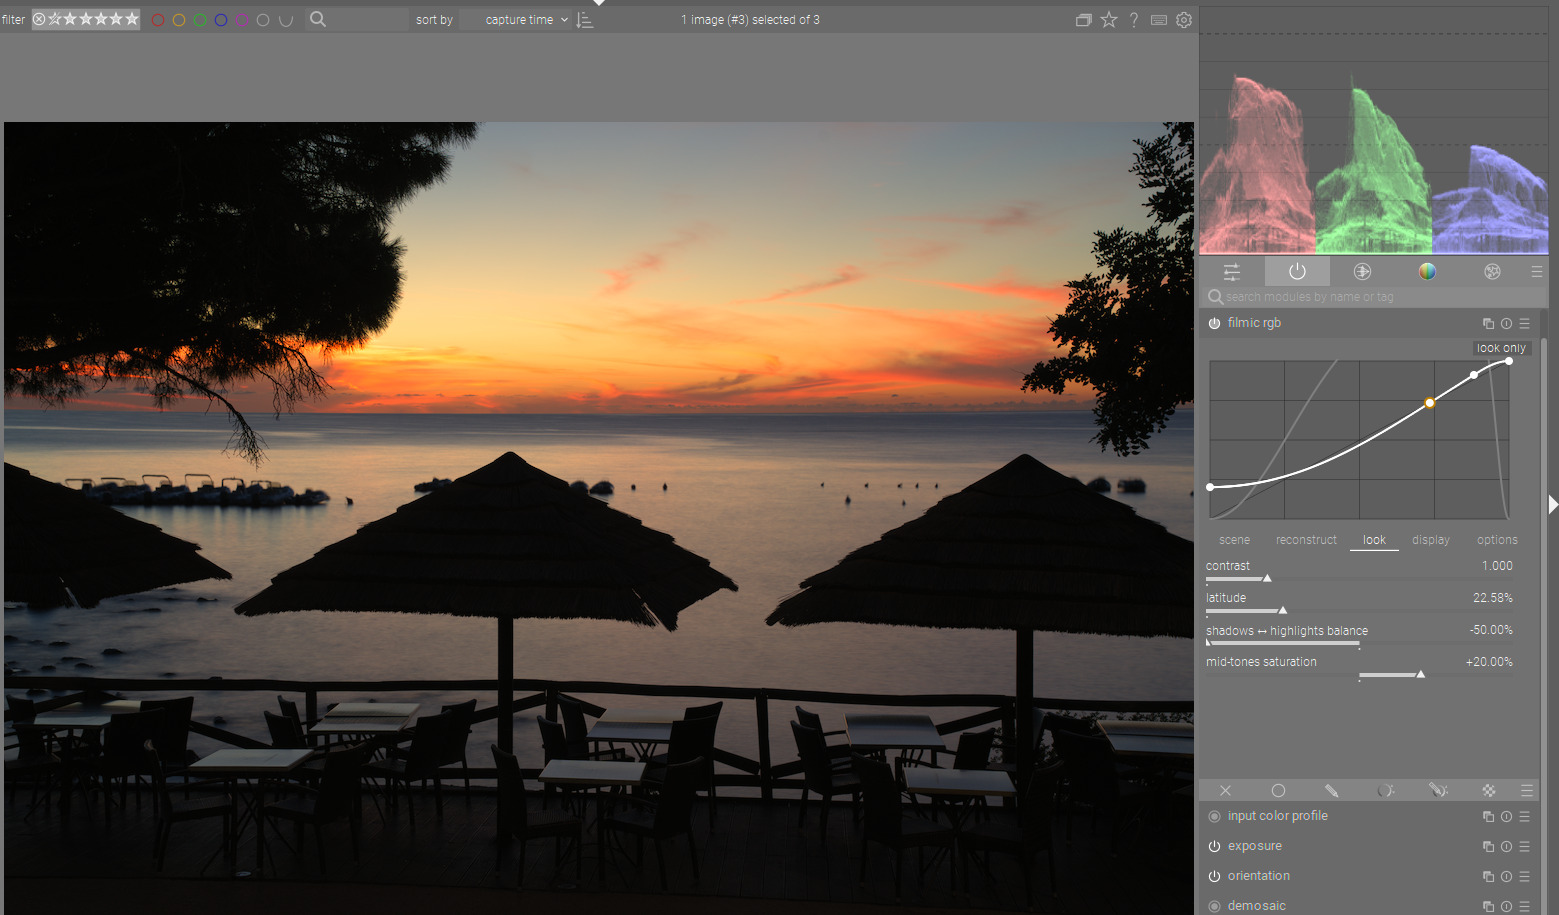
Thanks for the explanation and update on rawspeed… The first time I checked the white level using xnview to review the meta data I had not scrolled far enough down so I only saw the initial value ie the one DT is using until updated and I hadn’t reached the data in the maker notes…I think with this issue noticed by the OP its just a byproduct of the channel values and not really a highlights thing… Looking at the histogram… things will be exaggerated when you start to mess with color and exposure… I think when you open this image in DT with default v6 filmic and bump the exposure a bit you get what the OP was commenting on… Its easy enough to adjust if you know the tools but for a new user I guess they could initially be taken aback by the sudden magenta appearance…
EDIT…
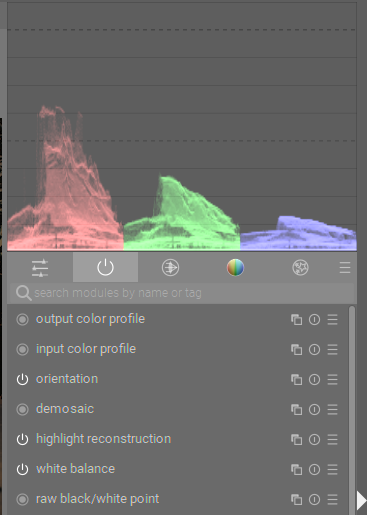
Is this just a visual thing on the histogram or am I too asleep this morning to figure this out?? I have disabled basically everything here and just raising exposure seems like it boosts the channels in a way that is not proportional and they seem to have different clipping points on the graph?? As I said likely just some artifact of the graph or my slow brain this morning…
If you note above it the screen shot I posted that is teh meta data for that file …just in the exif section of the data and DT used that… The values you provided come from the maker notes section and as you point out seem to make more sense… I think there is some sort of fix in the dev branch of rawspeed so it should filter soon to DT…
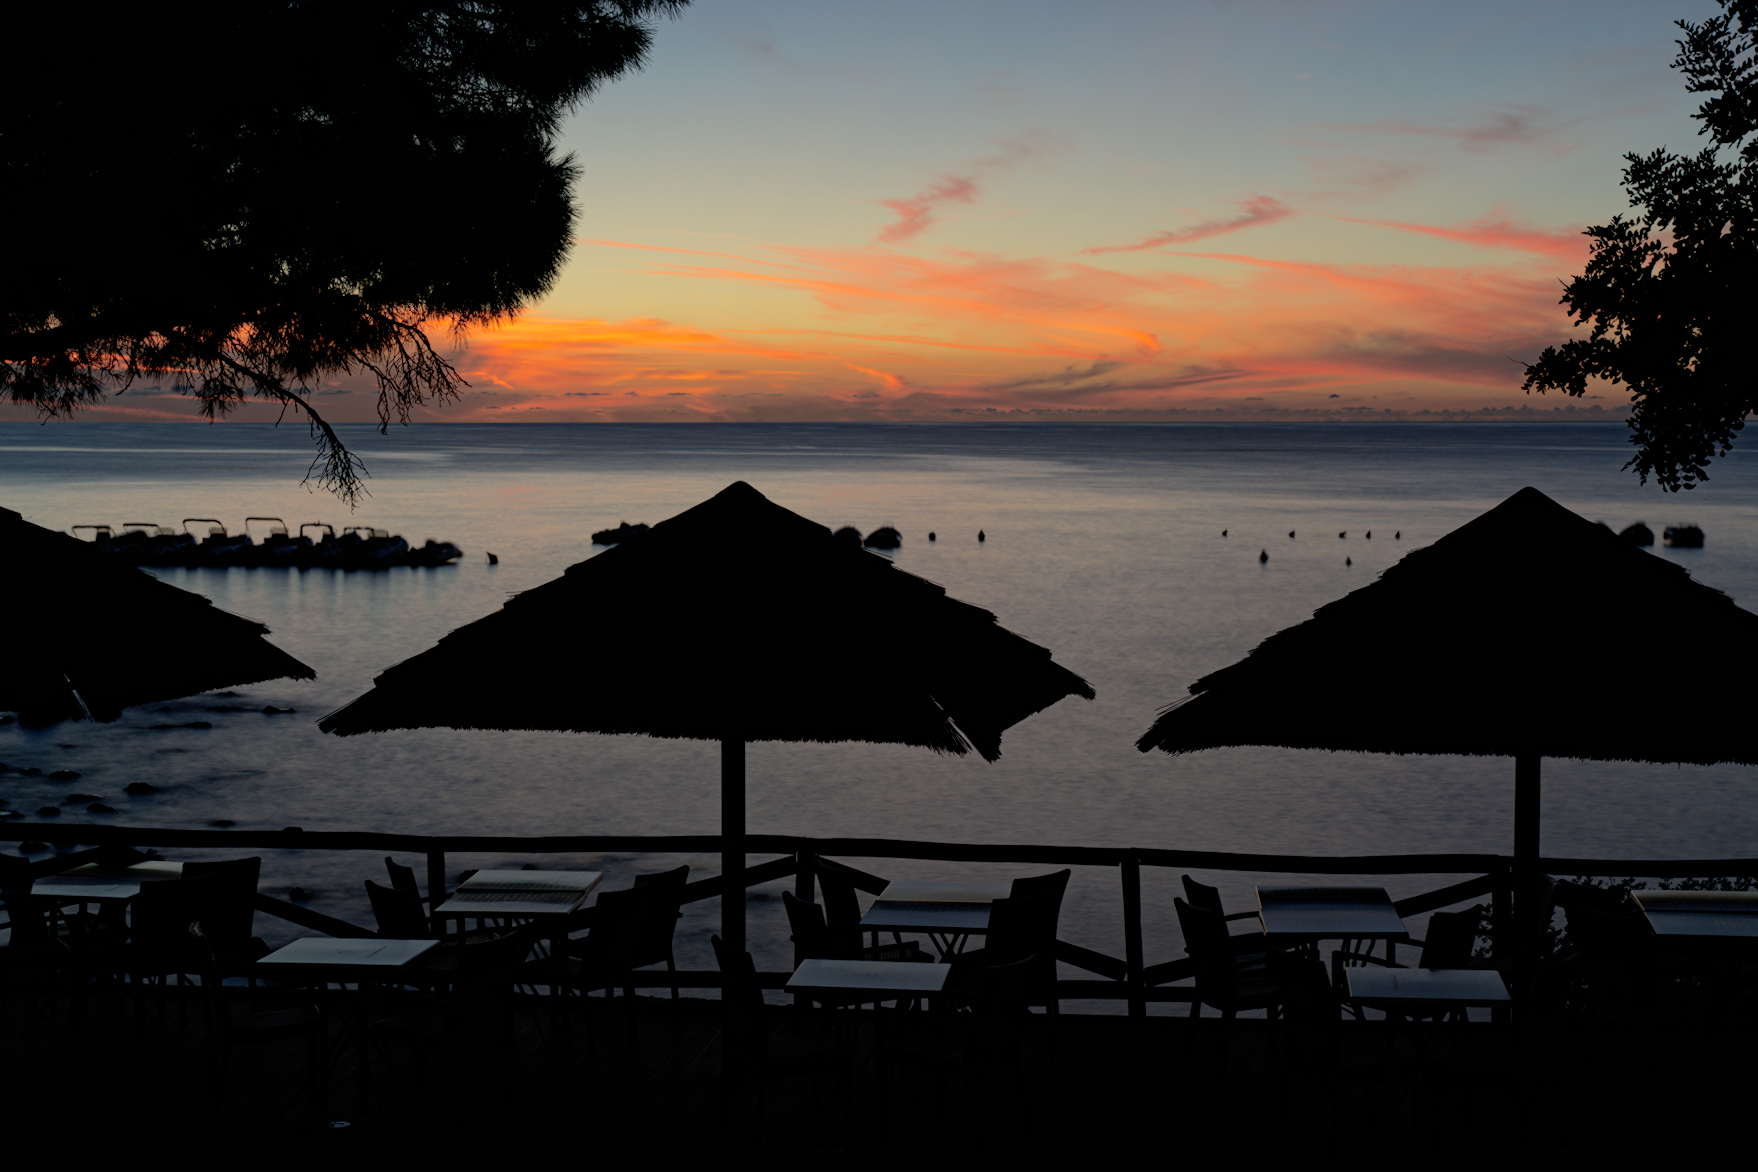
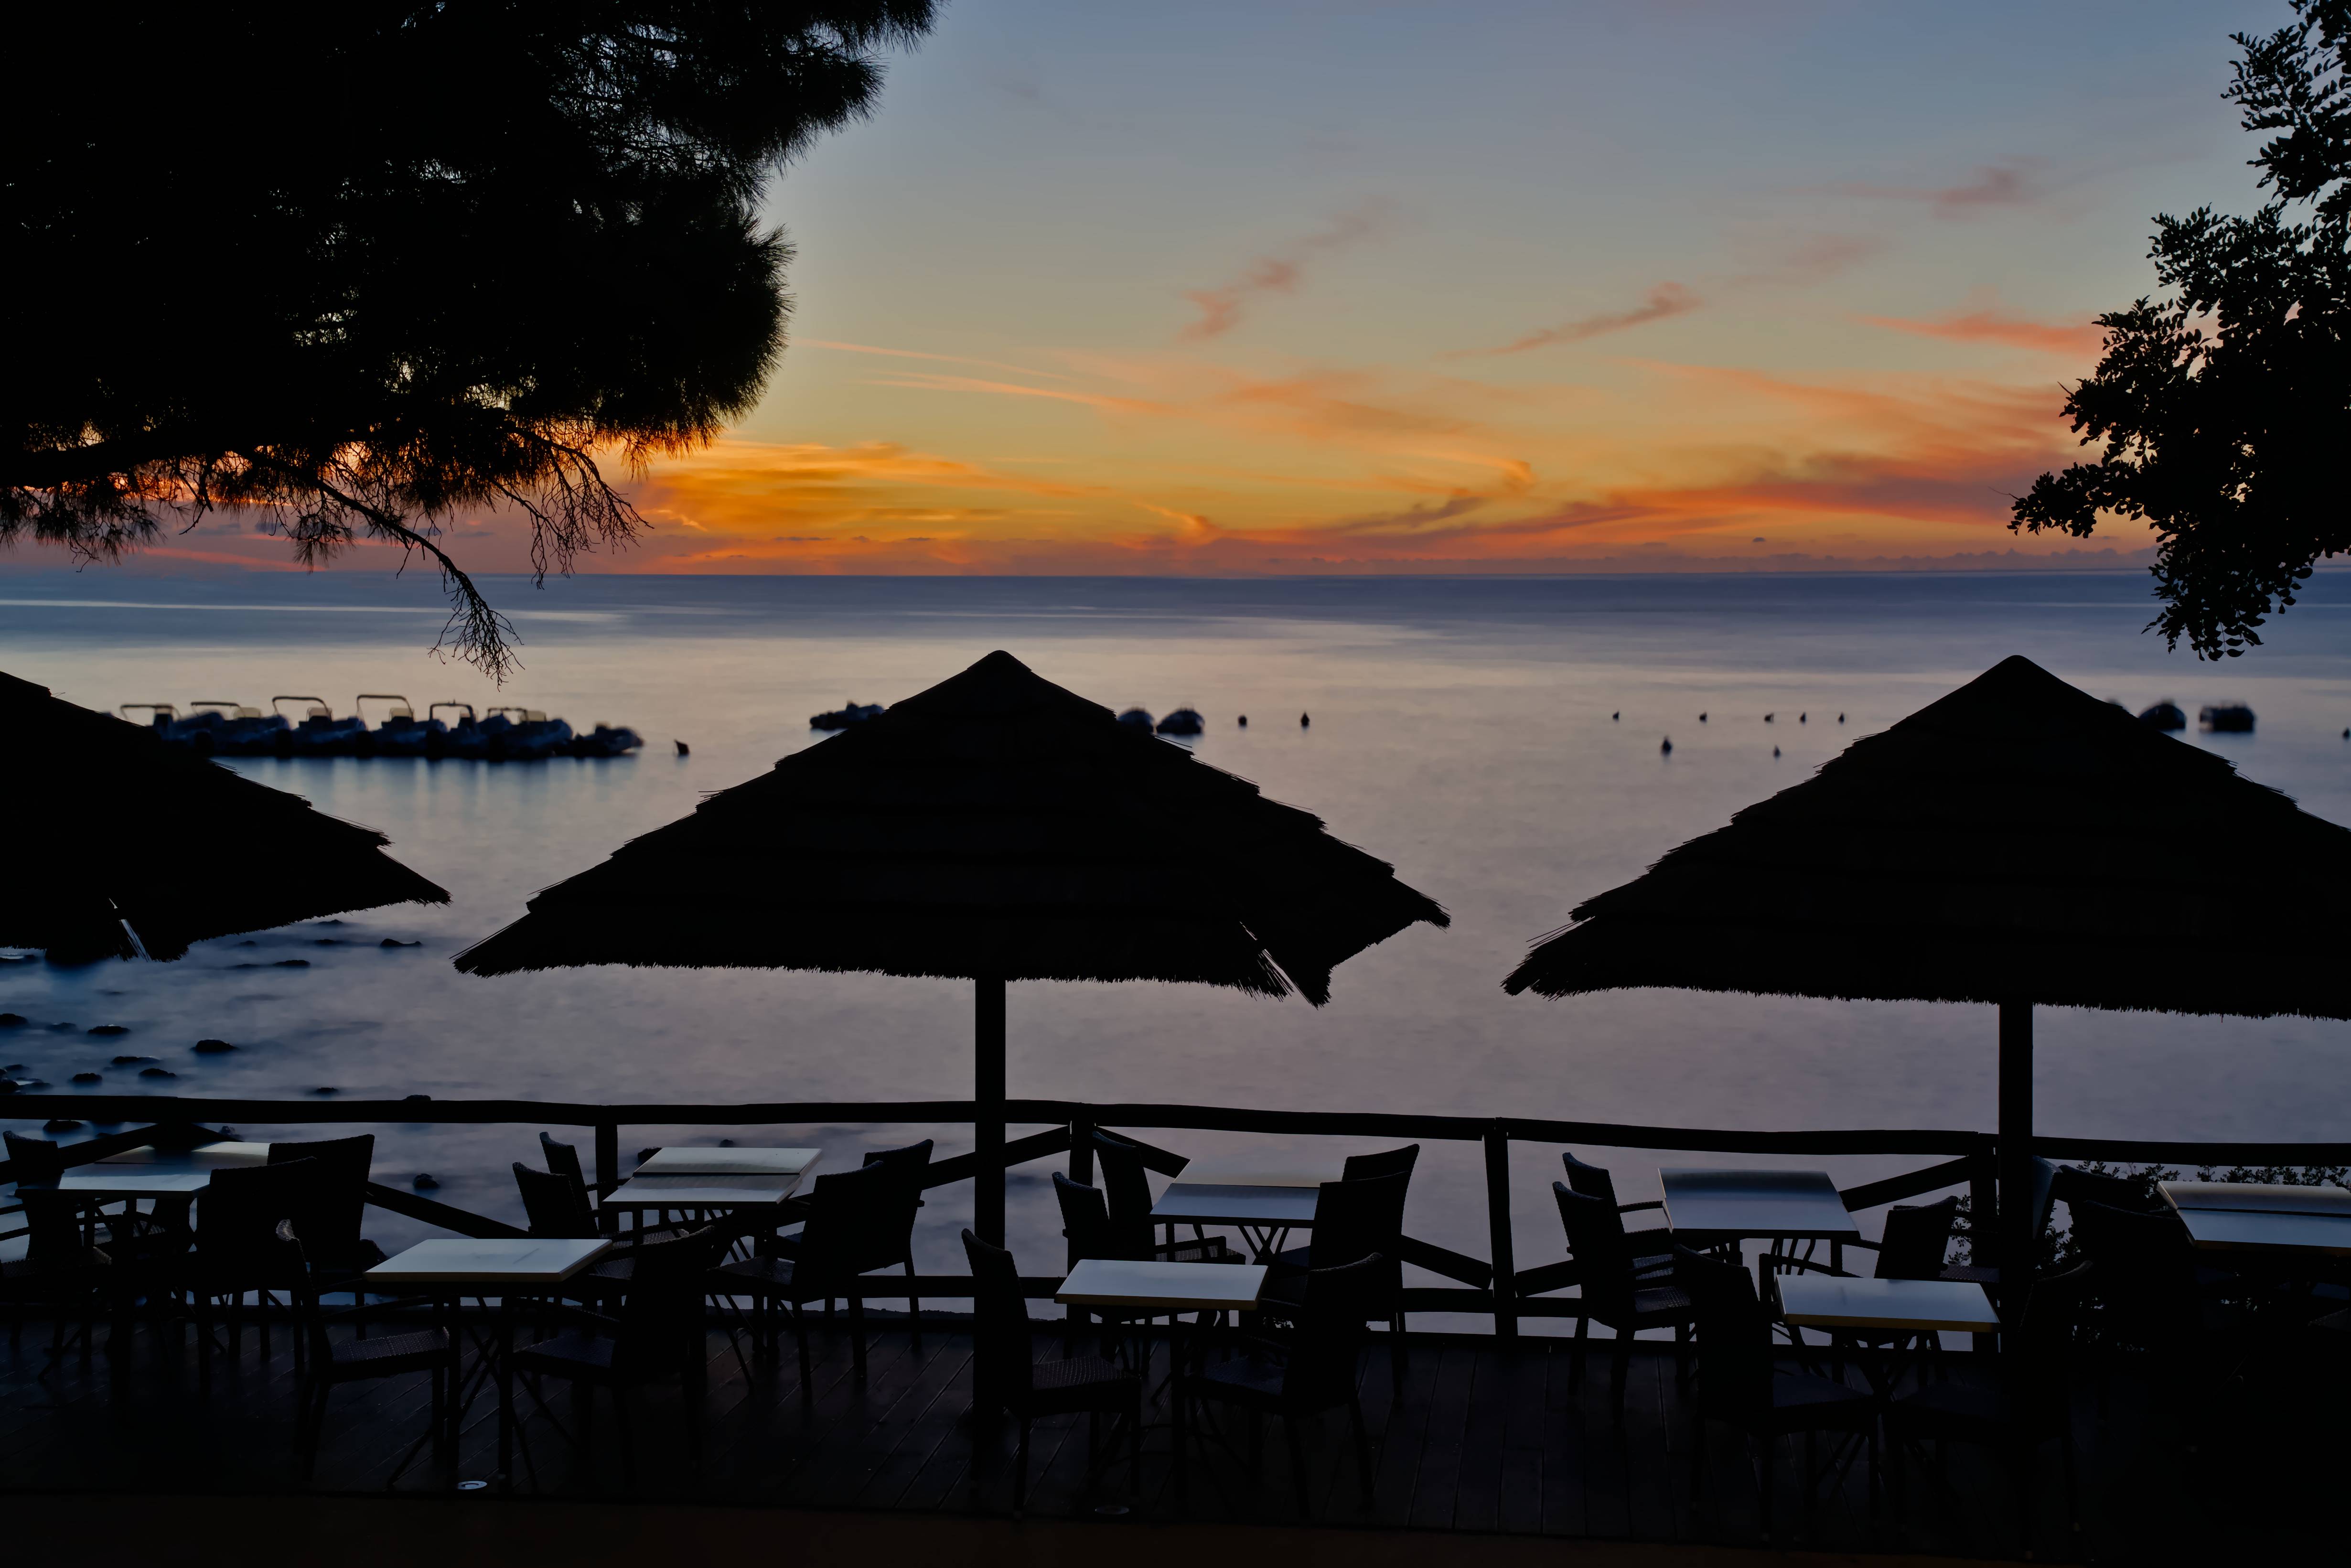
@Thomas_Do I’m also running darktable 4.0.1 on linux. Your clouds are not as pink as mine, but the natural yellow-orange color of the sunrise, as also seen in the JPG, is no longer present.
I think @priort gets the best results with natural yellow-orange clouds. The clouds in @wapitifass , @dqpcoxeas and @kakashy versions are still a little pink and miss the yellow-orange color.
Colors seems to be good if I disable filmic rgb module! For what should I use this module or is it doing some things wrong with highlights?
I also can confirm the white level from exiftool is different to that shown in darktable with 16383.
Filmic is used by default for global tone mapping. You could go with out it. I have developed lots of images just using the tone eq…one or two instances to deal with shadows and/or highlights if needed and maybe a third to deal with adding back some contrast… This can avoid some of the color manipulation that you see and need to account for in filmic but it can also be more tinkering .
Hi, nothing prevents to do the treatment by eye, until personal satisfaction, with the color area by selecting the color, I think it is possible.
Everyone has their own workflow, as long as you are satisfied with the desired result.
A try without doing anything but only disabling filmic and using sigmoid (from latest PR) lowering preserve hue. This gives a pleasing orange (IMHO not rat piss yellow) instead of the salmon of filmic and probably what @OrcLex is trying to obtain.
Doing this in the tone mapper could be considered wrong but it’ll be quite difficult and time consuming to obtain this by using other modules. P.S. I always prefer the sigmoid output and the last changes to the filmic rgb curve in current darktable makes working with it more difficult.
BTW I don’t see burned out highlights in this photo.
Actually its very easy and not so hard if you just use v5 instead in filmic and tweak the size and position of the latitude and then you can also bump or pull back the midtone saturation to your taste and you can arrive at pretty much any version of yellow to orange that you like…
If you look at the histogram
It starts here
Adding exposure begins to shift the color channels bumping green and blue giving the normal look we expect so with say 1.5 to 2 ev moving from orange to yellow
Adding v6 which I think does hue preservation in all modes reverts the shift but then we see this sort of magenta appear as it pulls back the green or it can be closer to white with some preservation modes.
If instead you use Filmic V5 with pres set to no so leave the hue shift and tweak the saturation slider along with latitude span and position you can have a range of orange and yellows in the sky…
I just tried switching filmic to V5 for this image because of @priort post and I was able to get the sky much closer to the JPG than with V6. I can’t upload my image at the moment due to bandwidth. However, maybe some images are just going to be easier to work with in filmic V5. At least we have the option to switch back when needed. Thanks Todd for suggesting such an easy fix.
Todd has the recipe. This is a beautiful sunset picture. Great camera! Noise free, even in the darkest areas. I like a little less yellow than the jpg.
Just disable this abomination called Filmic RGB and use any of available tone curve modules.
BTW Filmic should not be enabled by default - in my opinion. I wonder how many new users were disgusted by the results and dropped the idea of using Darktable at all just because of that.
Switch to the screen-referred workflow in settings, and you’ll use the basecurve by default (or nothing).
You’ll find this in settings under “processing” => “auto-apply pixel workflow defaults”, select “display-referred” or “none”, no more filùic by default.
That said, I find it a rather cheap shot to say a tool is an abomination before you have taken the time to learn its use (hint: there is a manual, and you need it). No, darktable doesn’t work the same way as ligthroom. That’s its strenght.
I like your one very much! Did you just use darktable or did you do it with gimp as the name suggests? Could you give us your sidecar file? What have you added/changed with gimp which was not possible with darktable?