Didn’t go ‘creative’, just an example of what ‘exposure + filmic, + local contrast + color-balance’ can do.
dt 3.7.0+1090
20120116_D7K0879_1.tif (12.2 MB)
I did do my ‘cheat’ again. I loaded the raw file into DxO Photolab to get optical corrections. In this case I did a tiny bit of straightening (took a window from the building right in the center, and wanted it to go straight up), and added ‘auto’ perspective correction which did a very, very tiny amount somewhere.
Other DxO auto tools are chroma-denoising (luma I turned off) with it’s old-skool mode (ISO 125, no need to go fancy here), vignetting and lens distortion, lens-sharpening and maybe a little cheat: ‘micro contrast’ at it’s default detection.
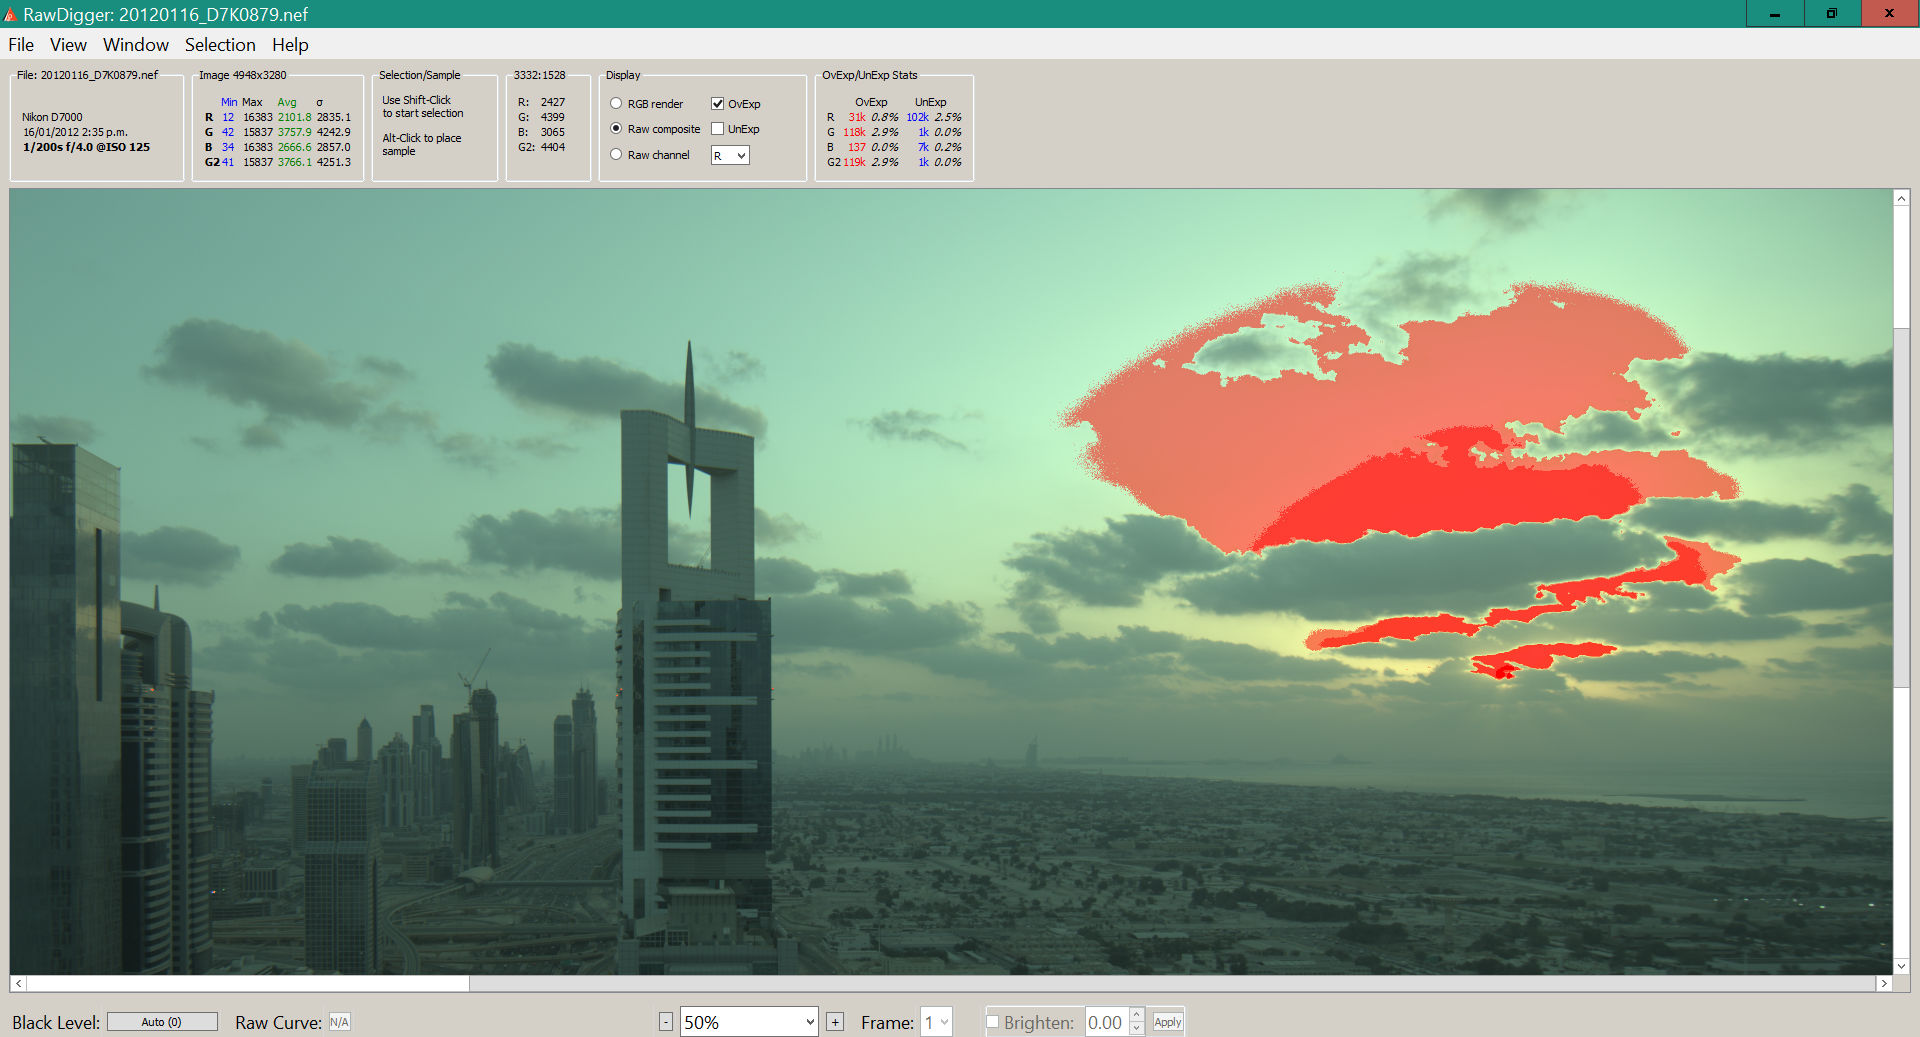
Exposure was off, white-balance was off, tonal adjustments were off, color rendering was off. So you get as much of the pure RAW in the demosaiced DNG. It’s just ‘fixing things’, all the tonal changes I do in Filmulator or in this case, Darktable.
20120116_D7K0879.dng.xmp (17.4 KB)
20120116_D7K0879.dng (60.0 MB)
Darktable loads per default with filmic off and highlight construction on, but the color-workflow is modern (so white balance to ‘reference’ and ‘color calibration’ is enabled with the stock camera-detection. I do turn off the ‘highlight reconstruction’ module because I do not think it’s needed (yet). It looks like you did a good job for exposing for the highlights.
With filmic still off, I increase exposure till I think it sits somewhere nice. I enable filmic, raise the lattitude and then hit the ‘auto’. It works (yayfor denoising) but I still lower (‘to the right’ at least) the white slider in filmic till I get color back in the sun. The only thing clipped in your RAW was the very small sun-disc. The surrounding parts are only clipped in one channel, or are ‘almost’ clipped.
It now looks very flat, so I try the tone-equalizer with the preset ‘contrast curve medium’. I move the 0ev point back to 0, and I do think the shadows where a bit too dark so I make the ‘darkening’ parts of the curve a bit less.

Still needs a bit of local contrast for my taste, so I grab contrast-equalizer. I do not want to touch the very fine parts there, because then it becomes more of a sharpening effect. I also don’t want to push the very coarse side because I’m looking for the details in between the very global contrast and the micro contrast. So I push the middle parts up a bunch:

It can look quite overdone, that’s where the ‘mix’ slider is for underneath the curve to lower the effect to your liking.
As a bit of advanced thing: I still felt it crushes the shadows too much, so I enabled the parametric-mask and pushed the sliders up on the ‘L’ section (The L from LAB, so luminance) to reduce the effect in the very dark parts.
I still like more details / clarity in the highlights, so I do my bilateral trick there. Enable local contrast, bilateral, very low contrast, very high detail, use parametric mask to only select the clouds. Tweak the ‘blend mode opacity’ to taste after to lessen the effect. In this case, I left it at 1.0.

In the end (maybe it was sooner, I don’t know) I enable ‘color balance rgb’ with the ‘add basic colorfulness’ preset and start moving things where I think they need it on the master tab. In this case, I felt like I still wanted more color, so I increased the global vibrance and global saturation. I like the effect of increasing the global brilliance (or only in the mid + highlights) a bit, so I did that as well. I still felt it wasn’t doing that much… maybe just not a lot of color in the image. Anyway, I just left it there.
Nothing fancy, just a way to show that if you set exposure first, then filmic to ‘pull in highlights’, then local contrast to taste you’ll get a lot of the way there without (much) fighting. Creative edits are up to you, of course.