
1 Like
Maybe it is a case of birefringence (due to the ND filter?). Nothing that subtle smoothing cannot fix.
BTW, the breakwater reminds me of a ![]()
I like a bright and cheerful day. ![]()
@clennep Unfortunately, there is some posterization in the sky.
1 Like

Thanks for sharing.

IMG_1925.CR2.xmp (31.2 KB)
Wrapping it up (added local contrast, haze removal, hot pixels and a slight temperature increase)

IMG_1925.CR2.xmp (35.0 KB)
4 Likes
Thanks for a great photo to play with.
First time I have edited in months!
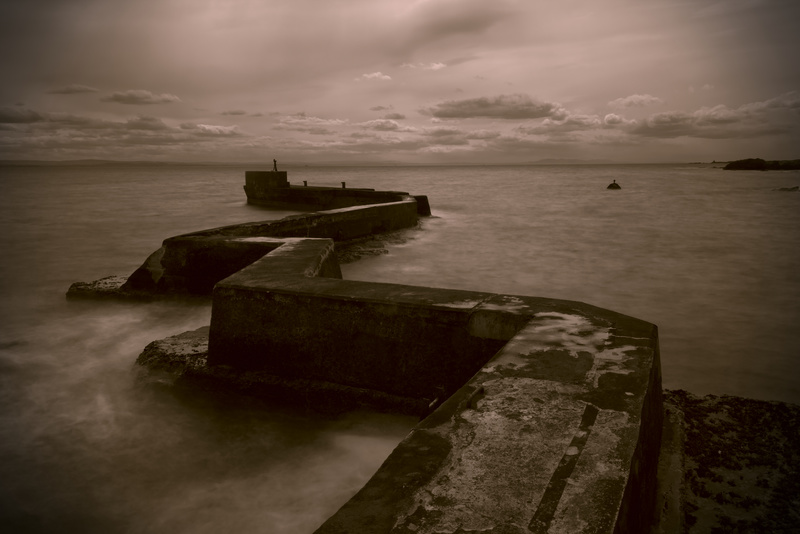
There is loss of detail/darkening on the breakwater in the foreground because of reducing image size.
Images such as this remind me of WW1 photography, so first I switched off base curve.I used colour correction for a sepia tone effect, vignette, default graduated density. Denoise(profiled), pushed levels to the right a bit for a gloomy tone, masked the sky in tone curve (med contrast).
Nothing extreme, just little nudges in tones.
Do you have another image with a longer exposure time, giving a more mirror like effect on the ocean?

2 Likes
Darktable + Gimp
contrast, local contrast, equalizer … + slight tone mapping

1 Like
Interesting image. Here a version with some more emphasis on the color in the sky.

IMG_1925.CR2.xmp (10.7 KB)
2 Likes
Nice sky!
Yes! Good rendition, Dave. It could totally pass for an old photo
IMG_1925.CR2.pp3 (13.2 KB)
ND filters do magic with wavy water, so I added some HDR Tone Mapping, Retinex, CIECAM02 color, and Wavelet Final Contrast.

The call to grayscale is strong…
It’s interesting, once you desaturate the image, the things you can get away with using a tone curve are disconcerting, yet intriguing:

Nice image to play with thanks @Brian_Innes
I’ve gone for colourful, but trying to keep a toe in reality.
Because of this and the low gamut of the image, I opted to use CIECAM02 from the off.
I like the murkiness of the image so chose not to apply any sharpening.

1 Like
This was an interesting photo to work on. It had a few unique properties that informed my processing approach (example). I tried cropping and doing distortion / perspective correction but was not satisfied with the results. I might revisit this when I do the alt.
It ended up being a subtle smooth B&W that I really enjoy.  My workflow is not colour managed or anything like that but I hope you can sort of see where I was going with it.
1 PhotoFlow → linear Rec.2020 (no clipping).
2 gmic → interpolate unwanted pixels → smooth (resize, close) → brighten → apply Kodak Tri-X 400 - → prep for your viewing pleasure: sharpen (tone), resize, sharpen (edge).

@Thomas, now that you’ve mentioned that, I’ve looked back at my images, and noticed the one I uploaded was the -2ev exposure from a bracketed set of exposures.
@afre, i’d be interested in seeing the steps you took to show those circular artefacts. I’ve done some googling, these artefacts may be what is known as “Newton’s Rings”. Perhaps caused by the fact that I had a UV filter, and the 10 stop nd filter on the lens? The reason I put the UV filter on, was to save the lens filter thread from screwing on and off the circular nd filter.
Must save up some cash for a square filter system 
Lots of lovely edits of my raw file, so I’ll use these as inspiration for a better edit of my own image (this time using the properly exposed image, rather than the -2ev bracket image)
I discovered the circular artifacts when pushing the image in various ways. They have an interference pattern that is dissimilar to Newton’s rings. (As above, I am guessing that they are a result of birefringence but I might not know what I am talking about.) And it isn’t just that: as you can see from my sample image, there are also horizontal rectangles and lines.
Anyway, a simple way to reveal the artifacts is doing what I would call a hessian norm. It is intended to be a higher order version of a gradient_norm, which is built in with G’MIC. Edit: I made a filter for the G’MIC plugin. Give it a try in GIMP. ![]()
@afre, I wonder if the horizontal rectangles and lines were from light possibly leaking through the viewfinder of the camera? If practical, could you list step by step what you did to my image to make these artefacts appear, so I can test further images to see if it is possibly a fault with the camera? Thanks!

@Brian_Innes I may have discovered the reason for the circular deformations. In one of the PhotoFlow outputs, I turned on all corrections under lens corrections. I haven’t checked the other combinations. When I don’t have that setting on, I only see the horizontal lines and sort of make out where the rectangles would be. Need further testing to see if the circles still exist behind the noise. @Carmelo_DrRaw
I have prepared the Hessian filter for you. Give it a try in GIMP. Hint: update the filters list first.

As your exposure was 4s, this might be relevant, from an official 5D4 cam manual, but I think it applies to various Canon DSLRs -
“Using the Eyepiece Cover
When you take a picture without looking through the viewfinder, such as
when you use the self-timer, bulb exposure, or a remote switch, stray
light entering the viewfinder may cause the picture to look dark
(underexposed). To prevent this, use the eyepiece cover (p.37)
attached to the camera strap.
Note that attaching the eyepiece cover is not necessary in Live View
shooting or movie shooting.”
1 Like
lol, I’ve just noticed the eyepiece cover which came attached to the camera strap! Might try using that the next time I do long exposure photography
1 Like