My fun
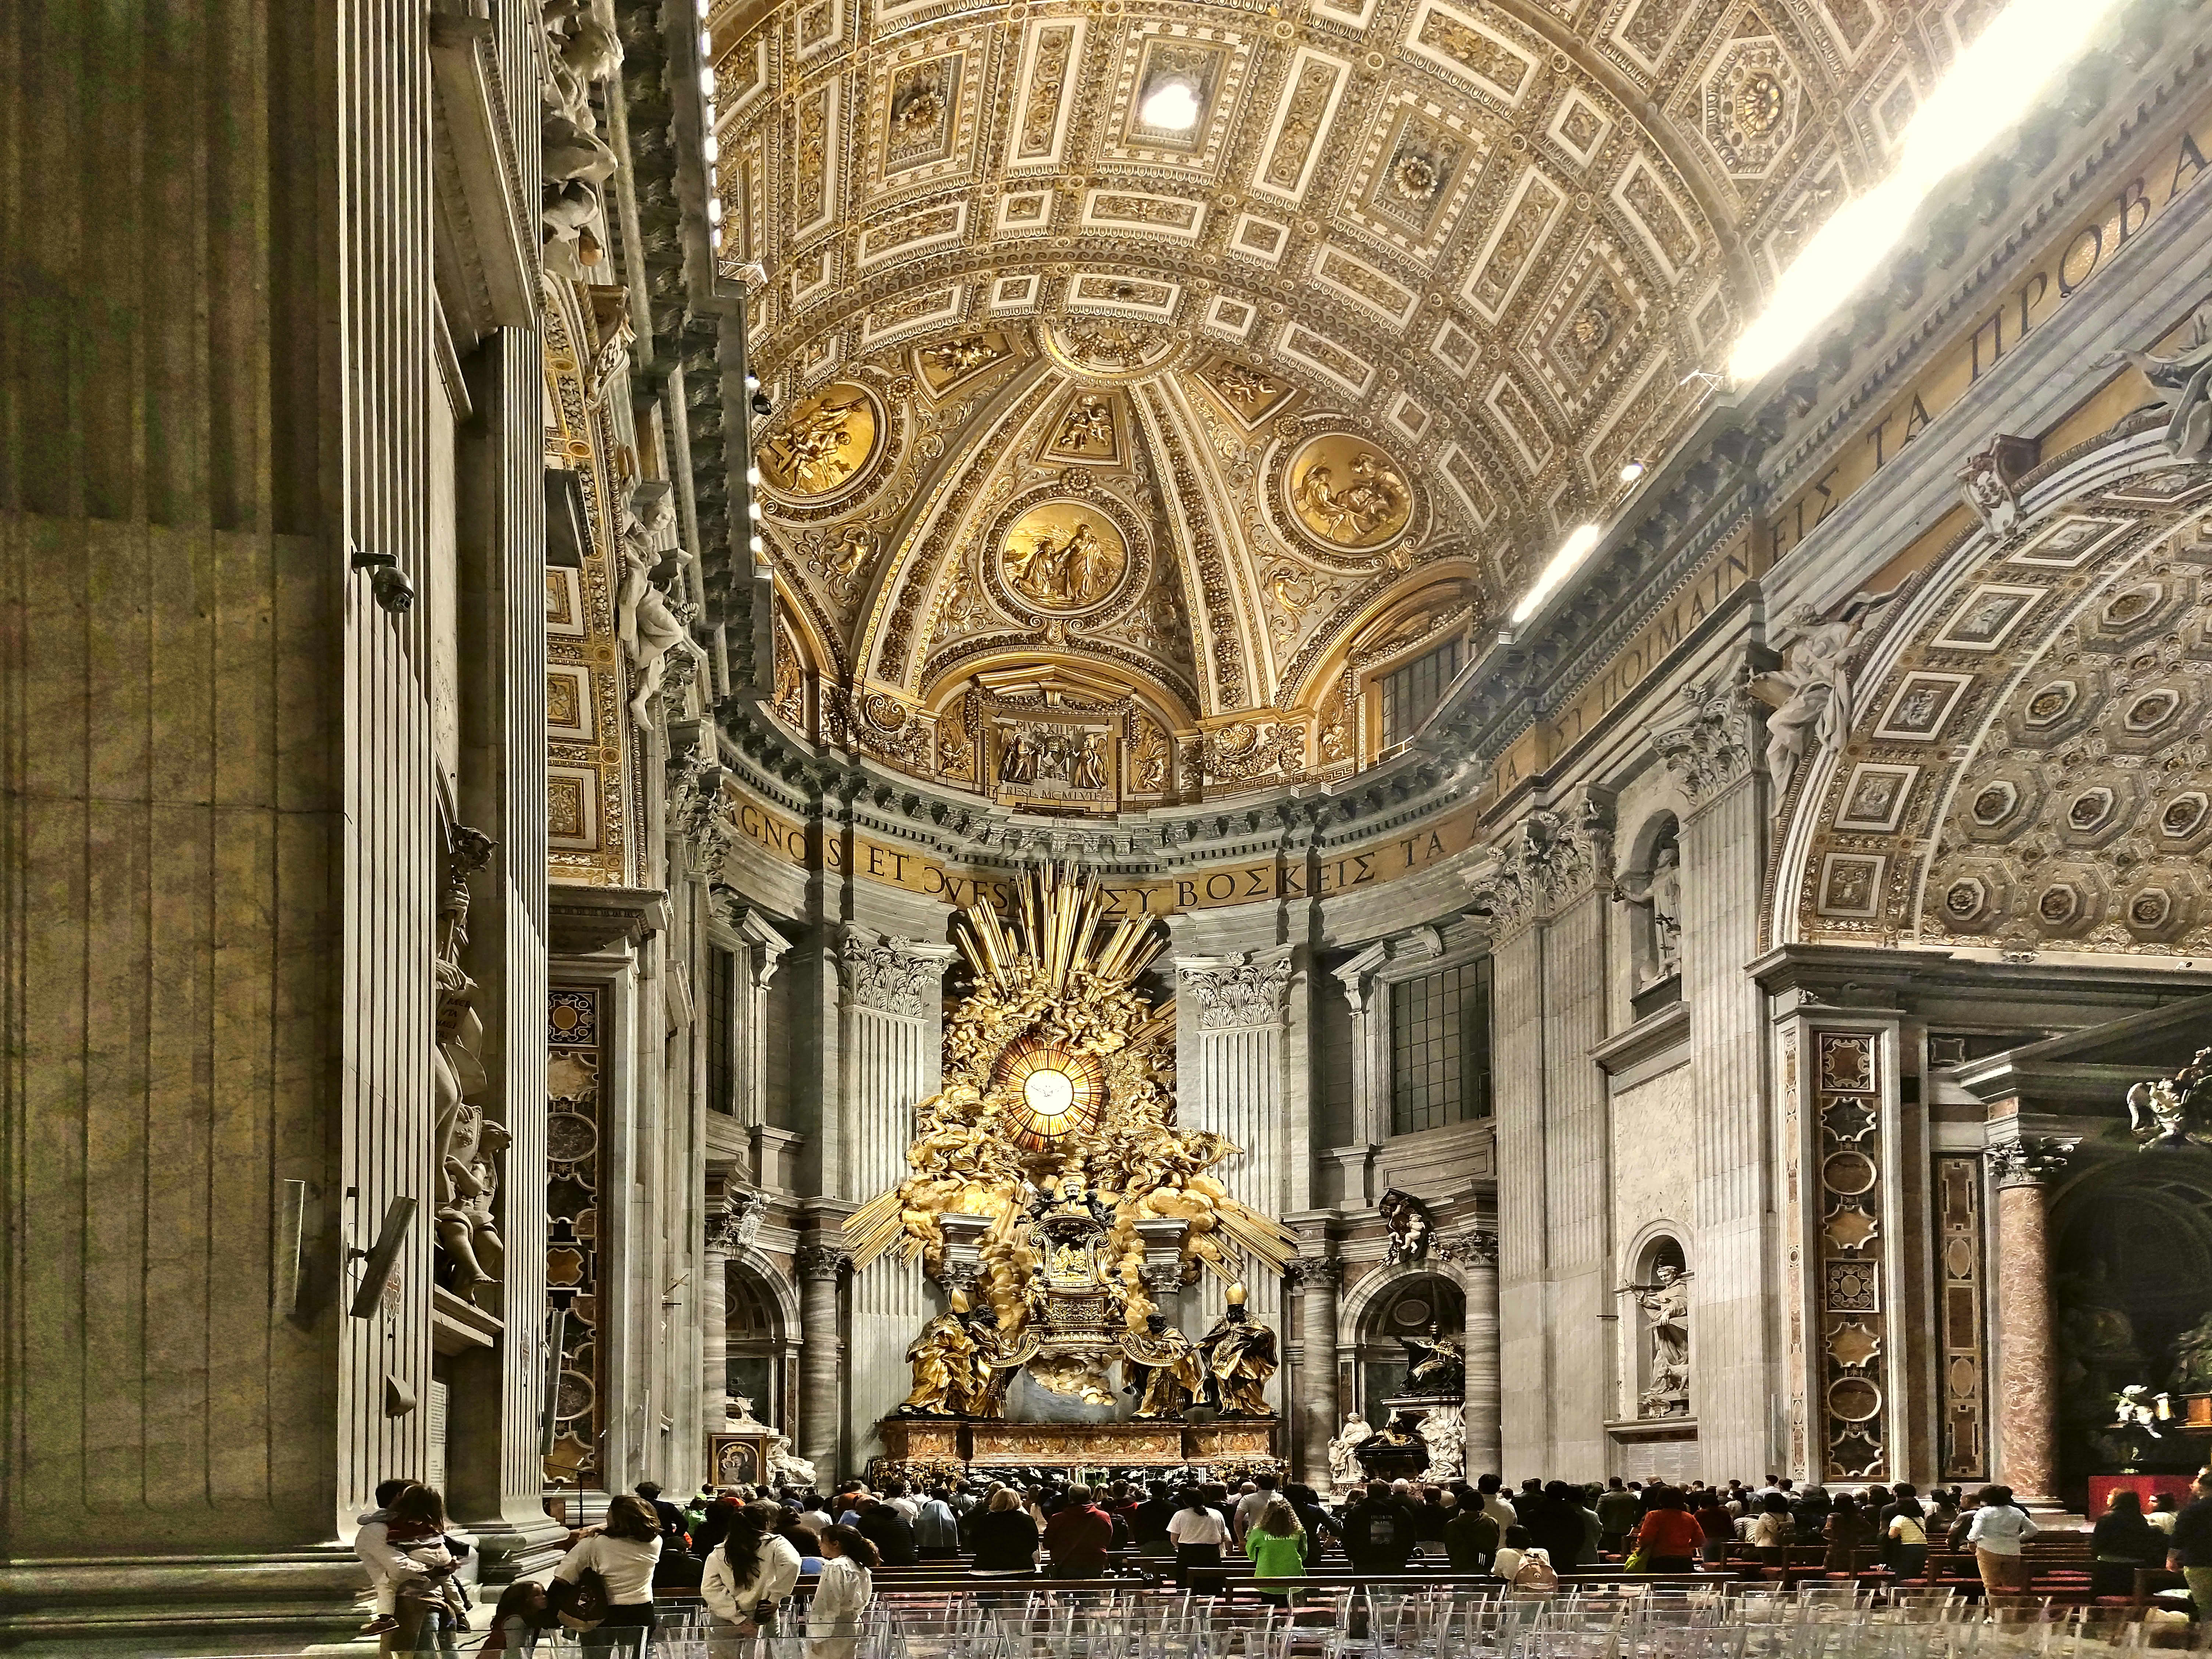
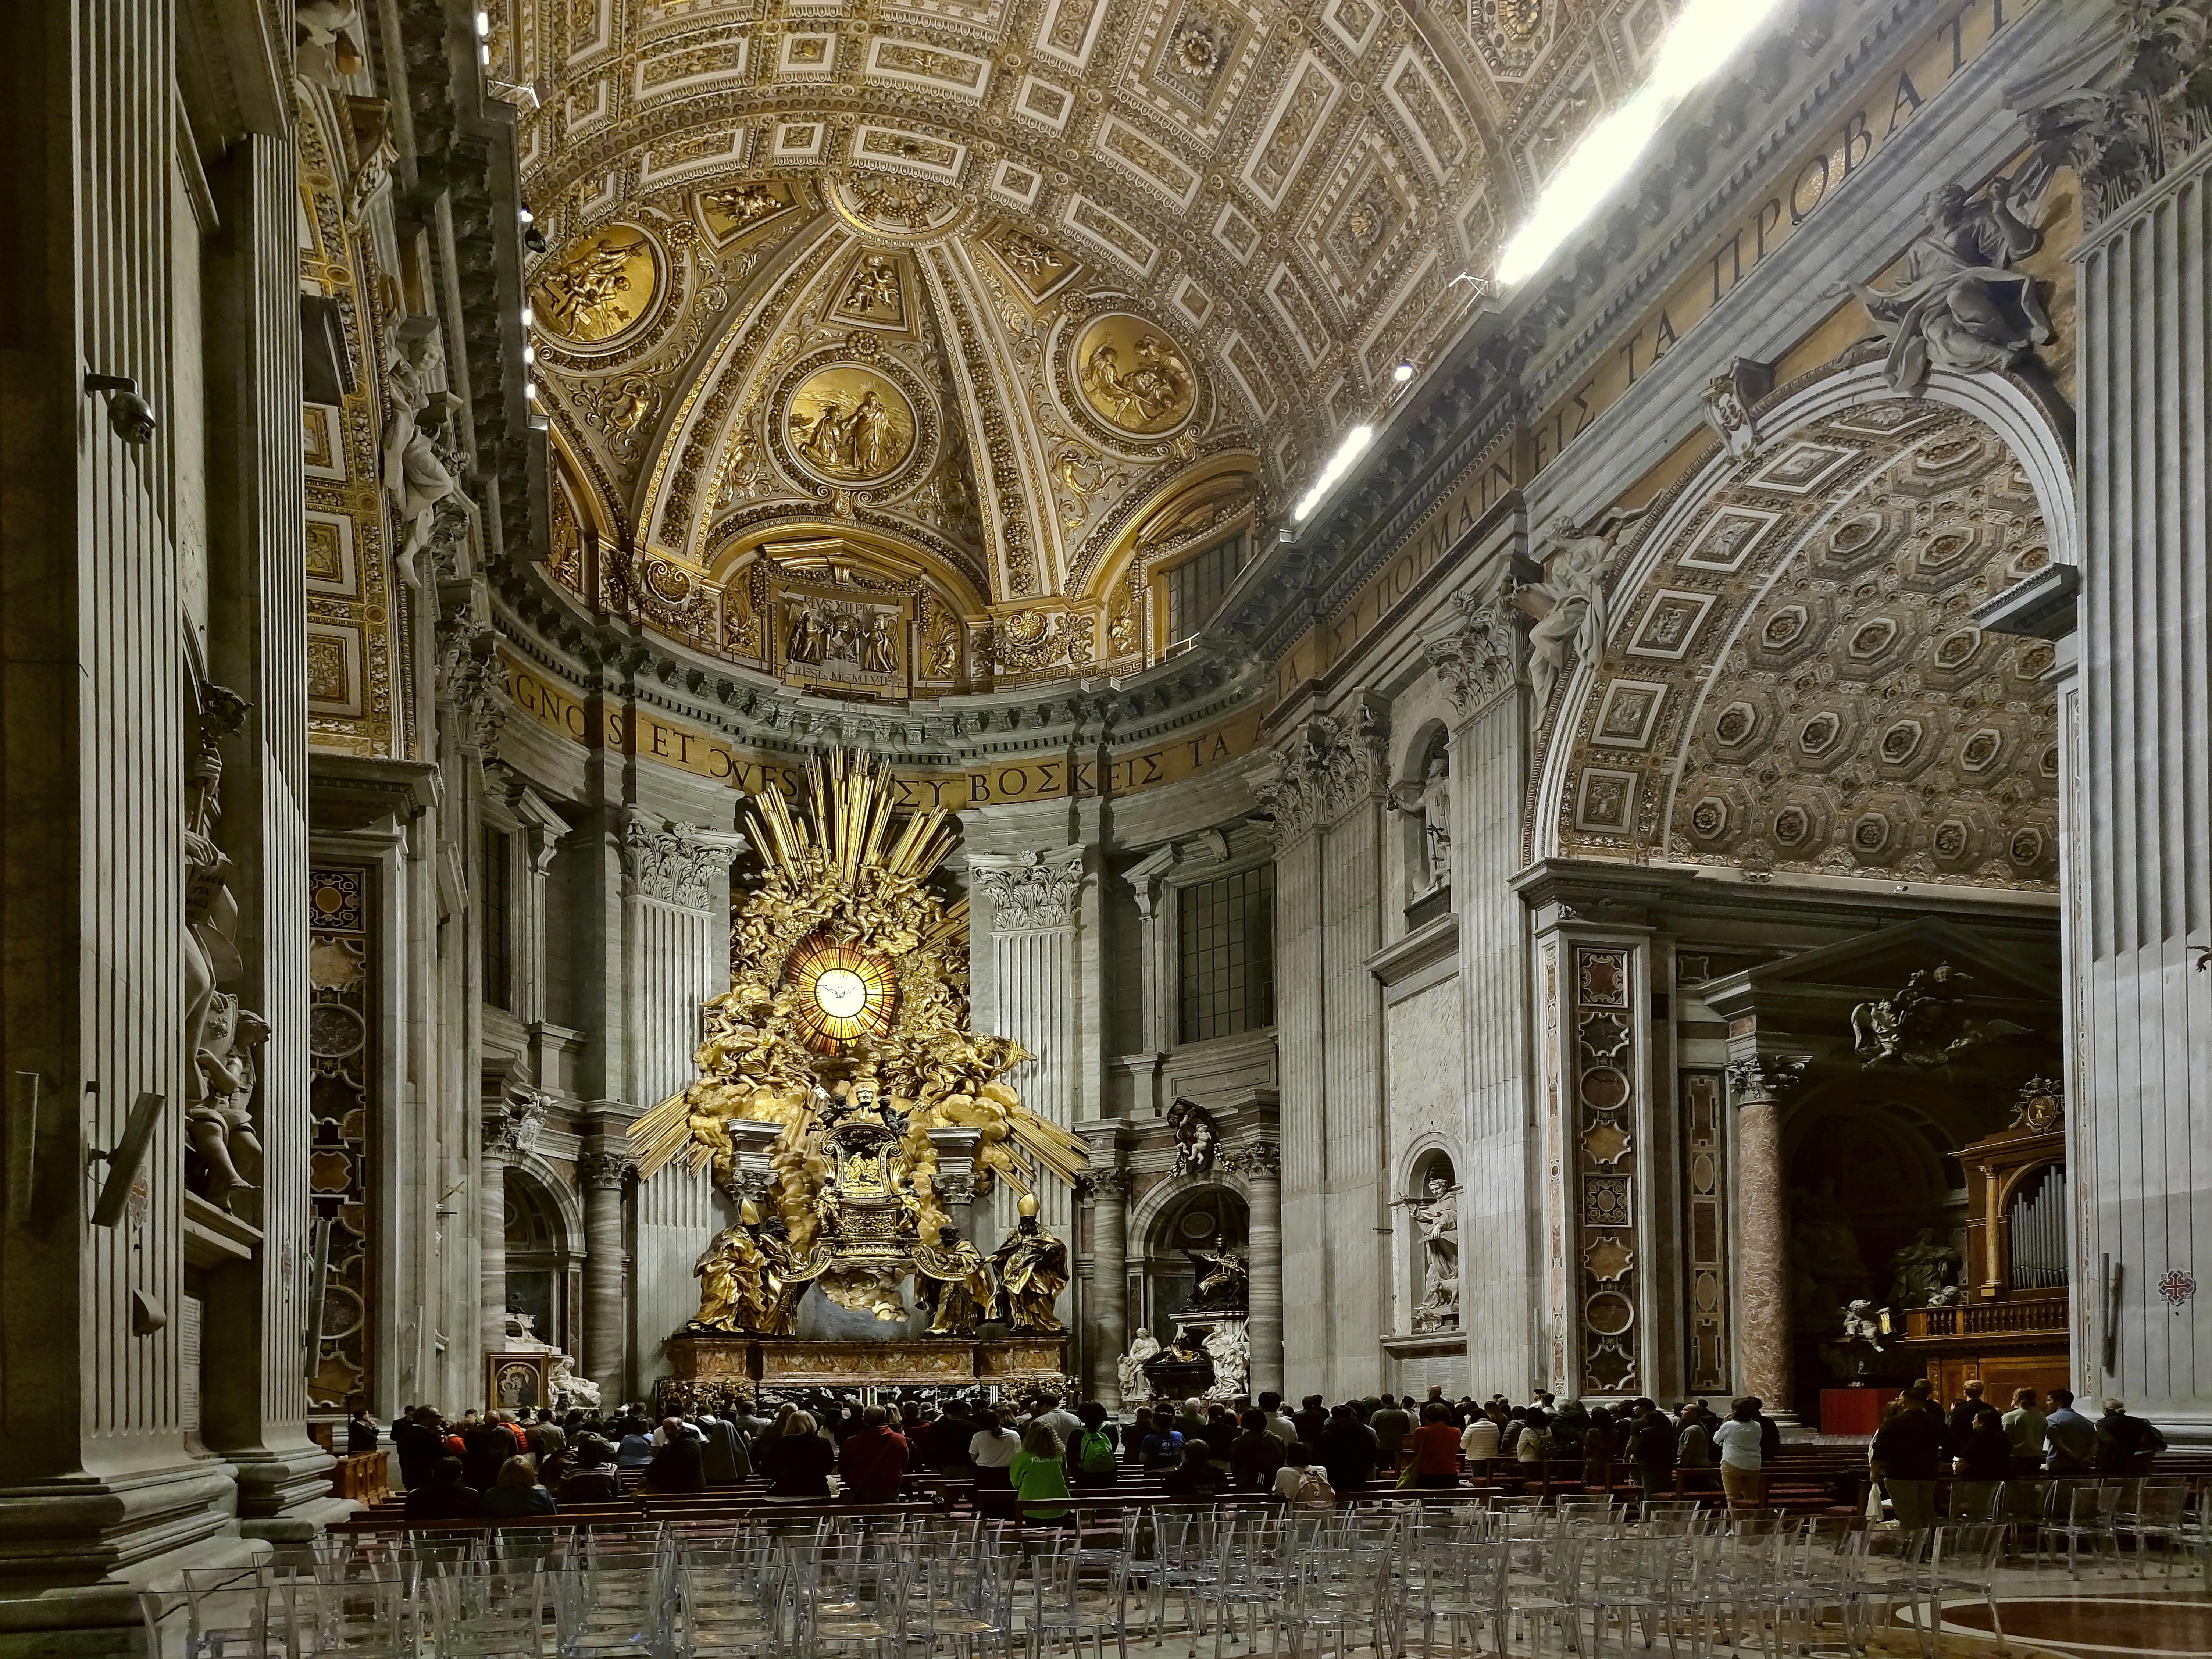
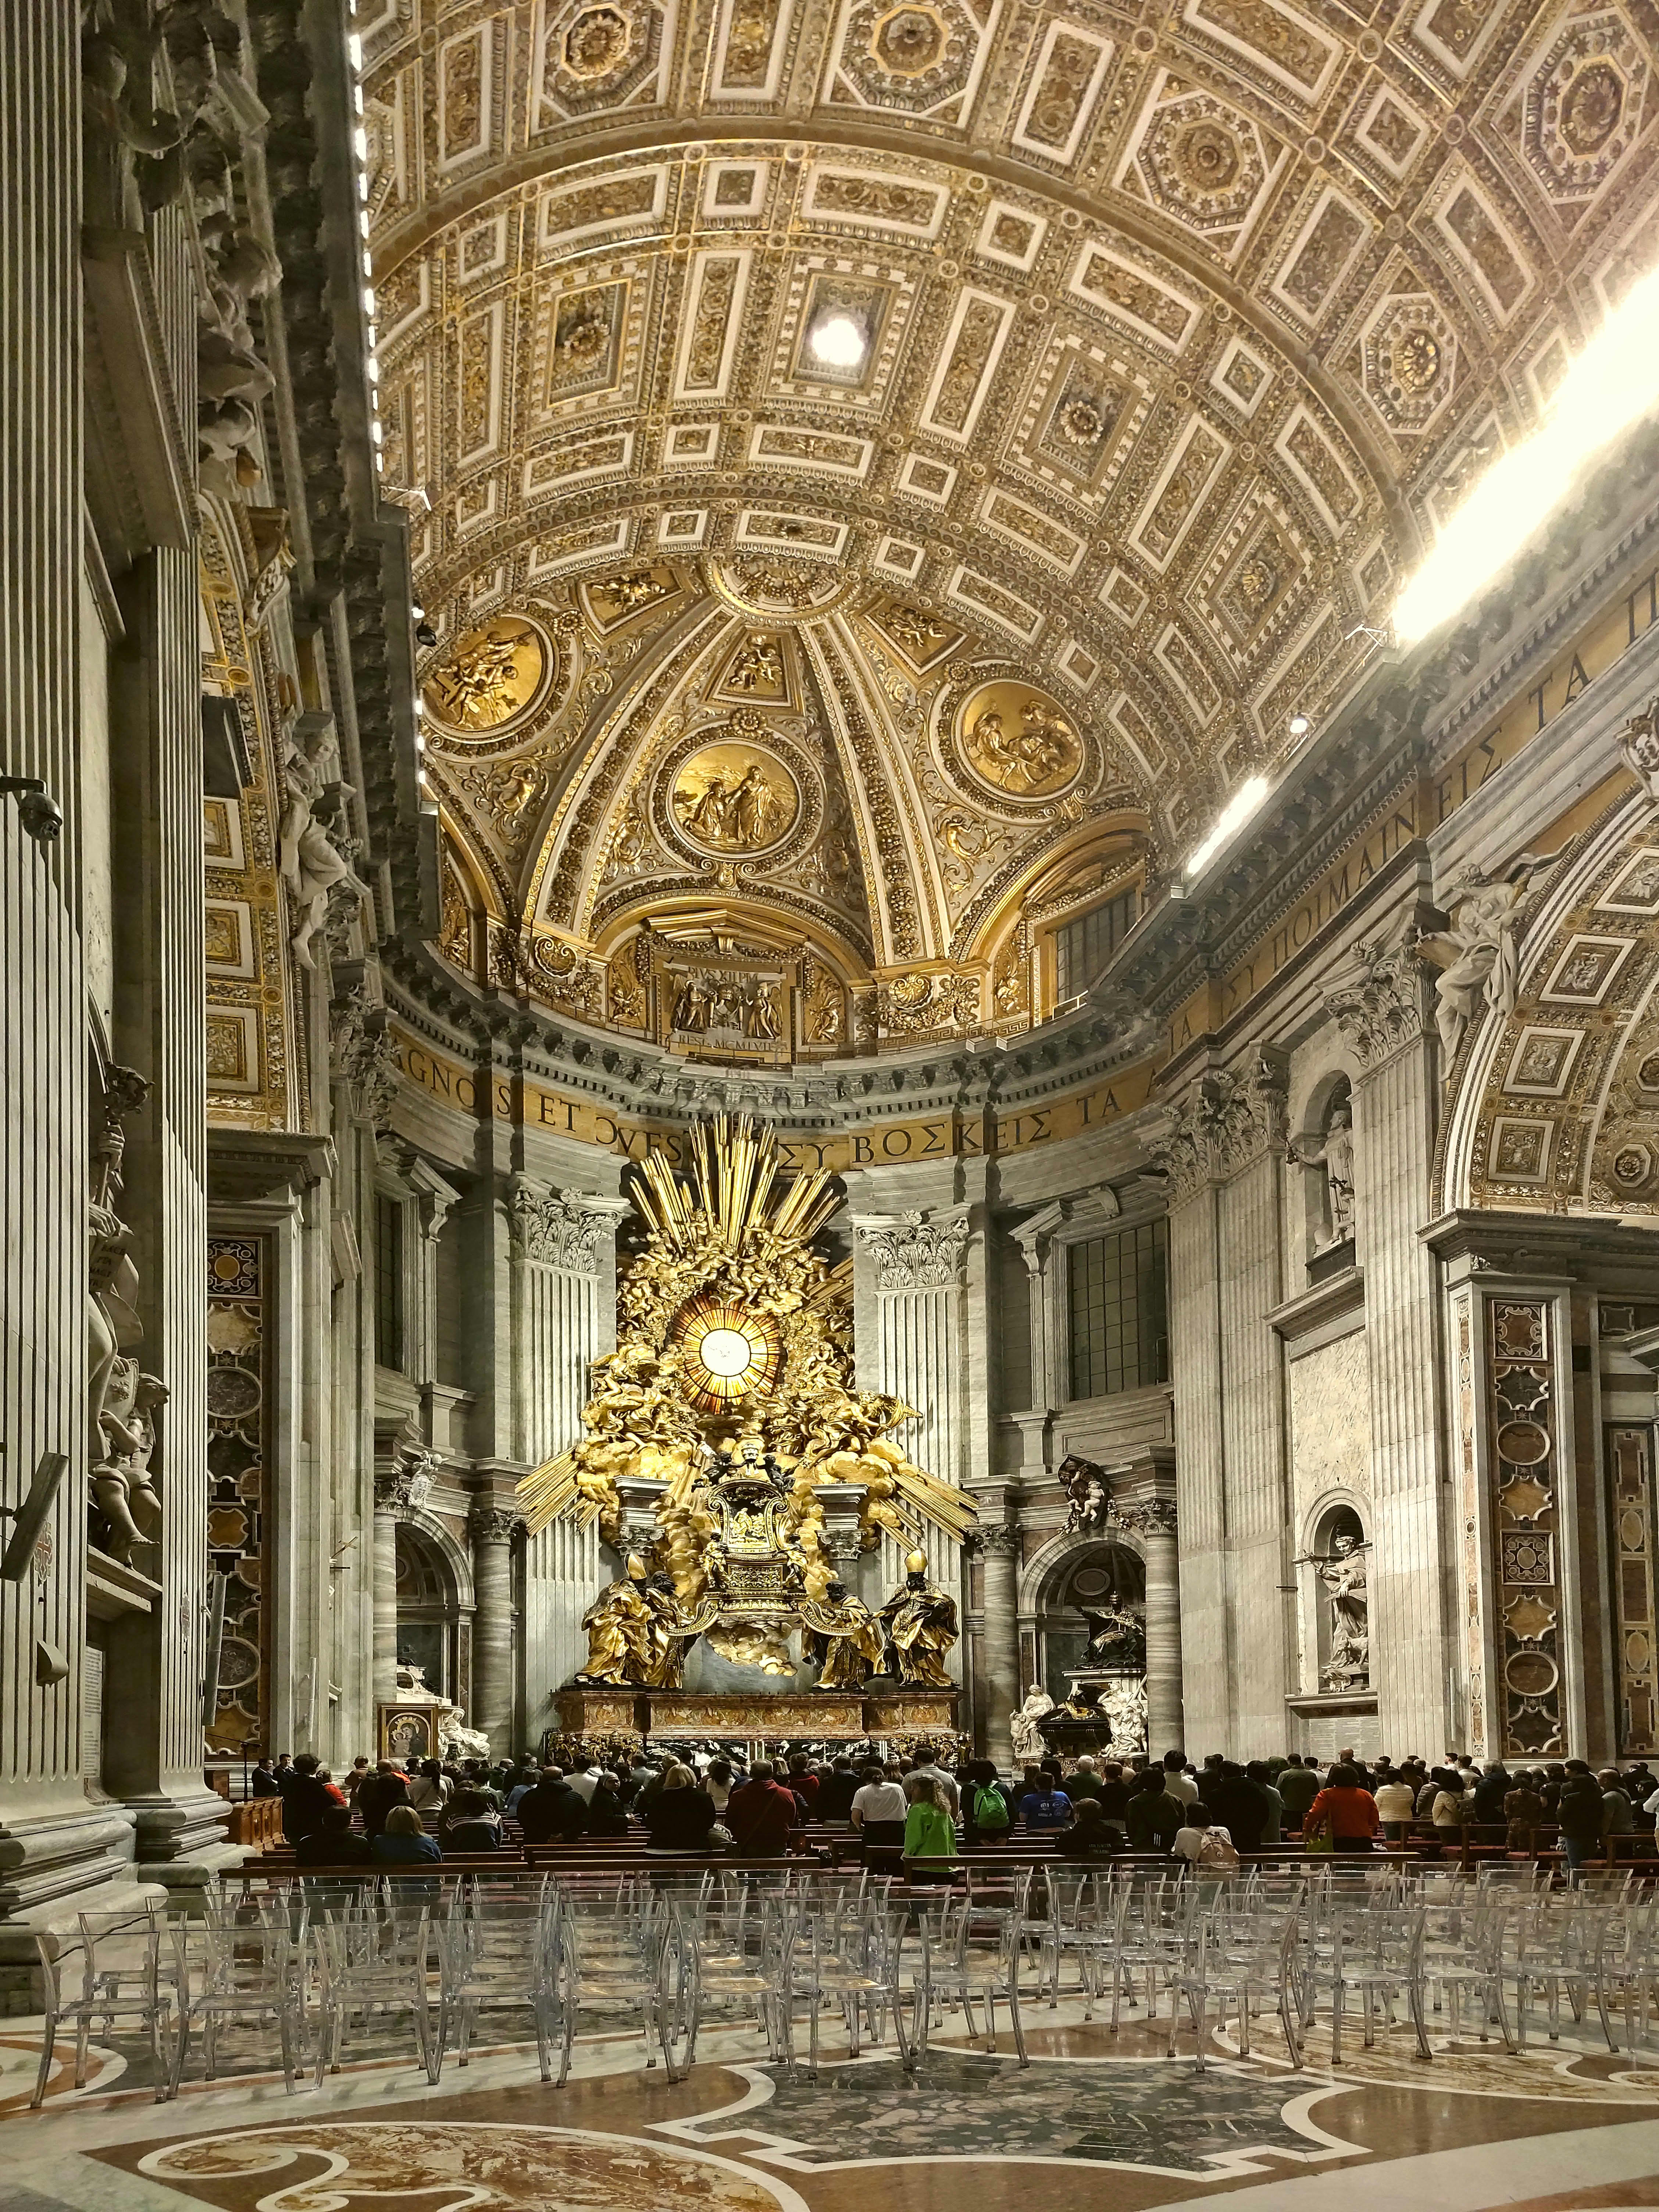
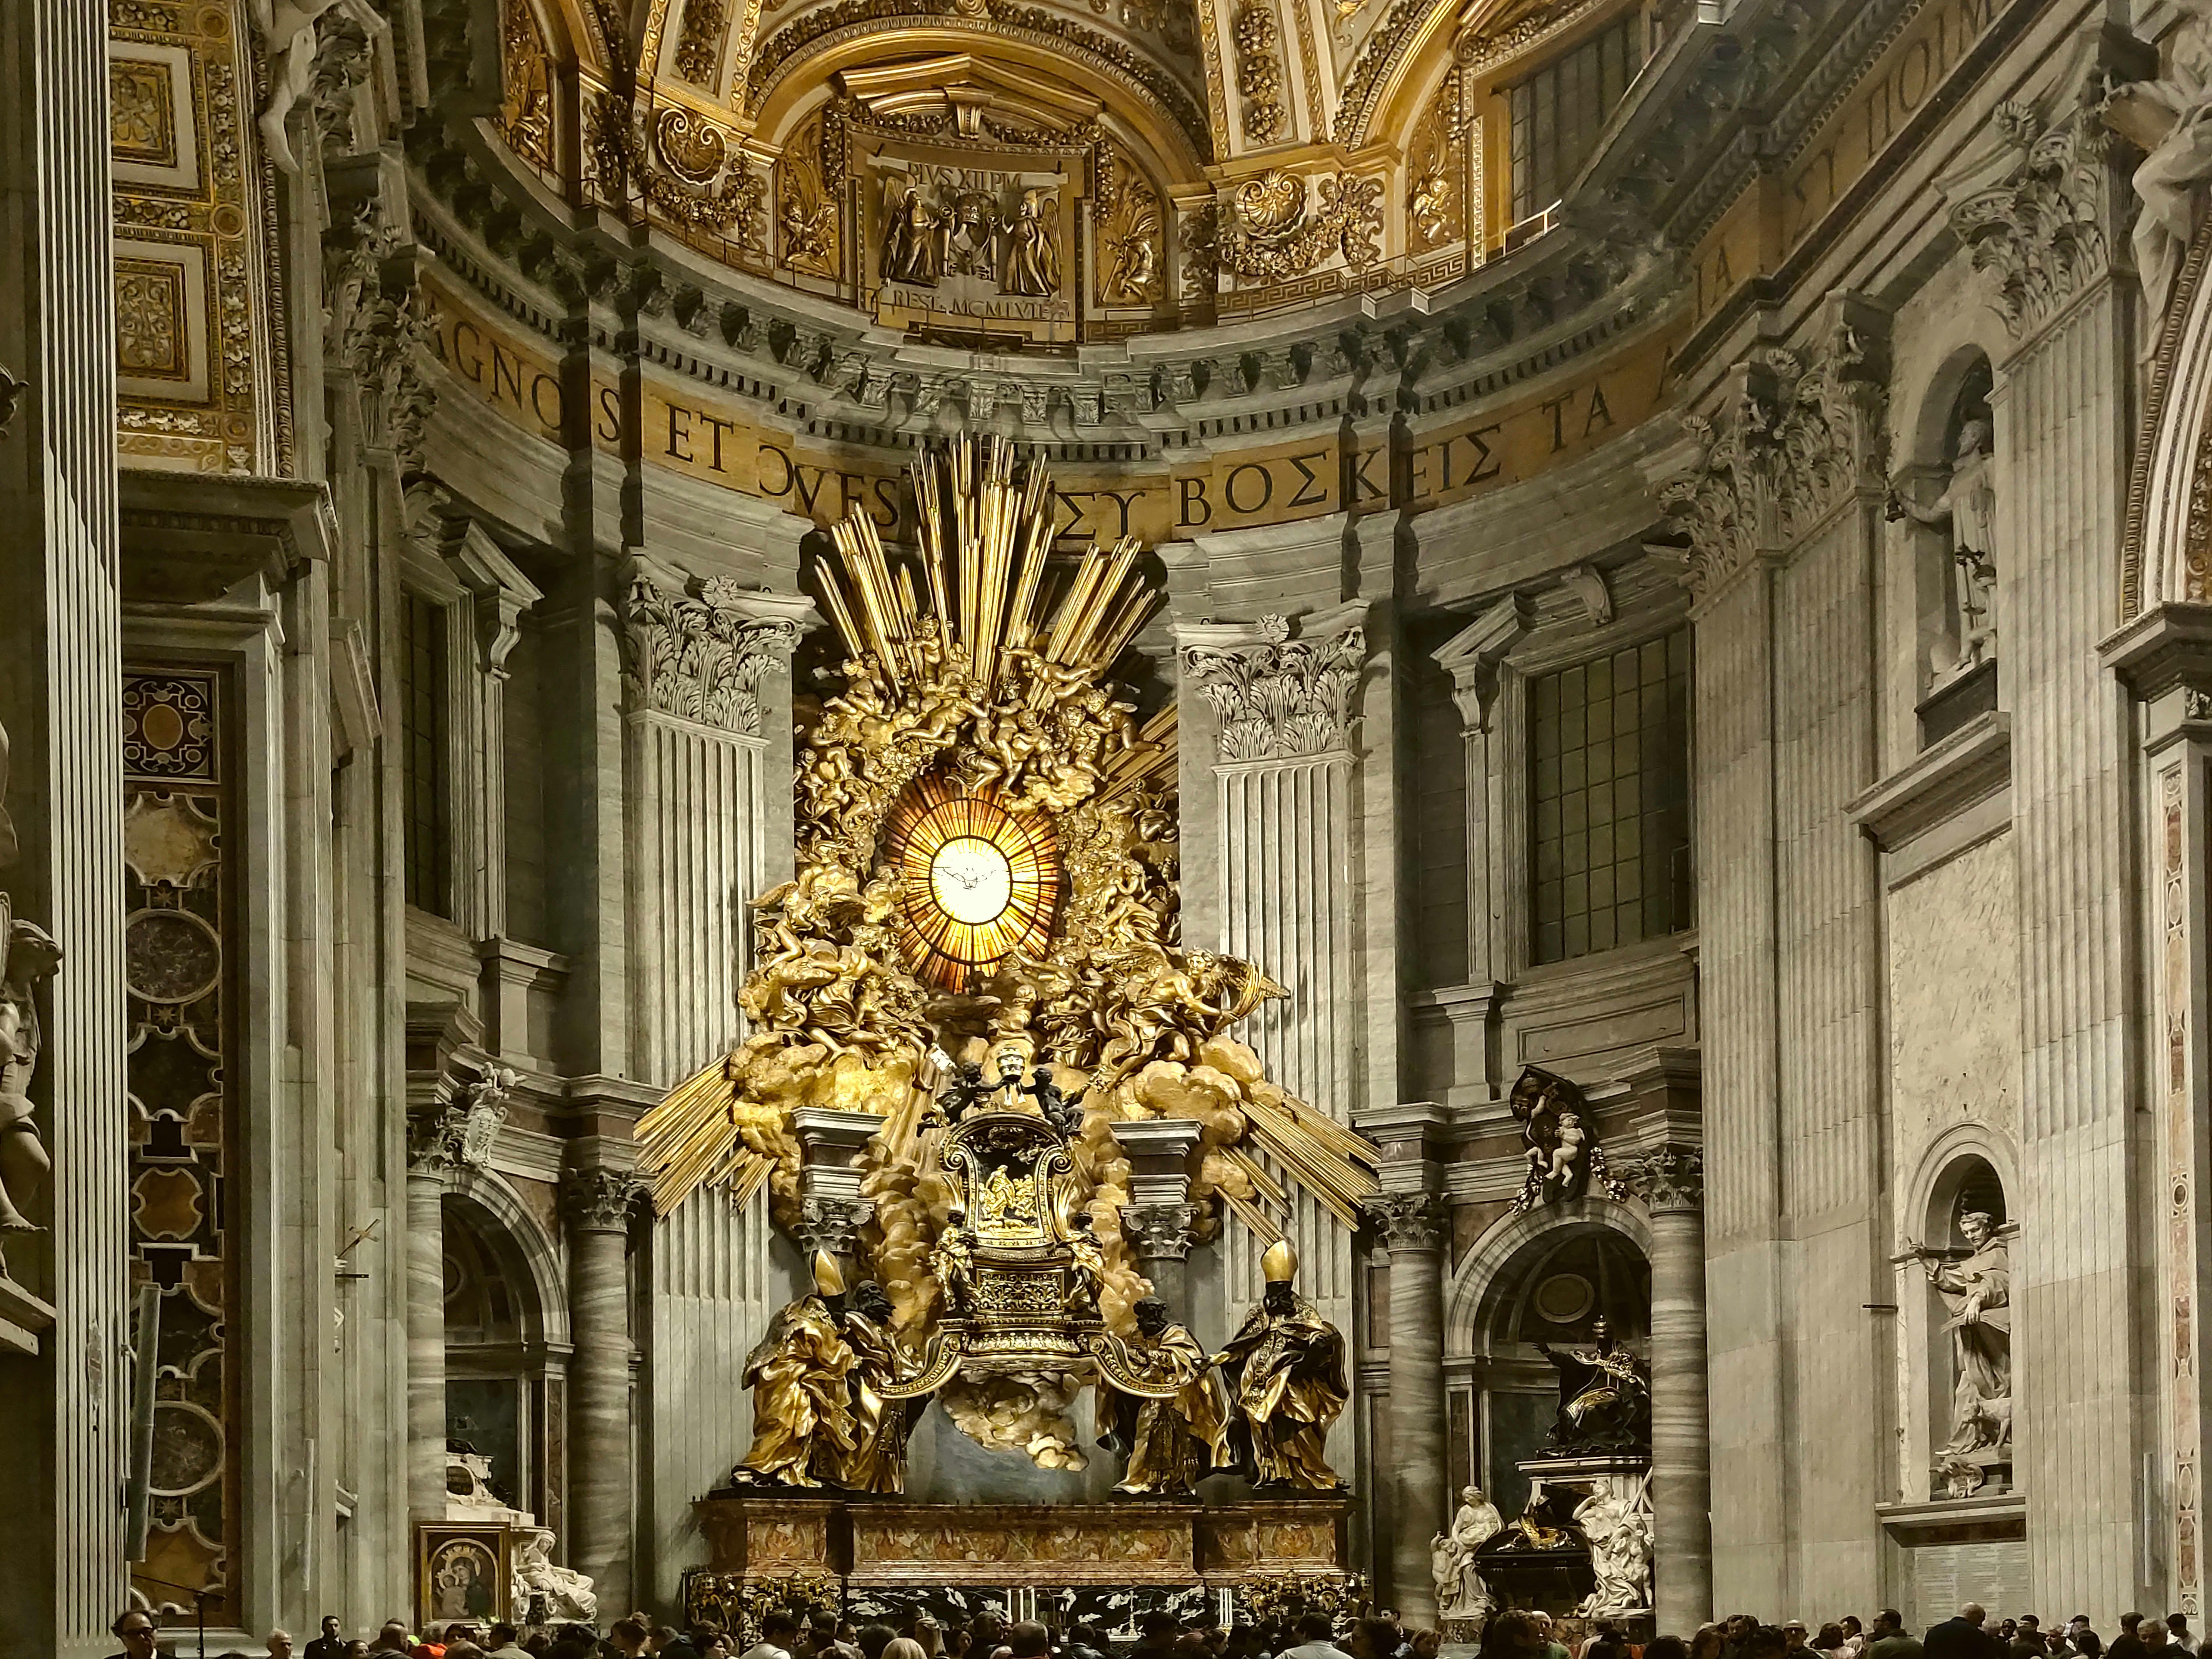
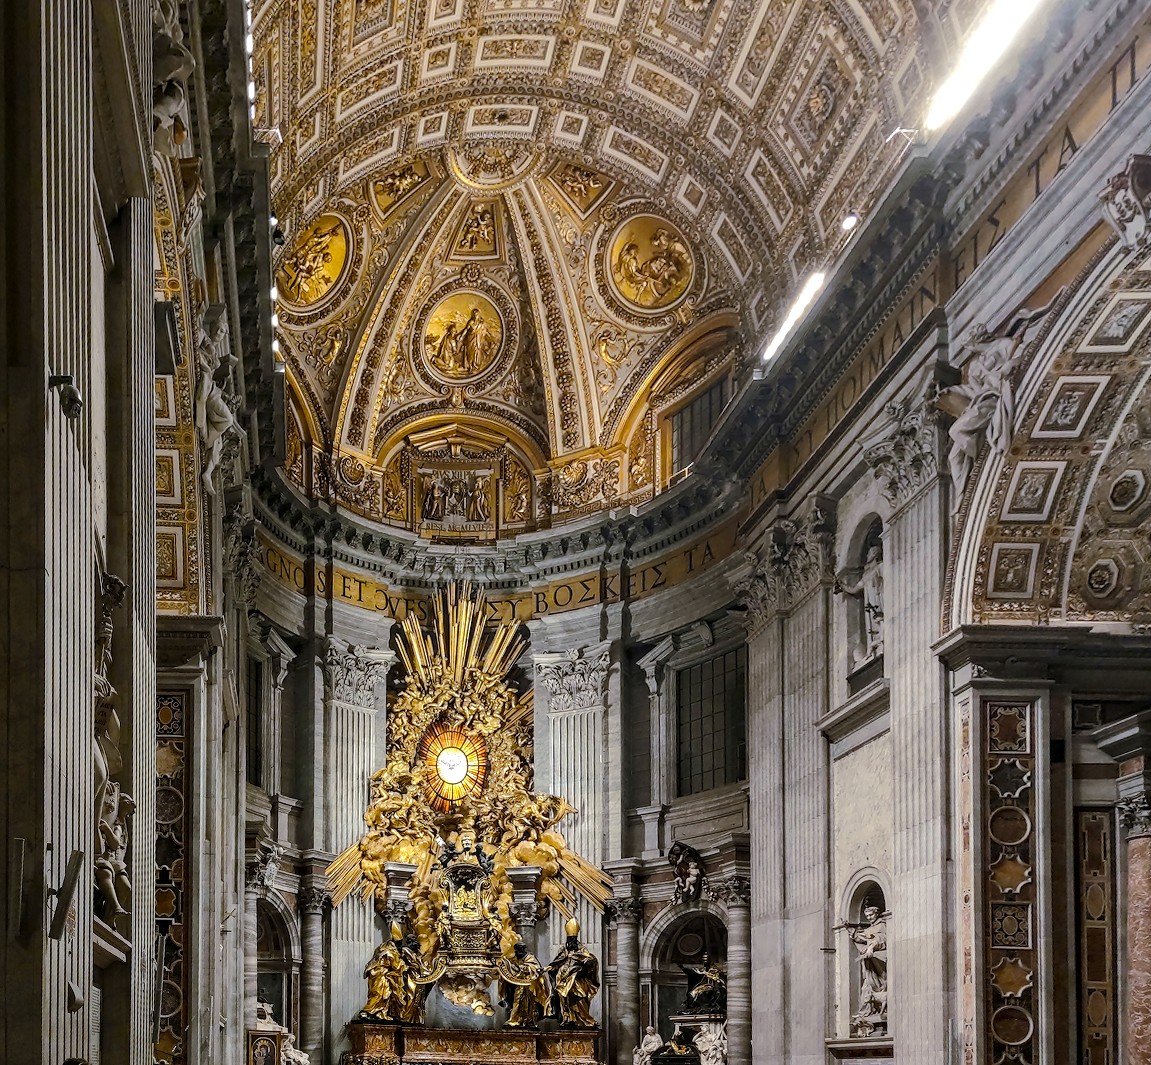
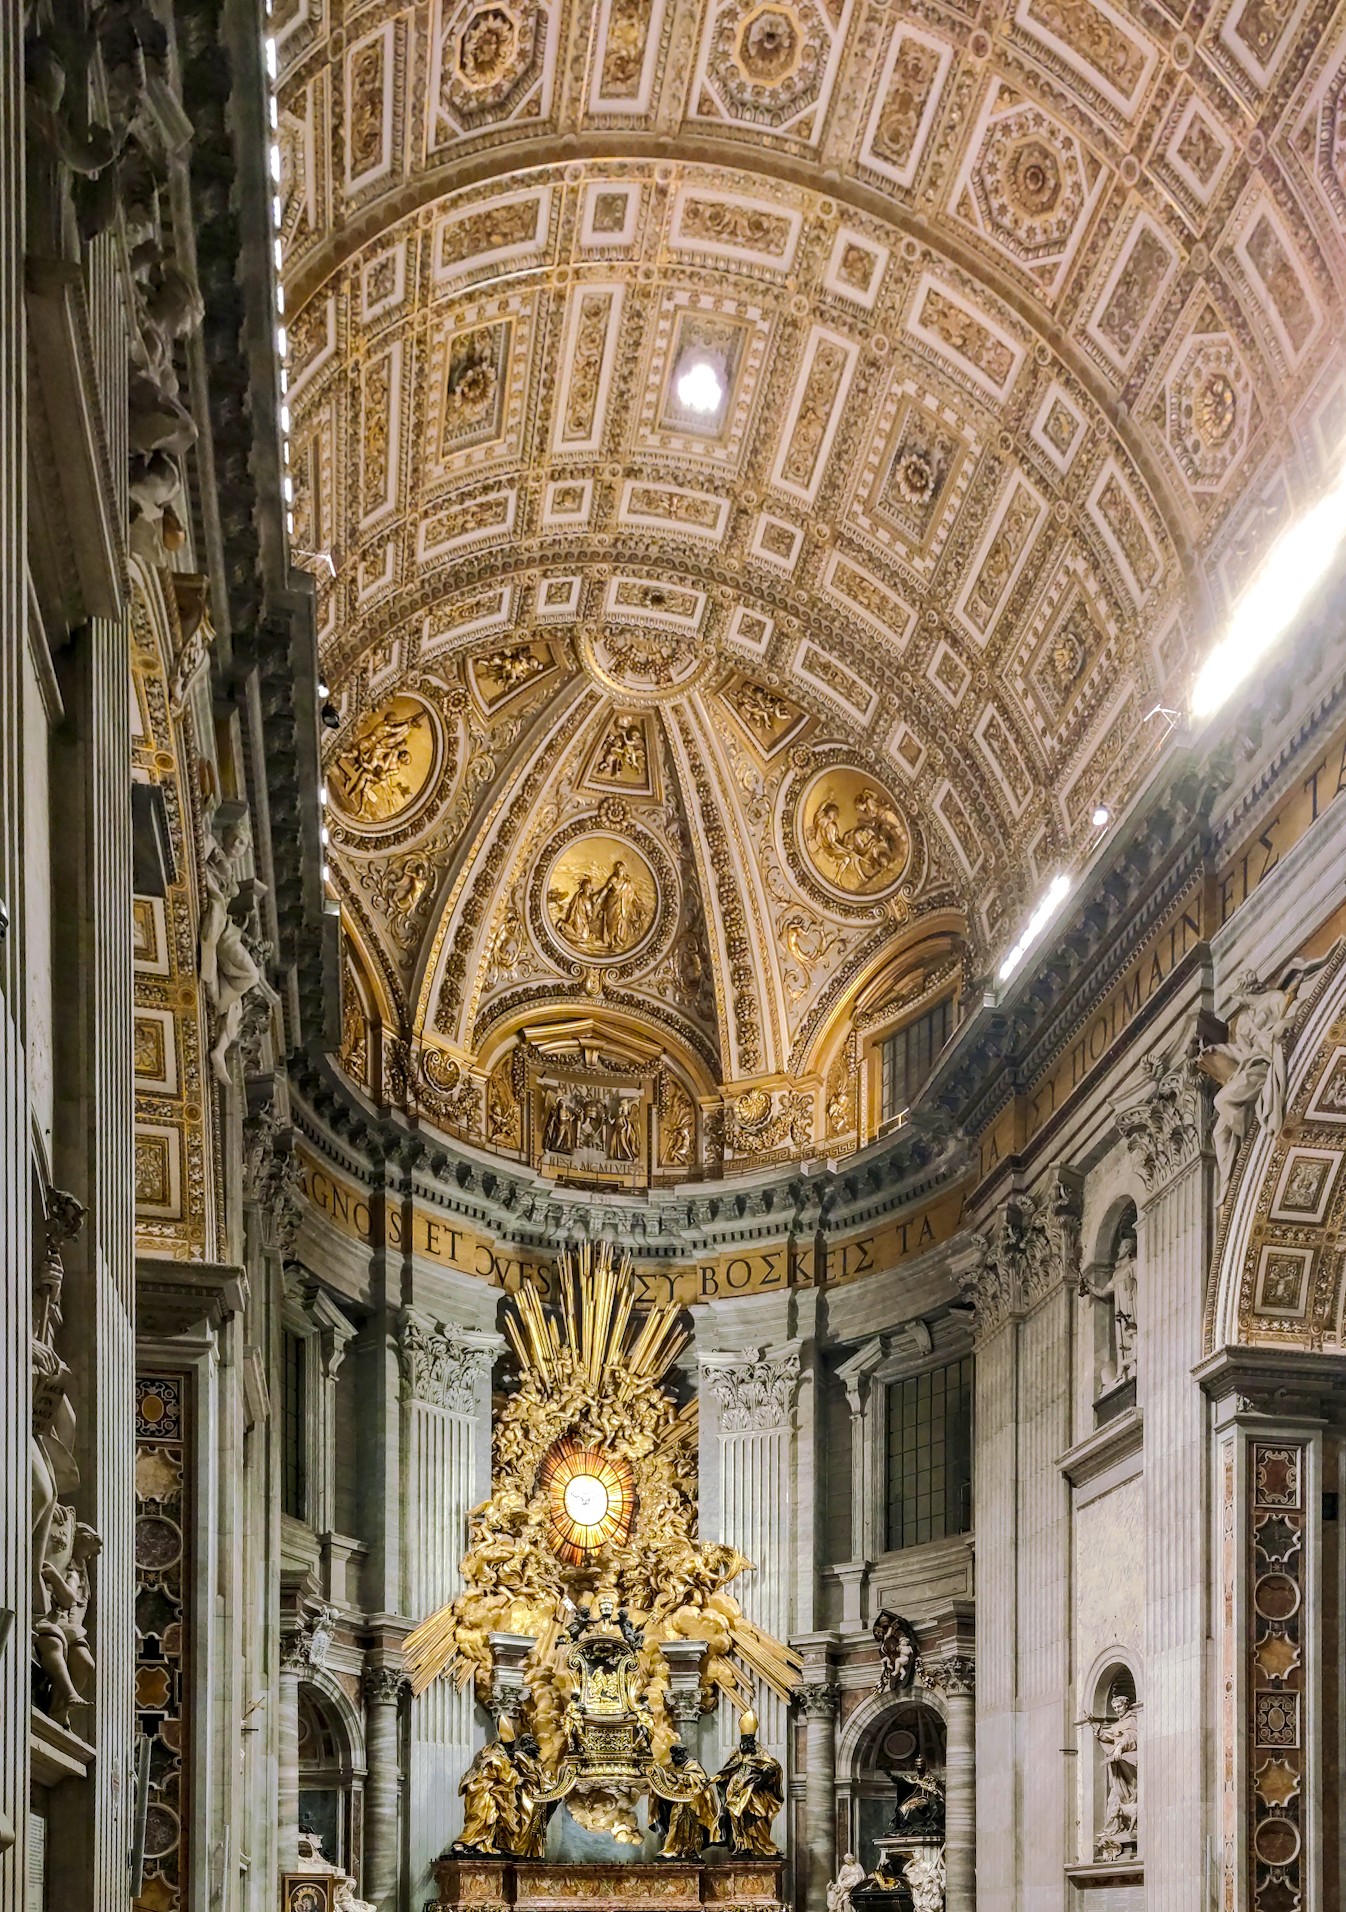
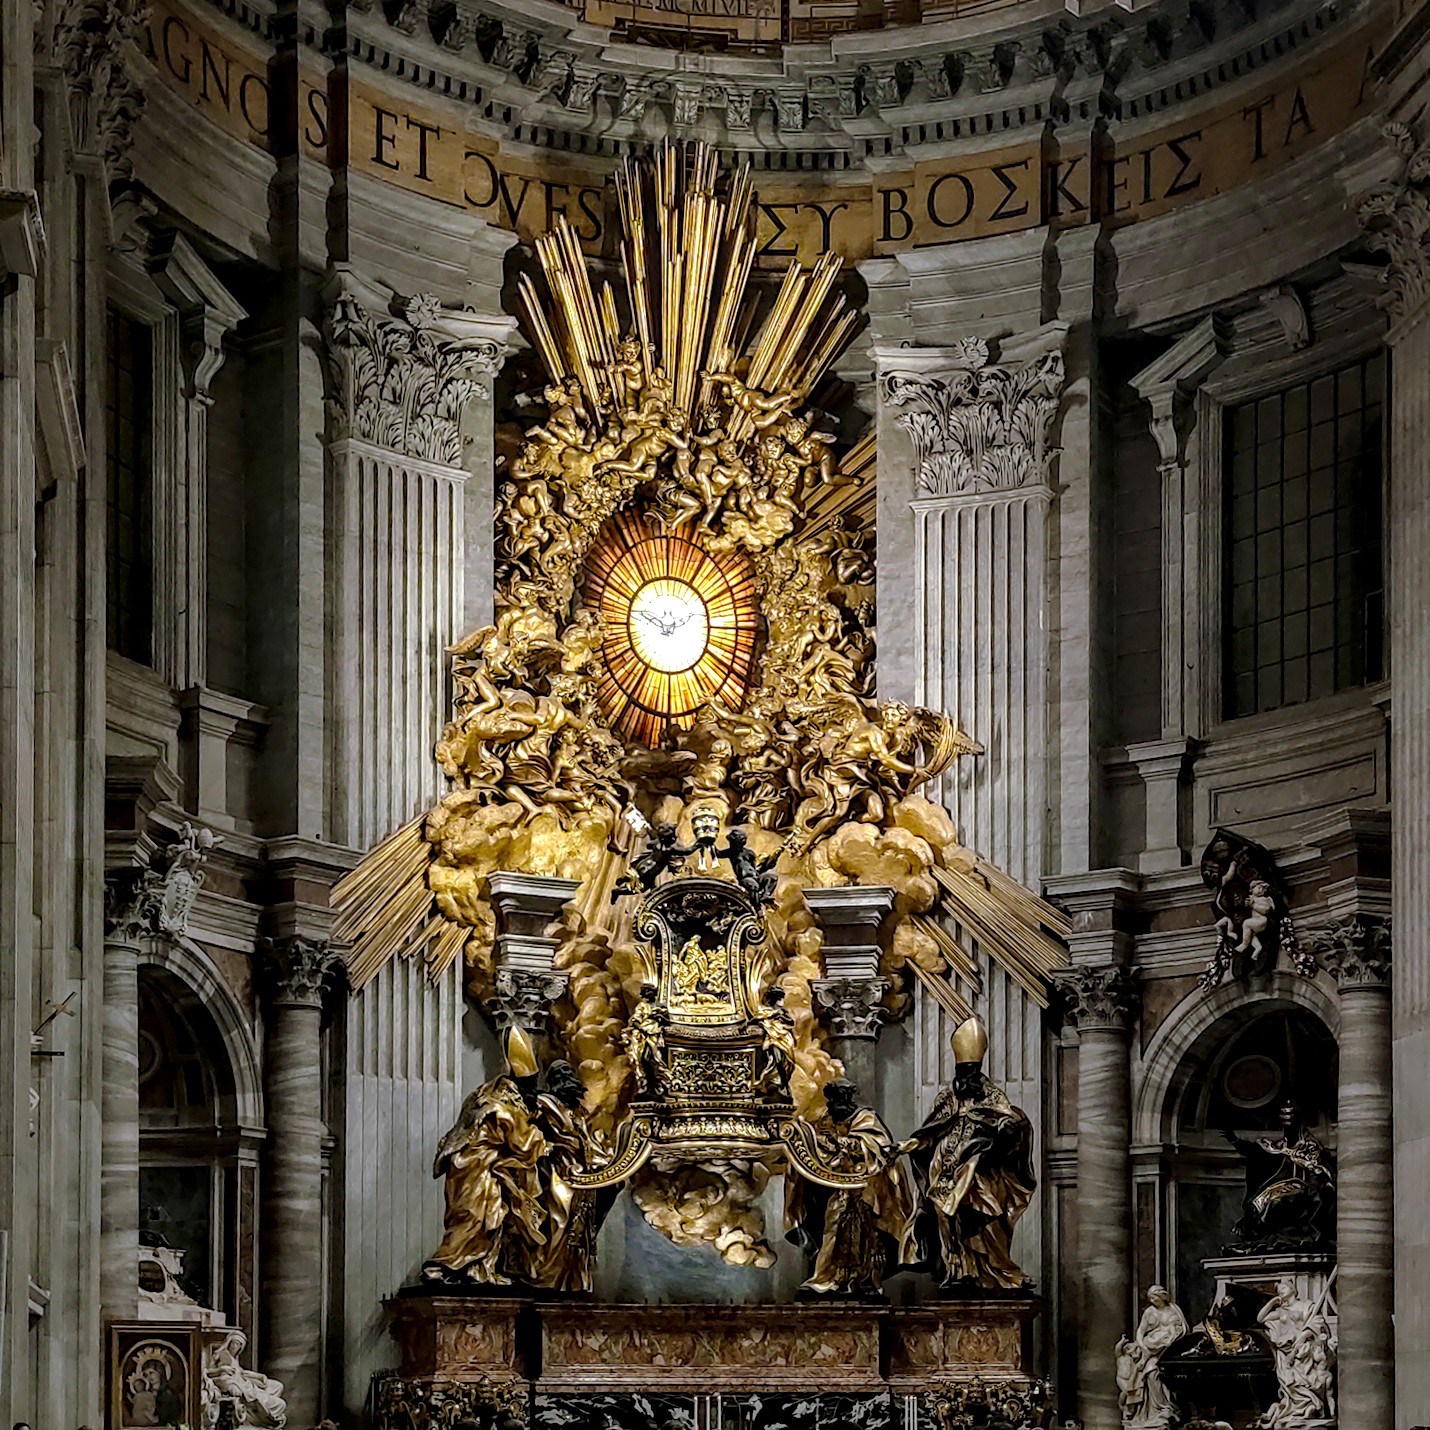
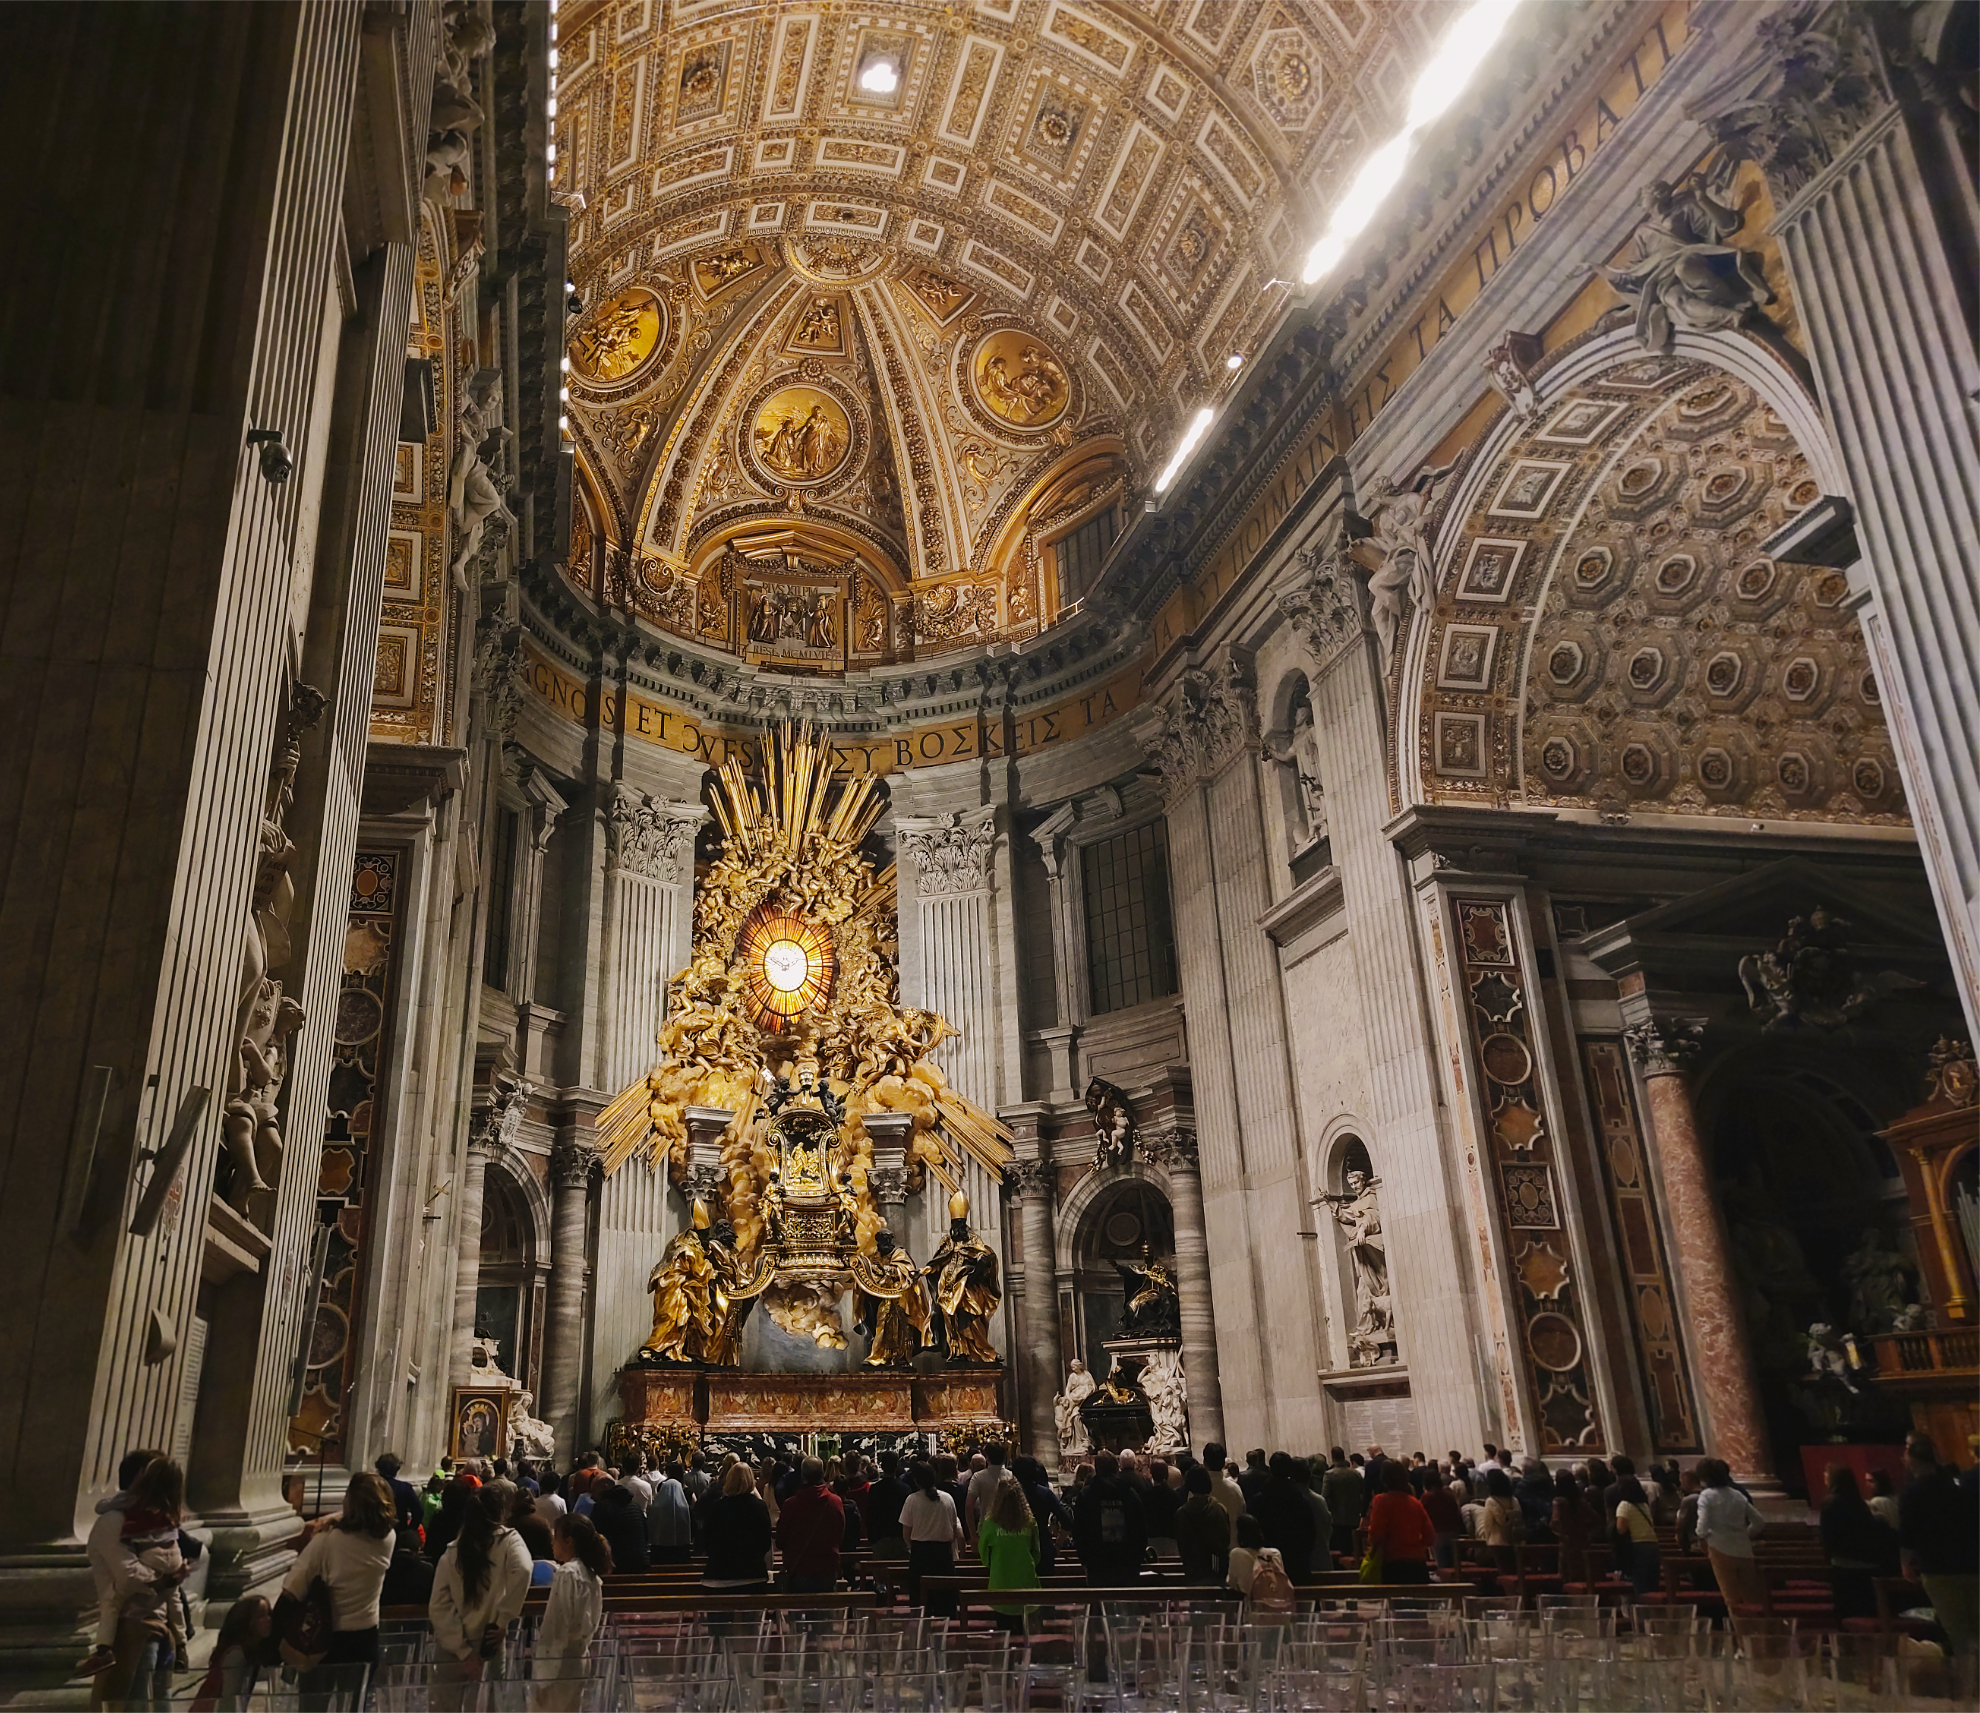
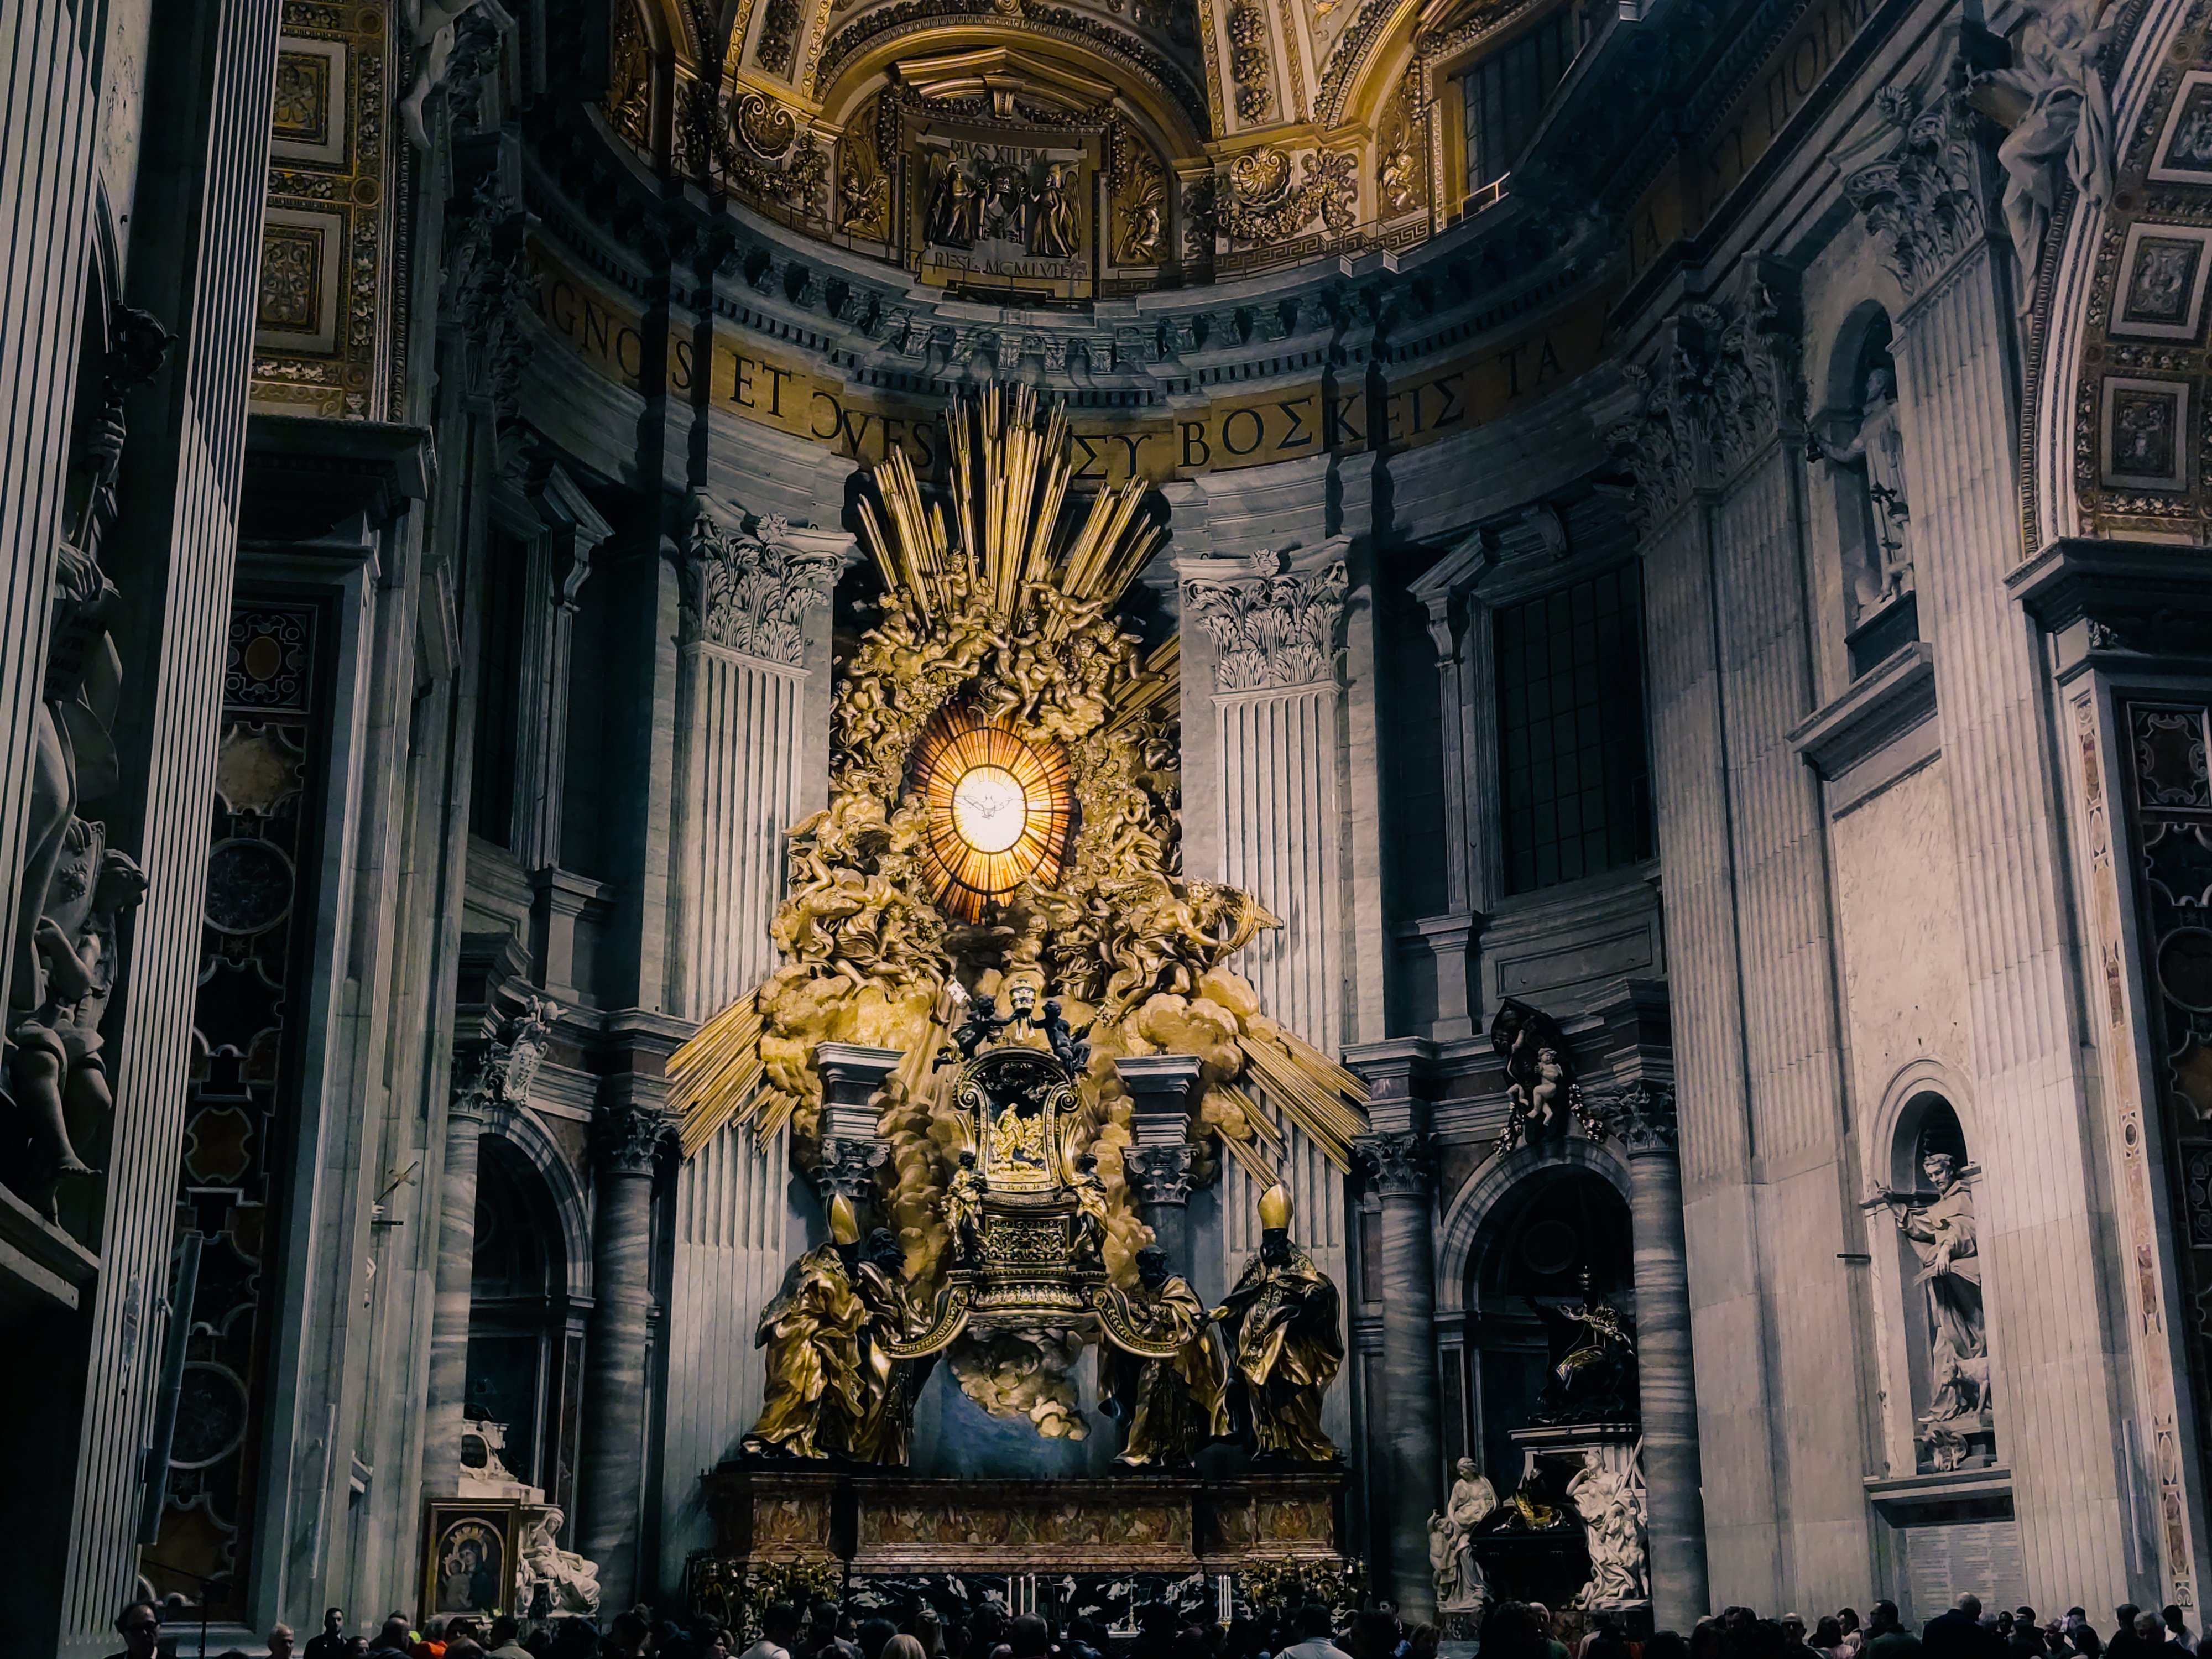
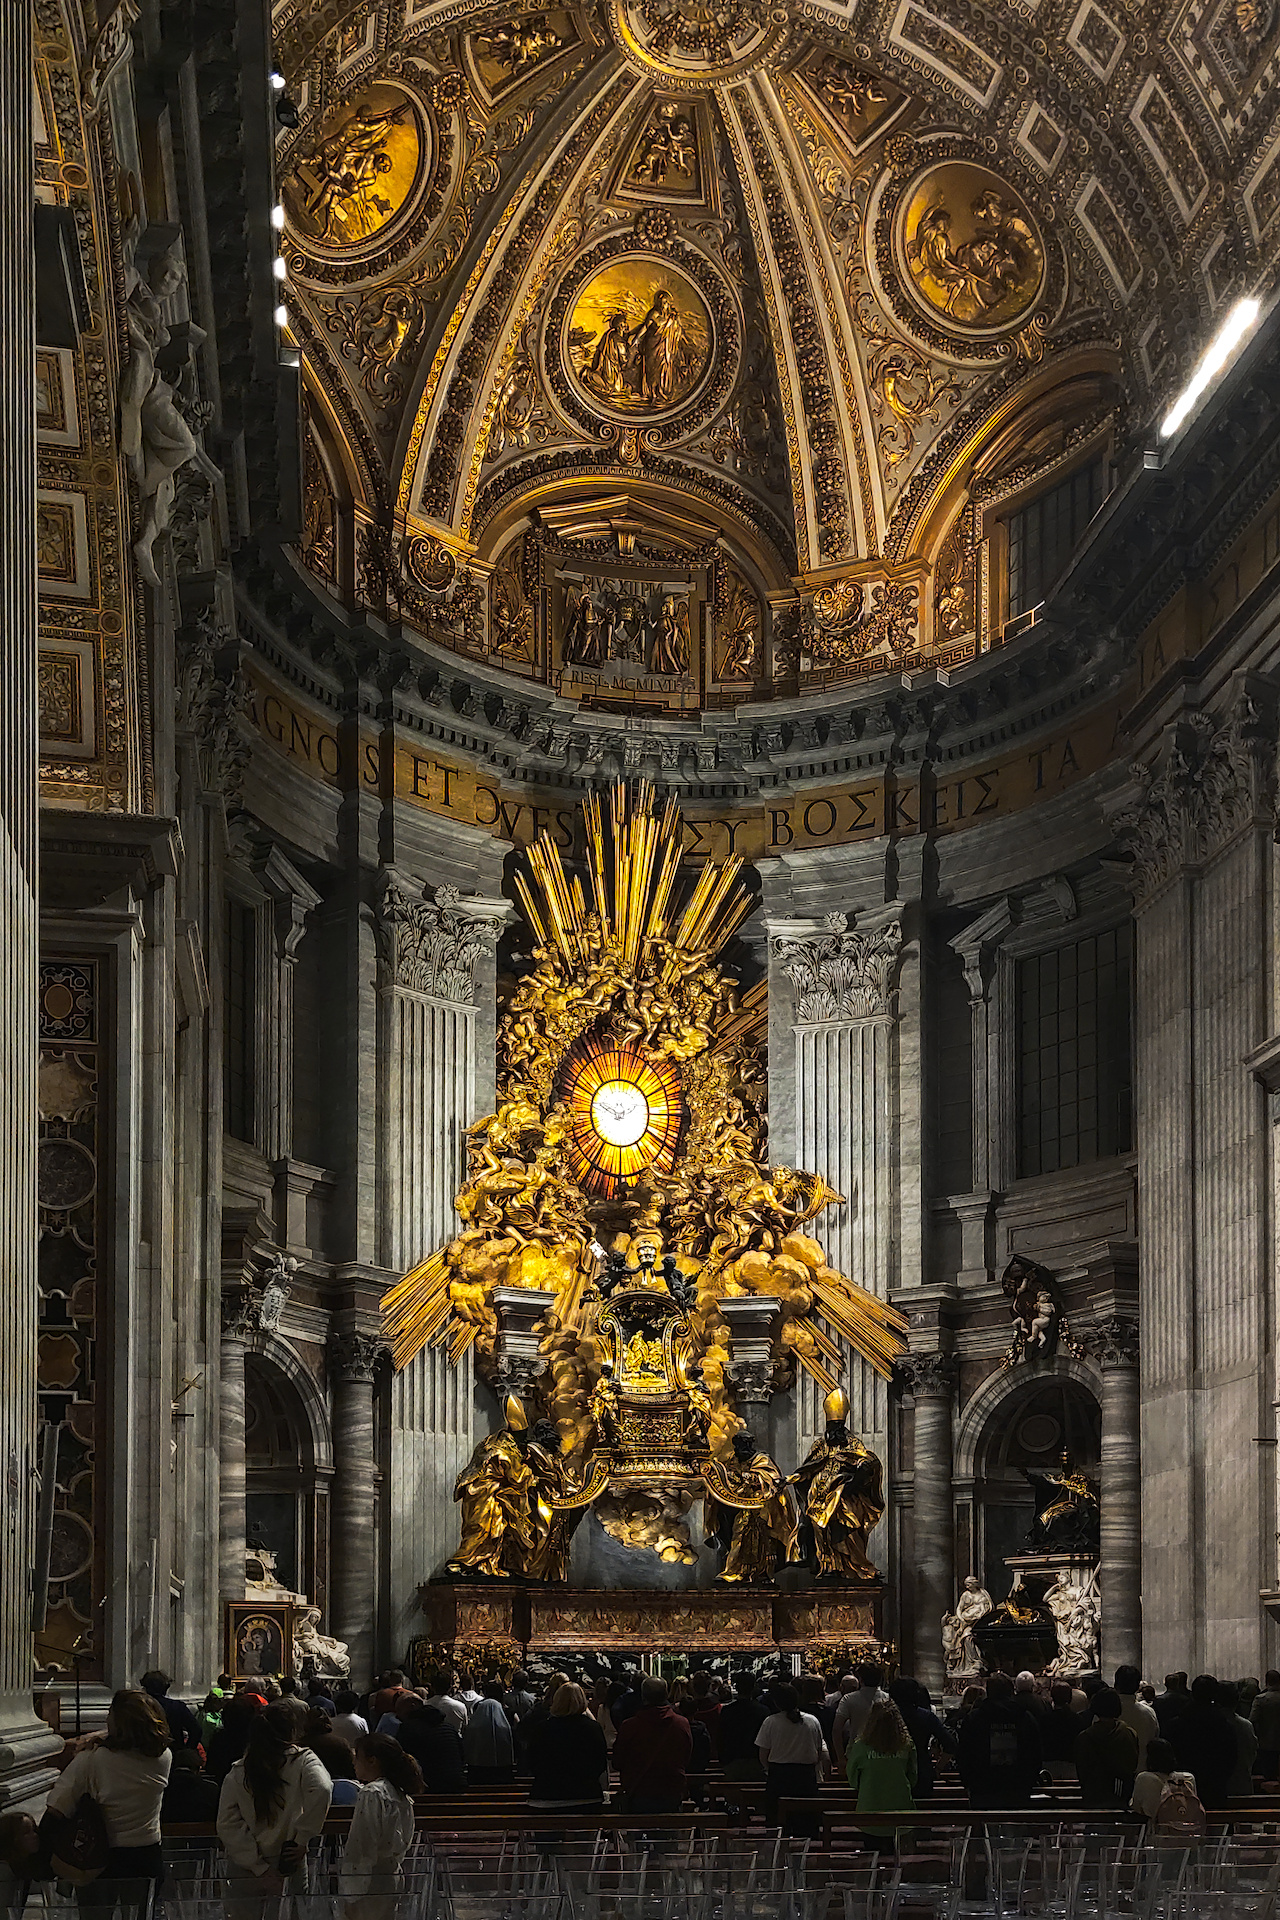
Your cathedral ones are a good example of highlight issues…at the top you have little choice and its really hard to get a nice result…Its not the main part of the photo but it can be a distractions…about all you can do is blow them out to a degree that looks okay…If you pull them down you get a very dull look and if you try to do it grey artifacts appear quickly. If you had a properly exposed raw you could likely make a lot more out of that part of the image and the shadows off to the sides and in an around the audience in the cathedral…
cathedral1.jpg.xmp (10,5 KB)

cathedral2.jpg.xmp (14,0 KB)
cathedral3.jpg.xmp (8,9 KB)
cathedral4.jpg.xmp (17,4 KB)
darktable 5.4
I’ve tried to desaturate the greens where there supposed to be grey/white and give the golden tones a push up. ![]()
I want to answer this quickly, please give me a little bit time to answer the rest.
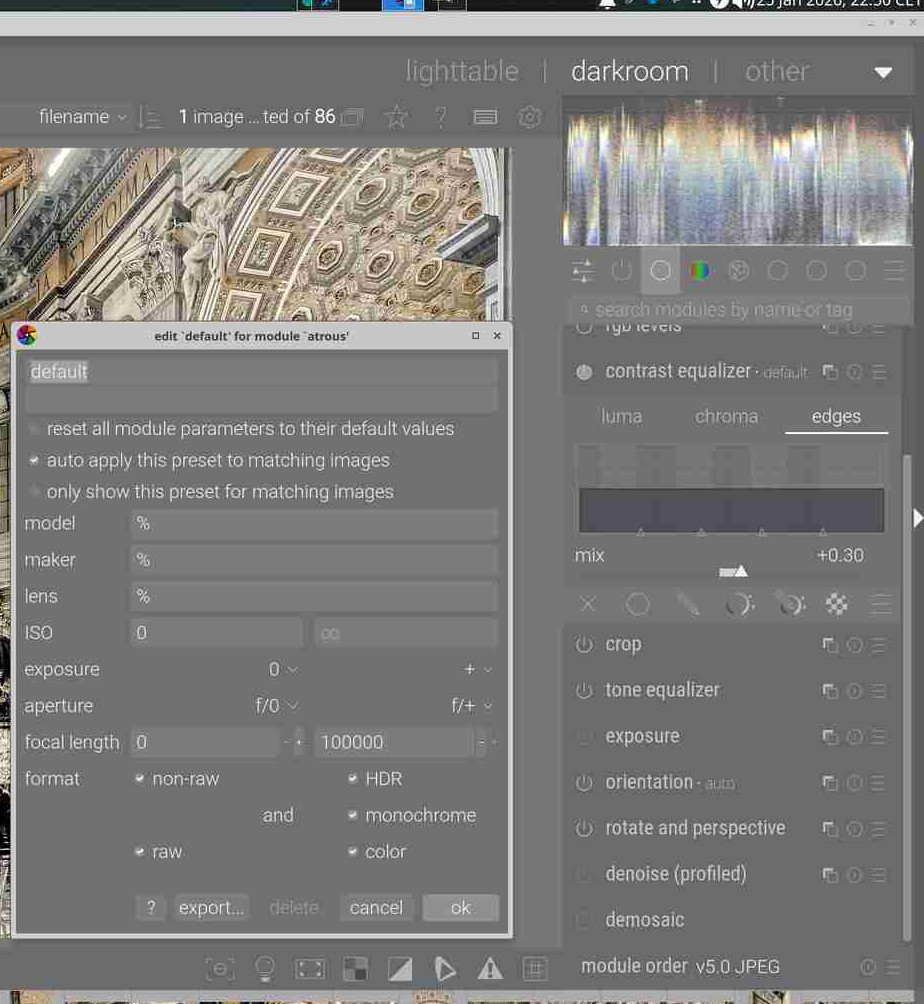
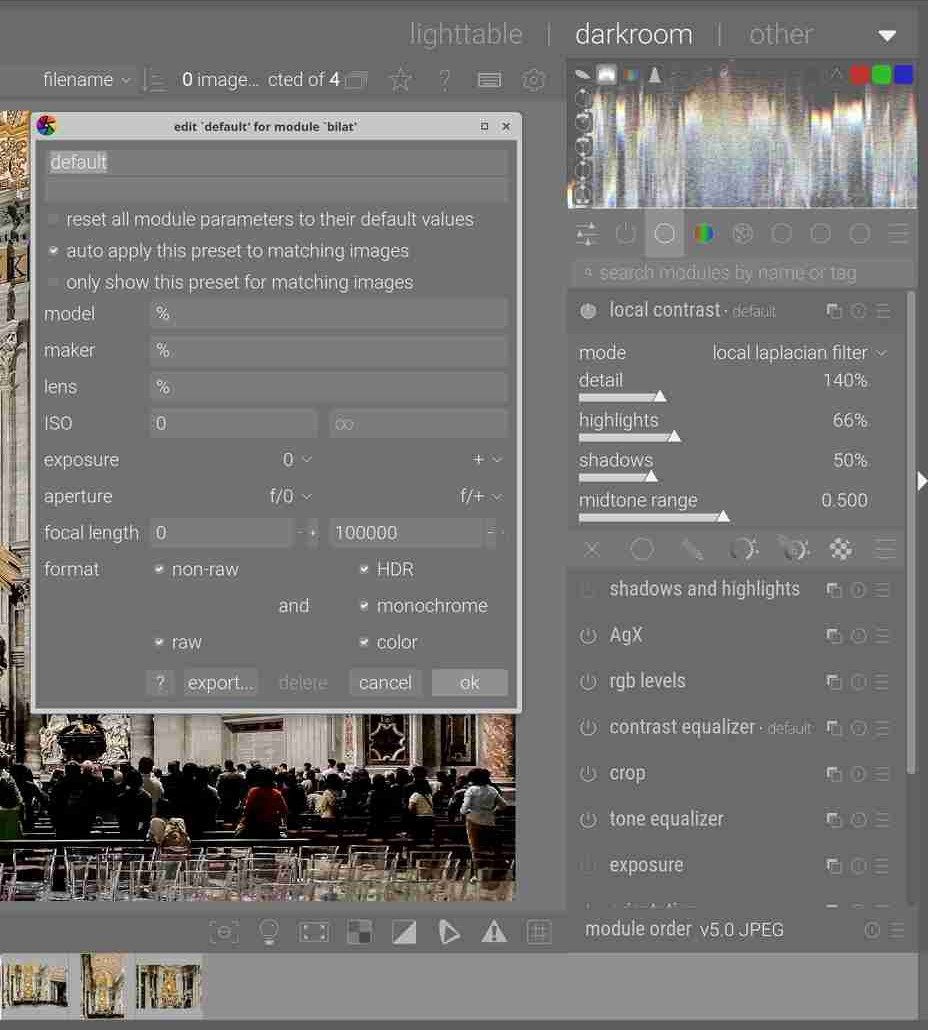
This is what I mean with preset. Every photo is sharpened a little bit, with a value of 0.3.
It looks like I have to disable it for non-raw.
Later I want to create styles, but for now I am not sure, what I want. I have to learn first.
As an aside I would have to go back and read the documents but iirc the edges does nothing unless you have made a change in the luma settings…Google Robert Hutton…He has a great video on what the module used to be called , the equalizer…He shows how to use the edges curves to manage halos and reverse halos or gradients that can happen with contrast enhancements at edges…
1 Like
My recommendation is to stop auto applying presets to every image. This is only a good idea for experienced users who know why and when this is of benefit. I have never chosen do this even after years of experience.
However, I have created styles based on experience to get my editing process started, but I would recommend that you are still in the early learning stages and not yet ready to create styles.
Here is one of my styles for my Canon R7 raw files. It includes local contrast because I use it on most of my images. It includes initial sharpening in demosaic module and diffuse or sharpen module. It includes initial denoising with the denoise (profiled) module. The exposure module is customised for my Canon R7 as I found the DT defaults not correct for my camera. It includes a preset for AgX based upon a preset shared by the creator of AgX.
So my style is applying initial sharpening, denoising and initial setting up of AgX. But with style applied I have to decide if I am happy with the exposure, then I have to go into AgX and use the auto tune levels and other settings. Then I decide to deactivate, keep or adjust the local contrast module. I may after this have to apply additional stronger noise correction for high ISO images. I may need to apply more sharpening such as lens deblur options if my image is too soft. And of course I might need some color corrections which I would not include in an initial style. This style is created to cut down on repetitive edits that I apply at the start of most of my edits.
I have created many styles after carefully thought to get my initial edits started. None of them are auto applied. Some of these styles will get deleted when I get improved workflows based on AgX because many of these are based on Sigmoid.
Auto applying presets and styles will hinder your learning process. Consider each image and what it needs.
A jpg is a finished image. It is produced by the camera or phone and intended as a fait accompli. When you bring it into DT for editing you are trying to find small faults you can correct. Maybe the shadows are too dark, maybe a sensor spot in the blue sky, maybe a minor color cast, cropping, or whatever. This will likely be different for each image. JPGs are sharpened in the camera or phone and rarely need additional sharpening.
Of course, all of what is written here is just my opinion and is not some hard and fast rule.
2 Likes
My try. Since a camera does a lot of processing on the jpg image, I felt the picture is best handled by a app like GIMP. Here is my try on one image
1 Like
1 Like
I think for raw a basic starting style like yours applied to a key image and then pasting that edit to similar ones is the most effective. Then on to the next key image and repeat.
As you note the JPGs are fully edited in the camera so to speak and here you are correcting or enhancing upon that each time
Please give me time to answer what you wrote, I have to try what you mean.
That is why I created my presets. I have thousands of similar plant photos in raw, which have to be edited or deleted. The goal is not a perfect photo, because it are so many photos.
My mistake was to use the preset for my raws as preset for the jpgs of my family. While local contrast is nice with macro-photos, it is not a good idea with jpg most times, like the ones in the cathedral.
I am interested of course in your comments, but if things last too long like masks the editing of the old photos will never end. Maybe I am coming back to some photos later and try a mask, saw some perfect images for a mask, but not now.
To goal at the moment is not to make big mistakes and your comments help me a lot, I would have done thousands pictures wrong.
Thank you all!
I am doing your advices slowly.
I found out that for my “plant raws” it is most time helpful to increase the local contrast default value of 125% to 140%, but with jpg this can be too much.
So disabling it simply for non-raw can be a solution.
Generally asked, can the preset set to 140 for raw and 130 to non-raw?
cathedral1.jpg.xmp (9.1 KB)
1 Like
You can make styles to select for different types of subjects or locations
You can do the same for presets for any module. The one shown here is for AgX and I have different presets for different subjects.
As for local contrast I always start of at the default value of 125% on the details slider. I only increase it when I am viewing the actual image and occasionally I disable the module if I don’t like the look. Some people on this forum never use or recommend the local contrast module, but I personally like it.
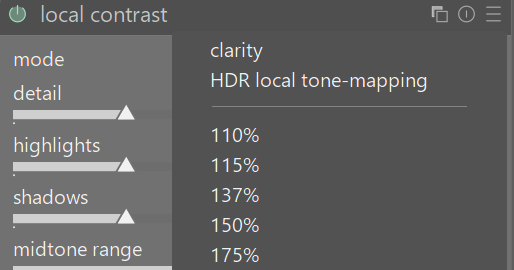
With my local contrast module I have found it easier to create presets at various values so I can rapidly click through them to decide the best. I haven’t included the 125% as a preset since I get this if I reset the module to defaults.