Invalid usually just means its not daylight based on the distance from the ideal curve so you can simply go to the hue/ chroma sliders and not think in temp anymore when using color calibration and its pretty easy to make corrections…
This may vary from image to image. I just tried filmic reconstruction on a very challenging image with magenta clouds and when filmic corrected the clouds it removed the blue from the bright sky.
These are all great points. And when something happens in a predictable way then you can adjust and adapt to correct for it. For me the issue around potentially wrong values being used is the most important issue. If i know a tool or module behaves in a certain way given the correct data then I can adapt or react to that tool to correct or enhance its effect as needed . If the result is not coming from the actions of the module but is as a result of data that is not accurate then this is an issue that hopefully can be resolved.
Luckily for most camera’s I think it is easy to check and experiment to see what the correct white value should be but for images like this one posted by the OP the only data I found from a quick scan of the metadata was the upper value for linearity so it might be less clear in this case what the correct value should be unless that sort of thing is published… I guess you could check some other sources to compare it…
EDIT : SO checking in RT… here are the values it would use… the posted shot is at ISO 80… not sure how to interpret this data but for an iso of 80 I wonder again if 4095 would be the right value… seems like it might be different??
// Quality A, samples by helices at RT forums
“make_model”: [ “Panasonic DMC-FZ1000”, “Leica V-LUX (Typ 114)” ],
“dcraw_matrix”: [ 7830,-2696,-764,-3325,11667,1865,-641,1712,4824 ], // DNG v13.2
“ranges”: {
“black”: 15, // 15 is BL offset. dcraw/RT read the base BL from Exif and calculates total BL = BLbase+BLoffset
“white”: [
{ “iso”: 80, “levels”: 3600 }, // Exif:3277 distribution peak at 3700 up to +/- 100
{ “iso”: [ 100, 125, 200, 400, 800, 1600 ], “levels”: 4050 }, // Exif 4095 distribution 4050-4095
{ “iso”: [ 3200, 6400, 12600, 25600 ], “levels”: 4080 } // Exif 4095 distribution 4080-4095
]
}
With darktable 4.1
P3050284.RW2.xmp (8.0 KB)
Steps
- Import
- Set preserve chrominance in filmic to luminance y
- Set highlight reconstruction to segmentation based
- Reduced exposure so that I could see the complete histogram
- Adjusted highlight reconstruction clipping threshold until I got rid of the “overshoot”
- Restored exposure
Time spent - 30 seconds
1 Like
I have to say I’m looking forward to seeing the new HR mode in a release. I’m not quite game to use the ‘beta’ versions for my main photo processing, but the mode seems great, from what I’ve seen so far.
The trouble is, filmic has no idea about what’s overexposed at the raw level. It deals with highlights, in general. However, its norms react badly to super-saturated colours caused by raw clipping, even when they are extremely bright (like the Sun disc).
See Magenta highlights vs raw clipping indicator vs filmic white level
I don’t understand how filmic handles brightness. I used to think I do. My understanding was that it calculates a number, the so-called norm, from the pixel’s RGB values, and uses that as the brightness for the tone mapping, and then calculates display-referred RGB values based on the mapped (display-referred) value of the norm and on how the original, scene-referred RGB values were related to the norm:
// R, G, B: scene-referred; r, g, b: display-referred
norm = f(R, G, B) // f depends on the selected norm
mapped = tm(norm) // tm: tone-mapping function
r = R/norm * mapped; g = G/norm * mapped; b = B/norm * mapped;
But then we read that it just so happens that this shade of magenta appears dark in some norms. However, the same magenta highlights are considered to have extreme brightness, as they are affected by the extreme luminance saturation slider (they are extremely bright: when we enter filmic, the (clipped in raw) Sun disc reads RGB = 4166, 1687, 5304, while the (non-clipped) bright sky reads 1572, 1188, 707).
Anyway, I don’t want to resurrect that old thread (especially with Aurélien gone). I just added it here for reference.
1 Like
With darktable 4.0, it does not, at least not here on this Windows laptop (without OpenCL):
Edit/clarification: by ‘it does not’, I mean that the raw overexposure does not trace the magenta; with the default raw white level of 4095, no pixels are highlighted at all (since none have that value).

Reducing the threshold in highlight recovery is pretty much the same as reducing the raw white point.
In fact, I have to lower the raw white point until 3845:


Once I do that, reconstruct in LCh works OK (subject to the limitations mentioned earlier regarding WB being set to 6502K). Switching to as-shot WB and turning off color calibration produces the grey we can expect from that method:
left: ‘modern’ chromatic adaptation (camera reference WB + color calibration), right: ‘legacy’ (as-shot WB, no color calibration):

Top (locked sample): ‘modern’, bottom: ‘legacy’:

Even if the ‘modern’ way produces a cast in the ‘recovered’ highlights, filmic’s norms will have a much easier time handling that ‘almost grey’ colour than they have with the strong magenta cast.
2 Likes
Same here… I discovered just earlier. Also Win (11) and no OpenCL. dt 4.0
1 Like
The “(invalid)” doesn’t mean the colour is invalid (after all, you see that colour, so it can’t be invalid…).
It means that the illuminant (the light lighting the scene) doesn’t fit the assumptions in the model used (e.g. “daylight”).
An example:
in a normal outdoors scene, the iluminant would be “daylight” with a certain colour temperature (let’s say 4200K). So far, easy, color balance RGB will show daylight at 4200K as illuminant.
Now we move under a tree (preferably with some grass underneath). The incoming light (the illuminant) will be filtered through the leaves or reflected frm the grass. This means the light will have a strong green cast ùand won’t fit the spectrum for “daylight” any longer (there is no green daylight). So the illuminant will be marked as “(invalid)” to show this.
In such cases, you will have two sliders to work with: a hue and a saturation. For me, modifying the saturation slider (to lower values) gives the best results in general: dt tries to get a neutral average for the image, which can break down if the illumiant has a strong colour, so lowering the saturation offsets that.
Of course, there are cases where I know the illuminant, so I can tell dt what it should be! Images with a strong dominant colour can confuse dt in picking a wrong value for the illuminant…
2 Likes
By Todd post, it looks like raw therapee is using 3600 for this camera/iso white point. I think that your fix is the right approach.
I tried looking at the file in exiftool, but I don’t see any white level in the exif or makernotes.
Looking at the snippet that was posted above from RawTherapee’s camconst.json, for ISO 80 the white level seems to be 3600.
Setting the white level to 3600, the sky is neatly marked as overexposed. (The magenta you see is overexposing your sensor.).
So, now that the white level is properly set, you can have a look at what the highlight-reconstruction options do. Unfortunately, the easiest one (reconstruct color) gives artifacts, so it’s not usable here. So you can use Lch (but that will mean no color in the overexposed bit). In this case that might work out ok, since there is little color in it anyway.
If you are on a recent compile / insider build, you’ll have segmentation-based which works quite nicely here.
Setting exposure (0.7, Aurelien’s defaults), enabling filmic with defaults (filmic v6, maxrgb mode, curves shadow/highlighs set to ‘hard’, latitude set to 0.01), clicking the auto ‘white picker’ (leaving the blacks alone) and leaving the rest at defaults gives a very good image.
Enable ‘sweeteners’ as you want (sharpening, lens correction, chromatic aberrations, local contrast). I added diffuse with ‘demosaic AA’ + diffuse with ‘lens deblur: hard’. I added local contrast in the bilaterial mode, contrast to 3, tweaking the details/strength slider to have a nice dehazing effect in the trees… then mask it to only work on the darker greens to only target the trees.
Then add another local-contrast module on stock defaults.
I’ve duplicated the edit and done a few versions:
segmentation-based highlight reconstruction + filmic v6 maxrgb:

‘reconstruct color’ highlight reconstruction + filmic v6 maxrgb: (reconstruct color gives artifacts in this case, but filmic seems to hide them?)

highlight reconstruction off + filmic v6 luminanceY mode (no filmic reconstruction yet):

highlight reconstruction off + filmic v6 PowerNorm, with reconstruction dialed in:
highlight reconstruction off + sigmoid (the mode with the least magenta, and then raising ‘skew’ so that the magenta turns to white):
In all cases, it starts by setting the white to 3600…
2 Likes
I have absolutely NO idea what you are replying to…
My post was dealing with the color calibration(*) and its use of “invalid”, not at all with raw white levels.
Nor did I edit or remove anything in the last few hours…
(*: thanks @priort ![]() )
)
But indeed, there seems to be no value for the raw white point readable by exiftool, there is a value for the linearity limit (around 3200).
But it’s still possible to retrieve some more detail in the background:

Color calibration… 
My mistake, I had set the clipping threshold in the raw overexposed indicator to 0.929…
Oops, I had set the clipping threshold in the raw overexposed indicator to 0.929…
Before making my comments above that included the RT wb data used for this camera I had basically done the same exercises as @kofa above…as always he took the time to break it down and with examples…I also did some other fiddling around. I don’t apply filmic by default. Largely because it can introduce things that can require some intervention. I like to see the image and the wb before filmic hits it and then I look to see how it responds to adding filmic… This image was a good example. Adding filmic revealed the deep magenta in the compressed highlights.
Doing things this way for many images, ie not starting automatically with filmic I will often use only Tone Eq instances and rgb color balance as I often feel that if you can get away with this for toning you often end up with more basic details and less potential artifacts … of course some times going the filmic route is the way to go.
So as you do when you are tinkering in this sort of a post I just tried the Panasonic base curve for this image. Interestingly enough and I would have to go back and redo it but I felt it was a more pleasing image with no highlight issues and more detail in the trees. Given where it now sits in the pipeline I think its a bit less restrictive than in the past. I am not advocating that this is a better approach but it was interesting that in this case there was some messing around to do with filmic and in the end the detail level in those trees which is not really great to begin with looked better with the base curve.
I can’t recall my parameters but basically I had done my filmic edit for the most part …I had used 2 instances of D&S in that edit and I can’t recall what else and then I just swapped in the base curve instead of filmic just as I said messing around and I was surprised by good it looked. I may or may not have made exposure adjustments on top of the swap and the rock was a little dark so I recall further doing a 3 exposure fusion bias on the shadows set to 0.3 or something… in the end it wasn’t a bad result…
Public Service Announcement: Exposure that preserved the data in that region would have obviated all this discussion of reconstruction/obliteration pet tricks…
I dragged the raw into rawproc and applied the librtprocess (RawTherapee derivative) highlight reconstruction, seemed to handle it okay. Here 'tis with only the HL reconstruction, no other processing, including tone curve (except for the export one):
Note that I established the white point as the maximum value contained in the image. Compared to the OOC JPEG, I’d say there’s other processing going on there…
Re-creating data you didn’t capture in the first place will always be at best a gross approximation. That said, getting better data in the parts of the image you care about is a good thing, so I’d say just learn to love whatever highlight reconstruction the software big-heads deem fit to provide… 
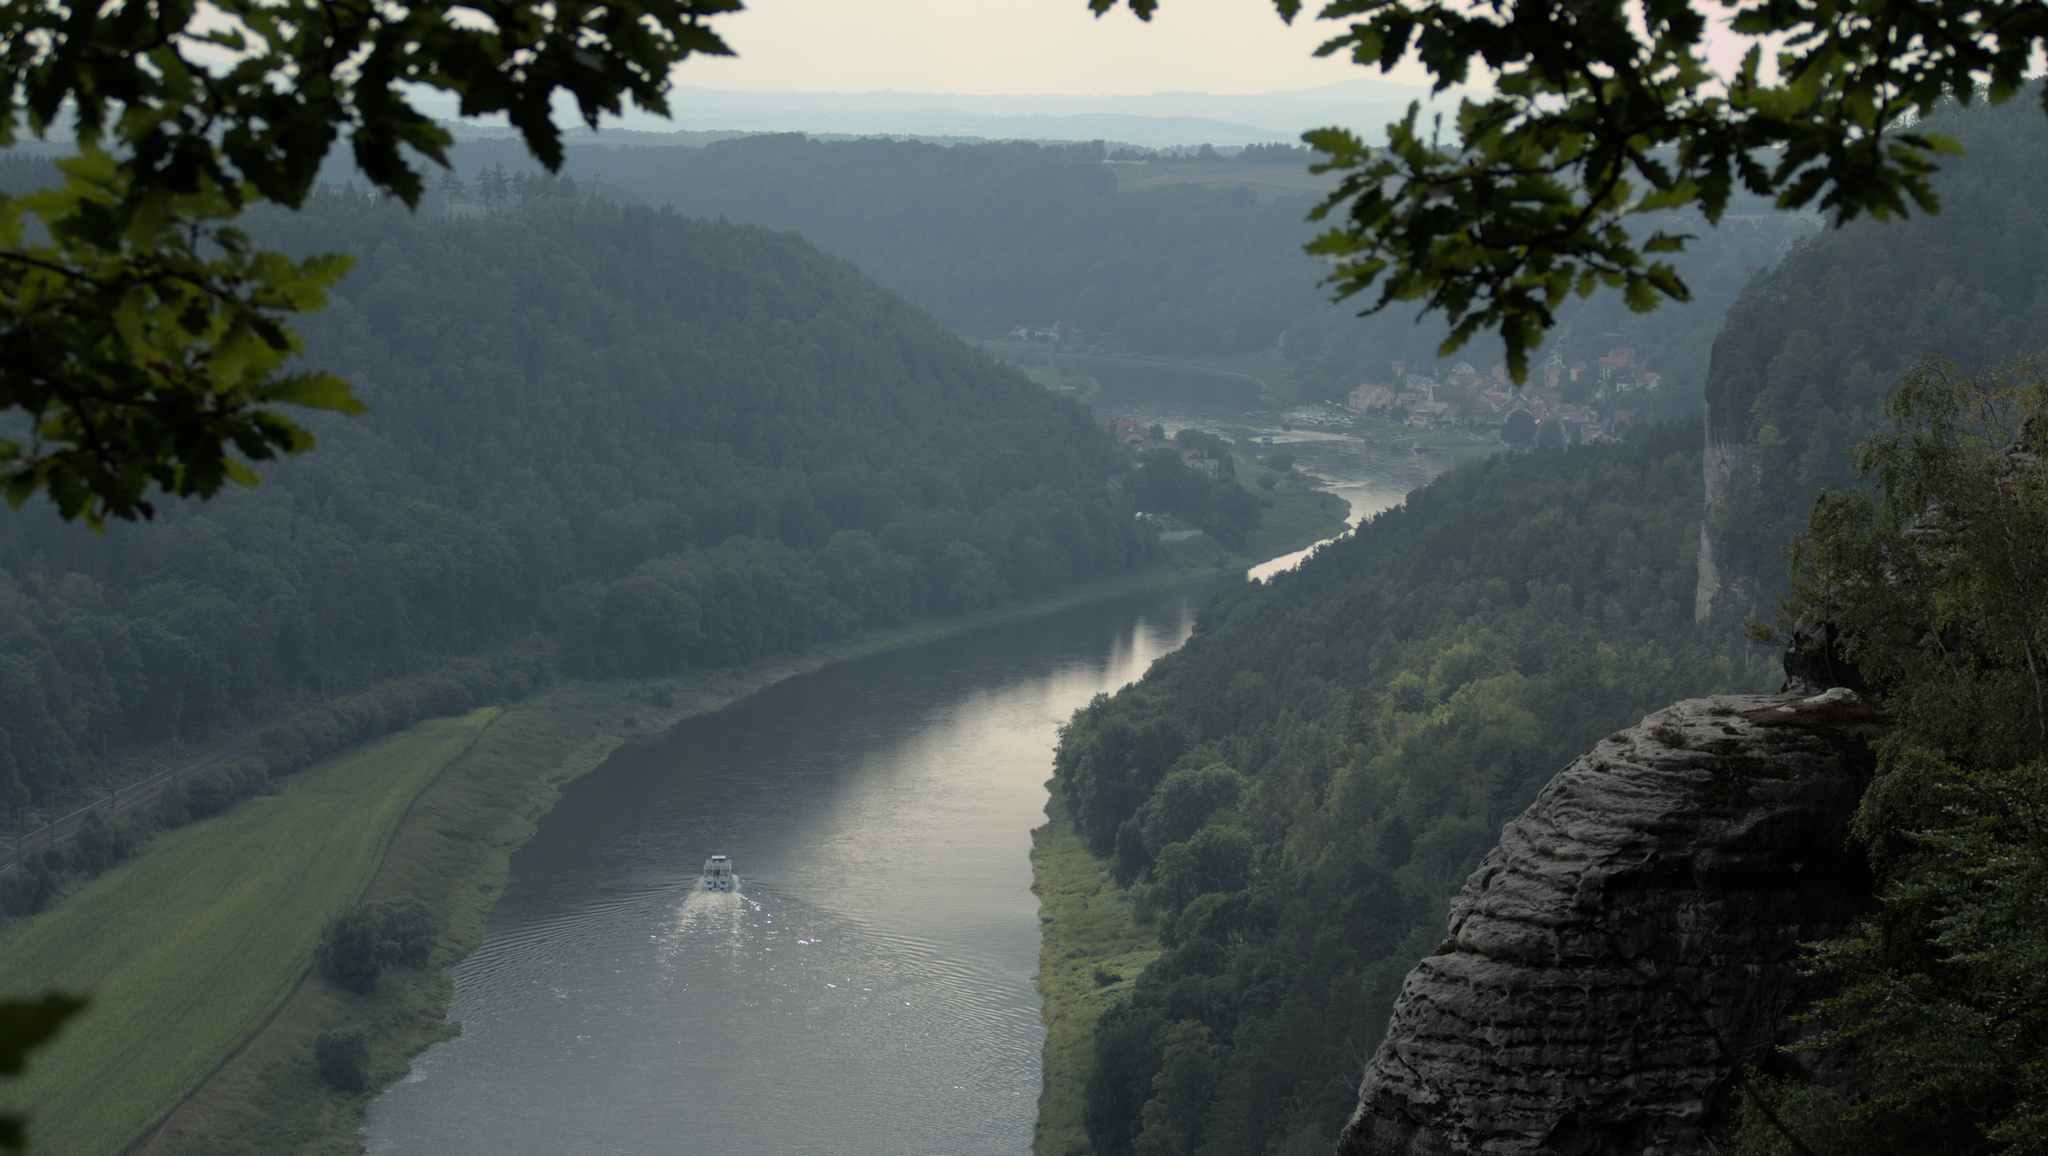
Oh, really nice image, by the way…
9 Likes
Hear, hear…
3 Likes
Hello,
I often see this argument when I read this forum, and somehow I disagree: while I perfectly understand that if you want a “postcard” image (sorry for the poor wording, not trying to feel snob), you need a super dynamic range and you want to preserve the highlights, in many cases I actually look for burnt highlights, and in this case I want them to be white. I think this is what many people expect, thus the numerous threads with people surprised to see them pink.
And I don’t even talk about high-key, just high contrast images going from pure black to pure white.
Sorry i’m on my phone, I’ll try to add a picture to illustrate.
1 Like
Most are not just asking about the cause of the magenta colour, but want to get detail and colour back in those blown areas, preferably in a way that resembles the original scene… (not possible…)
If you aim for blown areas as part of the image, there’s no problem, and the “magenta highlights” are easy enough to solve.