Parameter settings in xmps are quite useless if there’s no reference to a module version …
If you have a look at an XMP file with a darktable history, you’ll see the module data have a version number included.
The dev modifying the module code still has to code for it, and bump the version number (!), of course.
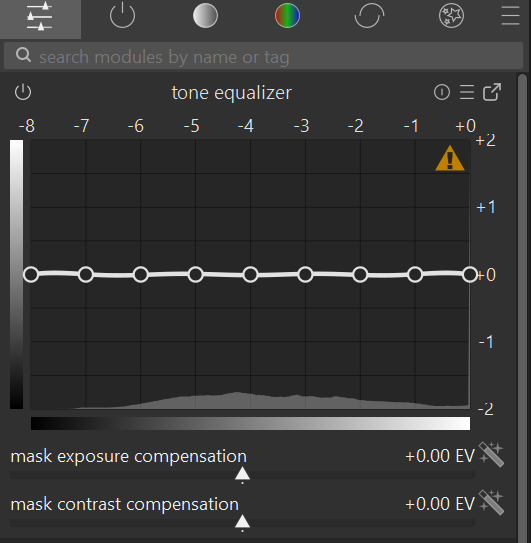
I’m late to the discussion here, but I like the proposed changes. I got frustrated with the original UI of tone equalizer because I needed to adjust mask exposure/contrast compensation sometimes but I couldn’t see the graph while making these changes. Following suggestions on this forum I made a customised view in the QA panel that works for me. Your proposed UI certainly achieves what I want. I like that the sliders are one click away if you want to expand that section and I don’t see that as a signifcant burden on screen real estate. Thanks for your efforts.
Here is my QA panel setup.
9 Likes
I do exactly the same thing.
1 Like
I added hotkeys with scroll wheel combos, so don’t need the sliders at all. I don’t use the quick access panel.
7 Likes
mee too and just made a pull request for that ( toneEQ: move exposure/contrast compensation sliders to advanced tab #18682)
11 Likes
@MStraeten I just saw your pull request. I was unsure if the last posts from @hannoschwalm meant that this is being put into the latest build. I certainly would be pleased if that is the case. It would be another small but good improvement to DTs functionality.
2 Likes
It was interesting I just went back and re-watched the very long video that AP made about dodging and burning with the tone eq. It made me think about the module a little differently than I had…around the 49 min mark he actually says that the tone eq is not for every image and works best where there is a more or less continuous gradient of light. He noted that for other images masks and exposure could be better. Also the whole interplay of the mask/guided filter/curve …the mask is quite important and if it is not correctly set then the curve can be much less effective than one might think. If I understand it then lets say you were to create a mask with only two or three broadly blurred areas then you have 3 main corrections you can make… All the pixels in each of those zones of the mask are getting the same correction designated by the curve even though individually they will vary and might even include much darker pixels grouped by that large 25% blurring radius of the filter…this will preserve the local contrast as it is supposed to but at least to me makes it more apparent why smooth curves and a targeted mask that defines the nature and location of the “zones” deserves more attention than thinking of a model where one slider hits a very discrete region as far as I can see it only can if the mask is set to really allow that and I think this would or can also be more prone to break the image…
3 Likes
I remember when it first was merged that AP very much emphasized that it was a “dodging and burning” module. But I think the name “Equalizer” and the fact that it shows 8 zones gives an impression that it’s a tool for manipulating each of those 8 zones. AP seemed to envisage it much more like a dodging and burning tool to mimic what you would do with film in a darkroom. As you point out, that means you’re pretty much making just 2 or 3 main corrections where the blurred areas are.
In many ways, it’s a different interface to doing a bunch of the popular radial filters that Lightroom users will be familiar with. And that means you’re really only working on a few areas rather than 8 zones.
4 Likes
I have the impression that AP’s focus in general has been more towards portraits and more subtle skin tones (?), although the video is of somewhat more contrasty images .
I’ve started to test your version of Tone Equalizer,
I have some issues but this might be related to caching maybe,
When I zoom after having used Tone Equalizer, the image breaks. But the thumbnails looks ok
Thanks for the bug report.
This initial version has a number of issues, I have already fixed this specific one. I still want to finish this project, but right now progress is slow, so it will take some time until I have something new.
3 Likes
I personally had not thought of it as a dodge and burn module. Maybe this is because of my background in professional darkroom printing. I though of it more as an alternative to the shadow and highlights module. The zones in TE certainly influenced my view here as well.
@JovianSettler I feel your direction looks very promising so good luck with it.
It can definitely replace the shadows and highlights module, because that old module is pretty much just true to its name and only operates on the shadows and highlights, which the Tone Equalizer handles much better.
I’ve already talked too much about what I would like to see, but another idea for a new/updated module (to accompany Tone Eq) would be adding a few more zones to the Shadows and Highlights module, so it became the “Blacks, Shadows, Midtones, Highlights and Whites” module. More of a mouthful, but more useful!
1 Like
The ART tone eq uses basically this with a heatmap/false color for each slider…I am not sure of the math for blending/feathering but you can push it pretty hard and get some decent results with just those sliders…
But really we do have all those and with an internal mask in the rgb CB module…
4 Likes
I remember @agriggio implementing that false colour mask back in the day. Loved it and I’d like to see it come to DT.
2 Likes
[quote=“europlatus, post:129, topic:49314, full:true”]
I never understood why he called this “dodging and burning”. In the film days that meant using tools or you hands to change exposures in a given area not related to the original tone. Dodging and burning are done using the exposure module with masks…[quote=“europlatus, post:129, topic:49314, full:true”]
2 Likes
I have had photos where I was unable to bring out details using tone equalizer, no matter what I tried, but worked really well with shadows and highlights after the tone mapper (and I’m saying that as someone who really complained a lot about the latter module in the display-referred days). I think the difference is that after the tone mapper the dynamic range is much smaller (they were photos with very high difference between shadows and highlights).
1 Like
Changing the radius and the compression in the module can drastically change the results …for the better. I often use it too or at least try it as you mention after tone mapping and even when I have already used a couple of instances of the tone eq and I have corrected some aspect of the image but there is still a little tweak needed and then I will give the good old S&H a try and adjust those sliders…it often is a nice finishing touch… ![]()
Interesting. I must admit I’ve not used that module much, although I did play around with it for this very tricky Play Raw and got some good results.
Have you ever used it to add contrast? Or just compress the dynamic range? I’ve always thought of it as a hyper-specialized tool that is only really good for compressing shadows and highlights and not much else. But I might do some more experimentation with it…