Of course this would be easy if I could brush or polygon an area in subtract mode, but that’s not currently available. Although they are not, if the ellipse or rectangle "Excluding Spot"control points where free to move in any direction, that would be most helpful.
Perhaps there is another module that would accomplish the background isolation better or easier.
First thing I did was looking for the lightest part of the area that needs to be selected and put the spot there.
Dial in the basic area using the Scope slider
Fine-tuning can now be done using the threshold and decay slider combo and/or the ab-L and C-H balance slider combo.
In this specific case the first set (threshold+decay) has the most effect (threshold down and decay up). The other combo is more colour related, although the ab-L slider might be increased a bit to emphasize the lightness side of things (I did not do that in the provided example).
It is a bit of a back-and-forth at times and you might even need to adjust the Scope slider during this process, although I hate having to do that, it being a bit of an anchor for the other sliders.
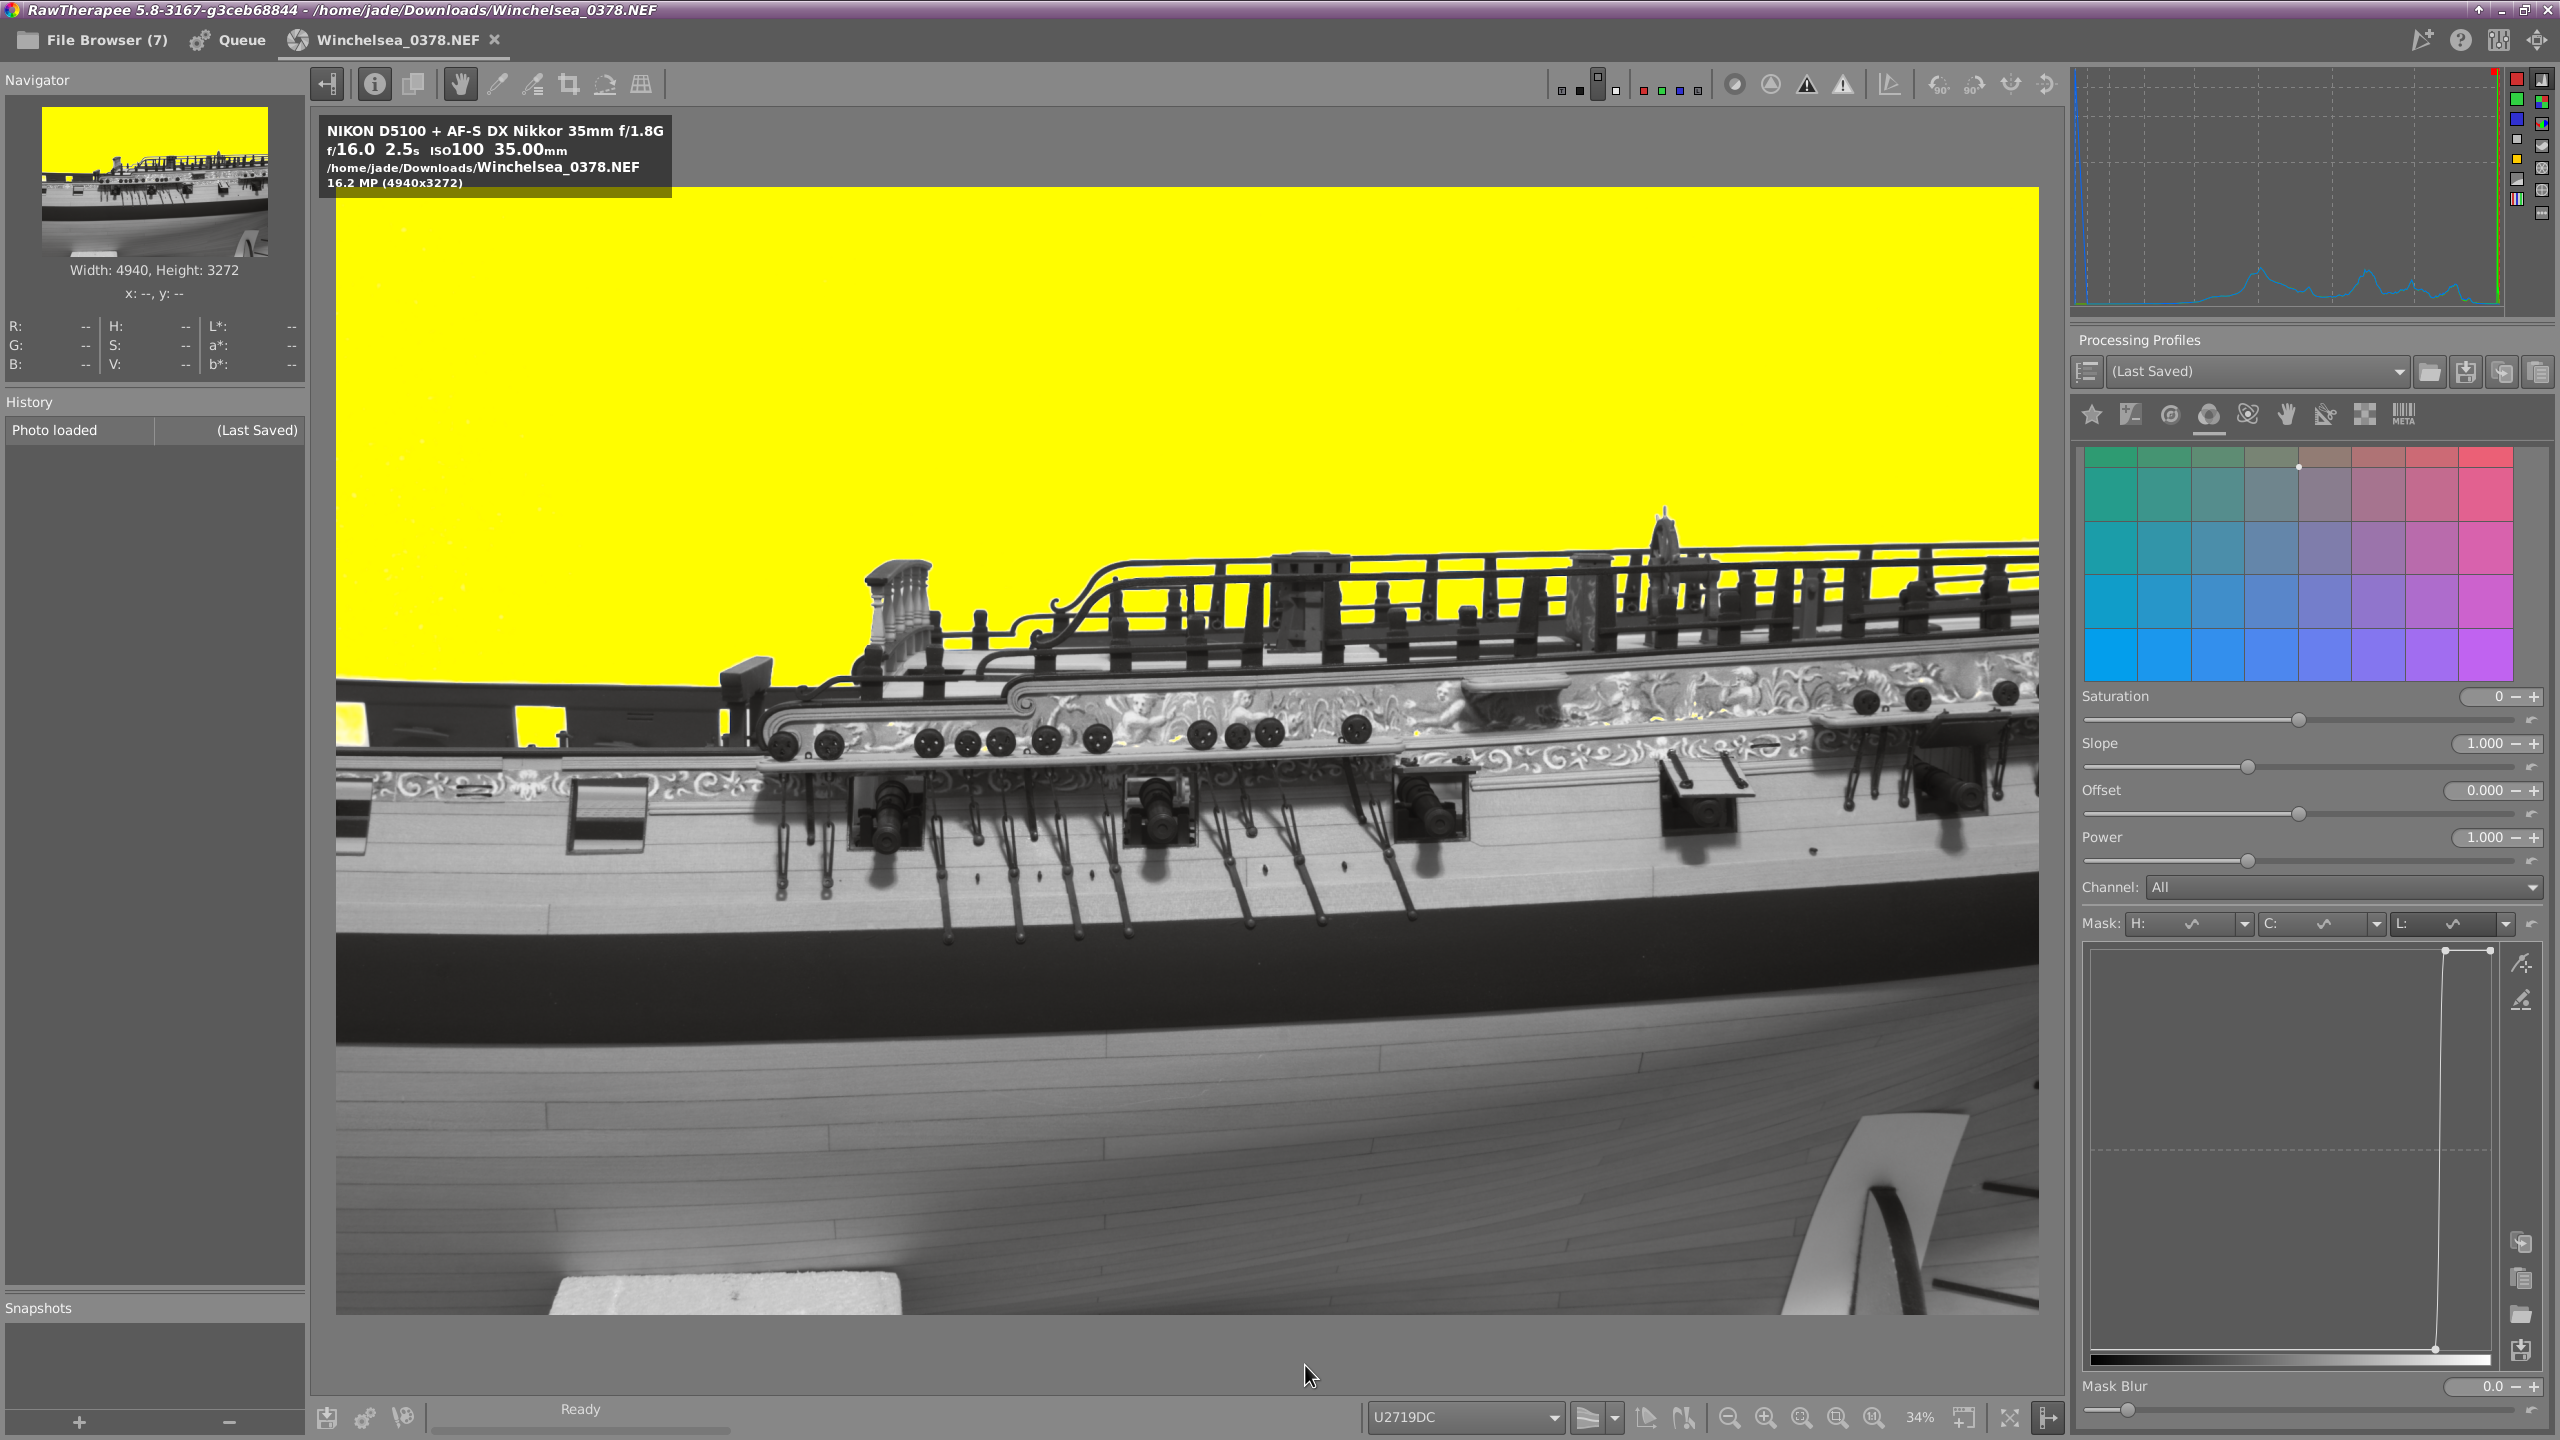
There is a possible alternative that you could use: the Colour Toning module:
This does have the drawback that is does not have the full set of tools that Local Adjustments gives you. You’re “limited” to saturation, slope, offset, power and colour toning (for all or one of the RGB channels).
But you can use multiple instances if wanted/needed.
Anyway, I provided the sidecars for both examples and hope this helps a bit.
Thanks @Jade_NL , that was quite helpful indeed. I do find that using the Local Adjustment you demonstrated is easier to do and gives more tool options.
What I find, is the Color Toning curve being a bit finicky to adjust. Sometimes I can get a “red” indicator on the spot and other times not so easy. Grabbing a control point with ctrl key is difficult at times which was also mentioned by @Andy_Astbury1.
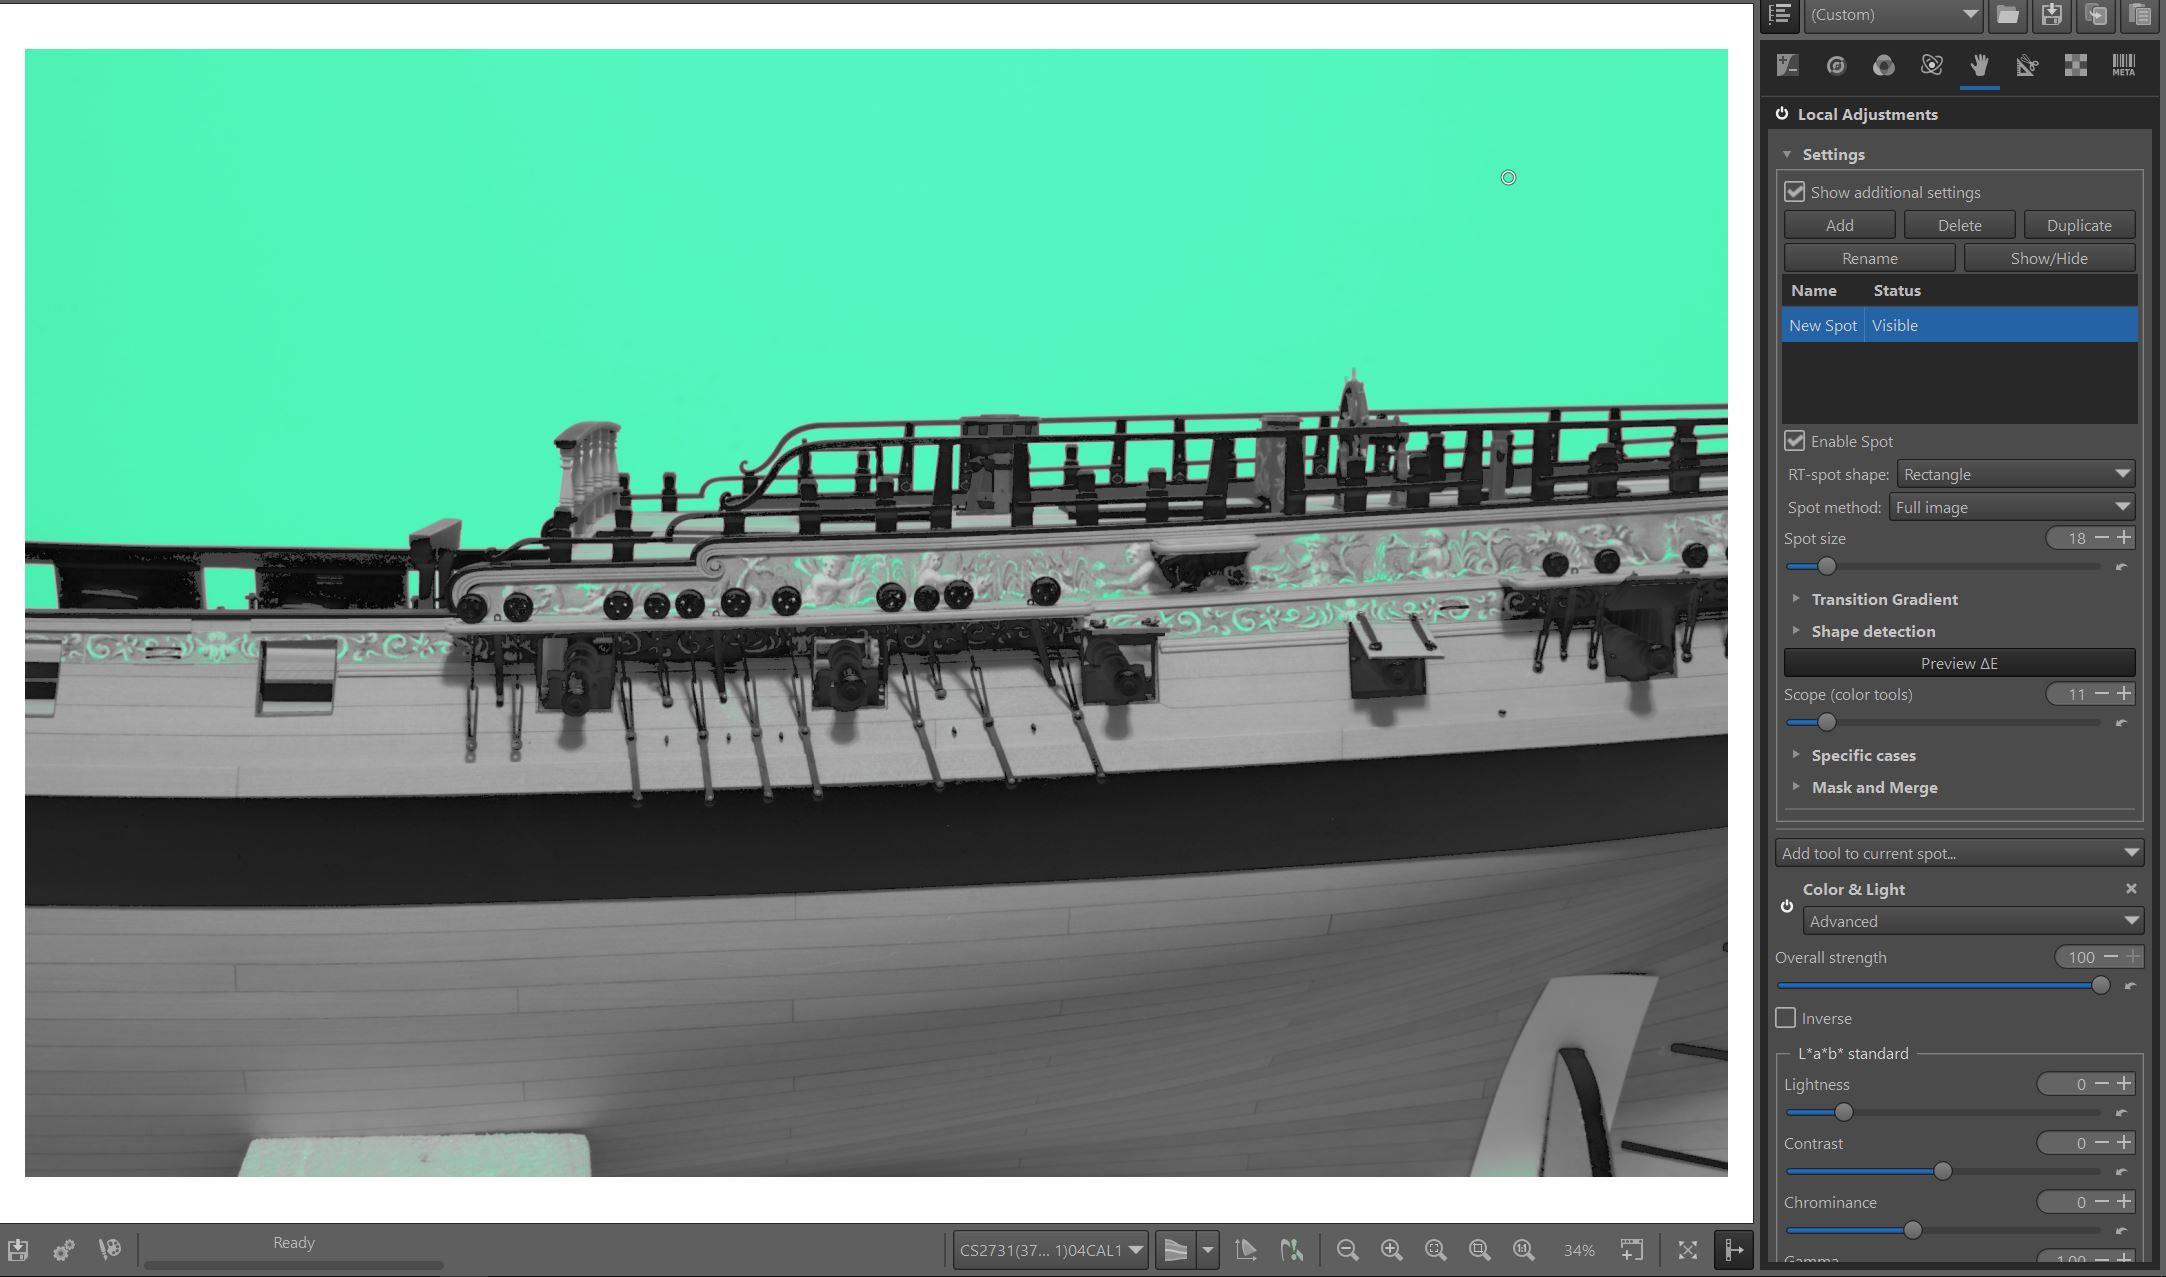
BTW: If you really need fine tuned control in LA you might want to have a look in the Mask and Modifications section. A section that (almost) all the Local Adjustments tools have. Don’t ask me to explain that one, though There are a few examples of how to use it in RawPedia (Local Adjustment section starting from 2.22). I find it a bit hard to get my head around, especially when you try to combine things. Maybe it is more intuitive for you, I find it a bit counter-intuitive.
I think I’ve figured it out (I also was confused about how to use masks). Add a tool, switch to advanced, go to masks, activate it, then open C, L, CL tabs. The transition from light gray indicates the value at the position of the spot. If you want to exclude regions darker than that draw a sharp curve bellow the gray transition, etc.
You can toggle DeltaE in the spot to see the effect or display the mask. It doesn’t work so well on this image though without an exclusion spot because the painting contains the same color as the background (you can get rid of the paintings but then you also lose some contour around the guards).
Yes, that works and I see what you are saying. So, it looks like the best approach for this photo would be to leave some of the color on the paintings and use a Excluding spot for them. This would avoid the loss of contour around the guards.
I agree! A lot simpler indeed and something that I thought would have been implemented not long after local adjustments where first available. Perhaps programming the feature was too complex for the developer.
I know who it is Mike and I doubt that!
Most likely the idea was never raised with him in the first place - I know I went out of my way to NOT ask him because I thought at the time it would delay the 5.9PR - ha, I got that wrong didn’t I!
I thought my mask got into the corners etc quite well btw!
@Andy_Astbury1, those corners and edges look very good. Actually that was the one thing I hadn’t noticed before, so I spent more time looking at your edits. I can see now that they are more involved than what I originally thought.
I think that until such time as we get the ability to use drawn masks of some sort, I will have do this kind of work in PS. I always do my final edits there anyway, so what’s another minute or two.