Be very careful with that black level! There’s a reason it’s set to a small negative value by default. That adjustment works by subtracting the provided value from all pixels; therefore, it can lead to negative RGB coordinates. The recommended way is to use other controls (like the black level of filmic, tone curves and so on).
Use exposure to get the mid-tones right; don’t worry too much about the others: those will be taken care of using the different tone mapping modules.
So, for color calibration and color balance RGB: don’t worry too much about the histogram.
Brilliance grading: first, go to the masks tab, and auto-pick the white. Although the documentation says it’s only used on the 4 ways tab (darktable 4.2 user manual - color balance rgb), Aurélien (the developer of the module) said it is not the case; also, according to him it is a UI bug that one can set values higher than 20%, and one must never exceed that value for highlights, as the maths fall apart. Unfortunately, he used rather foul language to describe this, but if you are interested, read here: [DT Master 4.1.0] color balance rgb perceptual briliance grading highlight slider creates artifacts · Issue #12442 · darktable-org/darktable · GitHub.
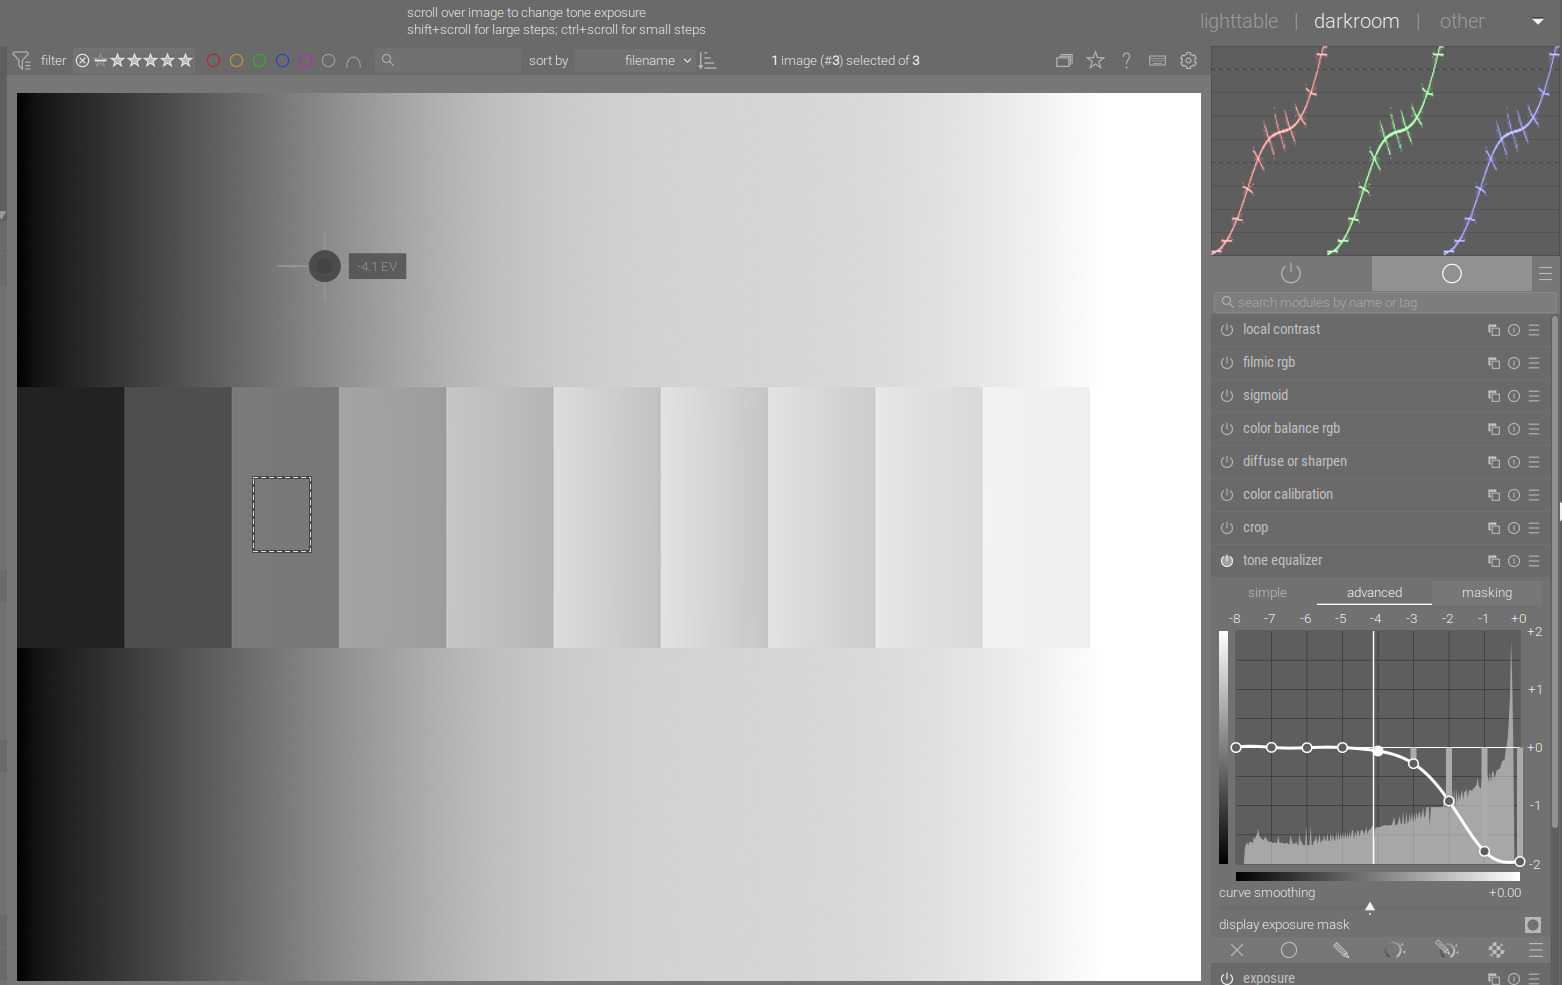
sigmoid and filmic are tone mappers. If your input does not cover a wide dynamic range (already fits within the screen’s DR), you don’t need them. It is also possible to tame high DR via tone equalizer alone. sigmoid and filmic are pixel-wise operations (except for the highlight blooming controls of filmic): each pixel is processed individually. Therefore, reducing global contrast (compressing the dynamic range: brightening shadows and darkening highlights) leads to reduced local contrast (neighbouring darker and brighter pixels will be made more similar). tone equalizer divides the picture into parts, and uniformly adjusts exposure for each part. Therefore, if you brighten shadows (or darken highlights), neighbouring darker and brighter pixels will change together, their difference will not change. The trade-off is haloing: how do you determine if the brighter pixel really belongs to the ‘dark’ area, or if it’s already the start of the ‘bright’ part of the image. The controls on the masking tab deal with exactly that question.
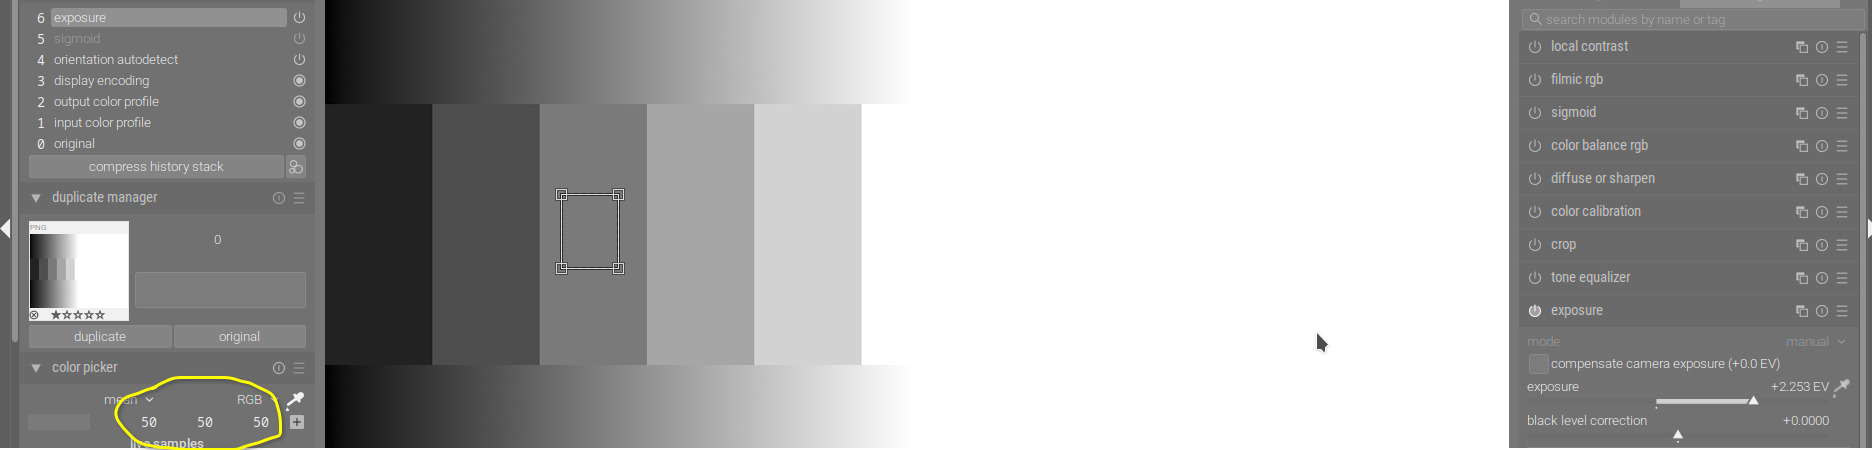
I rarely adjust exposure at the end, or only by small amounts. Why that effects brightness has already been explained. Exposure adjustment works by simple multiplication (and subtraction of the black level). The formula is simple:
out = (in - black level) * scale
The scale comes from the black level and the selected exposure:
white = 2^(-exposure)
scale = 1 / (white - black)
So, if you set black = 0.01, exposure = 1.5 EV, white is 2^(-1.5) ~= 0.3536, and scale is about 2.911. A pixel coordinate of value 0.2 will be mapped to (0.2 - 0.01) * 2.911 ~= 0.5531 (red, green and blue are multiplied separately). However, a value of 0.001 is mapped to -0.0262 - negative!