All I did was mask your Color Cal and create a second instance with the mask inverted. Then adjusted both until I could get a rough match. I tweaked the color to my preferences on a horrible laptop screen which should never be trusted lol. I would go back and re-do this yourself.
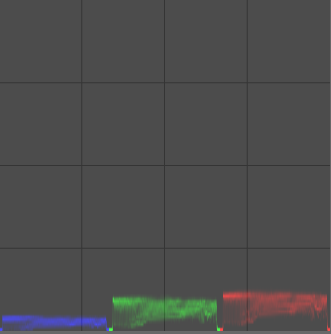
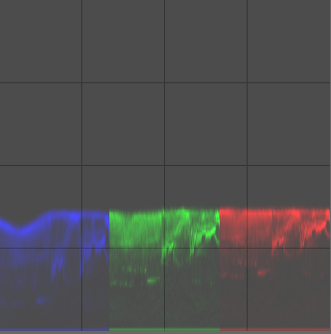
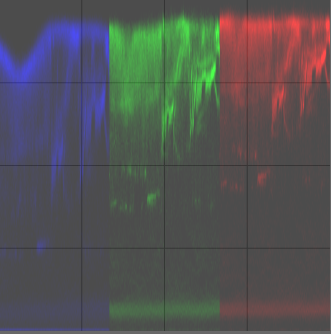
You can see that, among that all the data are compacted to the bottom, the blue channel is crushed into noise (and probably the bottom of the green channel). That will give you unexpected result, mostly in the highlights of your image.
You need to adjust the exposure so the red channel is exposed “to the top” of the scope.
Also, doing color calibration for negative film is not needed.
From my experiments, using the white balance module on a Dmin part of the film is better or - even better - expose per channel, so that the Dmin is close to “white” regarding the data of your raw file (R = G = G = B).
You can achieve that with a cold light (more blue / less red) or with a RGB LED light that can be controlled by channel.
How I do:
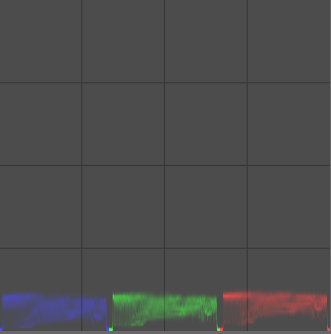
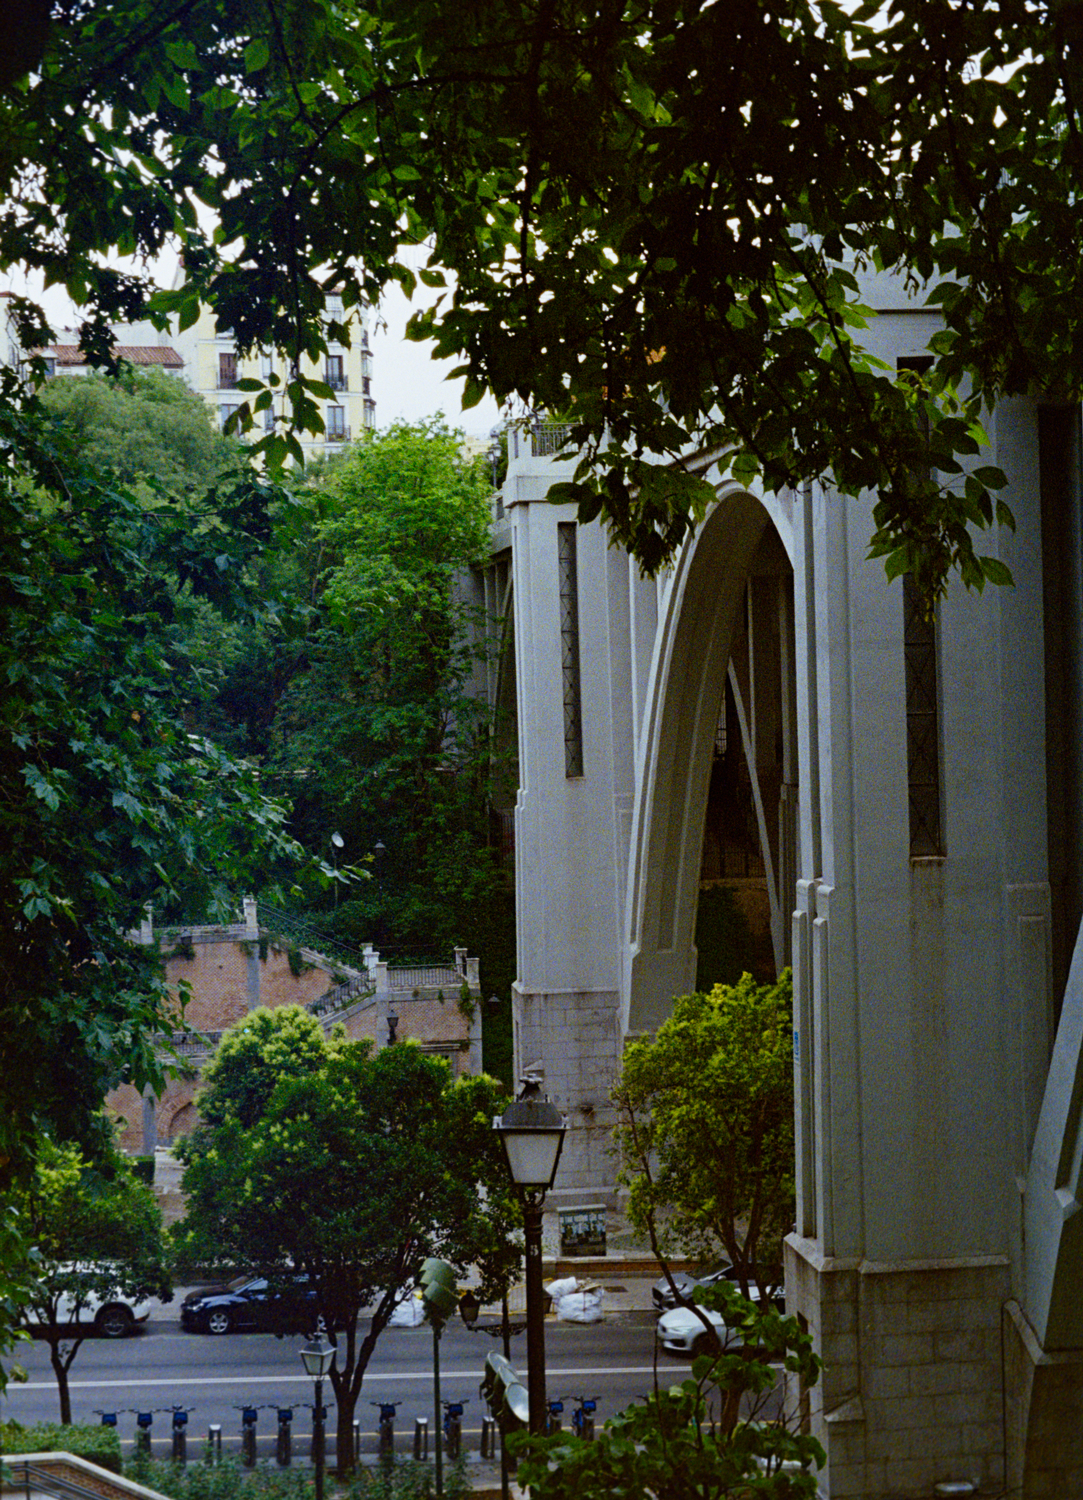
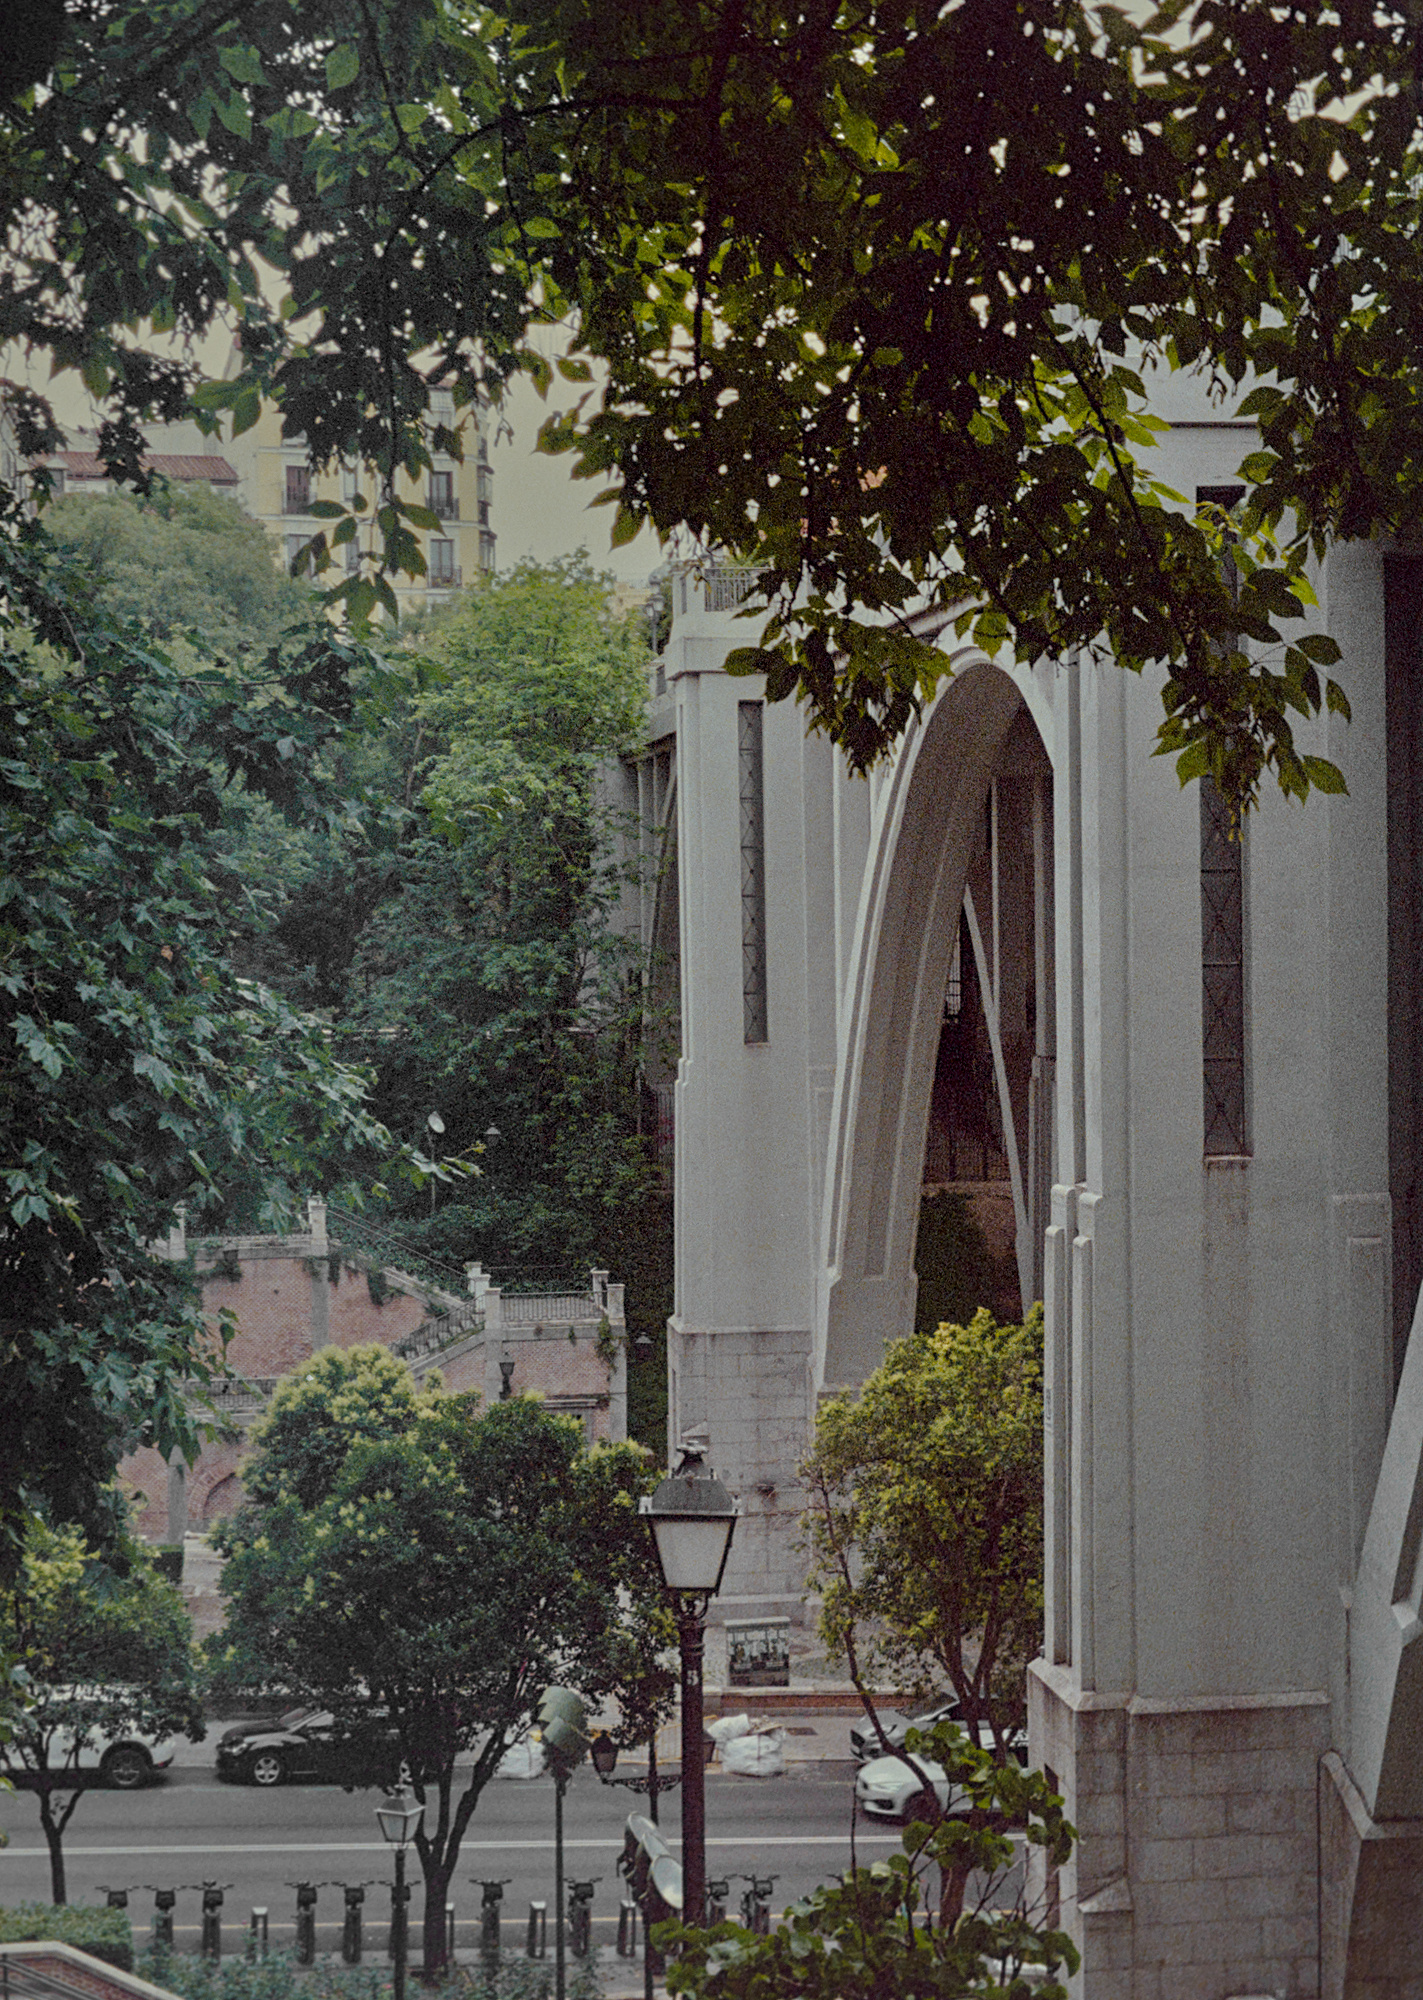
This is what we get with coef 1, 1.122, 2.720 in white balance:
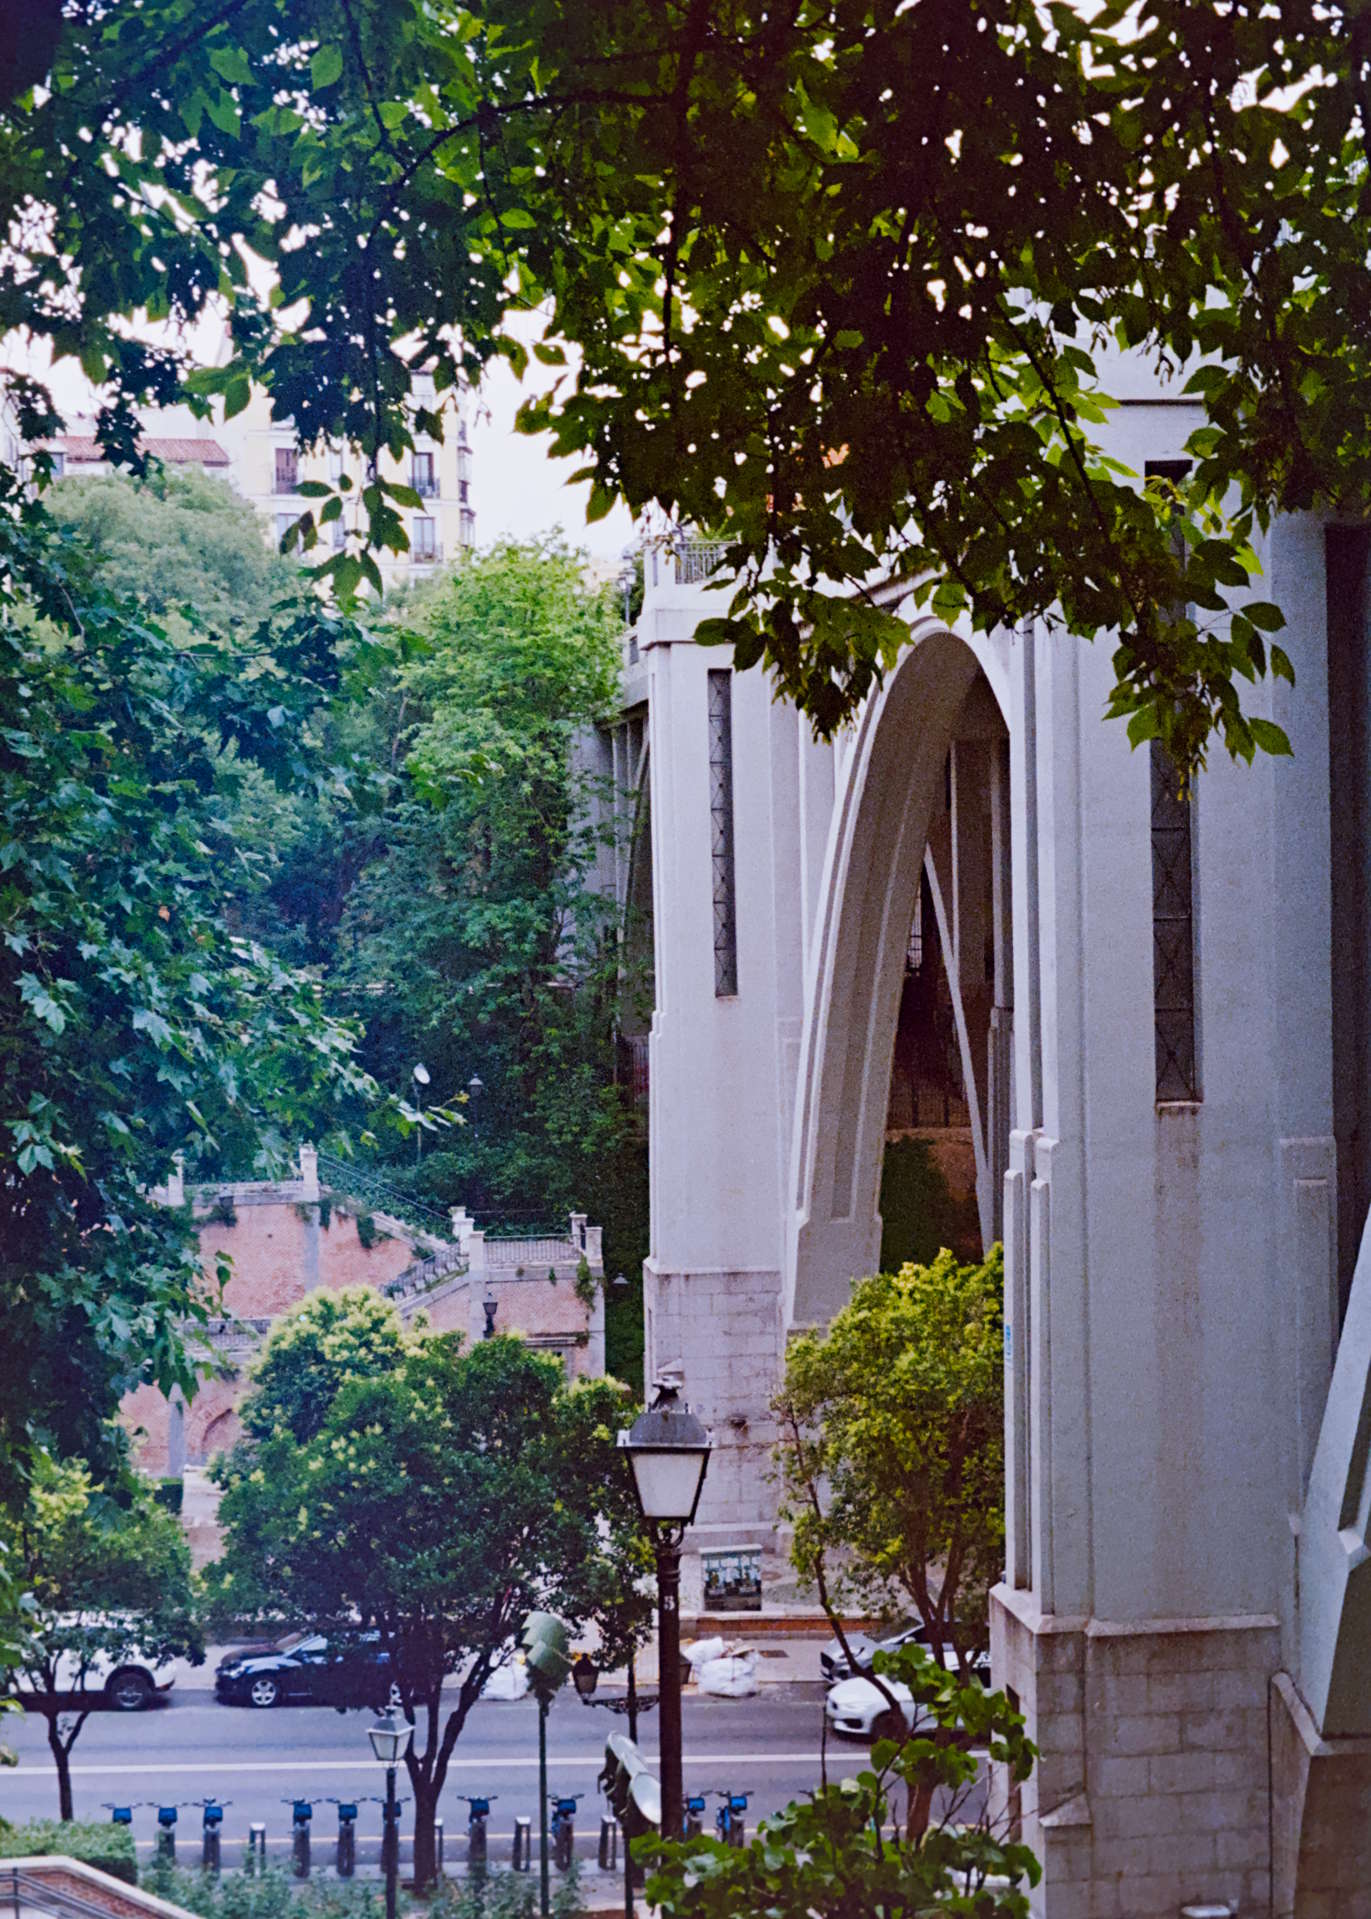
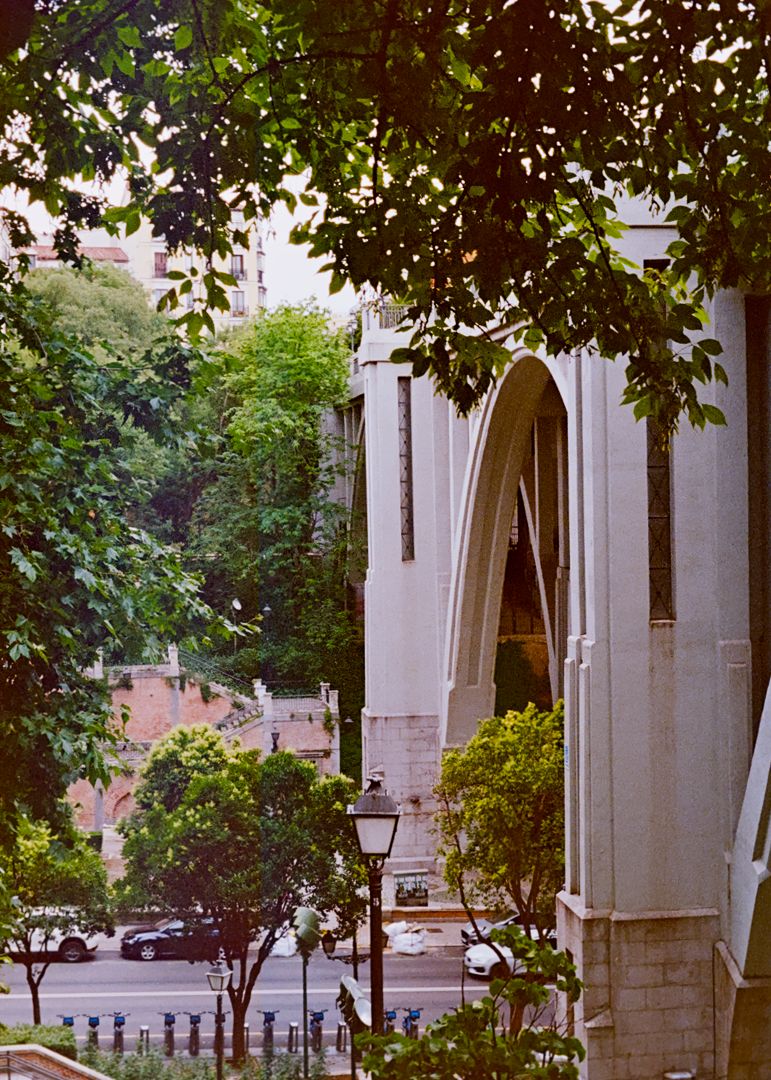
RAW, and final display:
Probably because it’s not the good thing to do with negadoctor …
And from what you do in Agx, it is 100% possible to do the same work in the “print” tab. Same for color calib actually.
Also the default settings in the “print” tab are not neutral but they are a good start.
Thanks for you explanations both here and in the BW image I appreciate it a lot
Here it seems youre using WB to do the job of the color of the film base sliders in negadoctor (?) and why do you prefer WB module for that rather than Color Calibration? some, albeit quick, test with the CC color picker does seem to get the same equalization of the RGB waveforms
Also, as i had understood it, i dont remember where i got it from, was to use CC to correct for the backlight.
And then youre using exposure module for what film properties tab would do? But trying to test that: one doesnt seem to be (at least visually) better than the other
I can get basically to the same point using exp or not, and it doesnt seem to affect noise or color casts either
im rereading on the negadoctor darktable docs and trying to make sense of the working profiles, meanwhile found some of your answers on github hahaha.
still dont understand lol
Your scan should not be treated as a final image of your film, but rather as a per-layer measurement of the film’s transmittance. Correcting backlight in Color Balance is not meaningful here, because you are not trying to achieve a specific aesthetic—like you would with a landscape photo. Instead, you are working with the actual transmittance data of the film layers, which represents how much light passes through the film.
For both negative and positive film, the Dmin (minimum density) is the clearest part of the film, containing no usable data. This area should represent the highest transmittance level of the film. Since higher values are better in the digital domain, you need to align the “zero” level of each layer to the same value. By applying white balance to this area, you normalize the levels of each layer. Ideally, this should be done by adjusting the light source to avoid any data loss.
Why use white balance for this?
Because you are working with raw, unprocessed data. This adjustment should be made before any color interpretation is applied.
Based on my tests (some color charts on film), you better to adjust the exposure as early as possible. Just like with normalization, the most effective approach is to set the exposure using the light source and exposure time of your digital camera, focusing on the film’s Dmin. This adjustment should be done once for each film roll when digitizing.
Then small adjustment of the exposure done in the Exposure module, and in the film base property in Negadoctor.
So far i think it makes/its starting to make sense on a theoretical level
But i cant really say the results from a better exposed scanning are actually That much better. People in this threads made the bad ones look perfectly fine. I mean, its very possible that with this proper raws im uploading now they can get even better results, but i think at best it will just be same result with less work. And i dont know how much “less work”. Possibly just a little less.
Also the negadoctor module is Very fiddly. I thought that perhaps it was because of the bad exp of the scan. But no dice. Still as fiddly. Thats why i had moved to using negadoctor as little as possible and why i eventually liked using AGX
Could you expand on this please?
Anyway, heres the new scan and the edit trying to follow this new editing guidelines
I did exp bracketing to test.Exposing higher than this makes it unusable after conversion. Completly blue. Might be coz this time around i went with a higher temp light.
There is nothing better than recording data in the topmost range of bits. Your sensor can record data over 14 bits. This means you can record 16384 shades per pixels, but the scale is logarithmic based on 2.
So shadows have a low range of shades but highlights have a big range of shades. That’s why it is preferably to digitize your film, with the Dmin normalized to the max by exposing “on the right”, so you have the best quality possible.
A developed color film has an average maximum density (Dmax) between 2.8 and 3. In Ev, this is equivalent to 9.32 Ev to 10 Ev. And black & white film has a maximum Dmax of 4! So you better have to expose to the right on Dmin if you don’t want to loose Dmax data in the bottom of the bit range!
I find it quite easy. The black setting, you use the colorpicker on all the cropped image, then adjust contrast with the Grade setting, then the exposure and finally adjust the highlight falloff setting
Then if you need adjustments you can continue with Tone EQ, Color balance, …
Nothing much to say, just that whoever wrote the guide didn’t know a lot on what are the issues.
There is not much difference just like that but I applied the same history to the previous version. I don’t know if your backlight is the same, the previous version appeared blue compared to your last raw. (previous is at the bottom)
I didnt quite understand this. I belive youre trying to tell me something about how film has better shadow renditions. But i gt lost with the numbers and the conversions lol
This time i used a bit colder ligth as recommended
Film has a density range equivalent from 9.32 Ev to 10 Ev
digital images have better data quality in highlight, negative film have better data quality in highlight too which corresponds to the high densities on the film, so it’s always preferable to use the Exposure To The Right (ETTR) technique when digitizing.
If you underexpose your film too much, then the high density areas get lost bellow the noise level, or even not recorded at all. Those areas are critical in your final image because they correspond to the highlights so you better want to have the highest data quality possible.
because of the orange mask, white light is inadequate for color negative film because the blue and green channels produced are too dark, and that increases the risk to have underexposing issue in the blue channel. Therefore, an RGB light should be used to produce a sort of strong indigo light to decrease red and green channels so they become to the same level as the blue channel, then apply EETR.