@ggbutcher See op.
@msdobrescu Great! I won’t have the time to address this but many forum members do. Good luck!
@ggbutcher See op.
@msdobrescu Great! I won’t have the time to address this but many forum members do. Good luck!
@ggbutcher, “Edit: Apologies, the ACR rendition is the JPEG you posted… ?” I’ve posted them, indeed.
@heckflosse, thank you, it looks even better, maybe too sharp, but how do I get to this level of knowledge?
@msdobrescu It seems RT uses a too low white level in this case. Have to check that now. Will take a while.
That’s probably because it is overexposed, but recovers acceptably. It is not a commercial photo, I just try to process my holiday photos and this is one of the worst I have, but nice to test one. I have a bunch to make a pano with Hugin, I try to make a profile to feed Hugin and to resynth the result a bit in Gimp.
What @afre was referring to (@afre, correct me if I’m wrong here) is that the LightRoom creative cloud thing has driven a lot of folk to try the open-source alternatives; they try to do the same with RawTherapee, and when they don’t get the same rendition, they come asking for help. It’s okay, the folk here are generally helpful souls.
You’re going to come to two realizations:
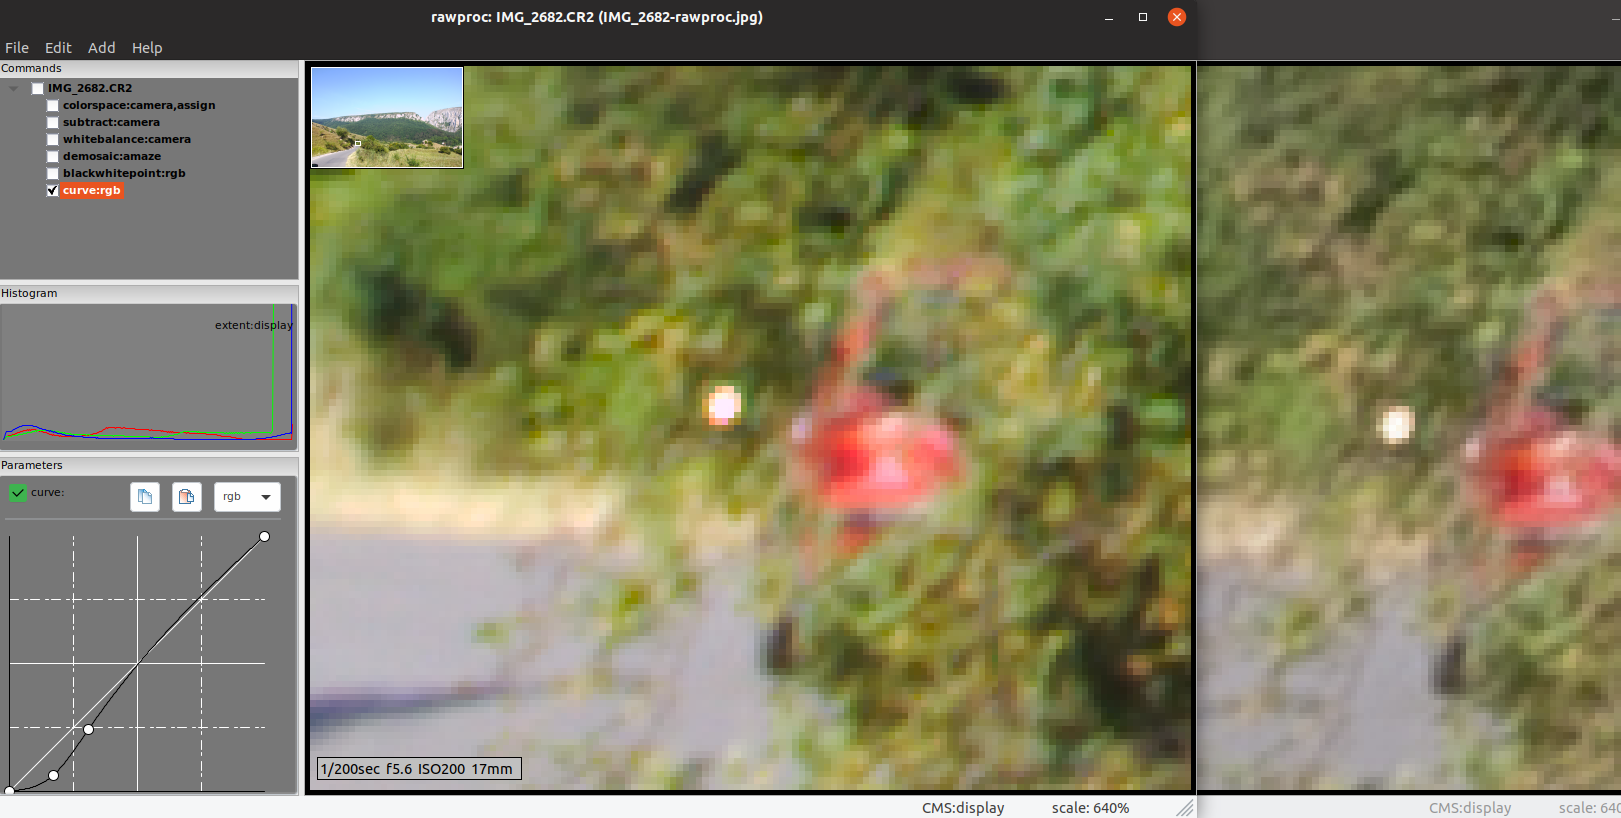
Your difference endeavor intrigued me, so I attempted to duplicate your ACR JPEG in my hack software, rawproc. I did it there in order to completely eliminate any hidden processing, and then explicitly apply what it took to approximate the JPEG. Here’s the compare screenshot, the rawproc working image on the left, the ACR JPEG on the right:
If you can read the commands pane on the right, it’s the camera color profile, the camera black subtract, the camera white balance, and @heckflosse’s AMAZE demosaic implementation, then a black/whitepoint scale of the raw data to fit the display black/white. That’s about as close to “Neutral” as you can get to obtain a starting raw image. So, the tool you see displayed in the bottom-left is a tone curve, and this is what it took to make the tones approximate the JPEG. I think your perception of sharpness may be differences in contrast.
Now, this isn’t really a fair comparison, because saving to JPEG does its own changes to the image. Here’s a JPEG-JPEG screenshot:
I need to go and mow the lawn before it rains, but food-for-thought…
I guess you mean the other right ![]()
Well, I don’t use LR, I find it so uncomfortable. I use ACR, which uses the same API as LR, but differently. ACR offers me a nice starting point - according to my taste.
Regarding the software… There are technical guys and simple users, who don’t need such refined details. They need simple controls, as a few sliders… This is the reason why powerful tools are not easily adopted these days, and thinking to those simple users needs consistent efforts, with the gain of having an increasing user base. This is the story of Linux, Linux DE’s and lots of free/open software. In time, the first impression remains in their heads and won’t come easily to use software that made them suffer once.
Now, what I have struggle with here, was, in part, the unresponsiveness of the edit boxes and made me think they have no effect. Some timer to decide the user have ended editing some value and start applying it would be nice.
On other hand, to help the migration, also my case, some profile for the initial automatic processing, with a very close result to some common commercial tools used these days, is very useful. You give to the new users something familiar that makes them stay. Just my two cents…
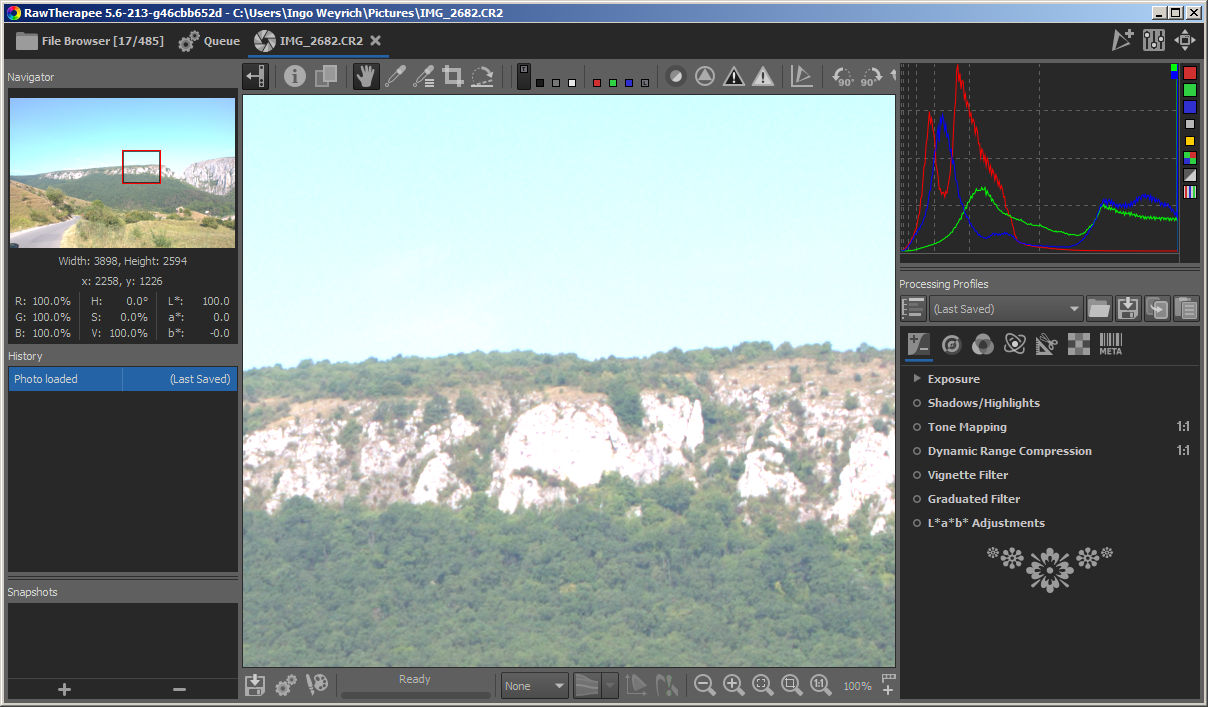
@msdobrescu Here’s what I would do:
Open the raw and apply neutral profile:
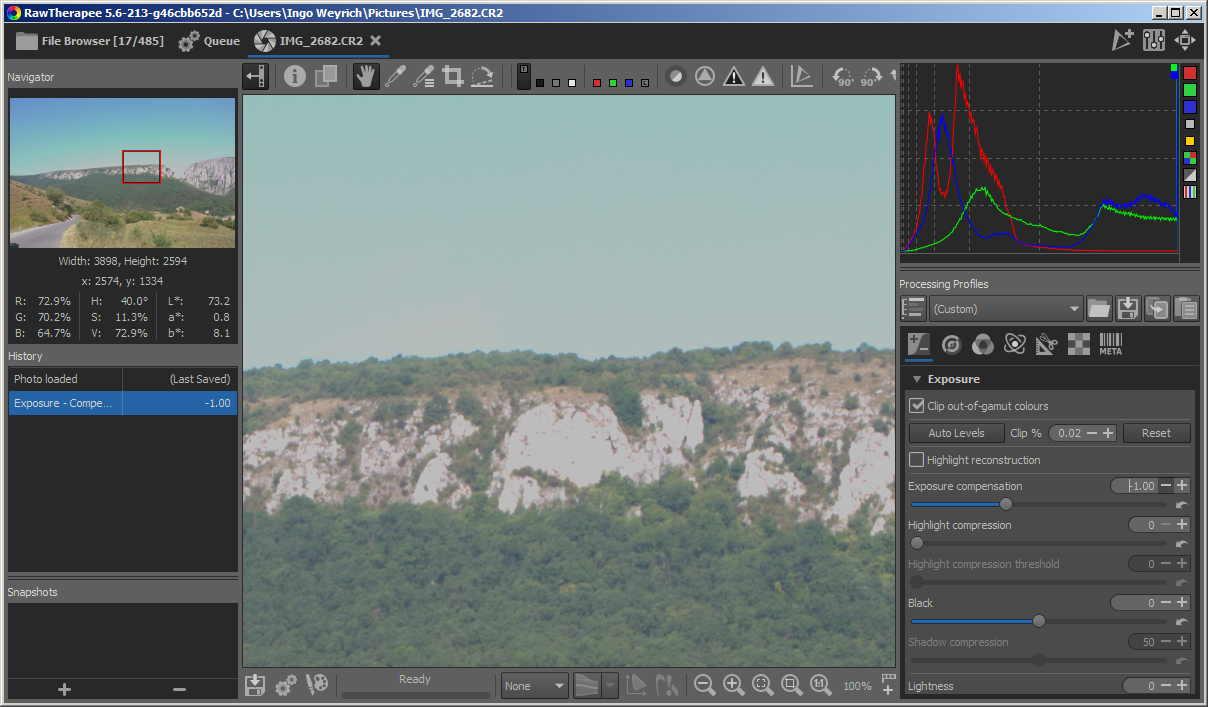
As it’s overexposed I set the exposure compensation to -1:
Adjust the white point until it looks so:
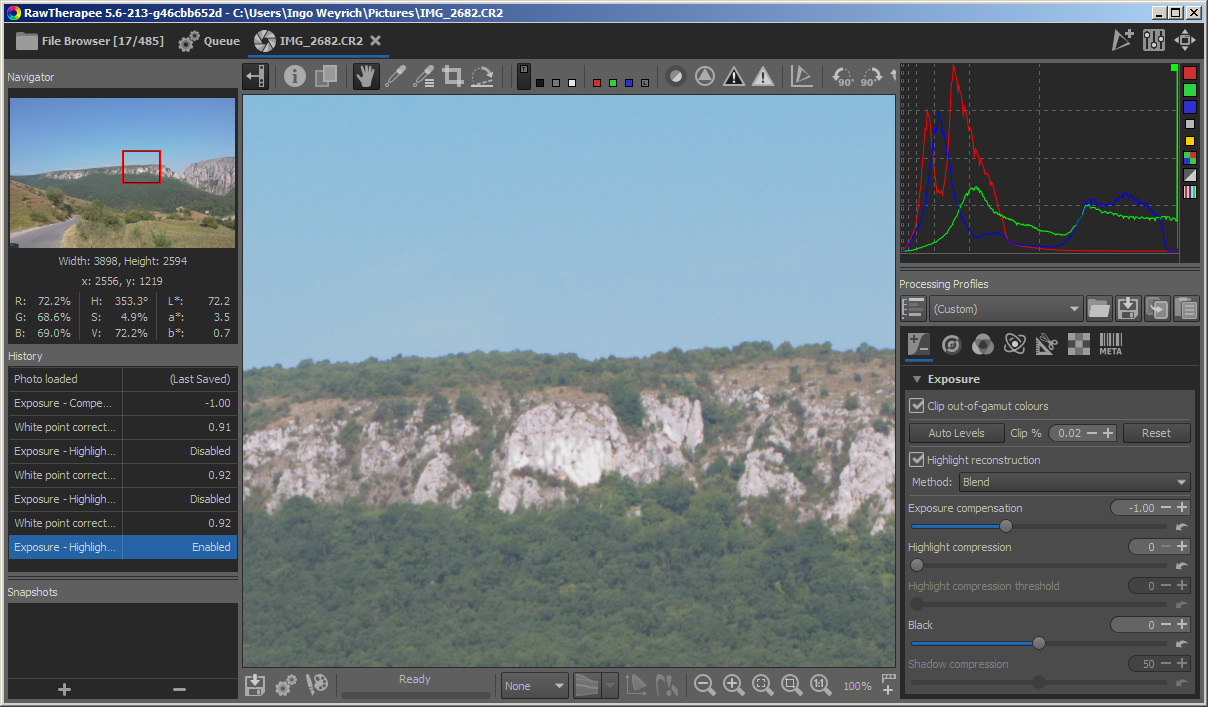
Then increase it by 0.01 (press the +) to remove the pinkish tint:
Enable Highlight reconstruction:
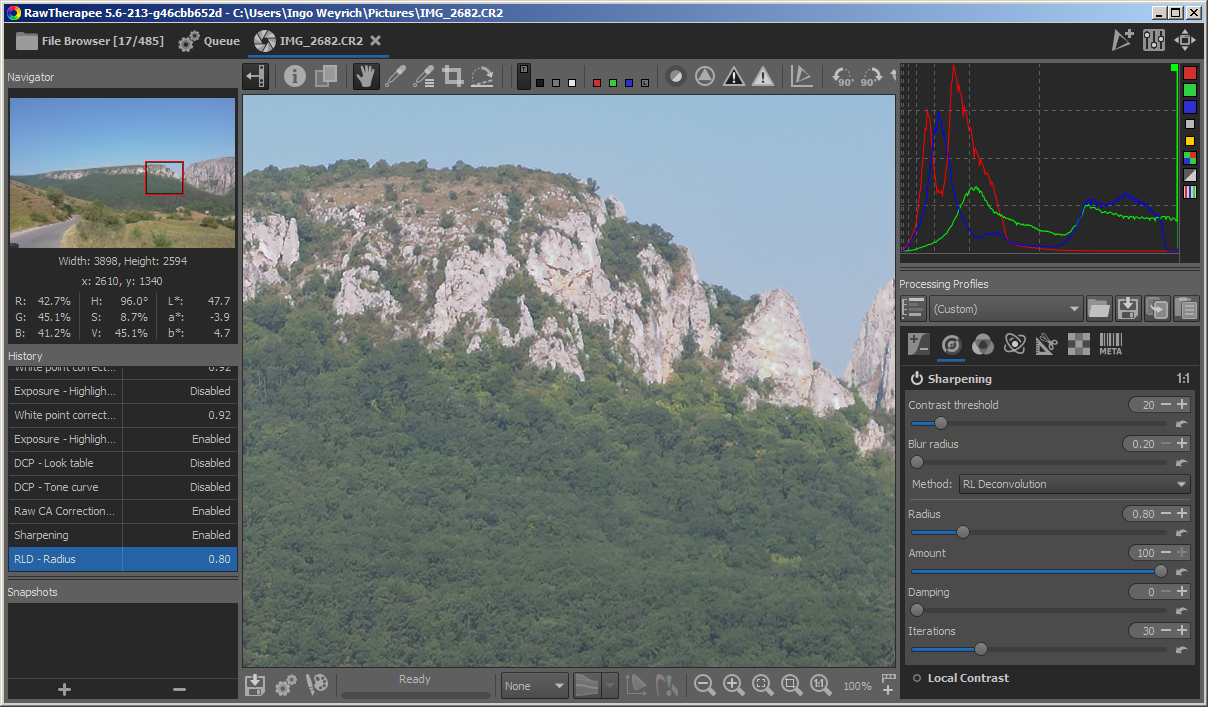
Now the details are partly back in overexposed regions. Let’s have a look at CA which you can see here:
And remove it:
Then a bit of sharpening, first without sharpening:
Then with sharpening:
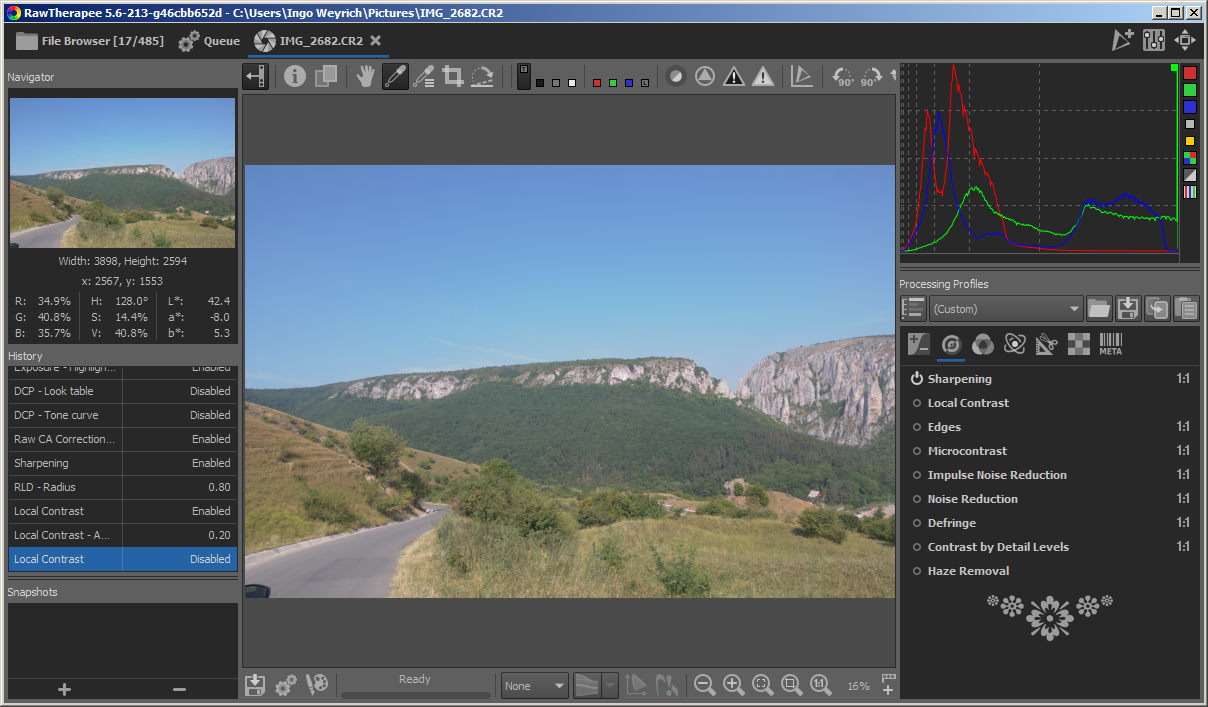
Maybe Local Contrast, first the before view:
Then the after view:
Further adjust to your taste…
Wow! Thanks for the detailed instructions!
@heckflosse Could you elaborate on what you are doing with white point? I think people would benefit from that.
@msdobrescu The fact, that I had to adjust the raw white point, means that the white level for your camera is probably not correct in RT. Can you provide some completely overexposed raw files from your camera using filebin.net and post the link here?
I did something, which usually should not be necessary if the white point for the camera in RT is correct. If the white point from dcraw or camconst.json is too large you get this pinkish tint when applying negative exposure compensation. In this case the white point was too low, means, to recover as much highlights as possible, I increased it by reducing the value of the white point correction adjuster until it was too much (pink) and then increased the adjuster value again by 0.01.
I have only some in the same place and having the same camera settings. Does it help?
Well, we can try. If there is at least a small completely overexposed region in the raw, it could work. The larger the region the better.
I lost my rock. In pilot training, the joke was that you held a rock in your right hand to remember which way… 
Right is where the thumb is left 
There’s no entry for the Canon 400D in camconst.json; dcraw.c has it, and the white value is 3726. That’s what libraw reports in its metadata.
When I open this image in rawproc, all three channels saturate at 4056.
@msdobrescu There is a file camconst.json in your rt installation folder.
Open it with an editor (not with notepad.exe) and insert this lines
    { // Quality C
        "make_model": [ "Canon EOS 400D" ],
        "ranges": {
            "white_max": 4018
        }
    },
after
// Canon mid-range DSLRs (Rebels)
Edit: hold please. there is something wrong.