I wanted to post @snibgo old script : Resampling with halo minimization
Resize down with absolute no artifacts And then sharpen.
Might also be an interesting method if you’re sensitive to haloing.
I wanted to post @snibgo old script : Resampling with halo minimization
Resize down with absolute no artifacts And then sharpen.
Might also be an interesting method if you’re sensitive to haloing.
In increasing sharpness.
Things to note:
 ?
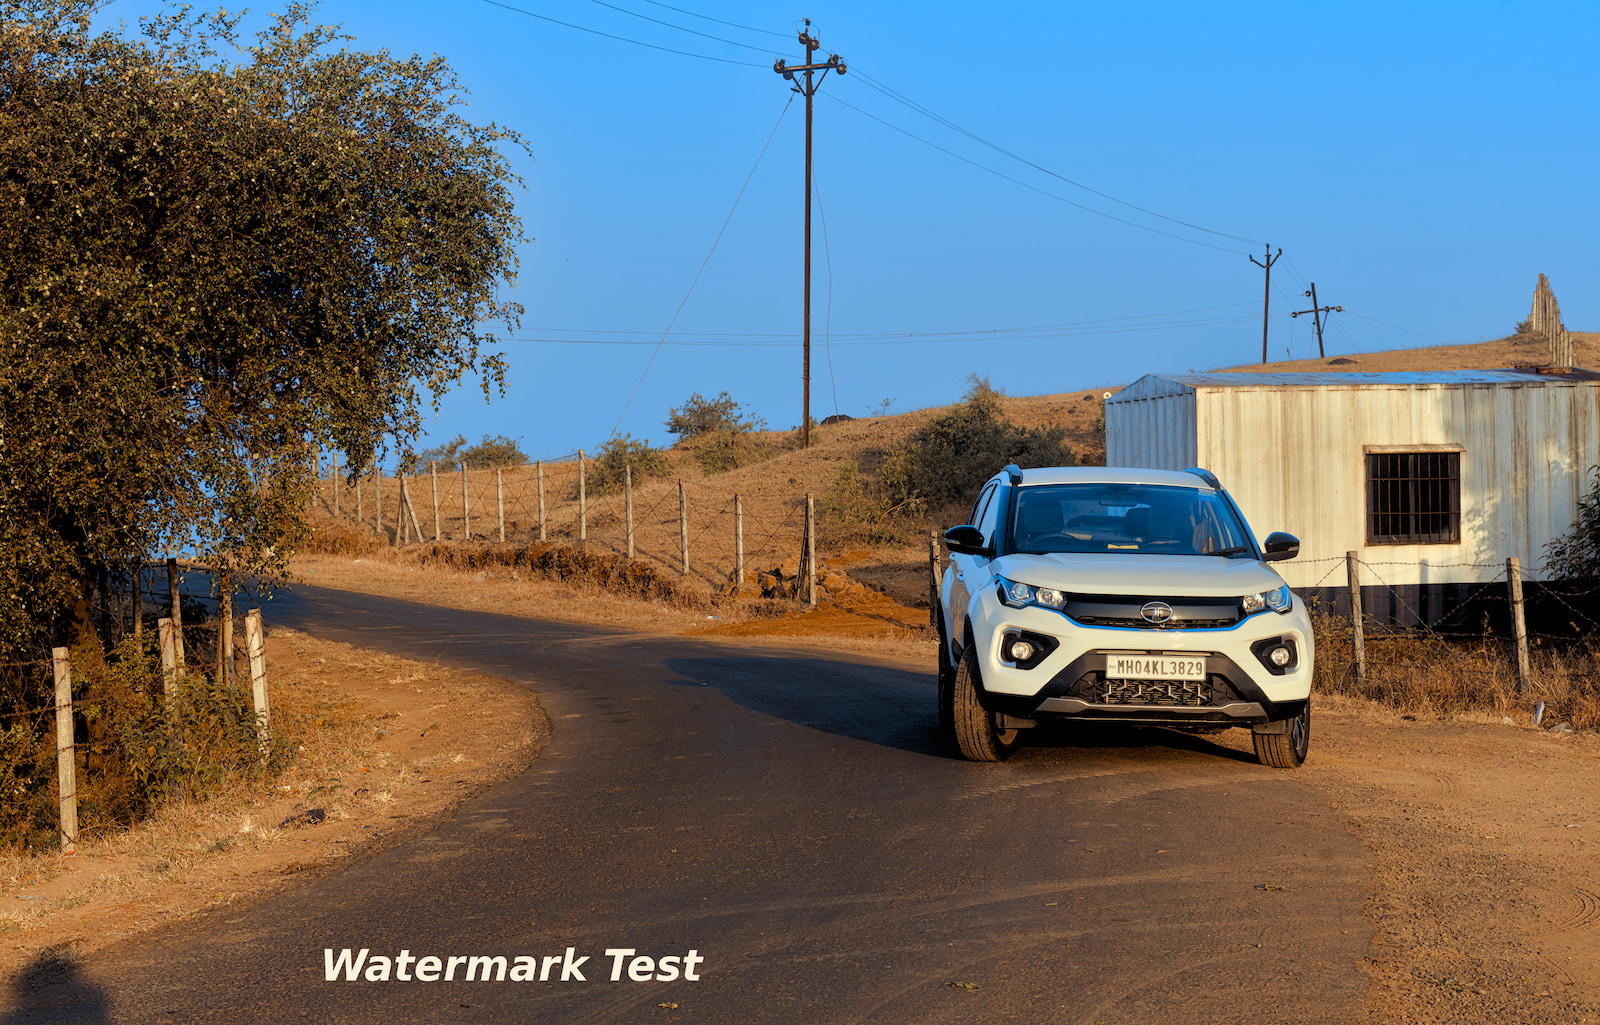
?I’m even going so far as to say that the defaults in Im produce an image just as sharp as your 10step, with just a little less haloing (looking at the car window edges).
So -resize 1600x1600 in linear space, without any filter tweaks or options.
It does a pretty good job but is clearly not as sharp as the 10 step. it is more similar to RobidouxSharp.
Good point. I chose jpg 92 as a more realistic output setting for my usage, but it certainly throws an added element into the mix.
I particularly like your version 2 and 3. Are you willing to share the recipe?
I’m comparing them at 300%, toggling between them. There is no difference in sharpness or small details. Maybe the ringing artifacts on your lanczos-10step gives the appearence of more sharpness, but when aligning them and toggling between them there is no difference. To be honest, I expected more difference if you know how the files were generated :P.
(different version of DT, different imagemagick? different jpeg encoder, lots of scaling steps vs just one, etc…).
Now that I open them in Affinity Photo and align them manually there in layers, and toggle one on/off, I even see there is a quite a big leap in sharpness in mine (the ‘def_resize’ version, just the -resize in linear space). Around the grill and the headlights of the car there is a big increase in sharpness in mine. I’m thinking you got the files mixed up if you think the lanczos-10step version is sharper here. I do not see any more haloing on mine but I do see more JPEG artifacts in certain sharp areas. But I’ve used a different JPEG encoder I’m sure, and since I have more details there, it’s harder for JPEG to compress.
the ‘def_resize’ version is made as following:
magick -quiet darktable-output-file.tif -resize 1600x1600 +profile "*" -profile Rec2020-elle-V4-g10.icc -black-point-compensation -intent relative -profile sRGB-elle-V4-srgbtrc.icc pnm:- | cjpeg-static -quality 92 -outfile output-file.jpgexiftool "-icc_profile<=sRGB-elle-V4-srgbtrc.icc" -overwrite_original output-file.jpgSo I export linear rec2020 fullsize from Darktable, load that into Imagemagick to do the resizing (so it’s still in linear rec2020 at that point), then convert the resized to sRGB, and pipe it into mozjpeg to encode. Then finally tag the file with the v4 srgb icc file to be sure.
the -1, -2, -3 and -4 files from earlier were @snibgo 's resampleHM script that I’ve linked to.
resamplehm darktable-output-file.tif 1600x1600 d 50 0 0 outputfile.tif.
The ‘50’ in that line is the sharpening amount. For 1, 2, 3 and 4 I’ve used 50, 100, 150 and 200 respectively.
I don’t think I’ve changed the script (much). I did alter the gamma assumptions to this:
set colspIn=-set colorspace RGB
set colspOut=-set colorspace RGB
Which basically means 'assume input is linear space, and assume output is linear space.
So the script doesn’t do anything with the profile inside of Darktable’s output file, it just assumes it’s linear RGB (but it’s linear rec2020, close enough).
Then the output is written to a TIF file. I then load that tif file into imagemagick to convert the colorspace and pipe it into mozjpeg:
magick output-from-resamplehm.tif +profile "*" -profile Rec2020-elle-V4-g10.icc -black-point-compensation -intent relative -profile sRGB-elle-V4-srgbtrc.icc pnm:- | cjpeg-static -quality 92 -outfile output-file.jpg
I’ve modified the resamplehm.bat file to output the imagemagick commandline that it’s using. And for the sharpening set to 100 (-2 version) this is the oneliner:
magick -quiet 20201122_07.36.44_DSC_3665.tif -alpha off -set colorspace RGB -define filter:c=0.1601886205085204 -filter Cubic -distort Resize 1600x1600 ( -clone 0 -gamma 3 -define convolve:scale=100%,100 -morphology Convolve DoG:3,0,0.4981063336734057 -gamma 0.3333333333333333 ) ( -clone 0 -define convolve:scale=100%,100 -morphology Convolve DoG:3,0,0.4981063336734057 ) -delete 0 ( -clone 1 -colorspace gray -auto-level ) -compose over -composite -set colorspace RGB +depth -compress None DSC_3665_out_2.tif
As I read it (snibgo might give a better explanation if he can still remember it :P)
Interesting, very complex! Will try to replicate tomorrow.
Additional sharpening explains how you got them so sharp. All my versions were without that, mainly because the initial experiment was to see which method gave the sharpest results without it. But of course, post-sharpening is valid. Different jpg encoder and applying it in rec 2020 as opposed to linear srgb may also have created slight differences. I see also you put black point compensation before intent.
I was comparing them at 100% in geeqie and firefox. Zooming to 400% in krita I see what you see. I now think it might have been that 1px difference that created the illusion of extra sharpness to me.
Let’s be absolutely clear, this is how the image should be viewed, and how it should be judged. And then I guess they are all just fine! We’re nitpicking and splitting hairs to the maximum here, sane people wouldn’t do that ![]() .
.
Exporting JPGs at 100 and viewing the result on multiple display types may also level the playing field. 
@jorismak’s explanation is accurate. The first copy is free of halos. The second copy, and the mask, have halos. At light/dark edges, halos make the dark side too dark and the light side too light.
The two copies are merged using a grayscale autoleveled version of the resized linear image as a mask.
Where the mask is black, we use pixels from the first copy. Where the mask is white, we use pixels from the second copy. Otherwise, pixels are blended according to the lightness of the mask. Hence the masking composite reduces the over-darkening of the dark side of edges. A more sophisticated method would also reduce the over-lightening.
To see intermediate images, we can insert debugging operations of the form “+write x.png”. Using a sharpening amount of 300, “over-sharpened” to exaggerate halos:
Copy0:

Copy1:
Mask:

Result:
Here, I show lossless PNG images. JPEG compression tends to create halos, so shouldn’t be used when comparing one algorithm against another. Of course, the overall workflow may require JPEG outputs, so then we need to include that in comparisons of workflows.
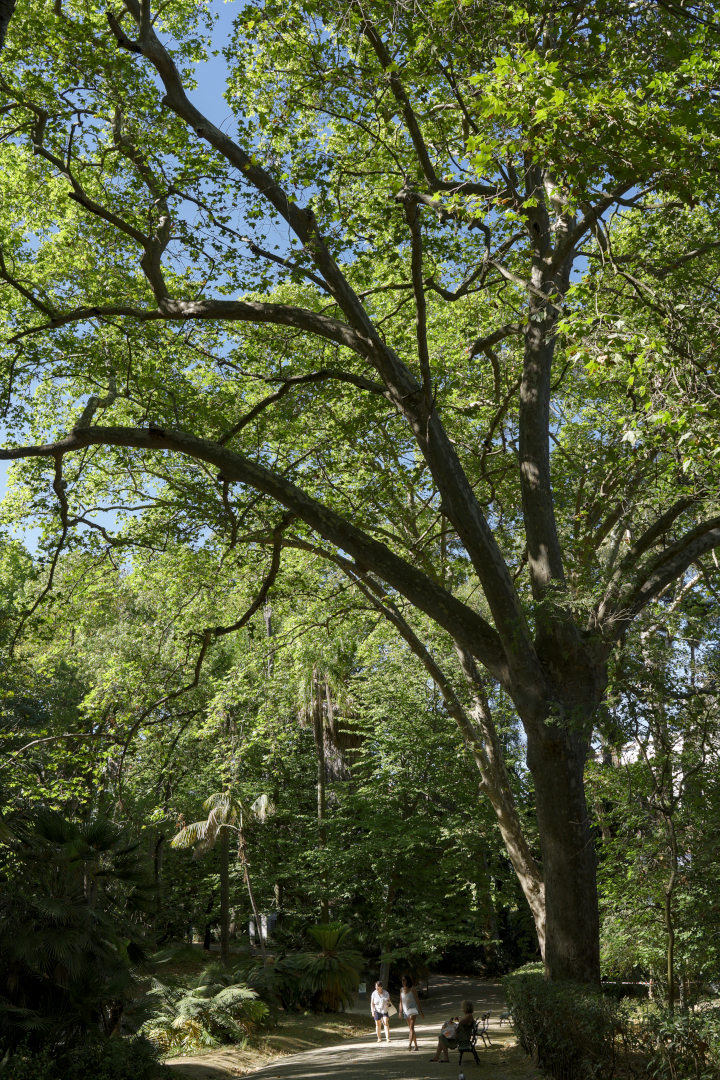
I founded something strange, the test image is from this playraw Beneath Giants - How to make it look good.
(darktable’s xmp DSCF9876.RAF.xmp (15.5 KB))
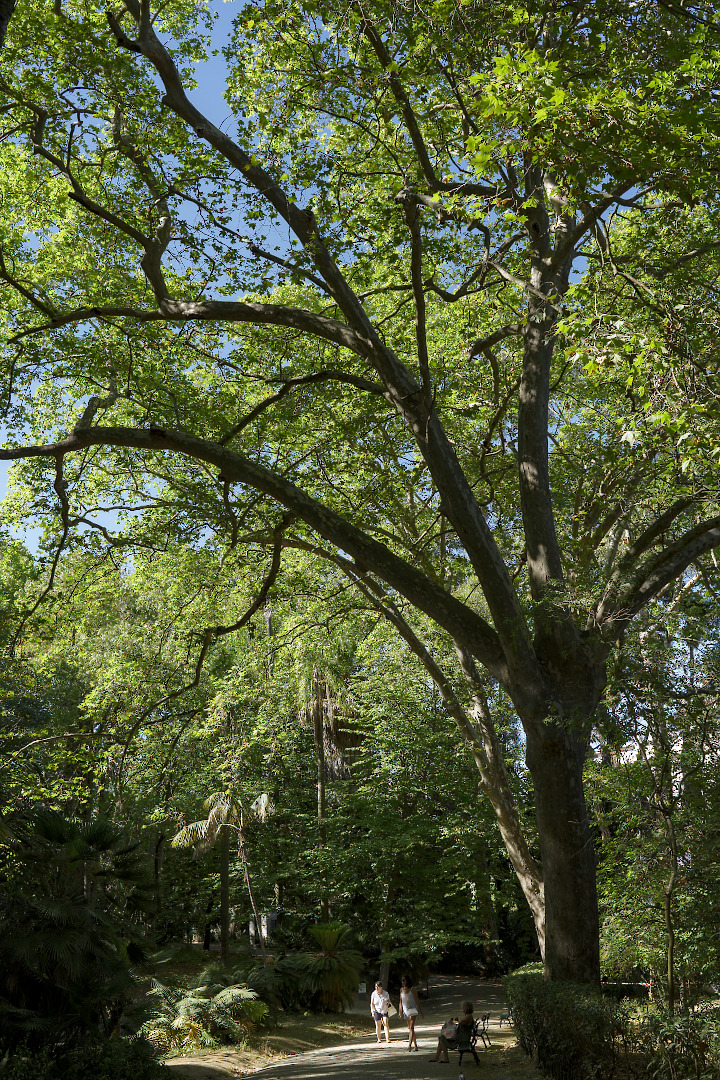
Linear downscaled
gamma downscaled
crop 1:1
The image downscaled in linear gamma looks too much desaturated on my monitor
How did you do the scaling?
It sounds like they weren’t all normal RGB colorspace. If one is for example ‘linear rec2020’, but you lose that info somewhere and display it as normal sRGB, it looks desaturated.
It might also be that it just looks that way because there might be a lot more white / highlights preserved, or something like that. (The same as a denoised version can look darker, but what happens is that the noise is removed that made darker parts look more greyish). Just thinking out loud.
If you explain your workflow, I (and others) can maybe poke holes in it if you did something wrong somewhere  .
.
Thanks, it wasn’t clear but I wasn’t asking for help.
I think this image is good for testing linear vs non-linear resize.

In that case, may i have your input file ? I know it’s from a play raw , but that means I first need to run it through Darktable and I may end up with something different.
It’s nice to have a tinker with an i age that responds very different to 'working space ’
With thanks to @snibgo I again have an updated method.
This time, I take the catrom-spline output from my previous script, and combine it with Robidoux using a mask - catrom-spline for fine details and Robidoux for coarse details.
It seems to give sharpness somewhere between Alan’s v2 and v3, but with less halo’s/dark edges.
Magick-Resize-Composite-Height.txt (6.9 KB)
Magick-Resize-Composite-Width.txt (6.9 KB)
Output:
Exporting Age’s edit as full size 16bit tiff from dt and using this script.
output profile and export profile in dt both set to linear srgb:
output profile and export profile in dt both set to srgb:
There is indeed greater saturation in the non-linear version. I don’t know how to explain it.
Darktable doesn’t has linear sRGB as output , right ?
Not out of the box. I use Elle’s linear srgb.
Weird question, is it the scaling or is the output from DT already different? Different output profiles can maybe affect filmic’s gamut mapping.
Yes, see filmic section in the manual, under “Background” heading -
“This gamut mapping uses the output color profile as a definition of the display color space and automatically adjusts to any output space.”
The image downscaled in linear gamma looks too much desaturated on my monitor
There is indeed greater saturation in the non-linear version. I don’t know how to explain it.
Interesting point. Comparing the two images of the big tree: (1) resized in non-linear sRGB space and (2) resized in linear space, then converted to non-linear sRGB, image (1) seems to be more saturated.
Why does that happen? I don’t know, and couldn’t figure it out. It turns out the answer is: the average chroma (aka “saturation”) of the two images are virtually the same. I am measuring chroma as the C channel of IM’s HCL. For some pixels (1) has the higher chroma, and for others (2) has the higher chroma.
The rule seems to be: where the input chroma is low, resizing in linear gives the highest chroma; but where the chroma is high, resizing in sRGB gives the highest chroma. However, low input chroma tends to occur where intensity is low, so disentangling the possible rule isn’t easy.
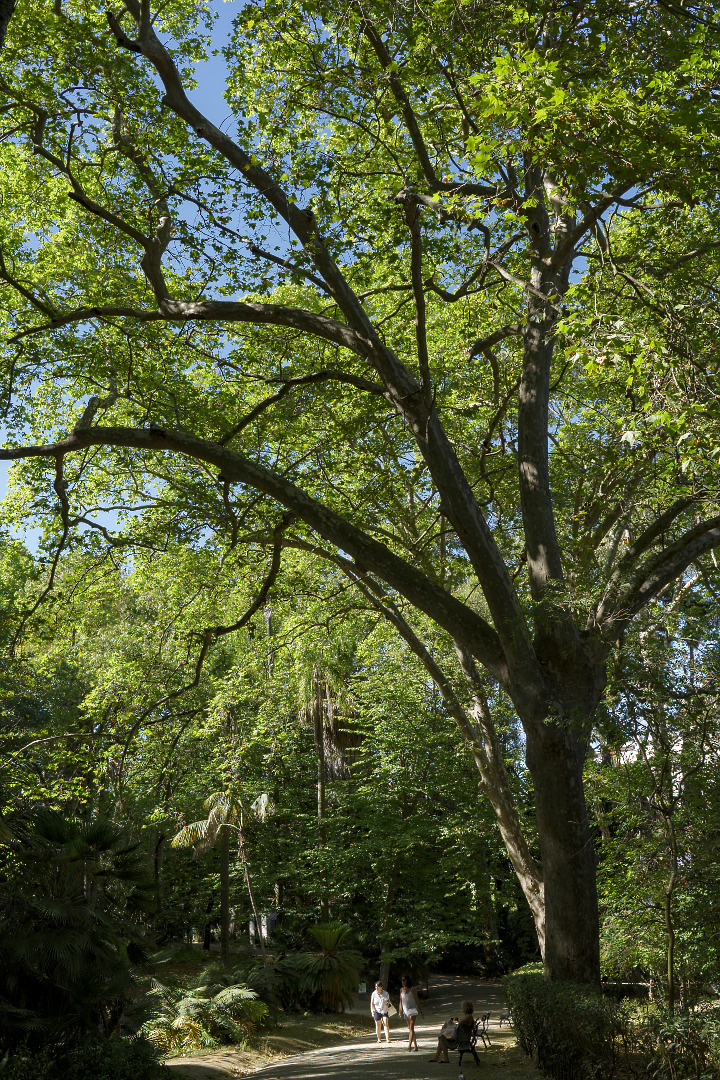
As we would expect, in areas of flat colour (1) and (2) have the same chroma.
EDIT: I should add that my findings are consistent with “resizing in sRGB seems to have the higher chroma.” Our attention is drawn to areas of high chroma, and that is where sRGB chroma is higher. Our attention ignores area of low chroma, so we don’t notice the chroma boost that linear gives there.
I had a similar thought, but the exported full size tiffs from dt were identical. The output profiles may be different, but they both have srgb primaries and white point, so the gamut mapping is equal for both. This means the difference occurs in the resizing.