For all those who have difficulties finding a clear approach because of many sliders, the last version offers a relatively direct and easy way to the goal.
The prerequisite is that you clearly define/select the main subject in the photo, which serves both for the exposure correction and for the focus of the contrast. This can of course be the entire photo or a specific motif.
In this example, we see the woman and the child in the evening sun. For us, the main subject is the woman’s smile, so that should be the focus for exposure compensation and later in Agx for contrast.

First we select the woman’s face in the exposure module with the color picker to be able to brighten this area optimally (to bring it into the middle gray range):

In Agx, we set the pivot x (contrast focal point) on the face with the color pipette and increase the gamma:
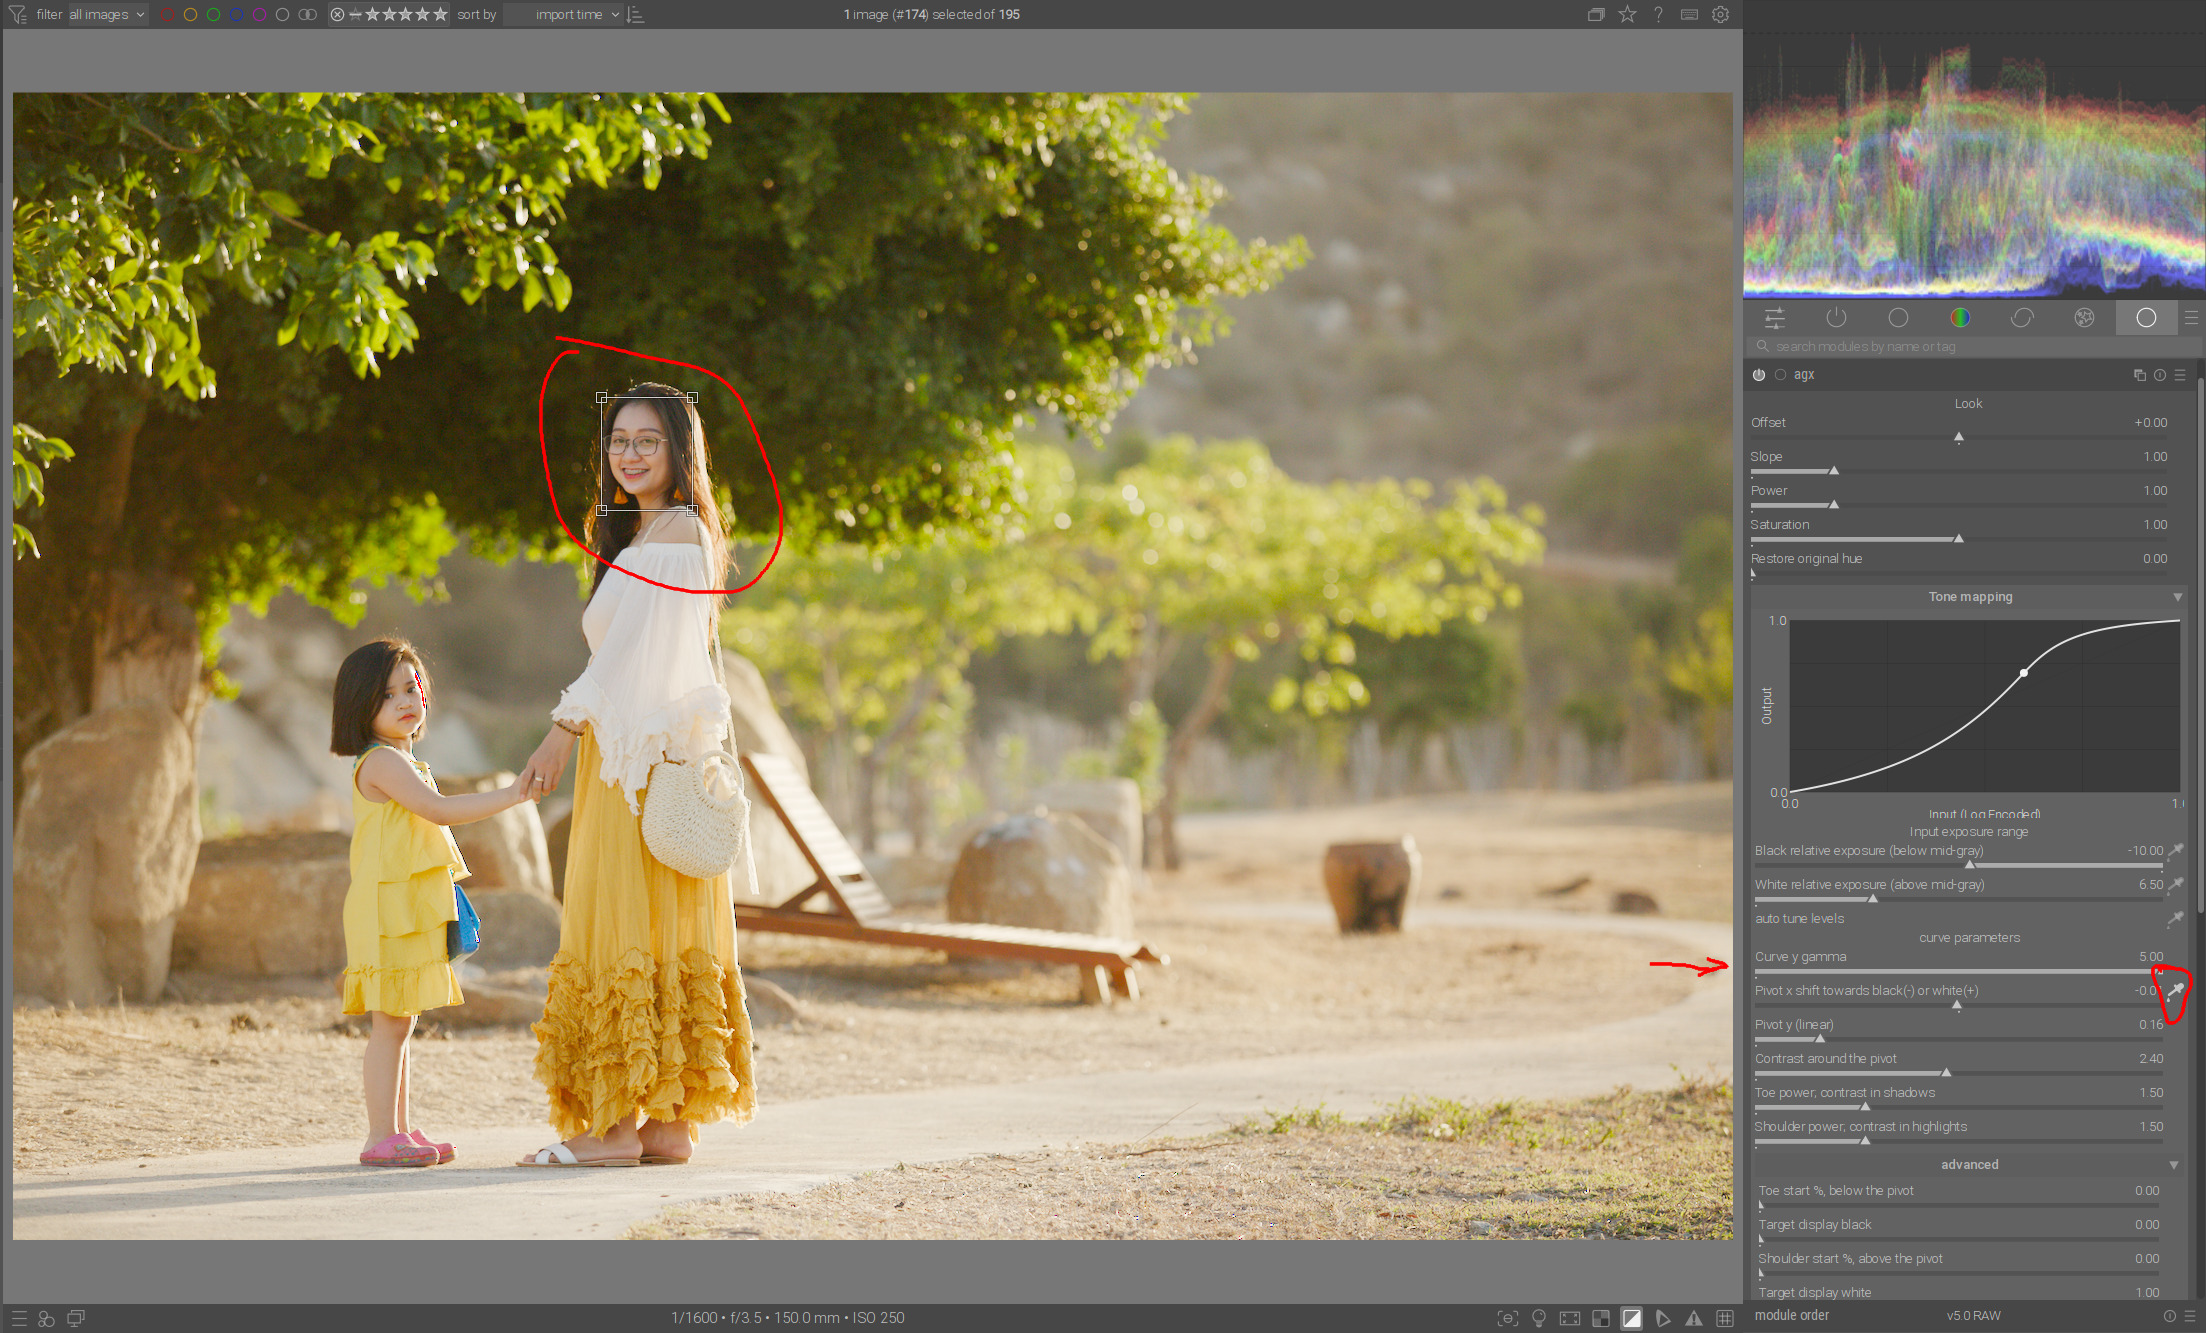
We can also increase the contrast around the pivot to get even more contrast in the face:

And at the end, we use the auto-tune level color picker to set the black/white point and/or prevent clipping:

This completes the basic processing.
In this case, however, we can darken the highlights a little with TE to bring back the details on the road and to achieve even stronger contrasts in highlights with the shoulder power in Agx:
