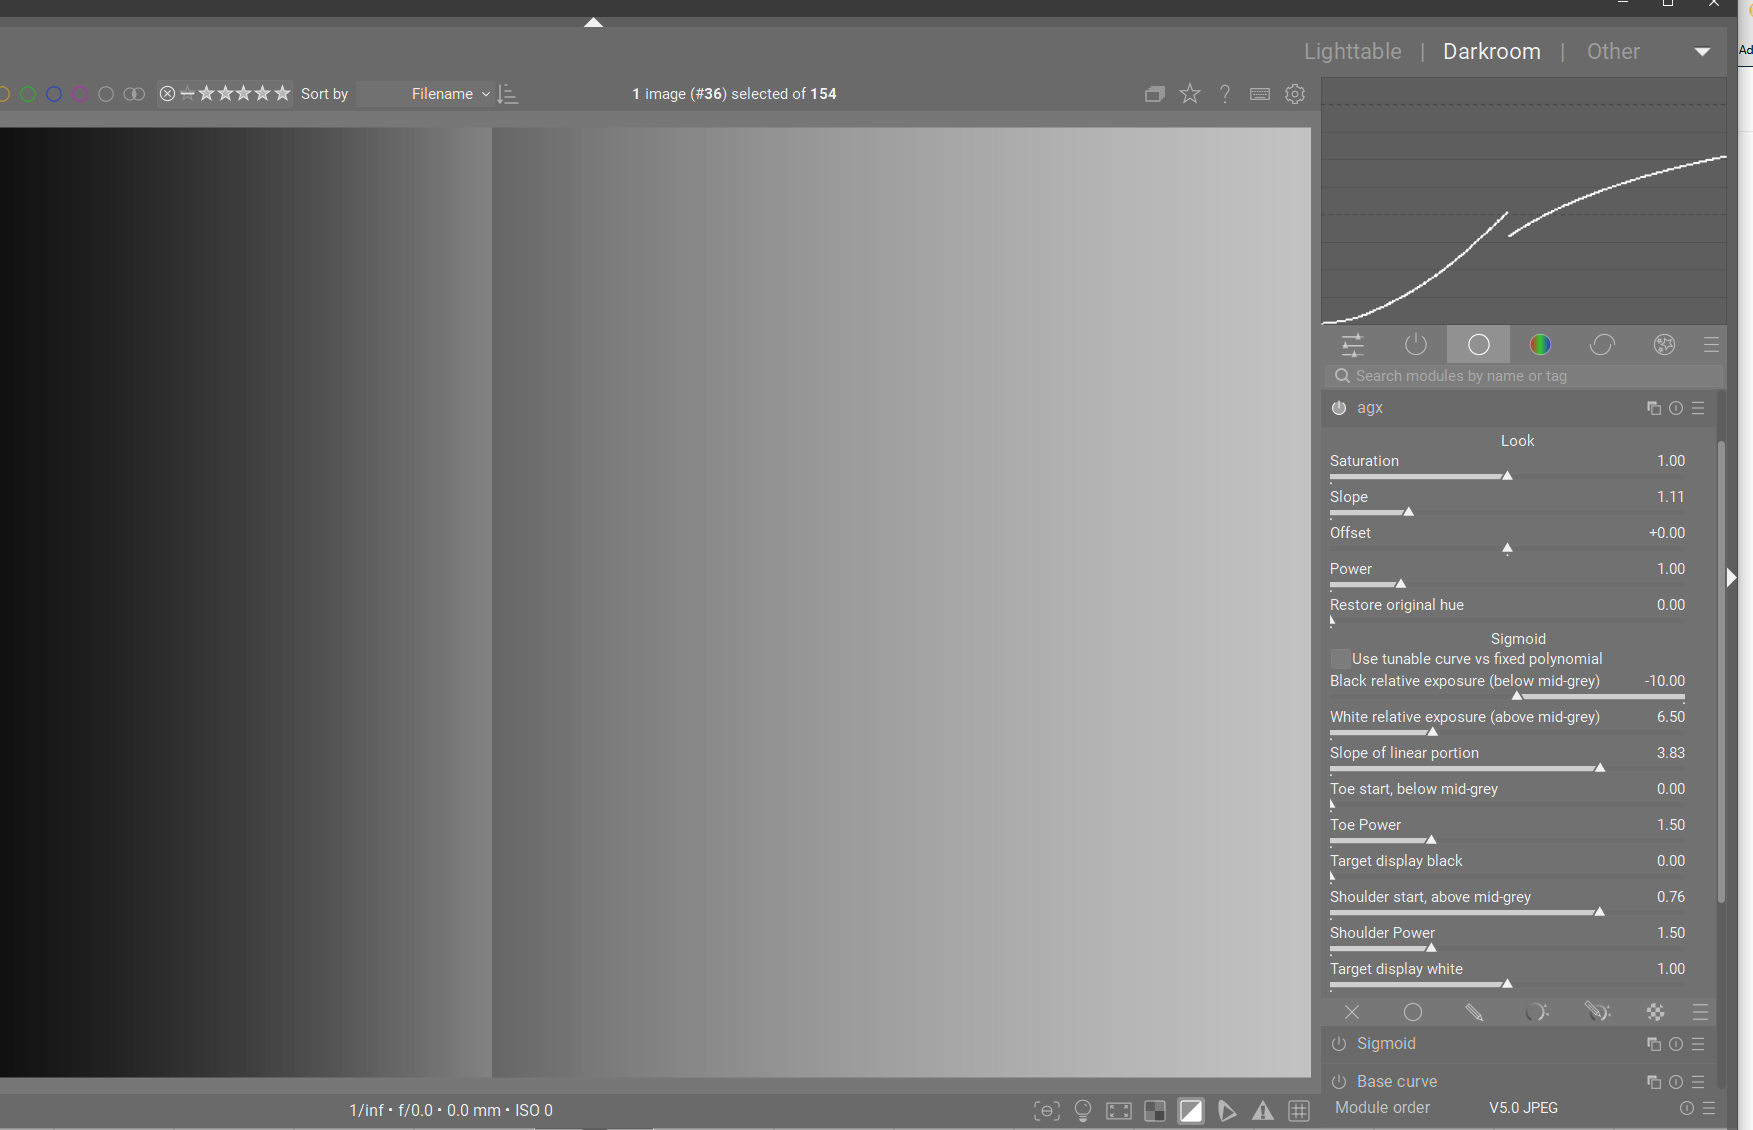
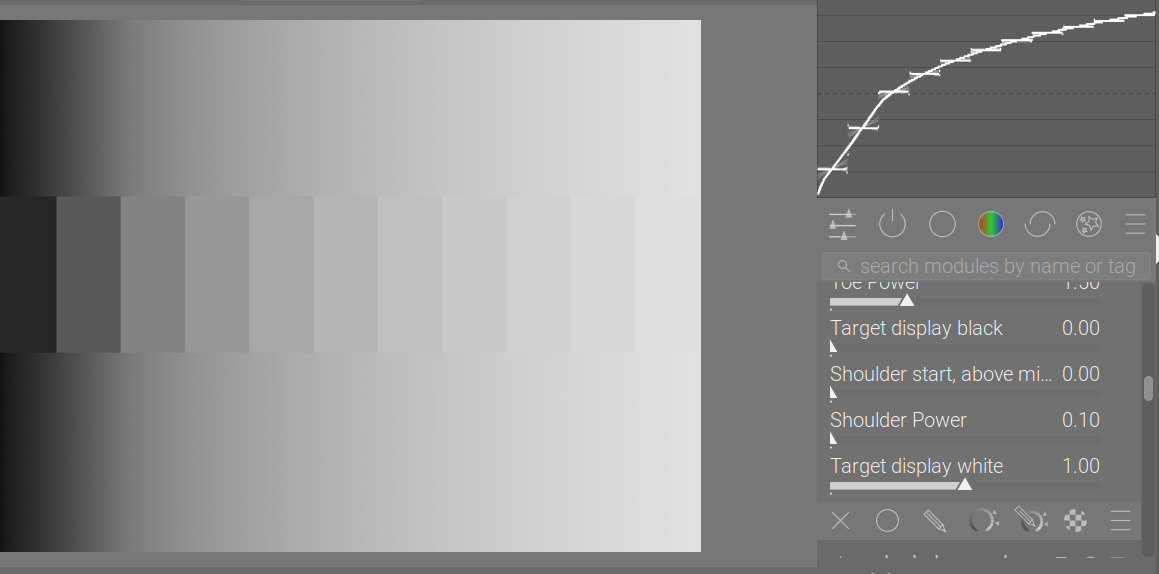
Ya you got it… I think going back and forth I sorted it as I was asking you…in the curve tool the curve by default is up at 1.5 and climbing to 2…as you add shoulder power the transition gets sharper but this drops the upper values to 1…so it looks like its pulling the curve down and in the ramp I had in DT the transition got sharp as well but the values were below max and so it looked like things were going the other direction…in the end the curve looked the same… I think its a sort of side effect of looking at this on a monitor vs a graph …you can’t just make changes and disply 1.5 or 2 times display max…
When you focus on the transition its perfectly clear…when I was first just messing around the visual I got from these two at first made it look like things were goin in a different directions…
I repeated your 3 versions and you can get something fairly similar but it does come pretty easy with AGX esp the shadows…for example you seem to be able to correct a pretty extreme image without even needing to add exposure sometimes…and in your filmic example if I added like 4 ish EV I got or could get shadows lifted in the same sort of range but then also you need to go to filmic HLR to tweak the lights also to get the best result…
Thanks, and I agree that I probably could have gotten a better results in the shadows. And of course there’s always the tone equalizer.
But I was struck by the roll off from the clipped highlights and the lack of harsh cut offs from the lights and greatly diminished halos, which would have been harder for me to correct otherwise.and I never did get the knack for Filmic’s highlight reconstruction
I’m a big fan of the skew control in sigmoid for controlling clipping in highlights, I use it a lot when I have clouds which I want to reduce harsh whites in
@kofa, your failing windows build. How much memory do you have on that machine. I build in a VM and it only has 8G of memory. I’m going to try increasing the memory to see if I can get the script to run without running out of memory. I’ll let you know.
I do that as well. What Sigmoid lacks for me is the ability to deepen shadows, but I can somewhat make up for that with skew, and I have options in other modules to do that as well. But it’s still nice to have those controls all together without hopping around.
And someone might yell at me for saying this, but I can get a similar skew effect in Filmic by activating and adjusting the middle grey set point that’s normally fixed at about 18%
Thanks again @kofa for the new module version, and @Dave22152 and @priort for making Windows builds. Much appreciated!
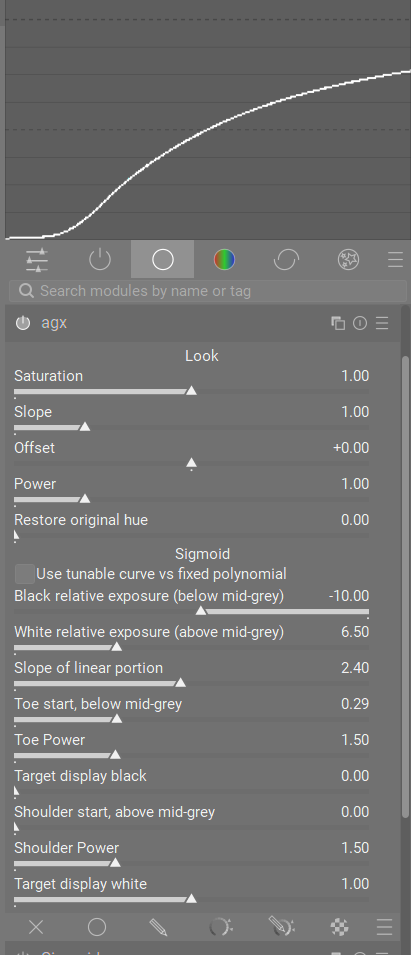
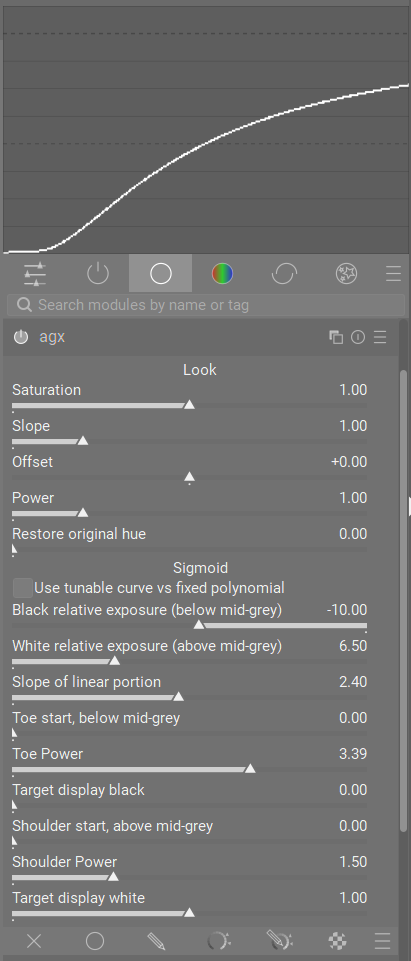
Yeah, I have to admit, I’m a little confused with how the Toe and Shoulder “start” sliders are meant to work in this latest version. I think I understand the theory behind them: that you use them to define the length of the toe/shoulder, then you use the Toe/Shoulder Power sliders to control the compression of them. But they seem to be acting like the Toe/Shoulder Power sliders in that they are controlling the curve on their own:
I didn’t change anything related to that (at least not intentionally). As explained above, a higher power makes gradient of the toe/shoulder stay close to that of the linear section (followed by an abrupt change), so they can cause behaviour that looks very similar to extending the linear section.
I’ll look into that transition issue later during the week (hopefully soon).
I am not sure the adjustment in color balance rgb is equivalent.
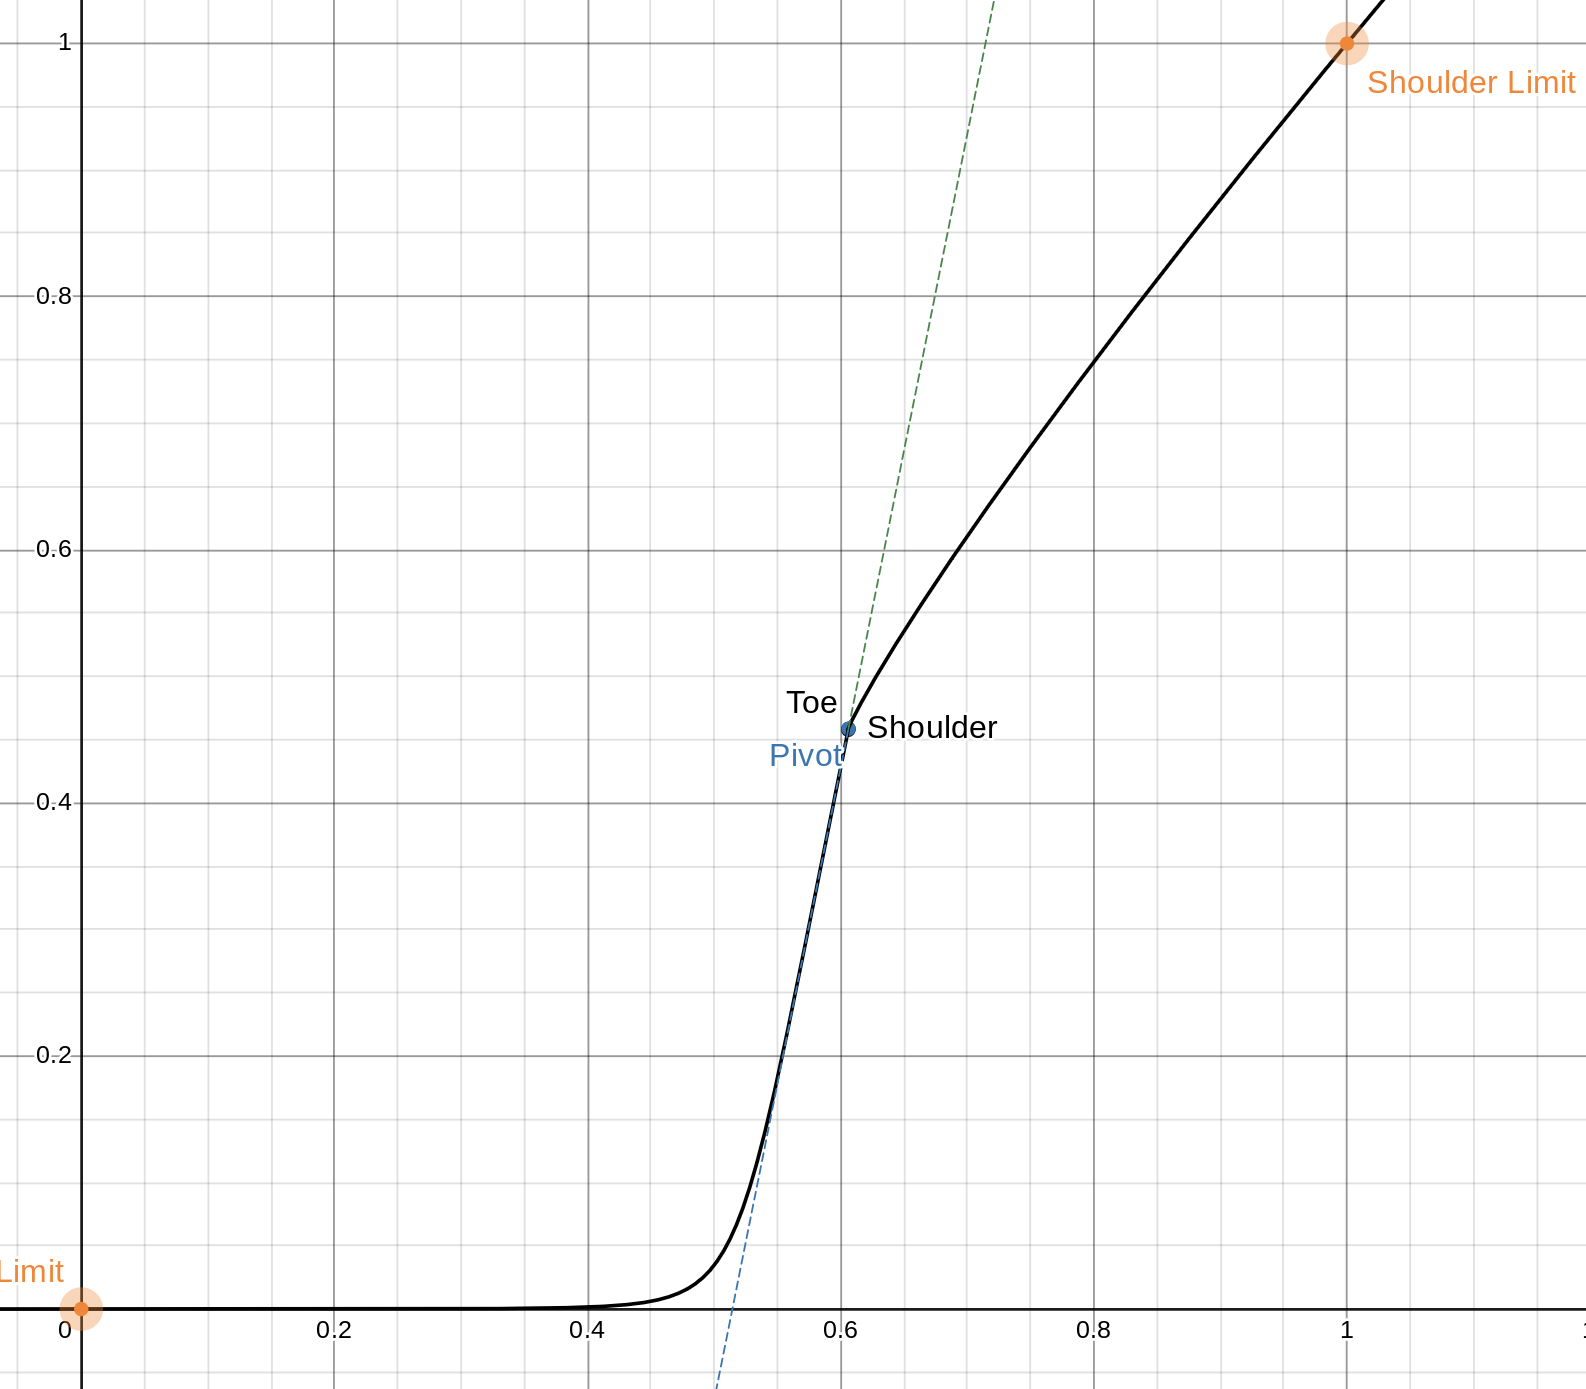
Just to clarify: let’s say that the luminance mapper is f: \mathbb{R}_{+} \to [0,1]. Generally we want a positive and unimodal f' \ge 0.
The “pivot” is y in
y = f(x) \qquad \text{where} \qquad x = \arg\max_x f'(x)
ie it is a parameter of the codomain, not the domain.
The intuition where we want the highest contrast in the display-referred space, ie y \in [0,1]. This rarely ever needs adjustment, but sometimes it does and it is hard to compensate with any other tool because of the inherent curvature in most tonemappers. (I trick @s7habo recently demonstrated in his videos is to make f almost linear, and use tone equalizer).
If we are after a new tonemapper, I think the best approach would be figuring out where the current ones are lacking and then work in that direction from first principles.
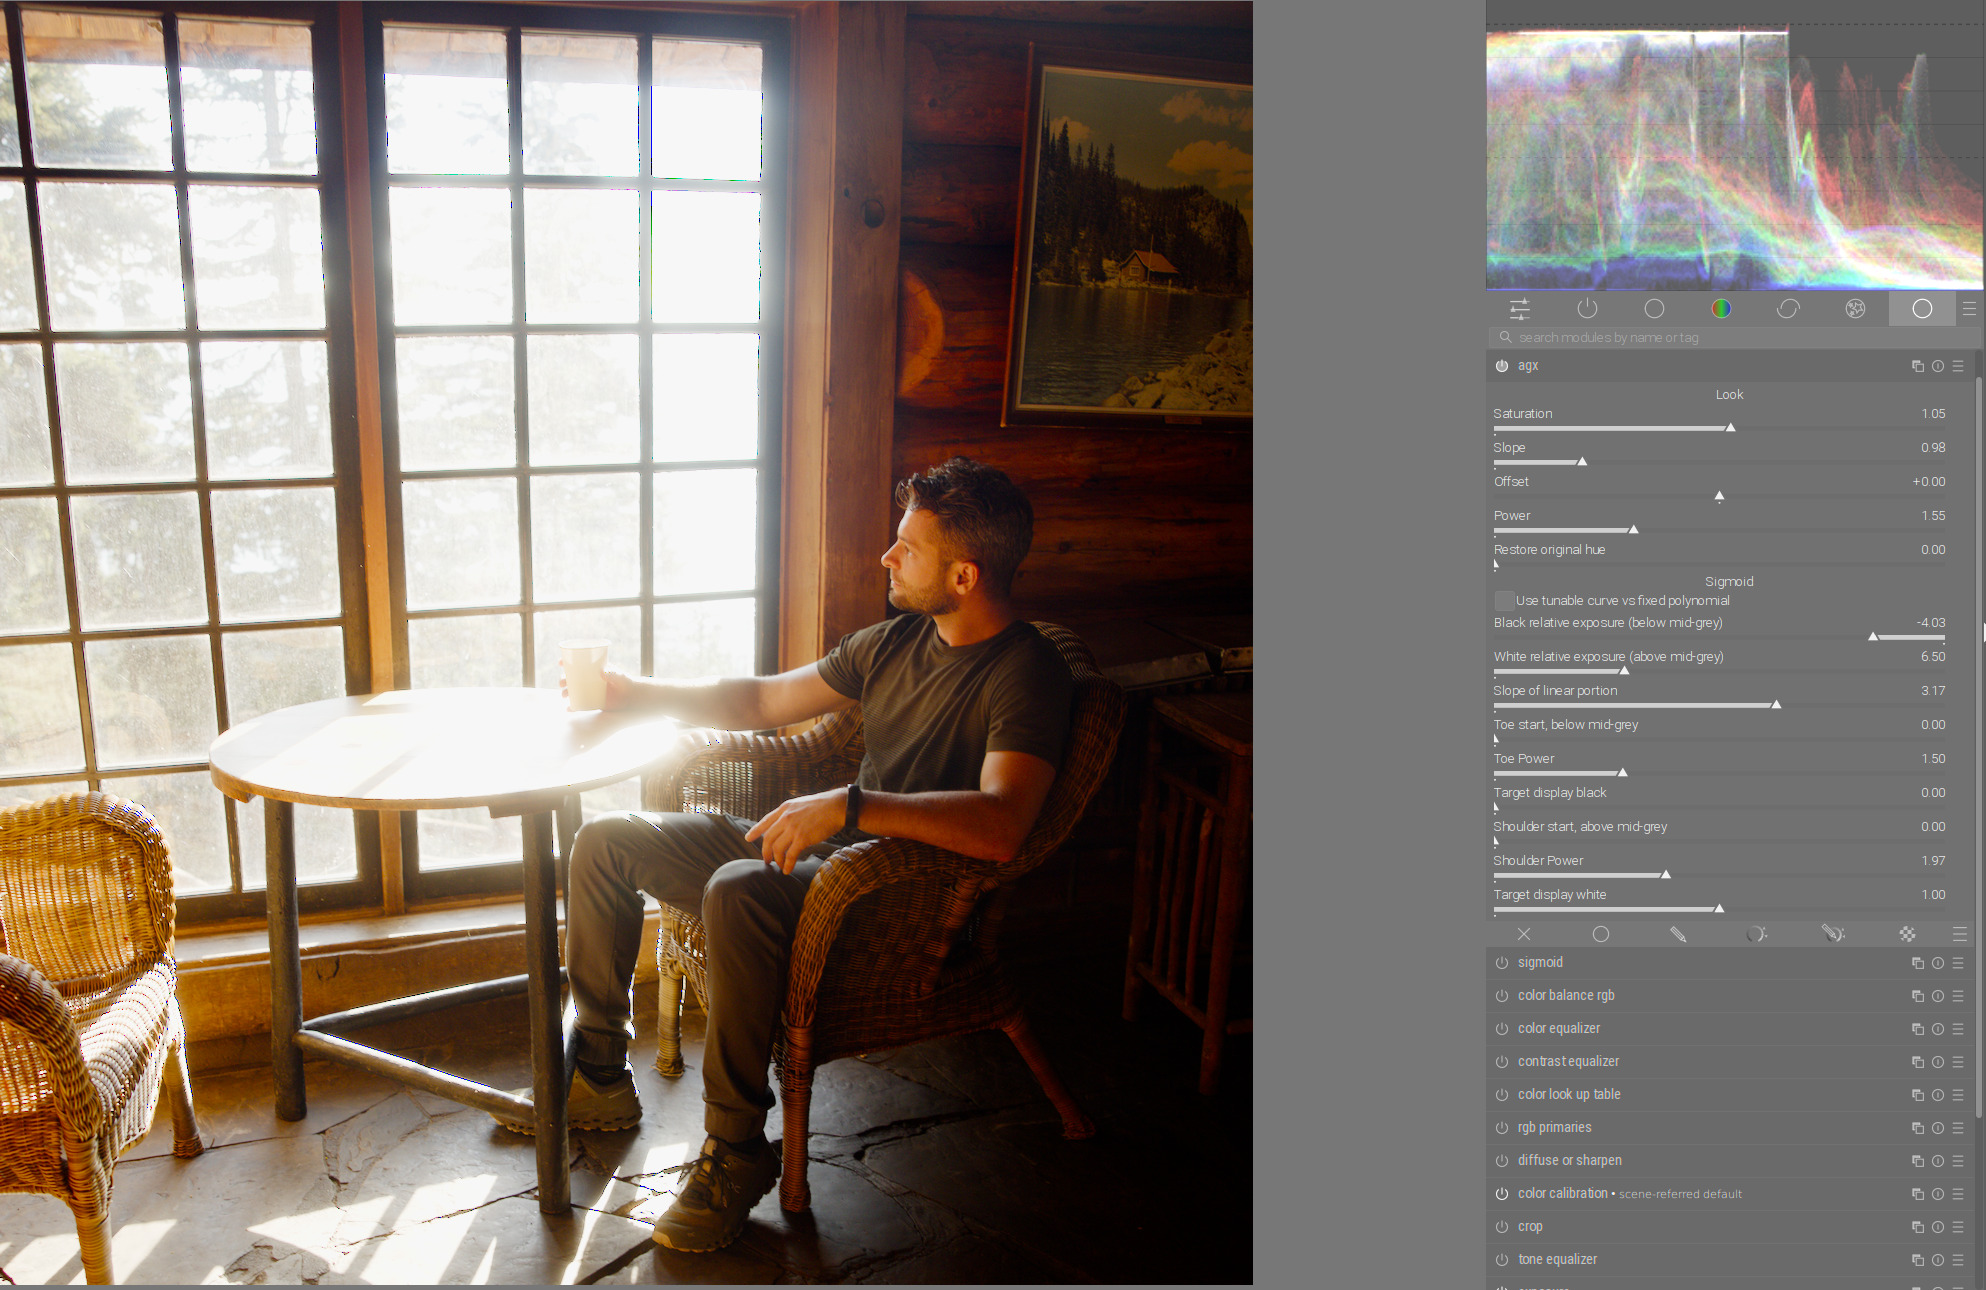
This is now much better in terms of control over the details in highlights but with the disadvantage of losing saturation.
Here is an example. In this scene with high dynamic range you get very good contrast in the darker areas. The saturation is also right so far (look at the contrast and saturation in the face of the person sitting to the right of the window):
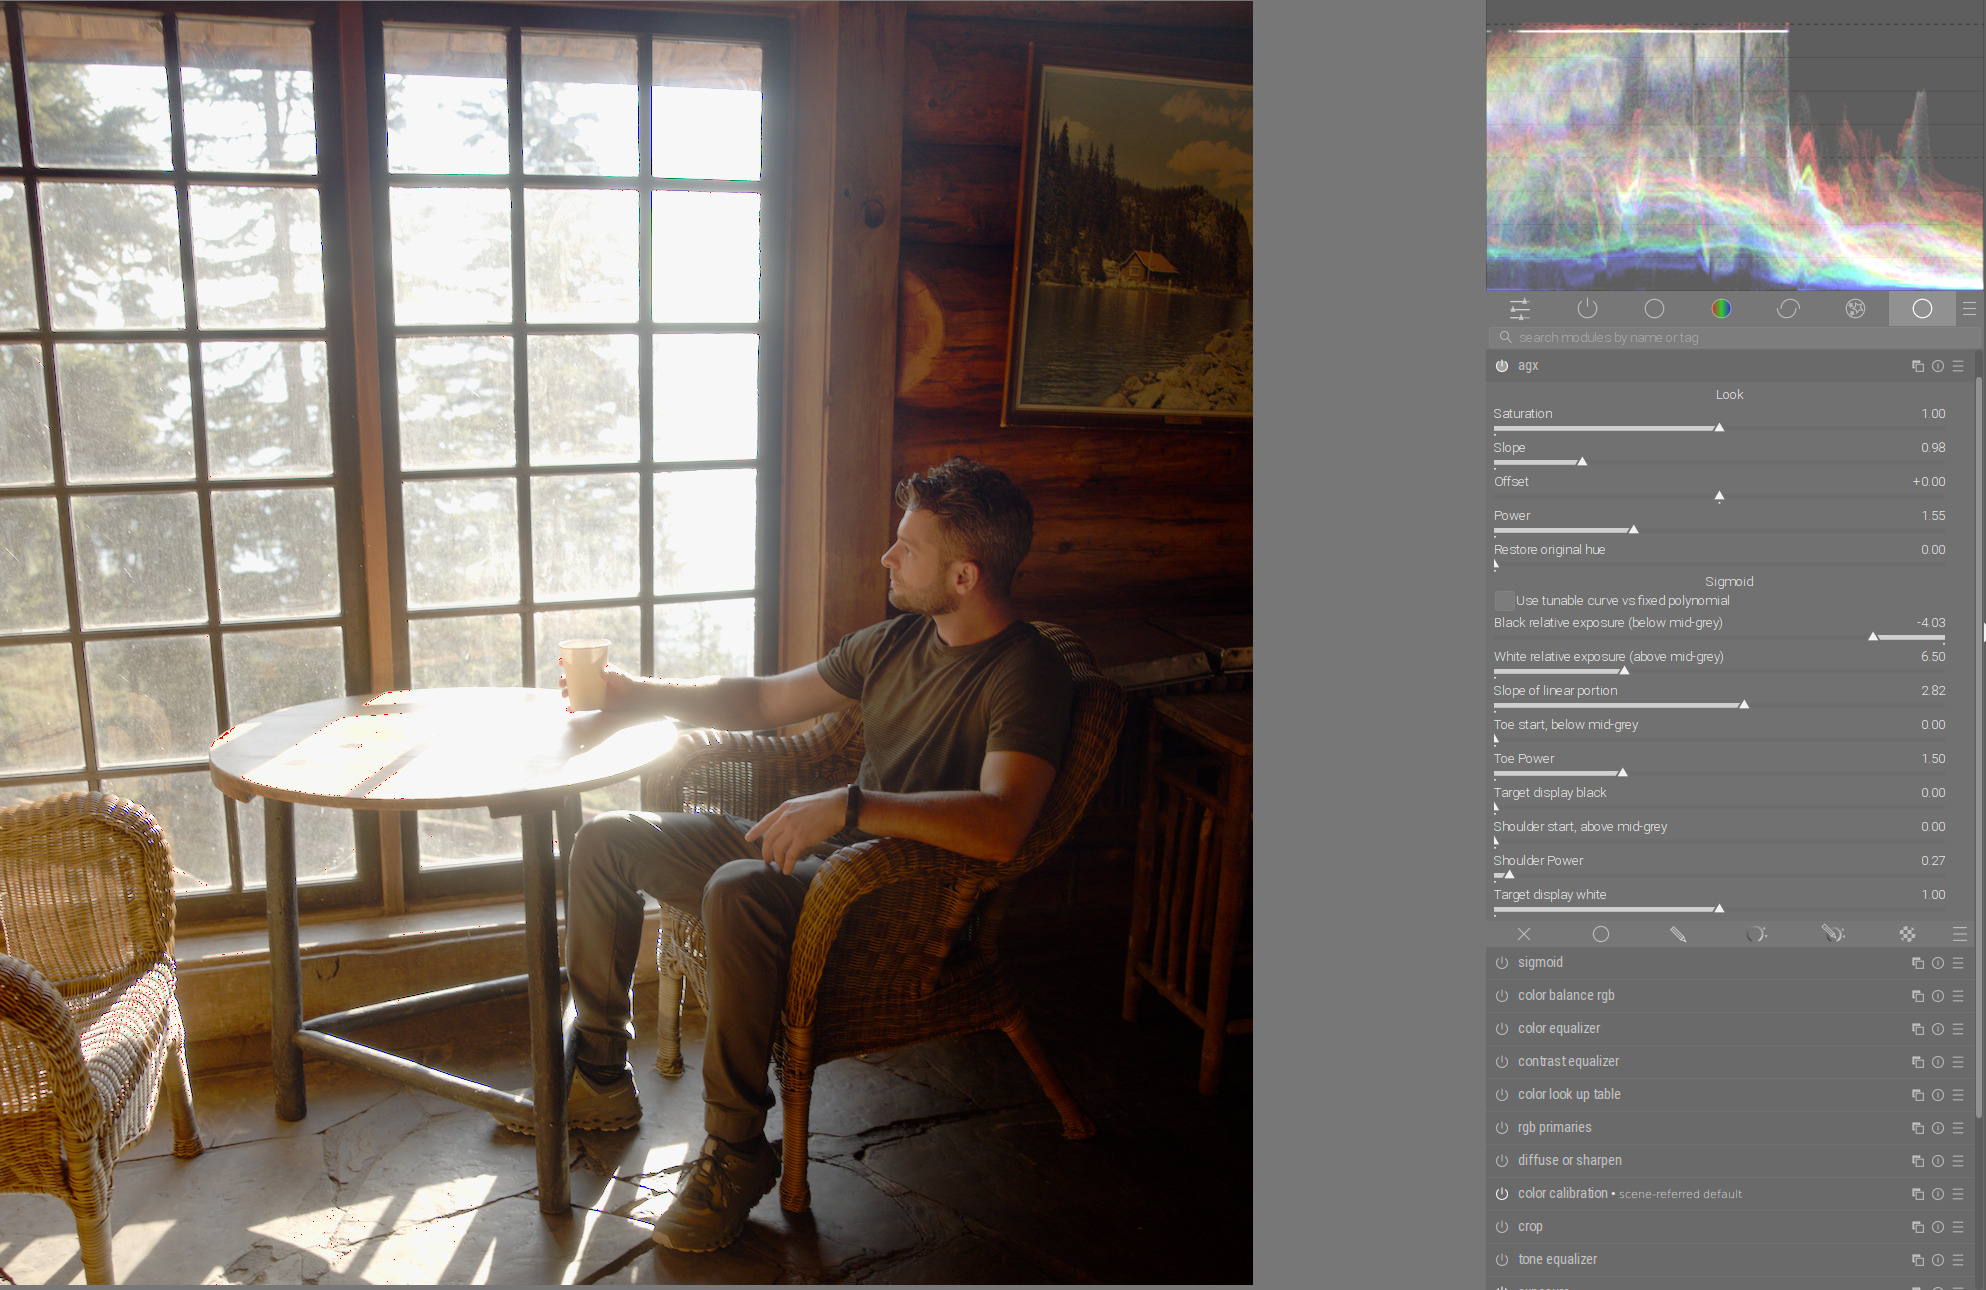
If you now reduce shoulder power to get back the details in highlights (the trees in the window), you lose contrast and the saturation in the face at the same time:
Which version were you using before, which version brought a change? There shouldn’t be a change in functionality, really.
Changes that may / will effect output:
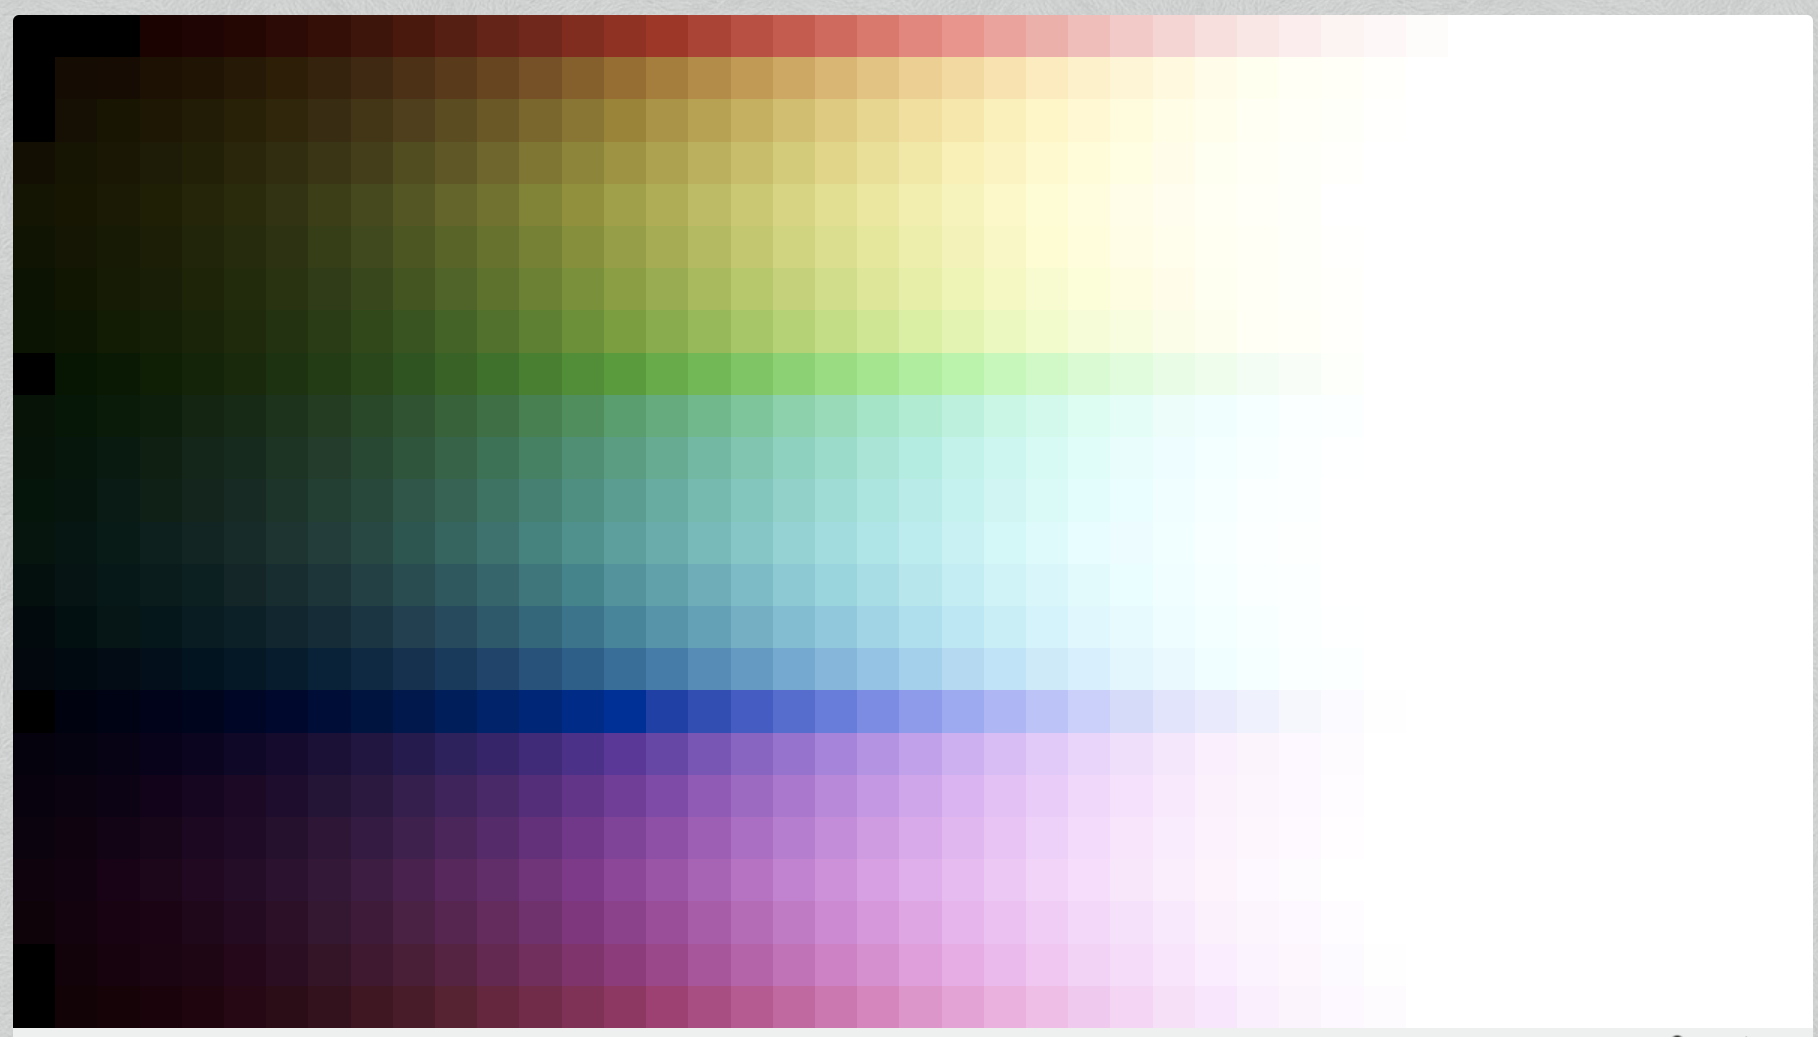
moving the outset matrix to the linearised portion. To the best of my understanding, that is what Blender actually uses. This is also something @flannelhead suggested.
the change to switch to the ‘fallback’ head or shoulder to reach black/white even if the slope would not allows you to reach them. However, when that kicks in, the user-selected toe/shoulder power is ignored.
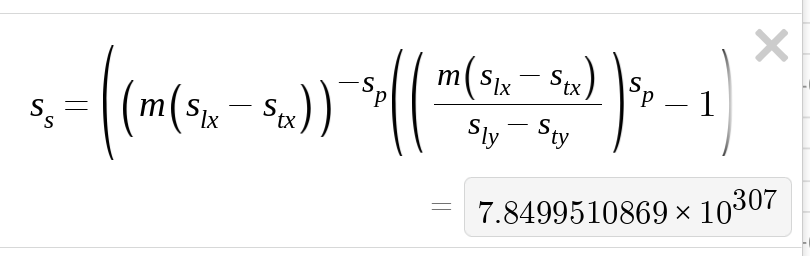
In today’s build, I limited the maximum ‘slope’ (an internal, calculated value) to 10^6. Those slopes are produced only when the toe/shoulder power is way below 1. That shoulder power of 0.27 in the second image is in the danger zone (it may be affected).
If you try the same settings (you may have to dial them in manually, though I think I have not changed them in the past few days), can you check if there are previous versions which were working better, and pinpoint which one causes the desaturation?
If you run this at the command-line, you’ll get a bunch of output (no need for -d debug flags, I write directly to the console).
Interesting values would be: need_convex_toe, need_concave_shoulder (those indicate that the fallback kicked in) and scale_toe, scale_shoulder (if + or - 1000000, the ‘explosion’ safeguard limited the scale).
But you are right, all the latest versions have the same result. So it’s not because of the new version.
So you have to be aware, if you use the shoulder power, that you have to take desaturation into account.
This is a simple, per-channel S-curve. There’s no saturation curve, only the saturation control of the ‘look’.
But you are right, all the latest versions have the same result.
Can you find the oldest AppImage that still has your desired look?
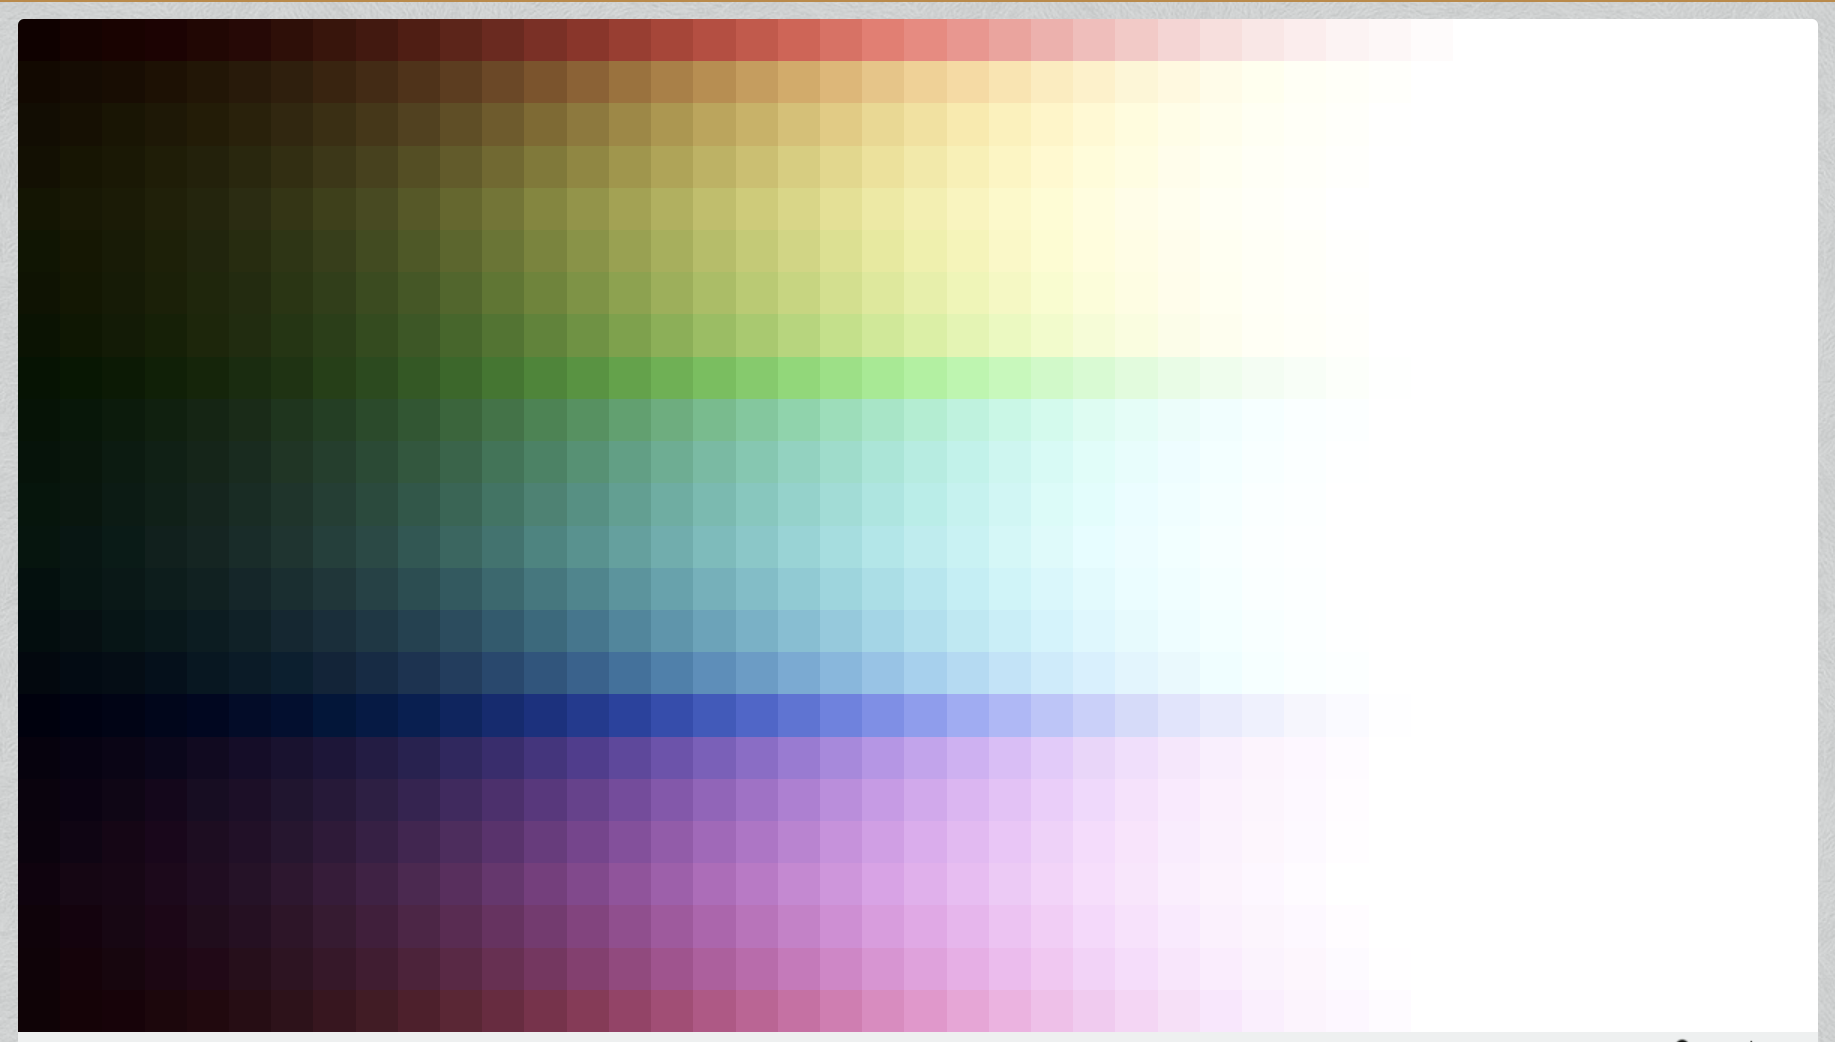
There was the change when I added the proper inverse matrix as an option, initially with a checkbox to switch between the EaryChow matrix and the inverse; and there was the change to move the matrix to the linearised part. I think you approved of the inverse matrix, so it may be the 2nd change, but that really is the logical place for applying the matrix, and is what I think Blender also uses (even though the GLSL code that I originally based the darktable version on was supposedly modified by Troy Sobotka, and there the matrix is in the non-linear part).
Here is the shader: Shader - Shadertoy BETA
Output if the matrix is applied without linearisation: