I don’t know how to detect when the picker is activated / deactivated. I only process the callback. Each ‘picking’ action modifies the curve, so the values don’t remain stable: where a certain region is mapped depends on what you picked before.
I’m thinking about setting Y from where the default 0.18 → 0.18 would map the selected region.
A new build:
- when auto-picking the pivot region, the corresponding the luminance Y will be calculated as if the curve were in its default 18% → 18% state (the other parameters, like contrast and selected black/white point, toe/shoulder params, are left unchanged for this calculation). This should help with consistency, but will not take it into account if you manually modified the luminance Y mapping.
- I’ve added a horribly abused (and therefore quite broken) version of @flannelhead 's highlights guard rail. It’s abused because it’s applied to display-referred data. I don’t think it will stay, at least not in its current form. You’ll find it in the advanced section. It’s disabled if the value is 0.
This build may be a bit faster. Still no OpenCL.
https://tech.kovacs-telekes.org/dt-agx/Darktable-5.1.0%2B726~gbe456cf330-x86_64.AppImage
@priort , @MStraeten : please update when you can find the time.
I’d like to switch to playing with the primaries. To do that, I’ll have to read and study a ‘bit’. Unless something is horribly broken, or someone contributes something nice, I don’t expect any new build from me until next weekend.
6 Likes
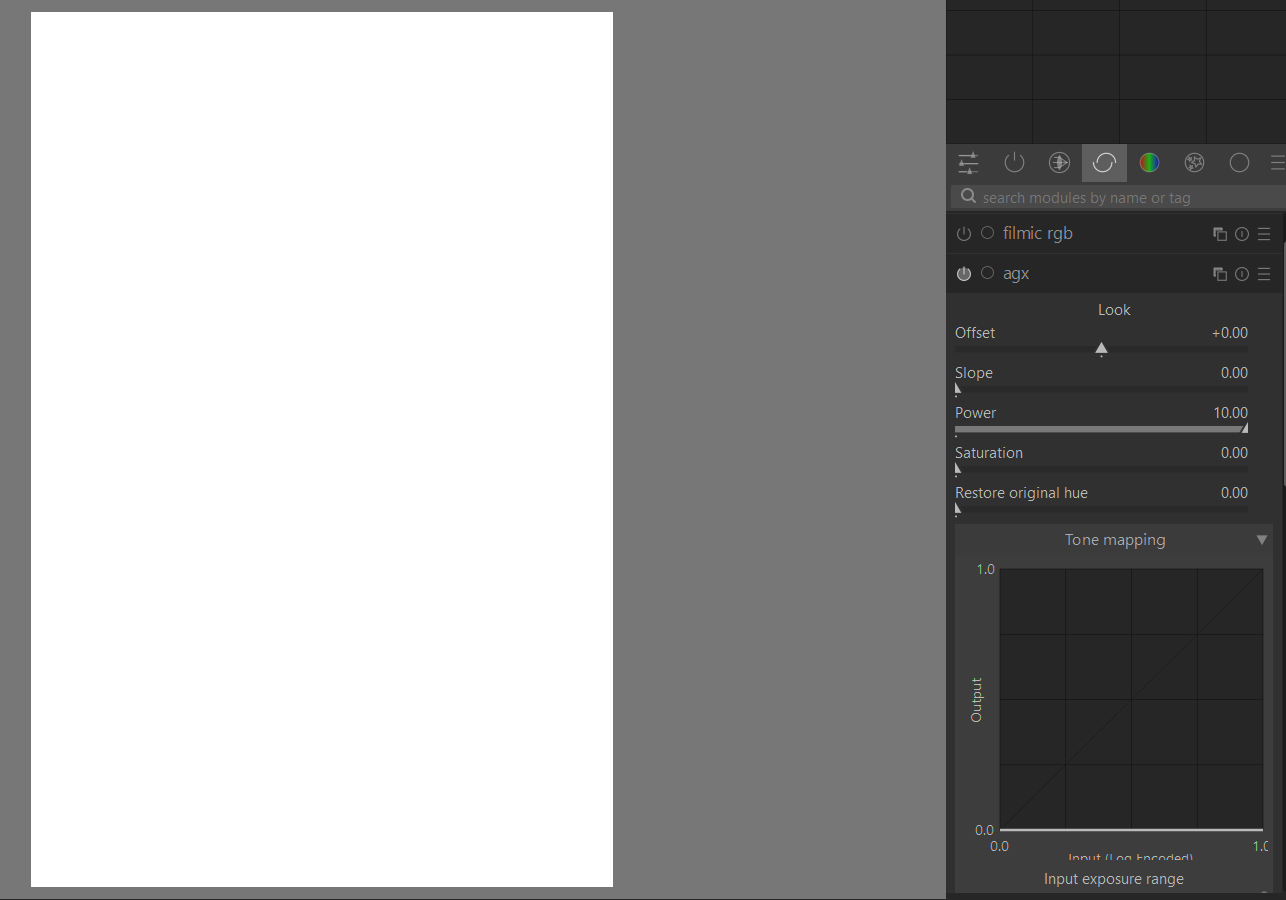
I am finding an odd problem with Agx. On occasions, I edit a photo with Agx, then at a later time when I want to edit it again, the picture becomes a white screen, and it remain white even in lighttable. However, if I turn off Agx, the picture is restored. The attached picture will explain.
When it turns white, in Agx, the tone mapping curve is blank. the picture with Agx turned on is also attached
I am also attaching the .xmp file, if it helps

What am I doing incorrectly?
Framed in Stone - 20240819_0272.CR2.xmp (17.5 KB)
This is the raw file
20240819_0272.CR2 (21.5 MB)
I am on the windows 11 implementation
Does it happen after a version update? The parameters are not yet fixed, and, this being a prototype/proof of concept, I don’t provide parameter migration.
1 Like
It probably does. I reinstalled the earlier version (723), but it didn’t work, even in 723. I then installed 726, it didn’t work either. I then compressed the history stack to the first instance of pre-Agx stage, then Agx worked.
thats due to changes in the module - yet there’re no parameter conversions implemented from each older version to the most recent one since it’s a wip module.
1 Like
here the macOS arm64 build:
darktable-5.1.0+663~g14be685919_arm64.dmg
and with a more custom tonemapper curve focused GUI (see Blender AgX in darktable (proof of concept) - #579 by MStraeten)
darktable-5.1.0+663~g14be685919_altGUI_arm64a.dmg
same comments as in Blender AgX in darktable (proof of concept) - #181
3 Likes
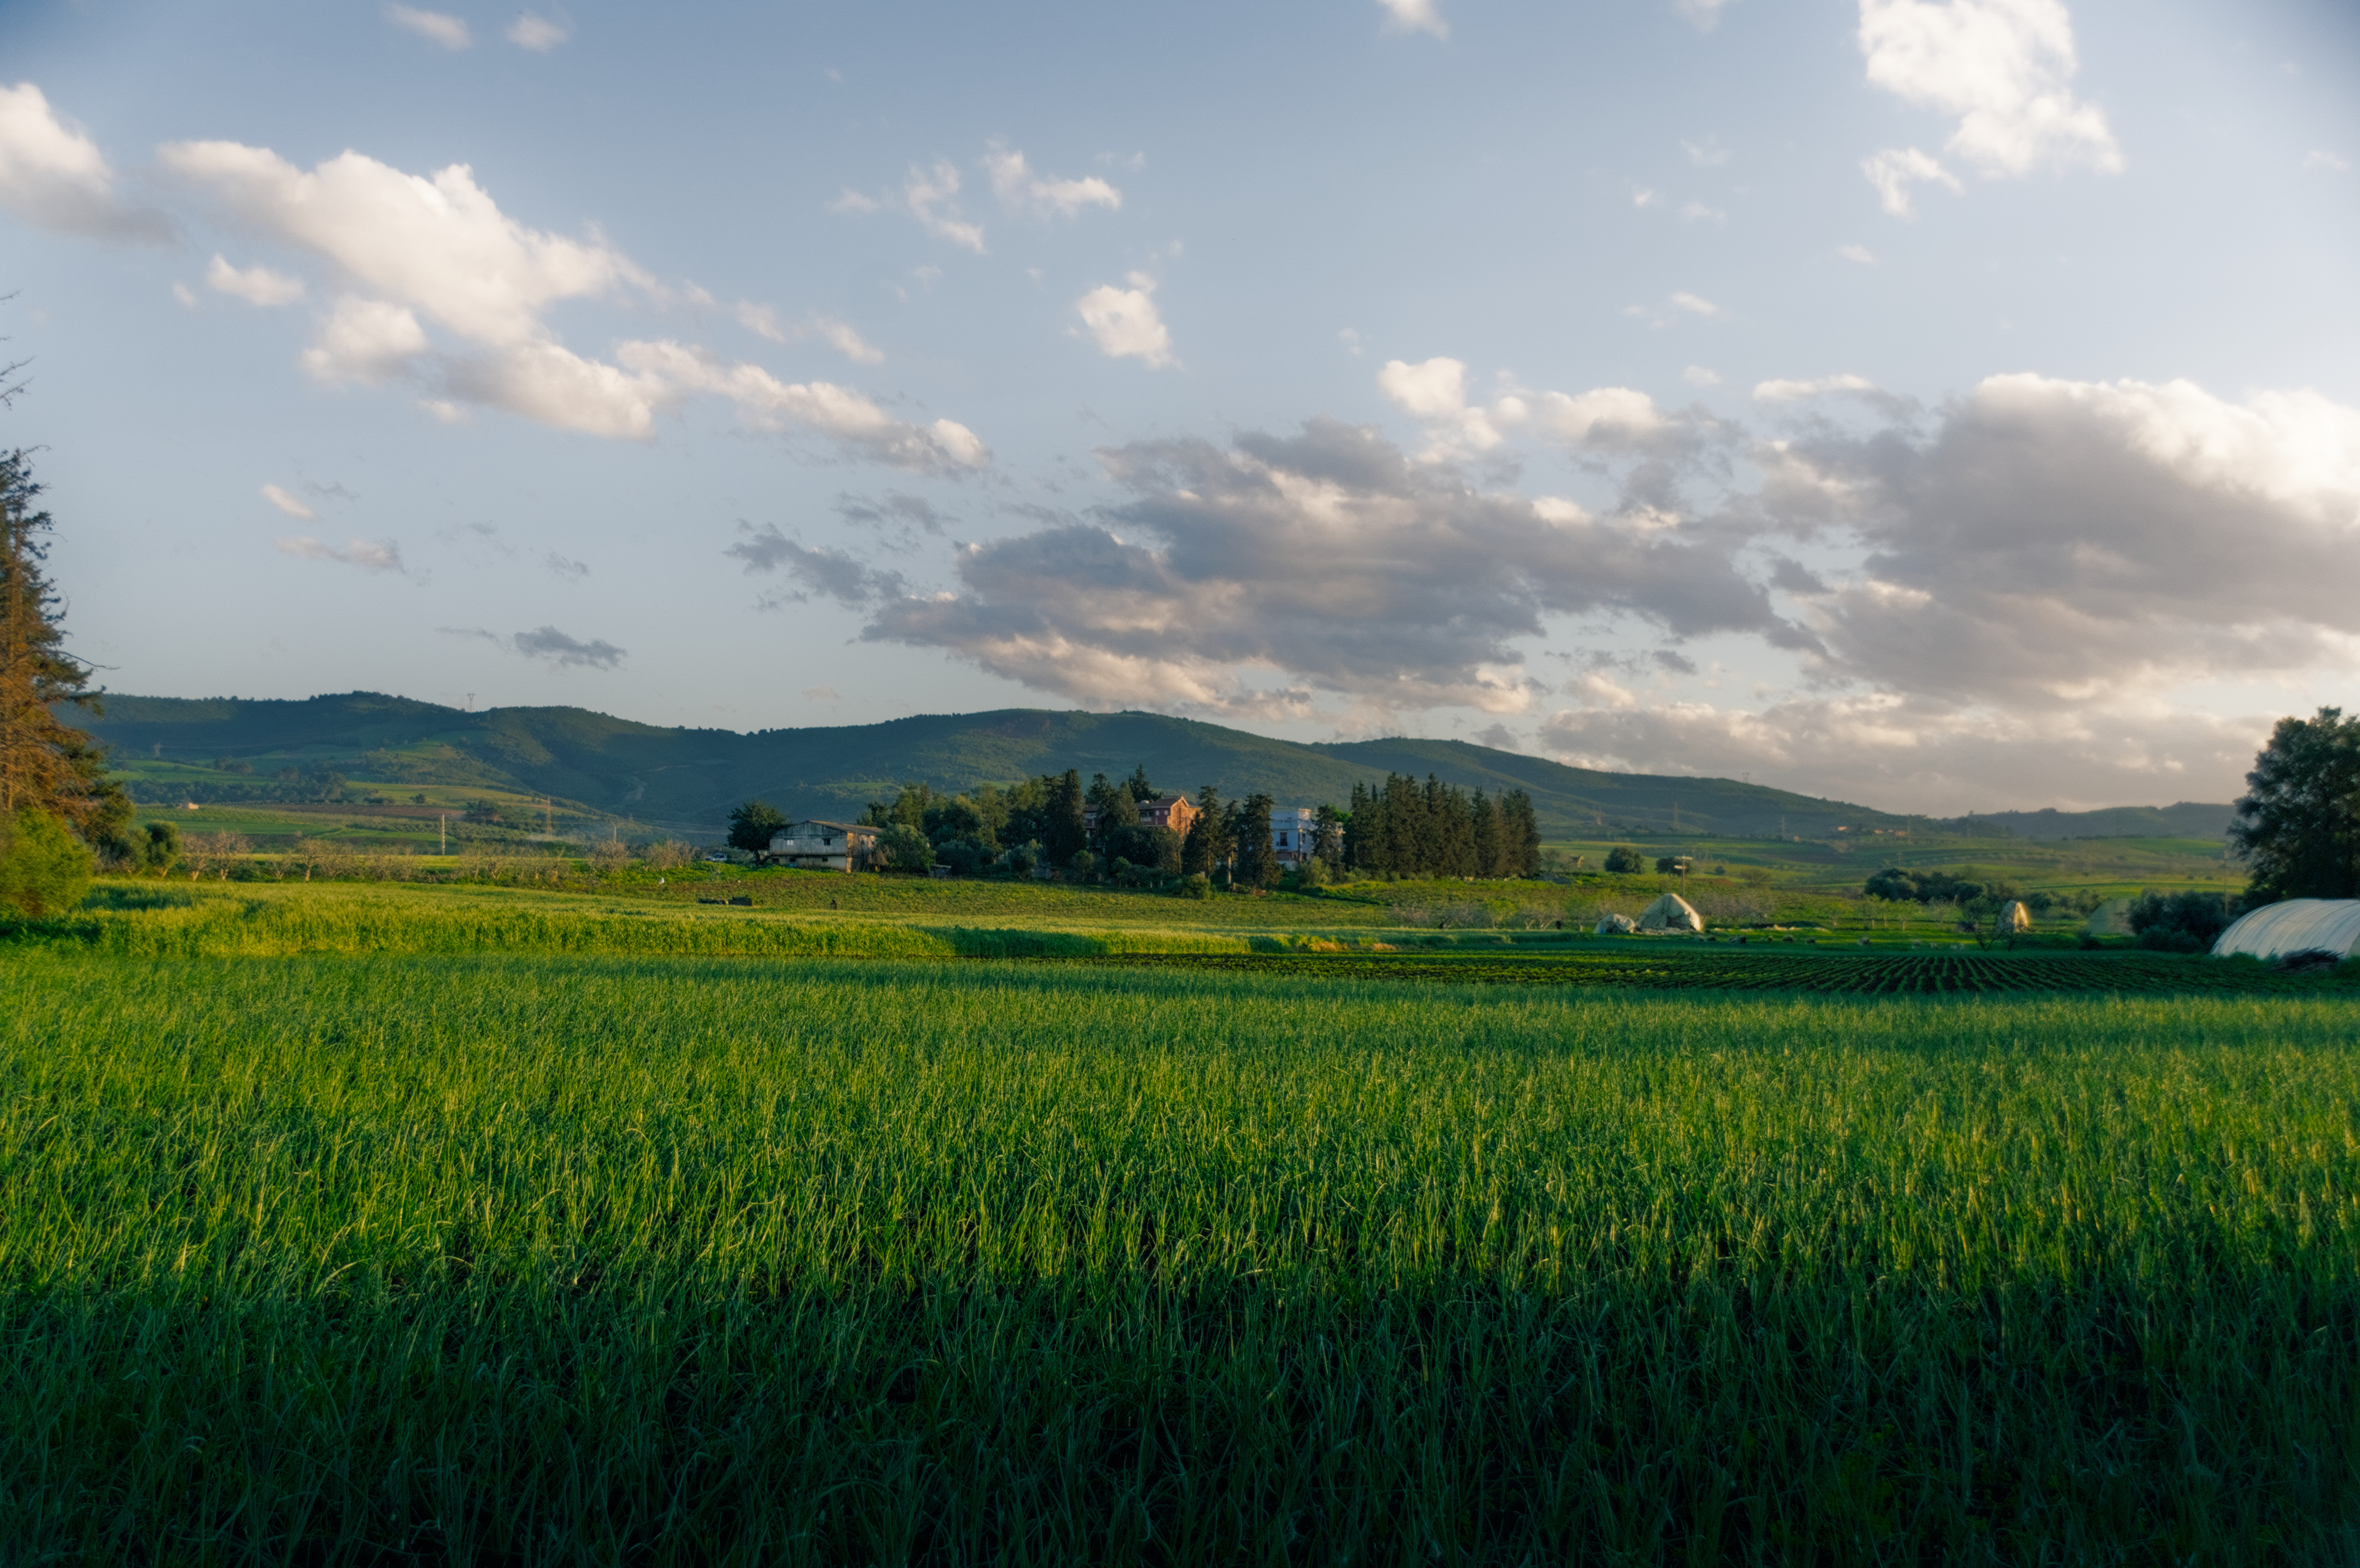
My first attempt using Agx. My first notice is how saturation is handled and how far you could push it without introducing chroma clipping, I usually face issues with greens especially when using filmic, sigmoid is not as problematic but Agx works like wonders
9 Likes
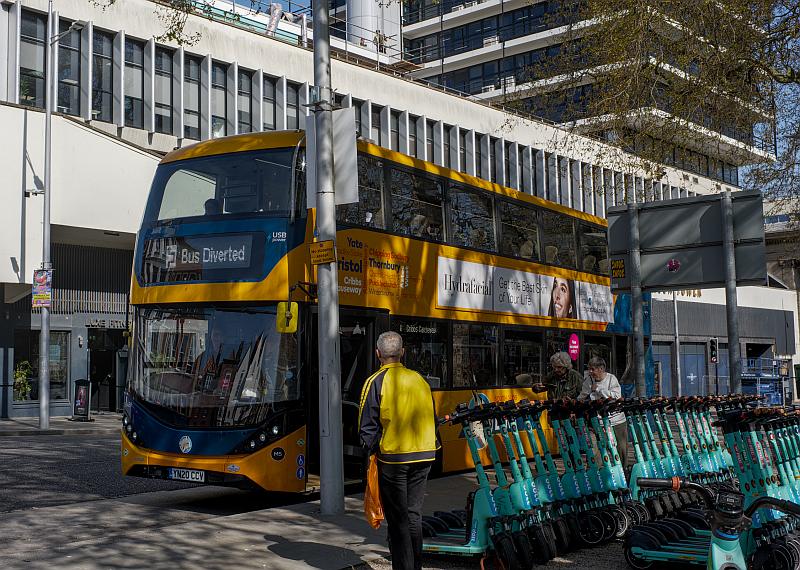
tried this out yesterday, I’ve tried before but not had great results, but I was happy with this one, I think the difference was that I’d got the exposure right, so it was easier to get nice results just by dragging a few sliders without much of a clue what I was doing.
1 Like
I’ve also been trying this. My current process is a) auto tune b) offset, slope, power saturation ordered as per gui c) tweak pivot x, pivot y, pivot contrast, toe power, shoulder power d) review offset thru’ saturation.
I think the sliders are too sensitive currently - appreciate POC stage for now.
Got this with AgX alone (and inpaint opposed for highlight recon.) -

4 Likes
I think the look is applied on top of the curve so maybe try the curve edits first and then tweak the look to see if you like the slider responses better …just a thought
1 Like
I agree on that. I also tend to find the sliders of the look pretty aggressive.
The agx module works in the following steps:
- it takes the values between black and white relative exposure (like filmic), and applies a log mapping (that is, a very flat curve to get a large dynamic range inside the the [0…1] limits. You control this via the black and white relative exposure sliders.
- then, it applies an S curve [0…1] → [0…1]. You control the parameters of the curve via the sliders in the tone mapping section.
- finally, the look controls are added.
In Blender, the parameters for the log (dynamic range compression) and the curve (controlling the distribution of the output values over the compressed input) are actually fixed. One can control overall brightness using exposure, black levels via offset, white levels and contrast via slope, contrast/brightness using power, saturation via saturation (power also affects it).
If you want more control, you can open the tone mapping section, where you can tune:
- the dynamic range compression (relative black and white exposure, with pickers, like in filmic)
- the curve itself:
- the most important one is probably the contrast (since the curve is applied to each channel separately, higher contrast also means higher saturation);
- then, you can use the toe and shoulder power to control how the middle region (around the ‘pivot’) transitions into the flatter toe and shoulder. A higher number means the curve is steeper for longer, and then becomes flatter, and this change also occurs more abruptly. A flatter end means more compressed details in ‘whites’ or ‘blacks’ (the brightest highlights / darkest shadows), but more contrast in (mid-)highlights and (mid-)shadows.
- you can also move the pivot, the point around which the curve is centred – this is the point where the contrast will be highest (normally, unless contrast is too low to reach the selected target black or white point, in which case the toe or shoulder is made steeper). There is a picker to select the region of interest (pivot x). You can fine-tune how bright that region becomes by adjusting pivot y.
- if the curve becomes very much distorted (e.g. very flat in the shadows, then a very steep transition in the middle part, or vice versa), you may want to change the curve y gamma. It affects the distribution of contrast.
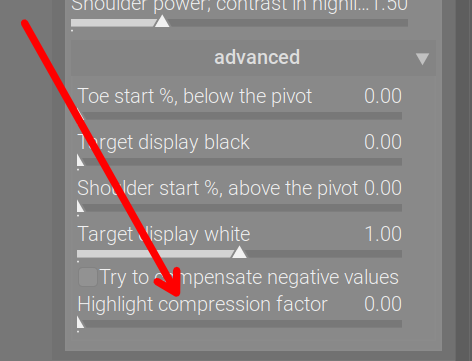
- in the advanced section, you find a a few more controls:
- toe and shoulder start are alternatives / supplements to the toe and shoulder power: they don’t just guide the curve to stay close to linear for longer, they actually enforce linearity. This can lead to increased contrast, but also to conditions where the maths don’t work out (it is possible to drive the linear part of the curve hard into the top or bottom edge).
- target white and black point: I’d strongly advise not to use white > 1, as it causes clipping anyway. Raising target black can give a more washed-out look to the image, a bit similar to raising the offset in the look section; lowering the target white makes bright highlights dimmer.
- there’s a checkbox to avoid out-of-gamut colours
- and a slider to compress highlights; low values may help with oversaturated highlights; there is a larger jump between 0 and 0.01 (because that toggles whether compression is applied to bring values below 1); then, sane values above 0.01 have a gradual desaturation/darkening effect; high values will ruin the image. I don’t recommend using this control.
That’s it for now. Don’t yank sliders around. Either try the look first, and then apply small changes to contrast, dynamic range and toe/shoulder power, or auto-pick the relative exposures first, adjust contrast, and fine-tune with the look controls. At least that’s what I do, but I have to admit, I have not edited many images with the module yet.
15 Likes
Which ones? There are a few. ![]()
Those are the standard sliders of ASC. Pretty much the only one I actually use is the saturation, though.
Hanno has mentioned the power slider, I’ll see if I can tame it.
I’m familiar with filmic and the concept of mapping scene linear data into a non linear display state and I also use only the saturation slider in the look tab. But something is making me confused regarding the clipping indicator since it has four options to use for judging our edits (full gamut, rgb channels,luminance and saturation only). I’m wondering what option you or anyone here uses ?
Ps: the new feature that you added for compensating negative values, does it compensate for clipped values in the working space or in the display one ? because I noticed that when I change the options of the clipping indicator it yields diffrent results.
And I want to thank you for your efforts.
My eyes, mostly. ![]() That is, if I don’t see detail loss or colour distortion, then I don’ mind if there is a slight clipping. And conversely, even if the indicator shows no clipping, the image may still have lost details.
That is, if I don’t see detail loss or colour distortion, then I don’ mind if there is a slight clipping. And conversely, even if the indicator shows no clipping, the image may still have lost details.
In the output space (set in the output color profile module).
Instresting.
So what is so special about Agx if it does a very similar job to filmic and sigmoid ?
What does those matrix do exactly, how it is diffrent or better ?
that’s a very comprehensive guide, thanks ![]()
The matrix tries to provide a nice transition to white for the brightest parts.
filmic tries to avoid colour shifts; but if I understand correctly, human vision has its own, which the AgX matrix tries to approximate (so you don’t get ‘salmon sunsets’).
The sigmoid module actually has the same matrix features (insetting/attenuation, rotation). Its source code and design documentation (PR) mention AgX as inspiration, see sigmoid: introduce custom primaries ("AgX-like" processing) by flannelhead · Pull Request #15104 · darktable-org/darktable · GitHub.
I think one difference is the curve, which in sigmoid can be quite flat at the ends (Naka-Rushton Tonescale | Desmos and Logistic function - Wikipedia, based on New module: Sigmoid display transform by jandren · Pull Request #12642 · darktable-org/darktable · GitHub mentioning the Log-Logistic / Naka-Rushton curve). In AgX: Power(P) Sigmoid | Desmos