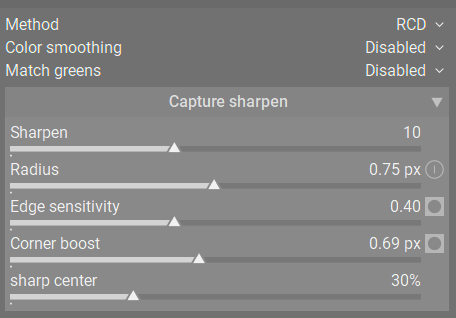
Here you go:
3 Likes
There have been other preset ideas like this.
You may of course used presets but remember, this is about sensor/lens gaussian blur correction, not for sharpening in general. Just never “overcook”. I have a number of presets for cameras i have been using for long and i am pretty sure how they behave.
As an example: for my Q2 i have 4 carefully tuned presets; high/low iso and normal/very-small aperture.
1 Like
Could you share how you developed those presets? Purely empirically, or is there some theory behind them? Any reusable advice, rules of thumb?
3 Likes
No big theory.
- It’s rarely required to use more than 8 for iterations.
- The main radius is calculated quite well in automatic mode when using low-noise images with a lot of detail. If you keep this, there will be no artifacts later on.
- For low-iso presets you can move the edge parameter to the left until the masks “shows image content”. For high iso presets you should make sure that the flat-but-noisy areas are “pretty dark” so you sharpen the edges but don’t add noise.
- the corner boost section is only good for lenses that are very sharp at the centre but loose sharpness when very wide open/closed. So somewhat special.
19 Likes
Hello,
Well done and thank you for this module. My initial empirical tests are very encouraging.
I noticed (perhaps mistakenly) that I could easily combine the capture sharpening settings with a little raw noise reduction. And with the LMMSE algorithm.
Greetings from Luberon, France.
Christian
2 Likes
For the radius, the tooltip currently says “This should be done in zoomed out darkroom”. Can you please clarify what you mean by “zoomed out”? The default zoom level is “fit”, so the zoom level depends on the size of your darktable window.
Does the zoom level actually matter if it’s taking a reading from sensor data?
I think this is related to the processing pipeline: from my understanding if you zoom into the picture, the processing pipeline does not know of the rest of the picture. Therefore zooming out will relate to fit, i.e. having the whole image data available in the processing pipeline.
4 Likes
Awesome that CS will make it into Darktable. It’s a really nice algorithm and works in RT quite well.
2 Likes
How can we visually discern the various types of blur that needs different types of sharpening?
1 Like
We can’t. As said, when using CS don’t think of it as a generic local-contrast-enhancer or sharpening-tool. It’s more a prerequisite to correct sensor/lens blurring, nothing else. Also it seems to improve further processing down the pipe … See the net for RT CS or other software having something like this.
What you find about CS on RT is mostly correct also for the DT implementation. (We have it much faster due to OpenCL ![]()
12 Likes
Of course, that’s a a good guideline to using the tool. But the ultimate arbiter is what looks good. Therefore, one should use the final image as the final guide on which tools to use and when.
I just want to say that I’m using the development release of dt and the combination of CS and the other demosaic tools is capable of some high quality image results. Keep up the great work!
6 Likes
Is this feature built into the system when installing the program or do I need to enable it?
This feature is in the demosaic module of the development version of darktable.
So, no specific compilation flag or setting to activate, but it’s not available in the 5.2.1 version (will be in the future 5.4)
2 Likes
Thanks a lot @hannoschwalm. I finally found the time to give this a try, it’s really nice.
At first, though, when trying with some images from my Fuji X-T4, I was a bit underwhelmed, as the effect was very subtle. However, when testing on images of the Oly PEN E-PL9, it is really noticable and improves the sharpness quite a bit. Even more so, on images of my crappy phone camera.
Now this makes me wonder: Is the effect on the X-T4 so small because that camera/lens is simply already very sharp without correction or is it due to the non-bayer sensor? I don’t know how CS relates to the demosaicing, but since it is in the same module, I could imagine that the color filter pattern has some influence on it?
2 Likes
It doesnt matter at all, if the sensor is bayer or xtrans. The demosaicer makes a slight difference for initial sharpness though.
The effect on images with good sensor and good lens is less pronounced of course.
3 Likes
So will the image sharpening quality still be better in RawTherapee than in Darktable?
I was hoping that DT would finally catch up with RT in terms of sharpness. So far, DT can’t compete with RT. At least for the average user who doesn’t want to spend a lot of time editing photos.
Well, if you shoot with a decent, sharp lens and sensor without AA filter, there is not much resolution loss to compensate for in Capture Sharpening.
Perhaps you confuse base sharpening with creative sharpening?
This is true but there is always some loss to the demosaic. I find that using it gives a better base even if no further sharpening is applied. But it really helps on blurrier pics, it provides a great base to then apply D&S lens deblurs.
–
For me dt has better sharpness due to D&S and of course better workflows overall than RT, even when it comes to quickly editing photos. It’s all to the user really. With agx you and auto applied presets for the usual modules(denoise, D&S), you could edit an image with just exposure, agx and color balance rgb, it doesn’t get easier than that.
2 Likes
I tried different settings and several instances of D&S modules, but the photos came out either too sharp or too blurry.
I have no problems with Rawtherapee. I turn on the tool and voila! The results are fantastic without any unnecessary corrections.
The sharpness is perfect.
1 Like