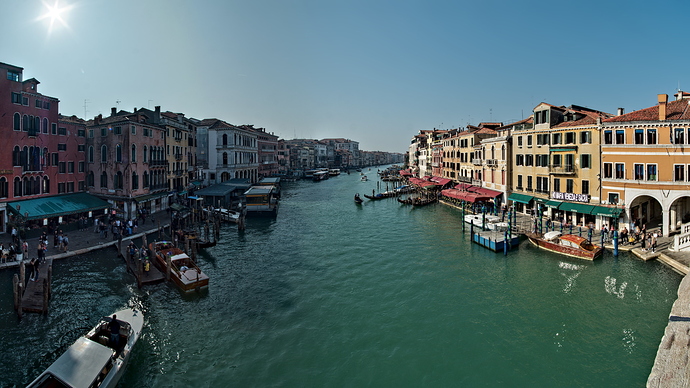
Here’s the result from stitching and blending 24 shots (8 groups of 3 bracketed frames shot in portrait orientation) in Hugin, with pre- and post-processing done in ART.
The scene was difficult because the left part of the scene was facing the sun (leading to a loss of contrast due to internal light reflections in my cheap 12mm Samyang lens I think, a buildings in the shade) while the right part was lit by the sun.
It’s not a breathtaking image, but if I there’s still some interest, I can share the full process.
I’m always interested in complicated hugin processes, do share.
Here’s the full process:
Using ART, the 24 raw frames were exported as 16-bit TIFF’s with only the following processing:
- Highlight reconstruction (blend mode)
- 0.5x resizing
- RTv4_ACES-AP1 output color profile
In hugin I loaded the 24 TIFF files and used some recipee I had seen somewhere (maybe on pixls.us but I don’t remember):
-
In the Photos tab:
a. Hugin will detect stacks, but choose Don’t assign stacks
b. Specify one of the middle frames as anchor for position and exposure
c. Under Featuring matching use CPfind + Celeste to assign control points
d. Use Edit > Fine-tune all points and then <righ-click> → Clean control points (I did it 3 times, to keep cleaner points)
e. Under Optimize forGeometricchoose Positions (incremental, starting from anchor)
f. Under Optimize forPhotometricchoose High dynamic range, fixed exposure
h. If needed add masks (I added one to remove ghosting from the moving boat at the bottom left) -
Using the OpenGL preview window, adjust the horizon/global position/projection/crop
-
In the Stitcher tab:
a. For Panorama outputs: check Exposure fused from any arrangement and select TIFF for the Format
b. Optionnally for Layers: check Blended layers of similar exposure, without exposure correction (in case you want to blend the exposure layers yourself in another program)
c. For Processing: use the following options:
enfuse:--exposure-weight=0.65 --exposure-width=0.65
enblend:--primary-seam-generator=nearest-feature-transform --blend-colorspace=IDENTITY
In ART I load the blended and fused panorama and use a number of filters to get the final result (to taste):
a. Exposure
b. Saturation
c. Sharpening, spot removal
d. Local adjustments (Color correction, Smoothing -for the sky-, Local contrast)
e. Haze removal
f. Film simulation
g. 16:9 Crop/1920x1080 Resize/Post-resize sharpening
Seing the final image on a small phone screen, I see that I really need to spend more time fixing the sky. The left part is desaturated and the transition to the right part is ugly
