Childrens´ Drawings: Need Help with Background Removal

GIMP only:

  1. Duplicate layer, desaturate that duplicate (Colors → desaturate → desaturate), add mask (grayscale copy of layer)
  2. Select that mask and add Selective Gaussian blur (filter → blur → selective gaussian blur)
  3. Add contrast to that mask with curves (colors → Curves) like this:

Curves

  1. Remove Noise from that mask (Filters → Enhance → Noise Reduction)

1 Like

I have added a ‘Subtract Cast’ filter to the GMIC plugin for GIMP under TestingIain Fergusson

6 Likes

Oh wow, the result looks amazing. It’s already late here, so I’ll try it tomorrow and come back then.

Let me know if you have problems. It works well on your sample but might fail on different images. Especially ones that have a lot of the paper covered with crayon marks.

@David_Tschumperle the Subtract Cast filter I added to my testing folder is not showing up when I update my filters. Have I missed something?

Iain, the filter is showing, but doesn’t subtract the color at my computer (solved it, see end):
(I tested it with the jpg from chris (topic start).

But! with the tif from chris it does work:

The exact same thing happens in GIMP 2.10: with the jpg the filter doesn’t subtract the cast color (also it doesn’t with precision “16 bit int” and perceptual gamma sRGB), but with the tif the filter works fine.

Your filter does appear at my pc in G’MIC 2.7.0 in both GIMP 2.8 and GIMP 2.10.

I did some further testing:

With a copied (from here) and pasted (Edit>Paste) jpg in GIMP, your filter doesn’t work, but with a downloaded/saved jpg (frome here), your filter does work. Has this something to do with a added color profile? I don’t understand this.

Ah!!! I found it, I had to Remove Alpha Channel, if removed, then your filter works beautiful, thanks.

While @Iain and others’ approaches removed the background, the actual drawing lost its colour integrity. In my eyes, @snibgo and mine were closer.

What about softwares that always have alpha channel on, and sends that info into G’MIC-QT? Krita and Paint.NET always send RGBA info into G’MIC QT. Krita sends the info as RGBA 32F scaled from 0,1 to 0,255 even if on LABA.

@Iain
The only way to fix the filter is to use sh 0,2 apply_filter[-1] rm. I guess this is how to fix it, but I’m not working on filters until next month.

Not sure if this is true. I got my hands on the original drawings, and what I can tell is that (at least it feels like) every single paper has a different colour. And format. And all A3 or bigger. What a mess :wink:.

About which approach is correct? I don’t know, but maybe I can borrow some crayons from my son tomorrow and generate some test pictures on different backgrounds. But I tend to believe that these are pure, rich colours, so your approach seems to just remove the paper where there is nothing drawn but keeps the yellowish appearance within the strokes, the other approach removes the paper impact everywhere. As there seems not to be a “correct” way to handle this, it’s maybe rather a matter of taste and purpose. For the given purpose, I tend to prefer @Iain’s result. This is similar to what I achieved colour-wise with the following approach:

  1. Generate a yellow layer that is close to the background above the image
  2. Use the difference layer mode on the colour layer
  3. Use the difference layer mode again on a new white layer above the yellow layer to invert the result.

This approach is kind of non-destructive, only the yellow layer breaks this paradigm.

But I had a hard time with the noise, Iain’s filter seems to handle that pretty well. However, I finally re-photographed all of the pictures by myself, and used reasonable lighting (picture on the floor, flash into the white ceiling), which allows (a) to stick to ISO 100 for better noise performance and (b) results in soft lighting which gets rid of some of the problematic paper structure. A grey card helped with the white balance.

I’ll keep you updated on my further findings :smile:.

1 Like

When the “job” is done, I’ll try to understand what your filter does. So far, I am just happy that it works. As my G’MIC fails to update the filters (I am stuck at an Ubuntu 16.04, for which I do not get updates anymore) I copied your code manually to my .gmic file, and I can confirm that it works on G’MIC 2.1.5 :smiley:. 2 of the pictures are done now, I’ll keep you updated on the progress.

Actually, my aim was to remove the yellow from the paper while retaining the colours of the crayons without background replacement. Easier said than done. I think the very unrefined effort was muddled by unnecessary garbage code. When I have more time and energy, I will spend some time producing a better example. In the meantime, I await for more of your samples.

Hm, working on my 5th image now, I tend to think that it depends on the image which approach works better … The last 4 worked pretty good, but the 5th is another level of difficult. But now it’s bed-time again. To be continued …

@Iain

My quick code edit worked for image with alpha channel meaning it’ll work with Paint.NET or Krita too. These programs don’t have the option for remove alpha channel per layer for g’mic qt processing. What I did was sh 0,2 l. endl done rm.

#@gui Subtract Cast : iain_sub_cast,iain_sub_cast(0)
#@gui :  noise reduction  = float (5,0,10)
#@gui :  black level  = float (20,0,128)
#@gui :  white level  = float (250,128,255)
iain_sub_cast:
-repeat $! -l[$>]
-sh 0,2
-l.
-srgb2rgb
--median[0] 3
-bilateral[0] [1],10,$1
-rm[1]
--resize[0] 10%,10%,100%,100%,2
-dilate[1] 21
-split[1] c
-fill[1] {1,ia}
-fill[2] {2,ia}
-fill[3] {3,ia}
-append[1,2,3] c
-resize[1] [0]
-sub[0] [1]
-k[0]
-n[0] 0,255
-c[0] $2,$3
-n 0,255
rgb2srgb
-endl
-rm.
nm name($nm)
-endl -done

Yes, without more samples, I won’t know how robust my wishy-washy :stuck_out_tongue: method is. In any case, colour constancy and correction isn’t a topic that can be solved overnight or with a few lines of code. Have a good rest. :sleepy:

Could you also take a photo of the actual crayons with their names? That would help us determine what the ideal colours are without the influence of the paper.


PS Found more time. :slight_smile:
Now the opposite extreme: aggressive background de-saturation.

I have made some changes so you can restore some of the original colour back into the crayon area. I haven’t added this to my testing folder, but the code is below.

#@gui Subtract Cast_2: iain_sub_cast_2,iain_sub_cast_2(0)
#@gui : Noise reduction = float (5,0,10)
#@gui : Restore colour = float (1,0,2)
#@gui : Black = float (20,0,255)
#@gui : White = float (240,0,255)

iain_sub_cast_2:

-repeat $! -l[$>]
-sh 0,2
-l.

-srgb2rgb # convert to linear rgb
--median[0] 3 # small radius denoising
-bilateral[0] [1],10,$1 # smooth using previus denoise as guide
-rm[1] # remove denoise guide
--resize[0] 10%,10%,100%,100%,2 # resize image to make next steps faster
-dilate[1] 21 # remove crayon marks (assuming cryons are always darker than the paper)
-split[1] c # Find average level for colour channels (to determine paper colour) and average luma 
r_mean={1,ia}
g_mean={2,ia}
b_mean={3,ia}
luma={$r_mean*0.2126+$g_mean*0.7125+$b_mean*0.0722}
-rm[1,2,3]  # calculations of average levels done, remove unneeded images

($r_mean^$g_mean^$b_mean) # create iamge of paper colour
-resize[-1] [0] # resize paper colour image to original size
--sub[0] [1] # subtract paper colour from original iamge
--abs[-1] # find absolute difference between paper colour and original image to detect where crayons marks are
-add[-2] $luma # add paper luma back to image to restore brightness
-rm[1] # remove undeed image
-split[-1] c -max[-1,-2,-3]  # use channel with maxium differnce to create a mask for resoring crayon colour
-mul[-1] $2 # scale mask
-append[0,-1] c # add mask as alpha channel
-reverse
-blend alpha # blend original crayon colour with corrected iamge
-rgb2srgb # back to sRGB
-c[0] $3,$4 -sub $3 -mul {255/{$4-$3}} # set levels

-endl
-rm.
nm name($nm)
-endl -done

Sorry for my late reply, but after finishing the project I was on vacation, so no chance to reply earlier. But the good news is: The project was finished in time, and this is also due to your help. A big thank you therefore goes to all that replied and helped with hints, advice and code! I learned a lot during the project, and I will try to describe my final workflow, obstacles and solutions so that you and others can avoid my mistakes :wink:.

The Reproduction

After working a lot with the original photographs of the paintings, which had issues with uneven lighting and high ISO noise, I decided that I want to scan the pictures myself on a flatbed scanner to have better source material. After getting the original paintings, I discovered that they (~25 paintings) come in all different sizes and paper colours. The sizes were mostly above A3, and I only own an A4 scanner, so that I had to use a camera for reproduction. The original photographs showed only 2 background colours (yellow and white), but I got at least 10 different paper colours. The auto white balance of the first photographs obviously got rid of most of the paper colour differences, but it changed crayon colours as well, such that I decided to use a fix white balance and use my colour checker target to get a good colour reproduction.

I used a flash pointing towards a white ceiling, set strong enough to overpower natural light, to get an even light distribution. The paintings were located on the floor, with my camera on the tripod facing downwards. Unfortunately, I did not have enough time for a proper setup, so I forgot to remove a moving box (we still have some to unpack from moving to this house) on the right of the area where the paintings were located, such that I got a slight brightness gradient on the right of all images. Eventually I lived with that and tried to remove it with an inverse gradient in post, but it made later processing times fail some times, such that I highly recommend to get the source image as good as possible. Next time I would shoot them again instead of fixing it in post, but the impact was varying a lot among the images, such that I first discovered it after finishing 6 or so images already.

The Raw Development

Only basic adjustments in darktable: Getting the exposure fixed, and cropping to the actual painting (some did not use the entire paper, others were painting over the edge which caused other trouble …).

Additionally, I used the perspective correction module of darktable to get the paper straight. There was not much distortion as the camera was almost parallel, but it helped rotating the image and getting rid of the little distortion that was still there. It helped that the floor colour (background) was different to the paper colour such that the module easily found straight edges in the image. I just had to remove false positives. This module is incredible, if you did not use it so far, make sure to check it out!

Background Removal & The Final Touch

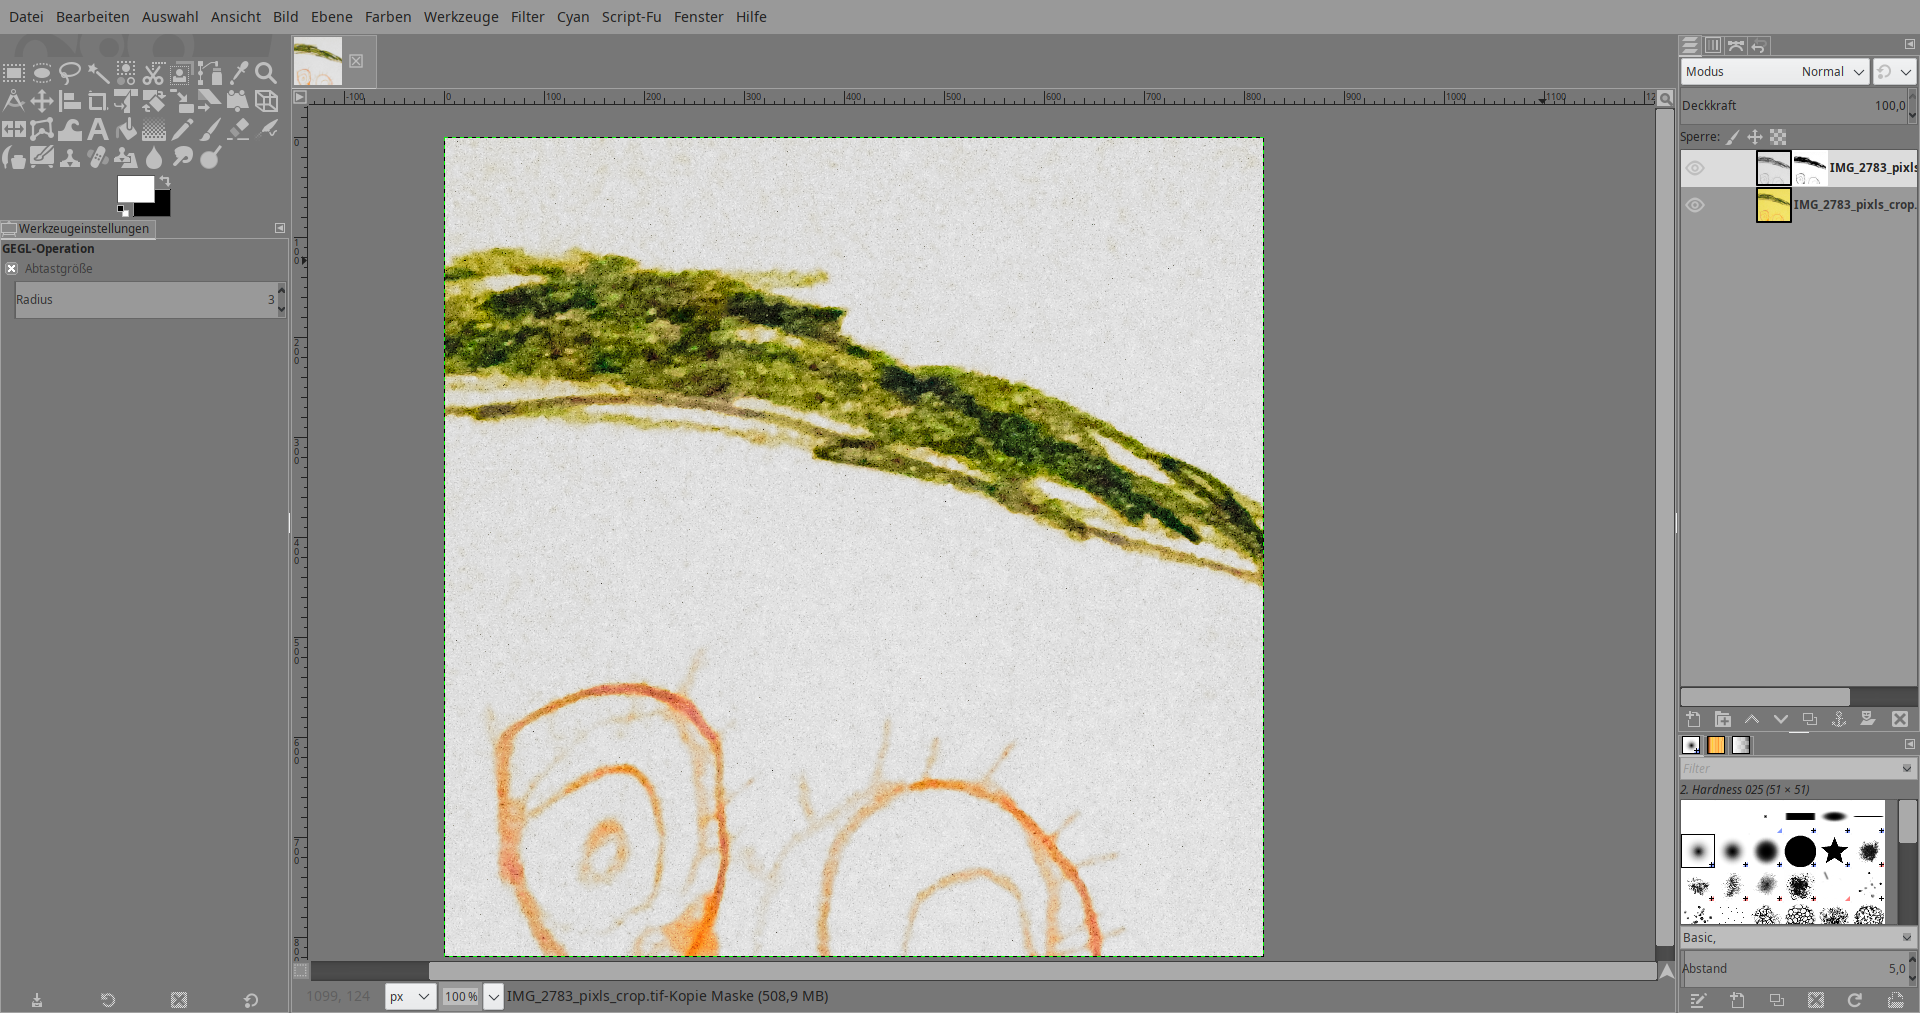
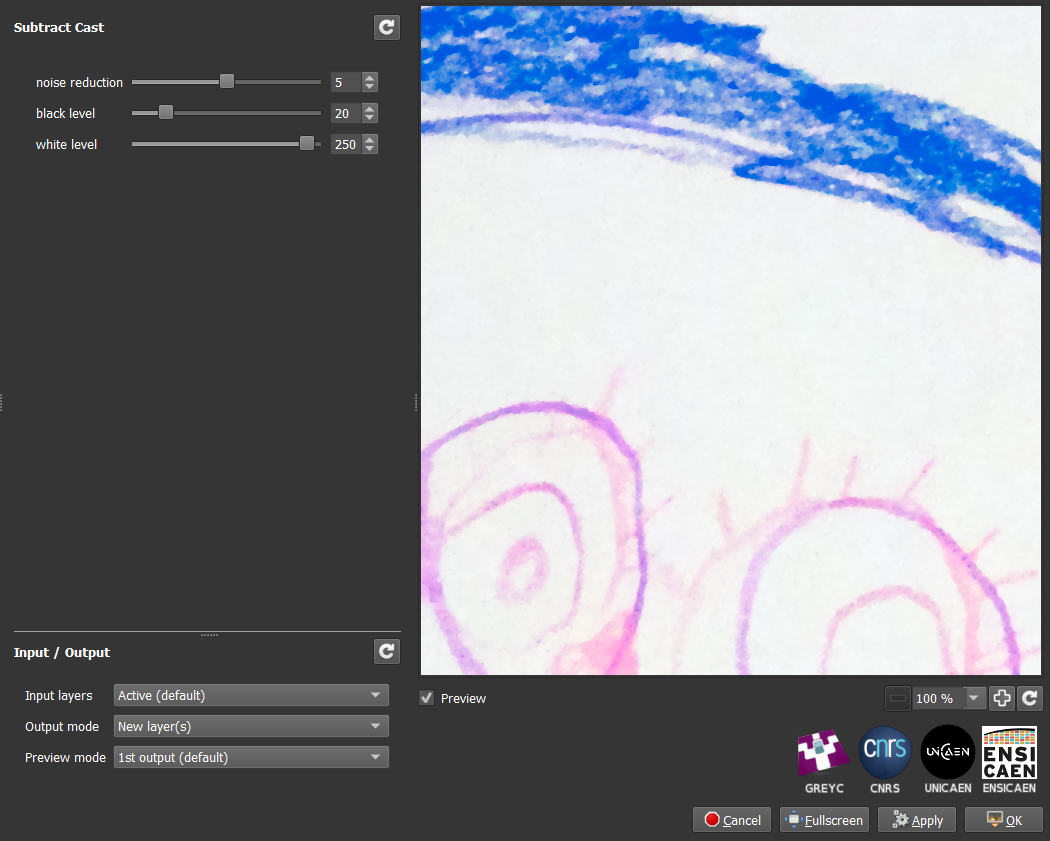
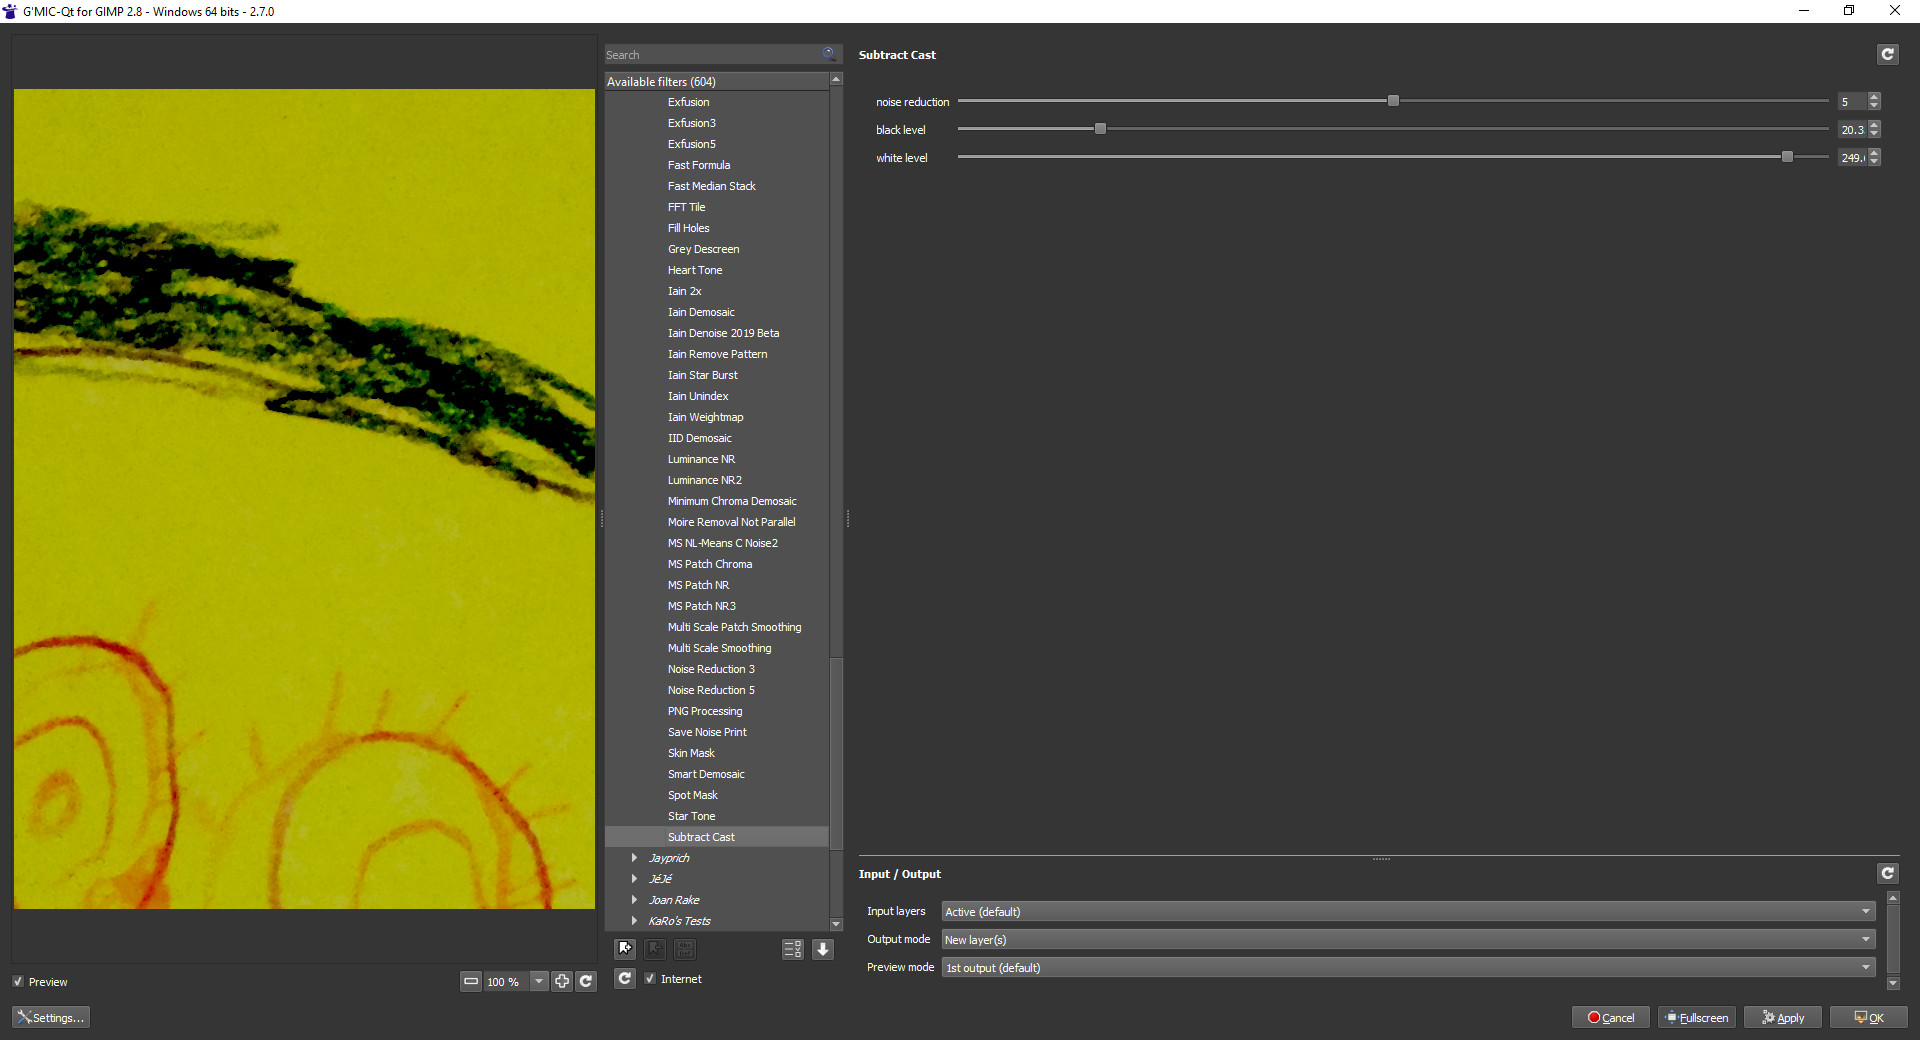
I ended up using @Iain’s extremely useful G’MIC script in GIMP. It did not work all the time, mostly due to uneven lighting (the gradient I already mentioned). So, I ended up processing different parts of the picture with different setting, blending them softly afterwards, or using other techniques to make it work.

This step was followed by a tone curve to improve contrast and make the background really white (and remove any remaining colour cast which was not properly removed). The background had to end up as [255, 255, 255] in the exported jpeg, which introduced additional difficulties, especially with extremely lightly painted details (but important to the image) and white/gray parts (painted on yellow background).

For the lightly painted details, there was no general solution. Most of the time I separated these and used additional tone curve operations and/or erode/dilate steps to improve the appearance, or did the background removal for these with different parameters.

The white/grey parts were not so easy to separate, and differed among the pictures (only approx. 5 pictures used white/grey colour at all). I ended up using an individual multi-step curve/inverse/lin<->log/desaturate combination to separate the grey strokes to a separate layer above the other parts.

Last steps have been to crop the image to square format, check the white of the background (by using a very steep curve that exaggerates all non-white image parts. Any idea how this could be implemented as a check layer?), and rework if necessary.

What I really missed, besides a check layer implementation of my really white check, were non-destructive workflows for operations such as curve, inverse, desaturate, such that mistakes would not require to start from scratch. I hope, GIMP gets there soon :smile:.

Final Thaughts

Hm, I have to learn to say “no”. This project took about 15 to 25 hours, plus your time. But seriously, I would do it again, it has been for a good cause, and it had been fun. The kindergartners got mugs with the pictures (the children painted the kindergartners) at their year-end as an additional thank-you which they for sure deserve. In my opinion, they are doing one of the most important jobs in the world, as they are the ones who are shaping the world’s future (not us silly engineers and scientists, I hope you understand what I mean :wink:). And they are (at least here) not paid the corresponding counter value. So I am really happy that this worked out well. A big THANK YOU again to all of you who helped!

7 Likes