Hello everyone, I’m playing around with Darktable and I’m finding it quite nice once you get used to it. I try to work following the scene-refered workflow but at some point, when I try to give a different touch to my images I usually turn to rgb curves to crush and fade my blacks, an to color zones to desaturate or play around with individual colors.
So, my question is, is there any plan to port any of these modules to a scene-refered workflow?
I don’t know how can achieve that faded effect using other modules and I’m so used to using curves to do it from other software that I find it really intuitive for some operations.
Thanks.
Post an example as a PlayRaw (a raw file, a JPG with the desired effect, and a sidecar), and people will help you achieve it with scene-referred tools.
Don’t forget to add a CC licence to allow processing your raw file and sharing the results.
Aurélien Pierre started working on a scene-referred colour equalizer, but it seems it will take time (or will not be completed at all). See Color EQ - DOA?.
Color Balance RGB let’s you achieve this very easily.
Using the global luma slider in RGB CB can lift and crush the blacks… to a degree your filmic or sigmoid settings will work with this… Setting the two autopickers for tone in the mask tab is also recommended to really target changes made here…
if you want to do just subtle tweaks there’s no reason to avoid those modules.
But better go for colorbalance rgb - maybe in combination with parametric masks
1 Like
It looks like @flannelhead did a bit more work on it actually after AP stopped… I wonder how close it might have been or what issues were still outstanding ??
Aurélien also added one more commit in December (but he lacks those from flannelhead).
1 Like
Fine tuning color balance rgb gives better results (multiple instances, mask by hue), but I find unless you are making large changes in the lightness tab of color zones it does a pretty good job (very suitable for presets in fast edits). I also find its desaturation more palatable than its saturation, so only really use it to reduce, not boost.
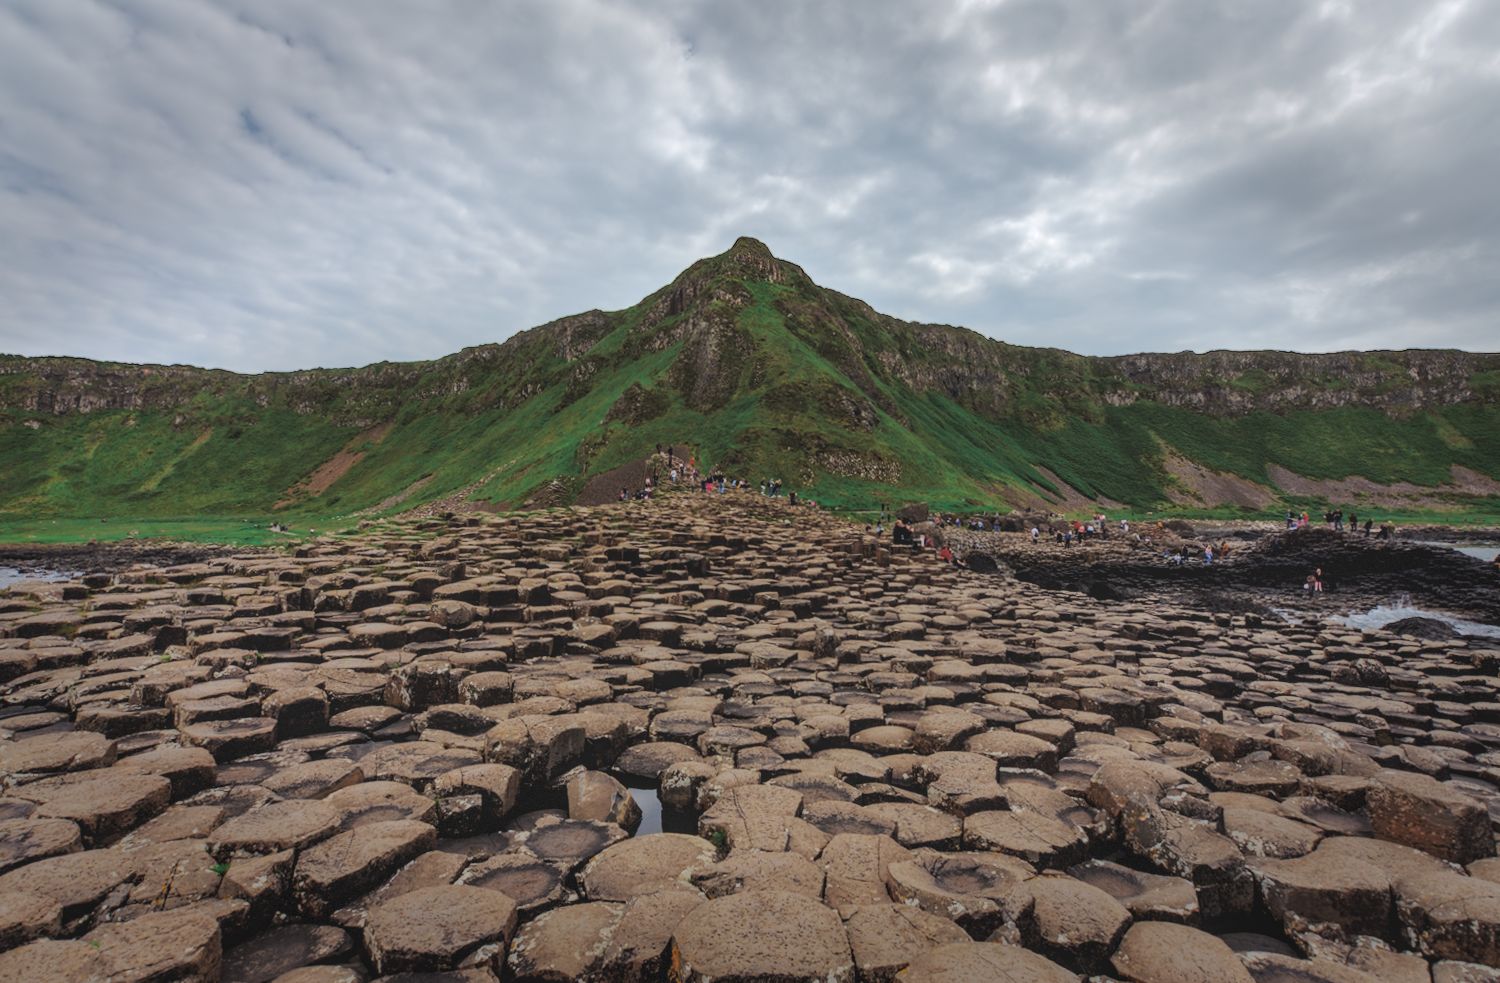
Thanks for all your answers. Here you have one file I’ve been playing around with. As I metioned, I’m trying to understand how the software works, so it’s just a “quick” edit.
What I don’t know how to do is to give it the CC license, but you have my consent to edit the raw file and share the results.
_DSC9410.NEF (28.2 MB)
Here’s the original raw file.
_DSC9410.NEF.xmp (23.4 KB)
And here’s my quick edit.
Couldn’t help, but I had to warm up the oven and cook the image.
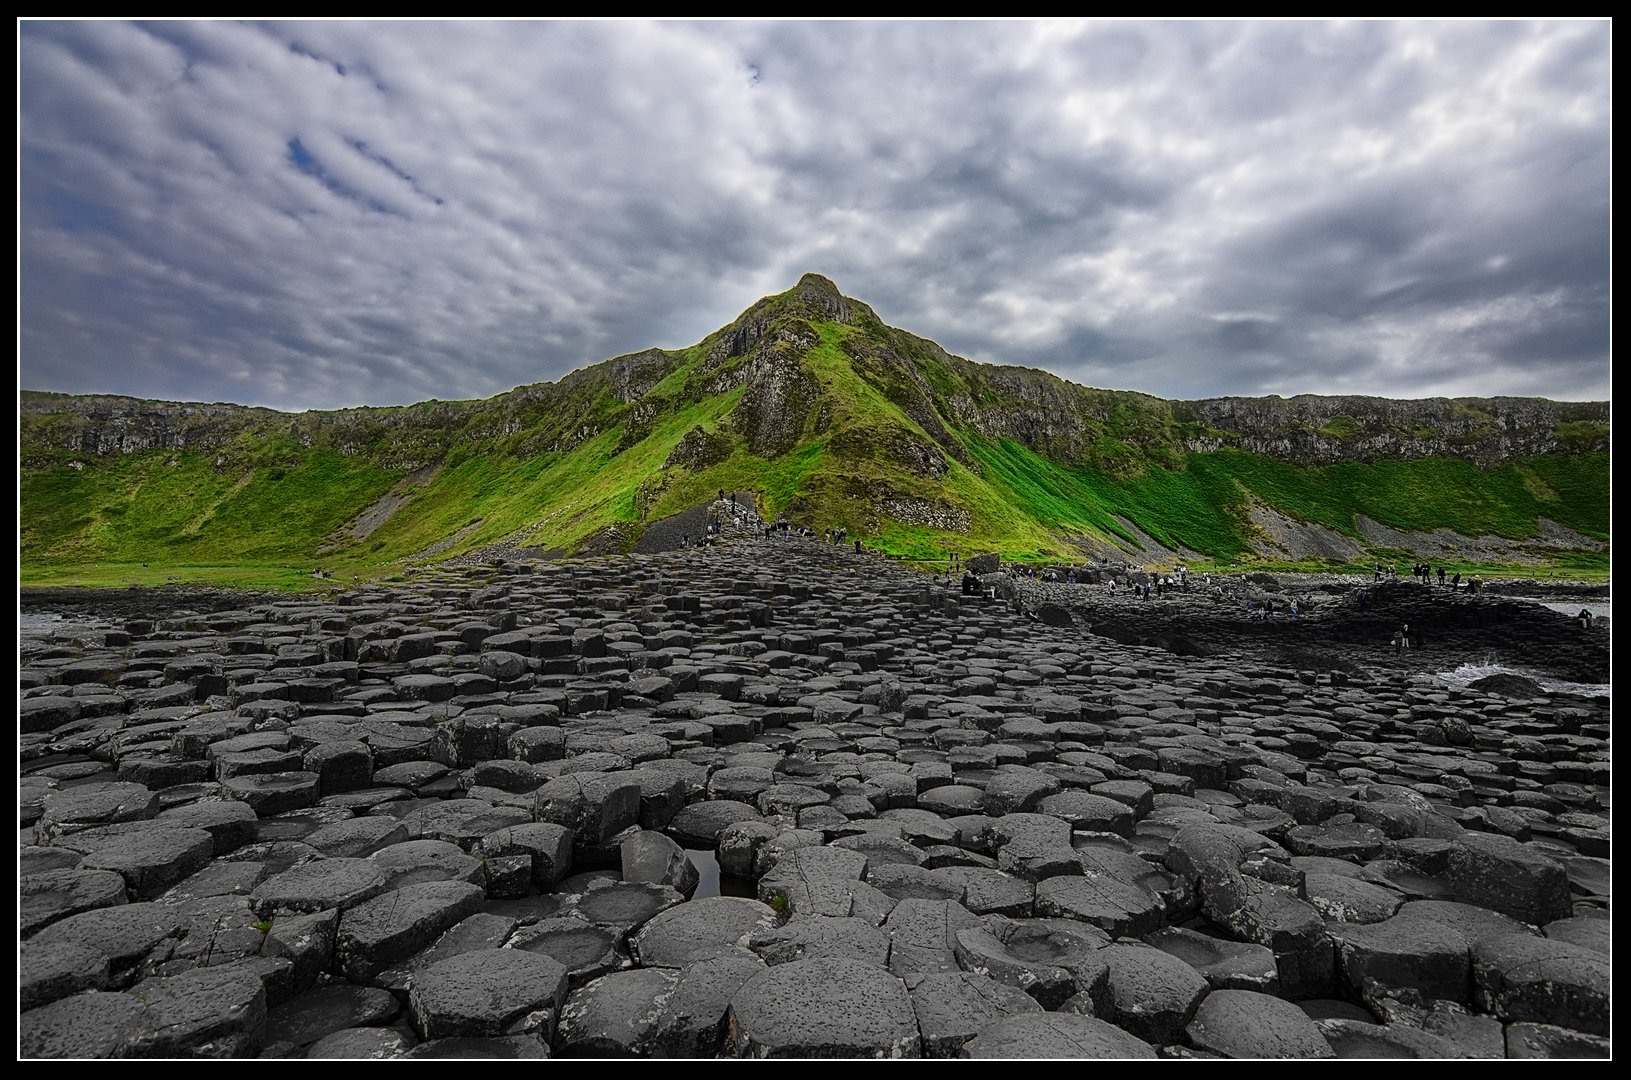
This is obviously a bit overdone, but after all, it’s called “play” raw… o, wait …
As I’m writing this, I realize, that this is actually not a play raw, but a question about scene referred workflow equivalents. Oh well, guess I completely missed the goal.
Gonna post it anyway, perhaps it helps.
Generally I try to stay with the scene referred tools, but if “older” modules give me faster results, I won’t hesitate to use them. Often I like to shape my tone curve more specific than filmic or sigmoid allow (for example to get multiple contrast zones) and I’m gonna use the tone curve. For color grading its often much faster to use the color zones than trying to use masked color balance rgbs. Also the contrast equalizer offers so much flexibility, that its hard to set aside.
So, yeah… take this with a grain of salt, as I’m more of a pragmatic person, but I’m actually pretty happy with my workflow.
edit: picture came out a bit dark after uploading, tried to fix that
2 Likes
Just pick one of these:
https://creativecommons.org/licenses/
If you are unsure, check what others have done in play raw’s.
curves-and-color-zones_DSC9410.NEF.xmp (23.3 KB)
dt 4.2.1
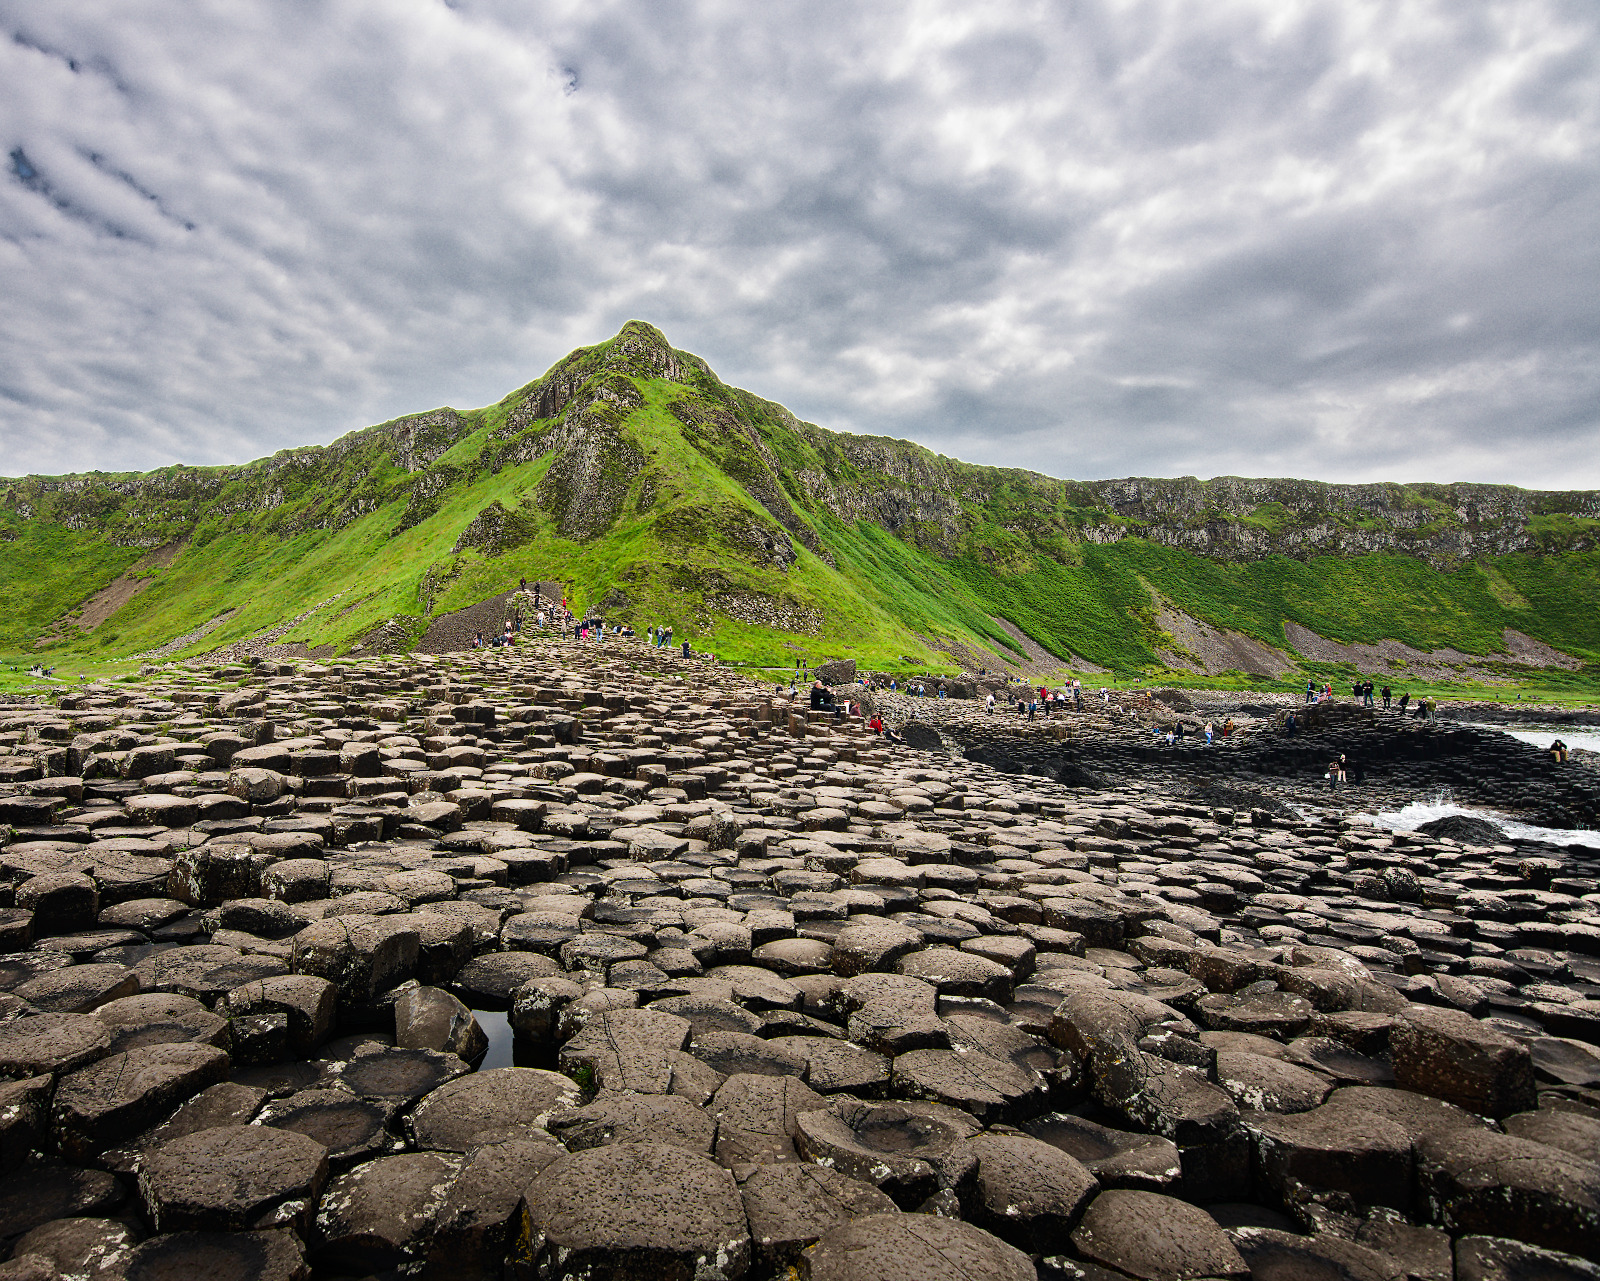
I only used scene-referred modules. No color zones.
Many ways in DT to do things. And you can make the choice once you get more familiar to move modules around in the pipeline as well to target the edit where it will not change your grade but add to it just what you want. You can also use the CLUT module for some selected color editing… this will give you a set of sliders for hue saturation and brightness… I often use it to tweak one or two colors. I know its not a “scene-referred” module but it has its uses. @s7habo uses it at times with nice results…
Here I just did a quick mindless edit…then I saw some bounce light on the rocks and wanted to tweak the grass. So I quickly tweaked two patches in the CLUT by shift clicking to do selective color edits… I could have masked or used CB but sometimes I just like to use this module
Adding the little CLUT tweak… bit cooked but also done for demonstration… changed the grass and desaturated and darkened the rocks…
It might be worth pointing that out to aurelien on ansel github, just in case he missed it.
Thanks, I know what a CC license is, what I miss is how do I give it to my image, is it enought to write it next to it in the forum?
Thanks for all your comments, I’ll try to go through all the modules you all have suggested and give them a try as soon as I have a bit of free time. I guess I’m so used to the workflow and tools from commercial software that it’s a bit tricky to change tools, and for me, the best way sometimes it’s just going to the tools I already know. I find them more “user friendly”, maybe just because I’m used to them.
Yes.
Color Balance RGB
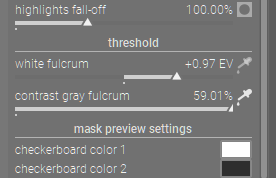
For this to work correctly, you have to set the white point (white fulcrum) and middle gray (contrast gray flcrum) in the Color Balance RGB masks. This is because in scene-referred, these values aren’t fixed (until after filim RGB or sigmoid). Use the eyedroppers on both and let the area select the whole image (i.e. default).
Crush blacks → use Power under the 4 ways tab.
Desaturate → vibrance, chroma and saturation. different effect for each. For chroma and saturation, you can tweak them globally or highlights, midtones and shadows independently
Play around with individual colors → Use the 4 ways tab. The classic example is split-toning. Change the hue of the image, highlights and shadows. To see the effect, you have to add chroma for the “strength”. 0% you won’t see anything
Use multiple instances. Use drawn & parametric masks and this can replace a lot of “legacy” tools.
Also Tone Equalizer for crushing blacks. Functionally, you get 8 control points for adjusting brightness instead of 3 (1?) in color balance RGB.
1 Like
Nope, middle grey is fixed; both filmic and sigmoid use curves that maintain its brightness. (Technically, you can change it in filmic via a hidden option, but it is not recommended: middle-gray luminance.)
The contrast gray fulcrum can be used to set the point around which you want to increase (or decrease) contrast. Most of the time, but not always, that will be the 18% middle grey point. You could use the colour picker to select an area in the image and enhance contrast ‘around’ it (make pixels brighter than the selected area’s average brighter, darker pixels darker). You can combine that with masks added to the module (I don’t mean the masks defined on the masks tab, but the general mask controls that are the same for all regular modules.
See contrast gray fulcrum under thresholds.
filmic’s black relative exposure can also be used:
This is the left bound of the scene dynamic range that wll be represented on the display – everything darker than this value on the scene will be clipped (pure black) on the display.