darktable 3.6 for the beauty retoucher

Arguably, the difficulty of beauty editing is not to do it but to stop it before you overdid it.

I think darktable is so far the only RAW editor to allow split-frequency skin retouch straight on RAW data, as well as liquify and healing brush. But the 3.6 that should be out in the first days of July will bring the color editing to a whole new level.

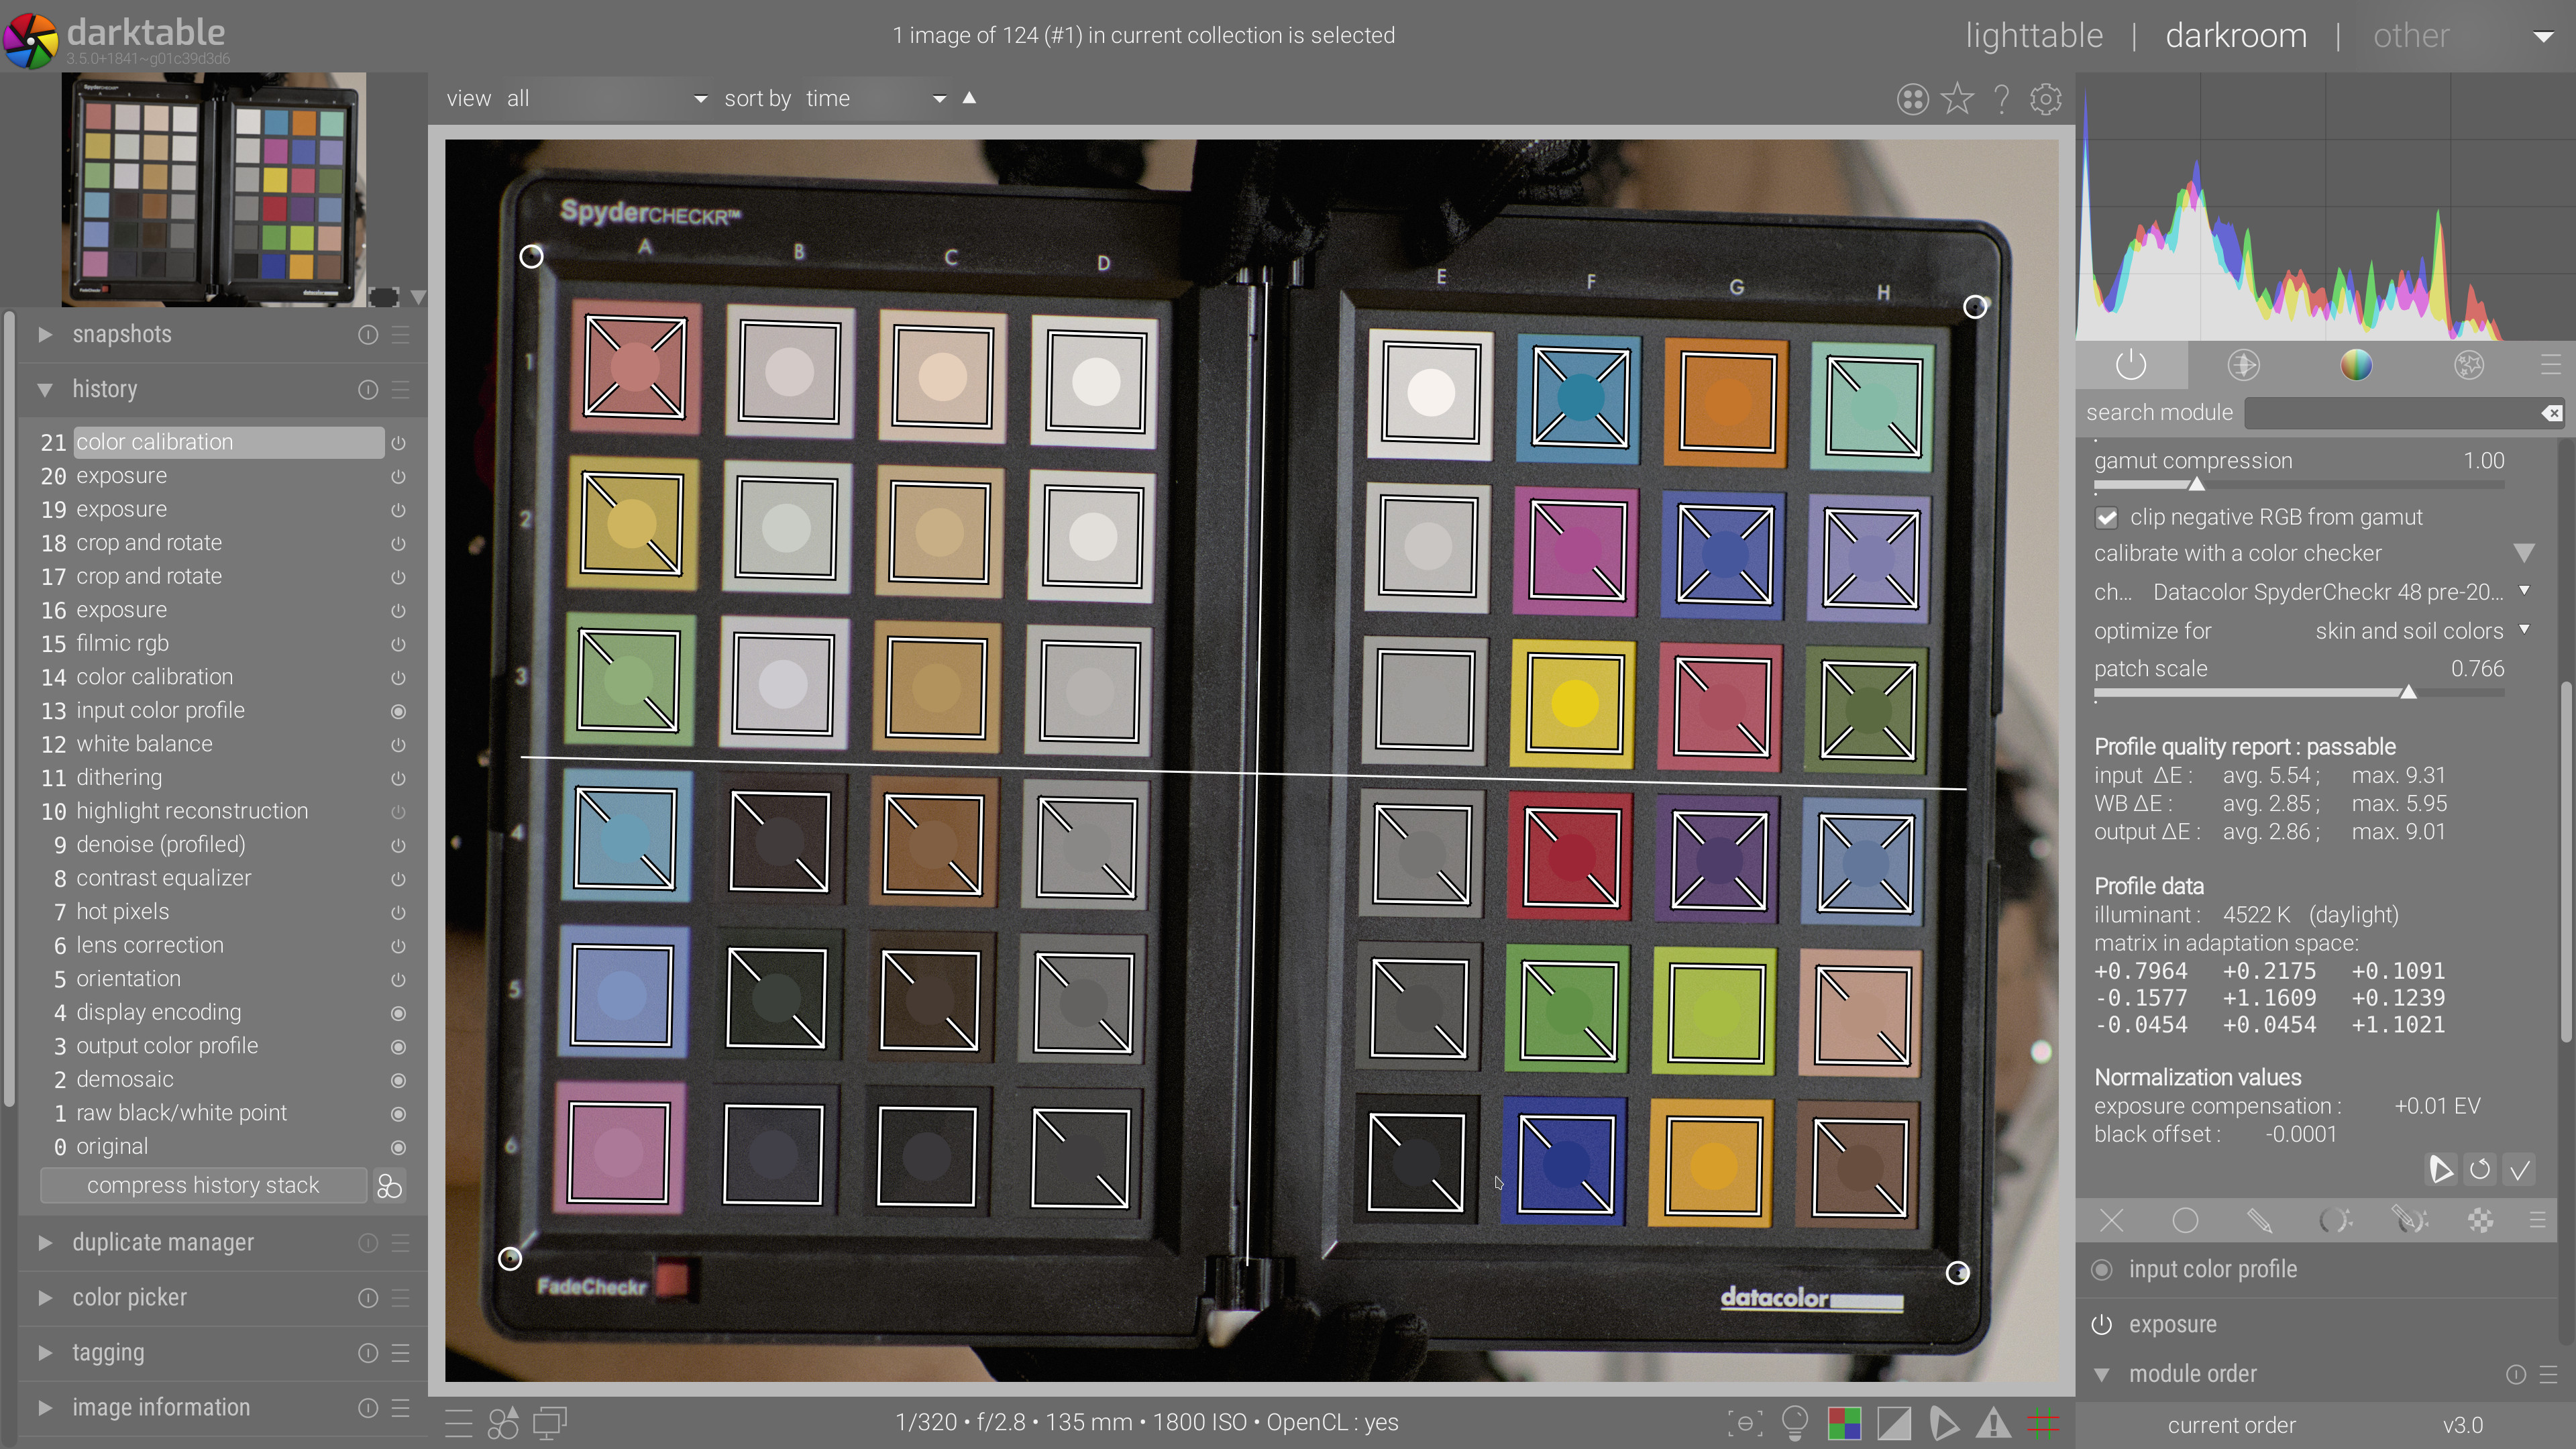
First, the color calibration makes it a breeze to extract white balance and color correction matrix from a color checker shot, sparing you the trouble of manually finding the best combination of parameters, even for scenes lit by different illuminants, since you can mask each light source and apply different color corrections easily.

Screenshot_20210416_030238

But, building on CIECAT 2016 for the first base, now you also have powerful and advanced options to creatively grade your pictures, based on Yrg, a linear color space designed for perceptual evenness of colors published end of 2019. The new color balance RGB lets you rethink your color palette as a painter would do it, with a supercharged slope/offset/power splitting HDR luminance zones in a much more transparent way (you can actually see how they are split), and provides perceptually even ways to adjust saturation (the real one, the Munsell’s one) as well as the usual chroma.

The color balance RGB, in addition of checking your gamut validity in and out, sits on top of the revamped chroma masking, introduced in darktable 3.4, using the HDR capabilities of JzAzBz color space, published in 2017 and showing near-perfect hue linearity up to 10,000 Cd/m².

What does that mean ? Well, let us start with a picture shot this afternoon, and just opened in darkroom with scene-referred defaults:

Retouche-beauté-avant

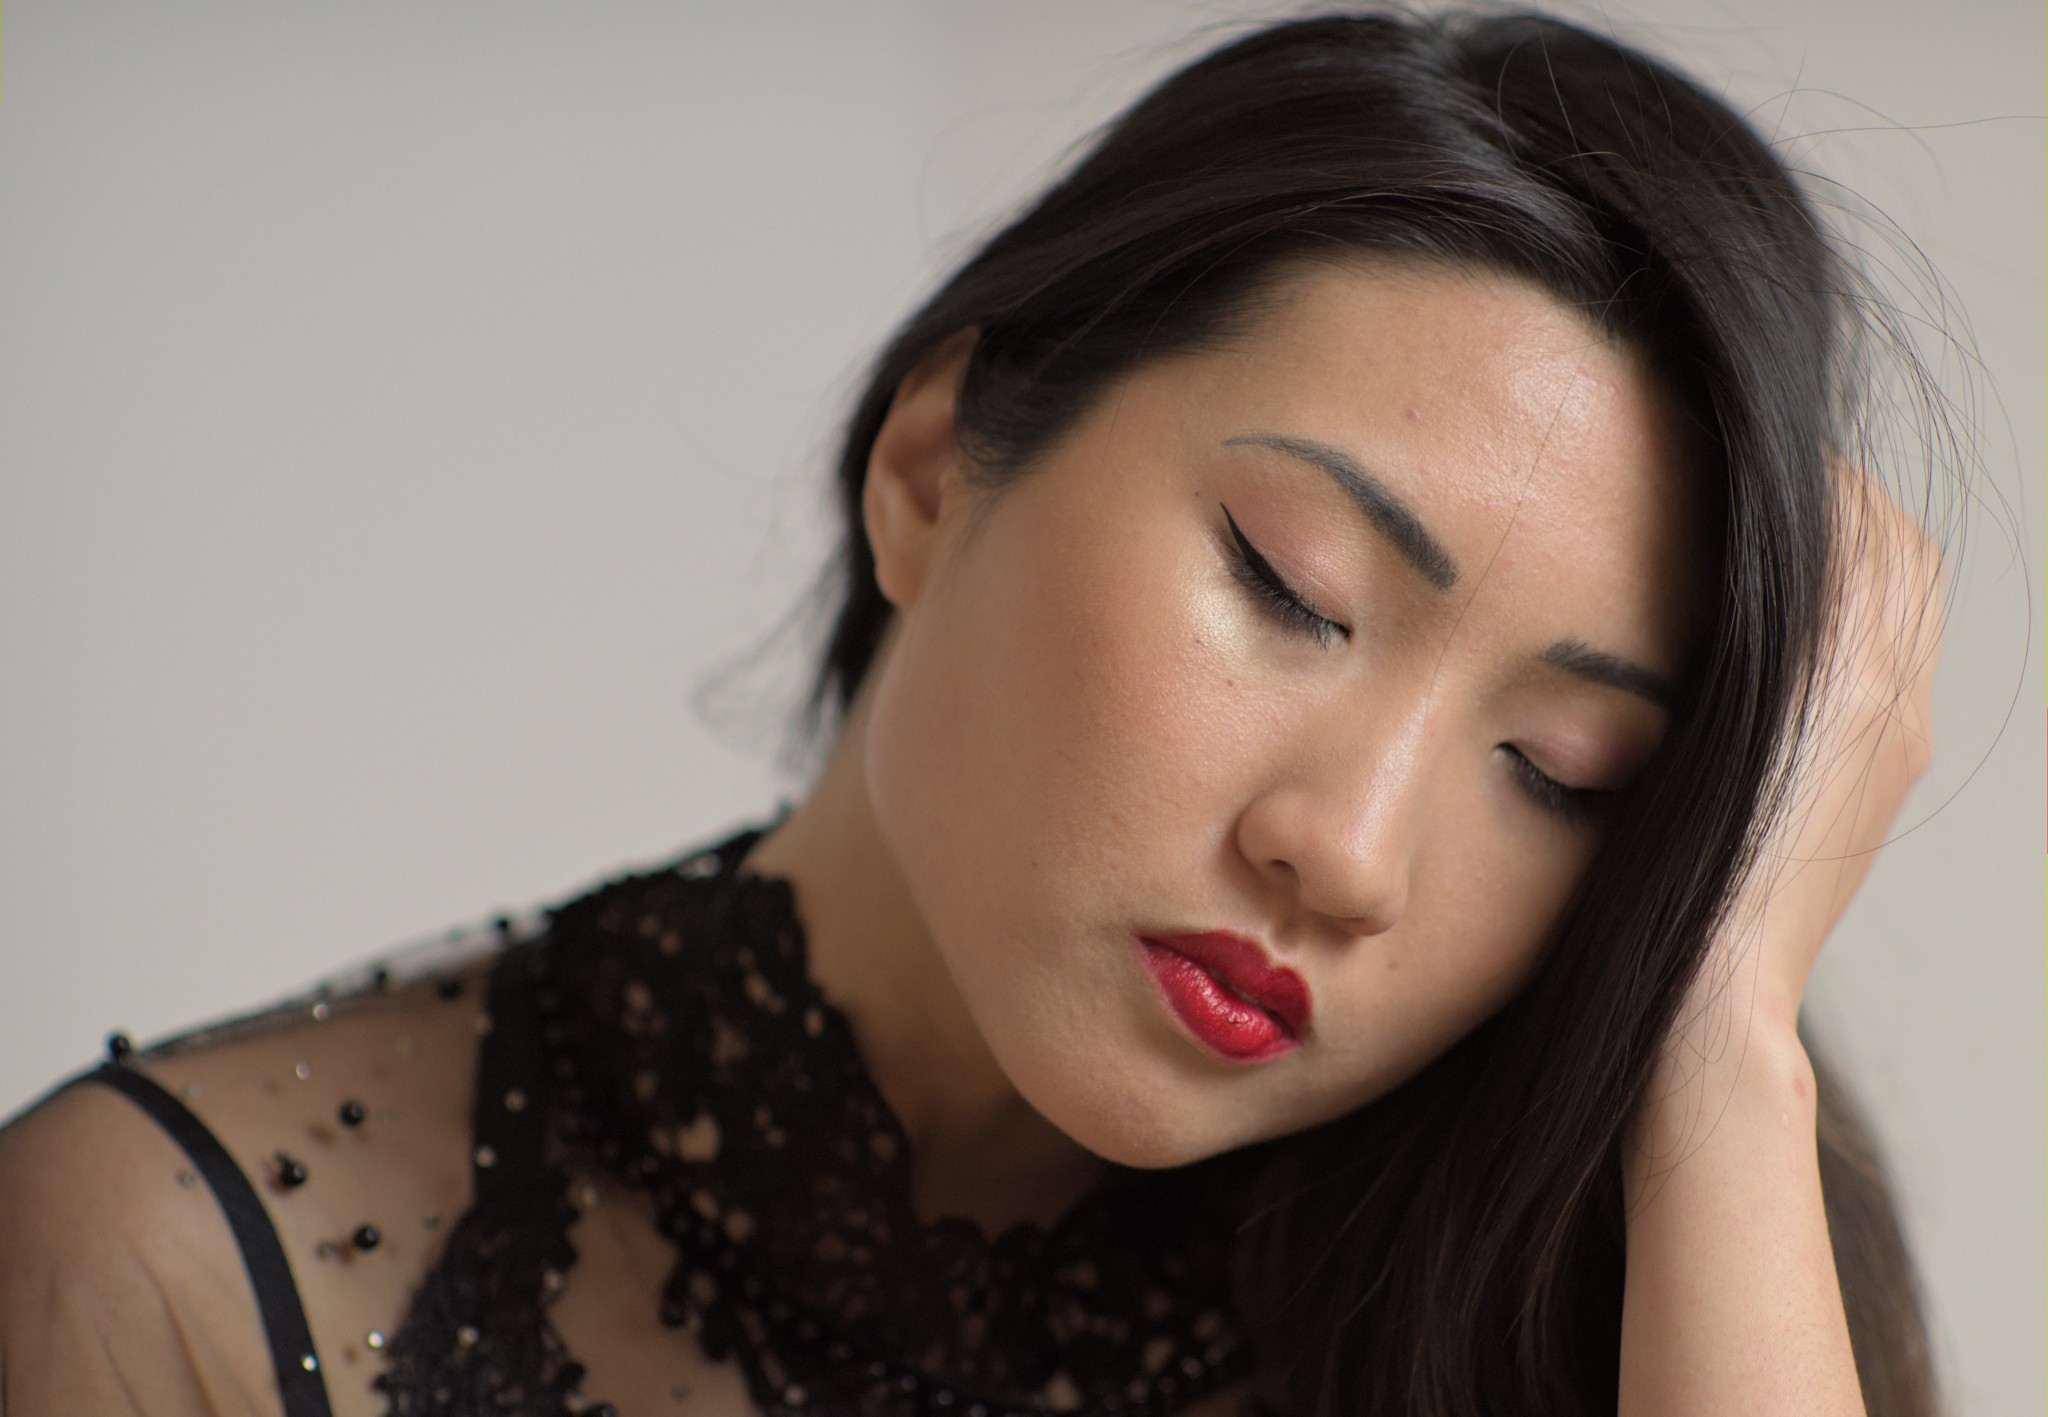
What happens there ? The cold daylight comes from a roof window, but a lot of ambiant light comes from the orange-y floor too. It’s now a matter of seconds to fix that. And a couple more minutes to get the creative color grading done. After this, your usual skin retouch.

Retouche-beauté-après

See what I did here ? Warm and rich skin tones with just a hint of cyan in highlights for the color contrast. A multi-scale split-frequency with gaussian blurs at 50% opacity, in addition of healing brush for the hair and blemishes.

And done ! All in RAW, scene-referred, inside a single piece of software from start to finish. Let 2021 be the year of professional color grading in opensource (and with actual cutting-edge color science in it).

33 Likes

Well this is exciting!

Very nice skin texture, would love to see a video tutorial for that! Does one exist already? I have seen a how-to video of the retouch module - which explained what each tool does - but would love to see a video for specifically this kind of skin texture.

Thanks ! I could make you a tuto about that, but it wouldn’t contain anything that has already been said elsewhere. The technique is stupid simple, but the bulk is eyeballing the result and deciding if you need to be more aggressive or gentle on the correction. It’s more eye training rather than tricks.

Hello guys quite beginner/intermediate level darktable user there i a way to calibrate profiling with color checker in wondows? If yes any link video? Im using 3.4.1

The color checker tool will be shipped in dt 3.6. It’s not in 3.4.

Is it mostly done by splitting the image into 6 wavelets and using the blur tool on the coarsest one?

User manual to the rescue:
https://darktable-org.github.io/dtdocs/module-reference/processing-modules/retouch/

It is working nicely if you can compile it from the master branch on github…

https://darktable-org.github.io/dtdocs/module-reference/processing-modules/color-calibration/#extracting-settings-using-a-color-checker

Yes, but not just the coarsest one. You need to preview each scale to see if it contains unwanted texture, and blur each scale with the appropriate blur radius to smooth it. My personal touch is that I always put an opacity around 50% on each blurring mask to avoid waxy skin.

2 Likes

Ok thanks. I just need more practice.

will it also support the x-rite colorchecker passport? If not, what would you need to support it?

Yes, it does (both variants from before 2014 and after).

2 Likes

Looking forward to that, looks amazing and so simple

Hi Aurelien, thanks for the great work and effort you put into Darktable I really love Filmic V4. I look forward to exploring the new and improved options in DT3.6. There is one feature I really liked in Photoshop Elements. It was never put into Photoshop itself and only ever worked on an 8 bit image. It was a simple eyedropper tool to color balance an image based on skin tone. This option was great for portraits. It also allowed fine tuning the result as not all skin tone are the same, but it was a brilliant tool. I was wondering if you could use your talents to create something like this in a future release of DT. And again thanks for your commitment to DT.

There are so many different colors of skin and so many tints of spray tan, I’m not sure how that feature is possible.

@s7habo did one

https://www.youtube.com/watch?v=owx40grkCq4

1 Like

Actually this would not be that hard. In the analog days of film we had colour spot analysers that we programmed for skin tone and these worked very well. It is surprising how similar skin tone is even between various ethic groups and countries. But as I suggested the tool exists in Photoshop elements and works very very well. Strange it is not in Photoshop. Lets be fair, most shots don’t have a grey card but do have skin tone. I only suggest it because I have seen it work.

4 Likes