darktable's dual white balance confusion

I saw a lengthy thread from 2023, but wasn’t able to really draw a tangible conclusion as to the explination for 2 white balance phases. We obviously on prior to demosaicing, this seems to be where the power of raw lays, in reality… true unadulterated color calibration of original sensor data at it’s core. Maybe I just don’t understand how the “camera reference” system works, but I just don’t see why we would want to trust our camera’s auto white balance for the demosaicing, and then tweak after the fact with the calibration after the fact after its been put into a fixed color-space such as rec 2020… It seems like setting the wb as accurate as possible would be most advantageous on the input side- especially when my AWB failed more spectacularly.

Am I fundamentally not understanding the whole camera reference/D65 thing? It just seems goofy to do the refined work after the fact when we already have to do this on the front regardless of what we do later.

1 Like

Have you read the color calibration page in the manual? darktable user manual - color calibration

yes, And my basic understanding is that the CAT works to correct the whole scene with all its colors- not just neutralize the grey- which is great, but wouldn’t it be better to start with the neutralization true and proper prior to the demosaicing? can we not do both? perhaps this is the whole chicken or egg situation?

I know you mention that you read a long thread…if it is this one then ignore…

YOu can follow from here…

I don’t think this made it to the manual but its the last comments in the thread and it was the suggestion of some wording for the manual or release notes…again if I missed it and its there sorry…

The new default “as shot to reference” is a subtle modification of the “camera reference” mode.

Assuming in the majority of raw images the exif data for “as-shot” white balance are a better match for correct rgb coefficients than those found as “camera reference” we use those coefficients in the pixelpipe until we set “color input profile”.
This results in slightly improved quality of modules like demosaic, denoised profile or highlights reconstruction but keeps all modules after “color input profile” working as in modern “camera reference” mode.

If for some reason the “as-shot” data are bad, use either the old “camera reference” default or use the other settings.

2 Likes

Prior to demosaicing there is no matrix - just individual R, G, B photosite values. The white-balance tool scales these raw values, which affects how demosaicing creates the missing color info for each pixel.

CAT works with matrices, but that’s after demosaicing already happened. So you’re adjusting interpolated data vs scaling the actual sensor data - working with more information and fewer assumptions.

Core difference: Pre-demosaicing affects how color gets created. Post-demosaicing adjusts color that’s already been created. Totally different operations.

1 Like

I deleted the off topic posts, please lets try to address and answer the original question.

3 Likes

Like yourself I am not really sure of the advantage of the dual white balance system. I am probably also more familiar with the idea of adjusting kelvin value and tint to achieve manual WB. However, under the latest DT the as shot to reference in WB and the as shot in camera option in the CC module works well for me as usually the camera has provided a nice white balance for most images. But I can not say it has produced a different or better result to the as shot in camera option found in WB module.

The only real advantage for me is the ability to use two or more instances of the CC module which I can’t do with the WB module. I also presume for competent users all the extra tabs and included sliders provide some fine tuning tweaks in the CC module. While I am not competent at using these options in the CC module I was able to achieve a desired result by experimenting the other day.

But truth be told I struggle to understand the advantage of dual white balance for a photo that can be white balance successfully with the WB module alone. But as my workflow depends upon as shot in camera normally I just ignore the issue and use the default system unless I need to tweak WB. Then sometimes I even turn of the CC module and depend upon the presets for my camera in the WB module. Cloudy and shade can often resolve my issues easily for me.

If you read the first paragraph in the manual at least the goal is pretty clear… ie a more complete and accurate chromatic adaptation transform so that the perception of color on the displayed image will match that from the scene on your monitor and not just the partial correction provided by wb. I guess its up to the user to determine if that added module and that extra adjustment offer them an improvement when they edit… if not its easy to opt out as with many things in DT.

This is also a good summary…you can read through, perhaps only glancing on the very surface at the math and rather taking a focus on the text to get the context/explanations that the document contains…section 5 focuses on the wb issue and use of CAT… It should make it pretty clear what the function is attempting to do. Again its for the user to place a value on the application and results as they see it…

1 Like

I’m actually a big fan of the other tools in the tab, but, to be fair, have less to do with standard color balance. its really cool that they offer these tools, most other systems dont proved the ability to tweak those type of things. if you choose normalize channels on the brightness tab, and reduce the blues, you get a VERY clean boost in skintone brightness. you can also turn down blue saturation to make the skin pop. lately I’ve been using the saturation in CC entirely avoiding even using the color balance rgb module all togeather

Anyhow,

After a lot of reading and re-reading, this is what I’ve concluded is going on with the system. It makes sense to a degree, but I still have my nits on the matter.

Step 1: darktable reads the metadata and learns what the camera’s D65 reference characterization is, and applies that correction (as stated directly in the manual).

This was a big part of my confusion. This is VERY different than the camera’s scene illuminant assessment. At this phase, it bypasses the camera’s analysis entirely. It’s literally saying: “For this camera model, under D65 lighting, a neutral target would require these specific channel multipliers - so I’m applying those regardless of the actual scene lighting.”

Part of me still cringes at potentially compromising the purity of RAW channel scaling, but I understand the engineering rationale.

Step 2: Color calibration can now perform sophisticated chromatic adaptation using advanced CAT algorithms, working from the known D65 baseline. These CAT operations apparently provide perceptual benefits that outweigh the theoretical advantages of manual pre-demosaicing white balance.

Here’s where my nits come in:

1: This does inherently fall apart when using extreme lighting conditions far away from the camera’s D65 reference point.

2: Colors remain perceptually inaccurate in the pipeline until reaching calibration, so any color-aware modules (tone equalizer with HSL, color equalizer, channel-based masking) will behave inconsistently between images with different scene lighting - unless repositioned after color calibration, which isn’t the default setup.

This is my challenge to the developers:
In theory, CAT shouldn’t require a fixed D65 standard. You could theoretically set white balance pre-demosaicing (via on-screen judgment or color targets), then apply the same advanced CAT algorithms to that variable-temperature baseline rather than forcing everything through D65 first.

Any interation with DT development of this nature comes from input here…

And if you go throught the thread I shared there is quite extensive back and forth already on this point ie how this is implemented so I would collect all those arguments and comments and then frame your feature request if it makes sense…

1 Like

awesome, thanks a bunch!

2 Likes

In that thread there was a call for images that would demonstrate how it would be improved by allowing this change so that might be a good place to start as well…

Still trying to keep up with terminology, may I ask how a camera assesses what the scene illuminant is? None of my cameras can do that.

This is an interesting paper…some might find interesting around this particular topic…

Why is this a challenge worth undertaking?

1 Like

First and foremost, I want to make sure everyone knows that I’m not trying to ruffle any feathers. This community is amazing and as a newcomer I don’t want to come in acting like I know better than everyone else. My background is in commercial photography, where precision is king - but I don’t claim to be a software engineer, or have a PhD in light/color science.

While I have very limited use of Sigma cameras, I would be shocked if this were the case, especially since you were actually posting different matrix sets.

I’m trying to use the vocabulary consistent with the manual, but this is essentially just a fancy way of saying auto white balance. In order for AWB to work, it analyzes the information provided by the sensor and makes an intelligent conclusion as to what the condition is. HOW it does this is a different topic altogether and is well above my pay grade, but I’m assuming its some type of fancy averaging system.

I plan on diving deeper into this paper, but a quick scan shows its pointing out exactly what I’m saying.

So at minimum it would provide better masking ability in the pipeline pre-calibration, but to me its more about clean accurate color, which in my eyes is a huge part of why we all shoot raw in the first place.

Diving even deeper into the way darktable functions I continue to get confused… just when I think I’ve figured it out, I find myself back at the front door lol.

Looking at my exif data from my Zf I noticed it actually doesn’t provide channel multipliers for D65, but it does provide the exact multipliers from its assessment.

jp@darkhorse:~$ exiftool -WhiteBalance* -WB* -ColorTemp* -ALL '/media/jp/NIKON Z F/DCIM/101NCZ_F/_DSC9009.NEF' | grep -i "balance\|temp\|calib"
White Balance                   : Auto1
White Balance Fine Tune         : 0 0
Color Temperature Auto          : 3250
White Balance                   : Auto1
White Balance Fine Tune         : 0 0
Color Temperature Auto          : 3250
Color Balance Version           : 0803
Blue Balance                    : 2.15625
Red Balance                     : 1.351563

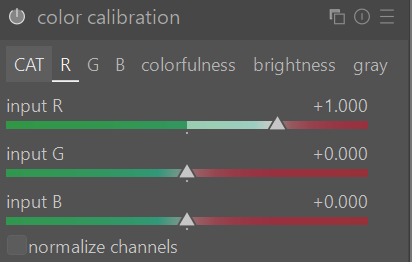
My last post/impression was that it used standard information in the exif to scale to D65. This no longer seems to be possible in my eyes, and it also half-way explains to me why when you toggle between camera reference and as shot to reference you get the same results (even though the sliders/values change). The curious part is that with the calibration off, they both are quite warm in the case of this image at 3250 - even though if it was using the provided scale multipliers and nothing else, it should appear neutral like it does with the legacy “as shot” method. So at this point, I’m really not sure what is going on with the two modern options after all.

To add to the confusion, the software has this profile, which is awesome that someone is doing this work, but I’m not all too sure what the software is really doing with this information. The matrix is useful, but without knowing its calibration illuminant (D65? Something else?), it’s unclear how darktable applies it to images shot under different lighting.

<Camera make="NIKON CORPORATION" model="NIKON Z f" mode="14bit-compressed">
		<ID make="Nikon" model="Z f">Nikon Z f</ID>
		<CFA width="2" height="2">
			<Color x="0" y="0">RED</Color>
			<Color x="1" y="0">GREEN</Color>
			<Color x="0" y="1">GREEN</Color>
			<Color x="1" y="1">BLUE</Color>
		</CFA>
		<Crop x="0" y="0" width="0" height="0"/>
		<Sensor black="1008" white="15892"/>
		<ColorMatrices>
			<ColorMatrix planes="3">
				<ColorMatrixRow plane="0">11607 -4491 -977</ColorMatrixRow>
				<ColorMatrixRow plane="1">-4522 12460 2304</ColorMatrixRow>
				<ColorMatrixRow plane="2">-458 1519 7616</ColorMatrixRow>
			</ColorMatrix>
		</ColorMatrices>
	</Camera>

At the end of the day what I’m saying is that the matrix system isn’t EVIL, but it feels a bit like working on display information when we could in theory be working on scene-referred data. Once we step past demosaicing the image we’re trying to force a conversion that is just not as simple/linear as the math would like it to be. I know its not exactly the same as trying to fix a bad compressed jpeg, but as far as I can see this essentially is still what we are doing - but with a lot more wiggle-room.

The fundamental question is: why discard the camera’s accurate scene analysis (3250K with specific multipliers) to force everything through a theoretical D65 reference, then try to fix the resulting color cast with CAT?

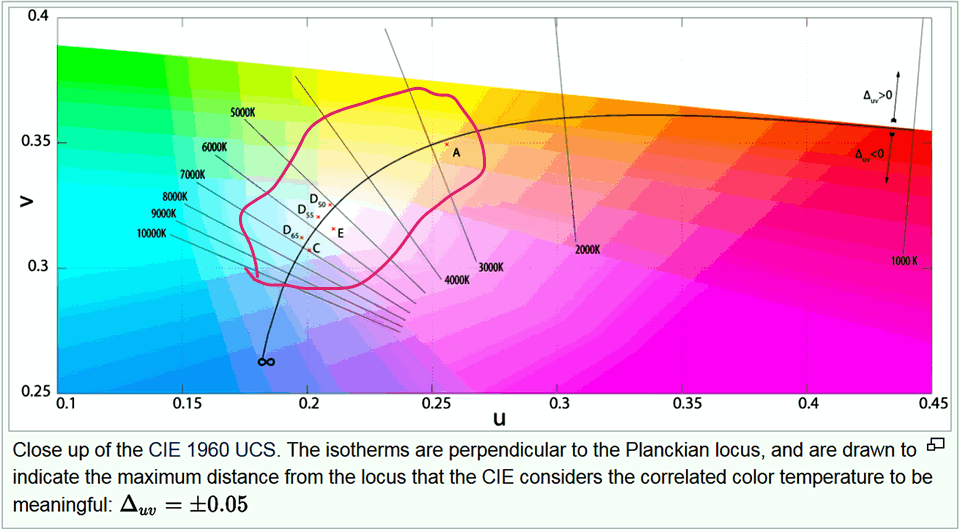
Also… as far as I understand D65 is/was a standard that has its roots going back to the earliest days of color displays (we’re talkin’ tubes). This day and age with modern digital displays and capture devices it seems like a weird place to standardize. Daylight is generally close to 5500K (along with flash), tungsten is 3200K, and with modern home/commercial lighting typically sits somewhere in between the two… Why not push to 4000K or something if we must take that approach? Having an illuminant at or near 6500K is actually pretty uncommon in the real world.

If this is what you’re after, have you looked at using the function in Color Calibration that uses a color target? I’ve used it several times and it works quite well.

Are those numbers standard across all raw files and camera makers? I am not sure why we use D65 either, but if the exit you’re looking at doesn’t exist in all raw files, then its hard to rely on it for something so fundamental, as we try and support as much as we can.

You lost me here, it isn’t clear what you’re trying to say, sorry.

I’d say the camera’s white balance is also subjective. Its been designed to be accurate under specific conditions and often times it is not “right.” Consider shooting portraits under sodum vapor lights, or LEDs.

I won’t say I shoot under too many challenging conditions in this respect, but I have found that the CAT is quite good at rendering a neutral scene, where it looks like the white balance is correct. When it is clearly wrong, there are tools present to give you control to fix things, like under mixed LED lighting.

When I look at reference material, its always D50 or D65. So… 50/50 chance? Probably not, and I’m sure the choice was made for a reason, but I can’t find why.

See the chromaticity diagram in the CIE 1960 Uniform Color Space:

https://en.wikipedia.org/wiki/CIE_1960_color_space

Yes, infact I’ve been using my target with testing while in the deep dive. these targets are great for adjusting post demosaicing for further refinement, similar to what the functionality of the CAT does, but this is still different than adjusting the raw multipliers prior to demosiacing.

I only have a few files handy from other bodies, but this is the information i was able to extract from an canon r5, similar output:

Color Temp As Shot              : 5200
Color Temp Auto                 : 5489
Color Temp Measured             : 5489
Blue Balance                    : 1.818359
Red Balance                     : 1.943359

I was using a manual temp setting, which is why there is an auto vs shot temp. Also green is omitted from both cameras because it represents 1- as you can see these numbers are roughly but not exactly double because there are 2x green photo sites on the sensor, this remains true for the x-trans sensors on fuji cameras even though they have more complex pattern.

My point is that once the image is de-mosiaced you no longer have true unlimited flexibility as one assumes from a raw file there is some actual hard data “baked in” as people say when comparing jpeg vs raw. The difference is that the working colorspace and data is HUGE so typically you can slide it around as needed without too much issue. That being said- and correct me if i’m wrong here, but this where the matrix adjustments come into play, you can’t simply slide things around as reliably as the actual illuminate deviates from a fixed starting point. Lets use an extreme case as an example, say you shot something under sodium vapor lights. If you process de-mosiac this with a d65 formula your blue channel will likely be close if not at 0, and to add to that, the cri values of these lights aren’t great, so once it gets to the color calibration module there’s only so much data that it has to work with because that d65 multiplier setting we used during de-mosaicing significantly reduced what little blue channel data was there to begin with.

Does this help?

I completely agree, It’s far from perfect! that being said, I think it generally gets it in a better ball park than just trashing it and pushing it out as D65 and correcting it later. at minimum, if we had a few basic set points if having a fully fluid system is wildly too complex to program, and allow it to choose the closest set point to detected temp.

Yes. If I read our docs, and the Ansel docs correctly, we demoasic using the white balance, then move to a D65 reference, then do the CAT correction. So it does not discard whats in the raw file at all. Am I reading that correctly? Or does your reading differ?

I am neither dev nor expert, but the module as it exists now seems fairly complicated.

The beauty is, that you don’t have to use it at all, and there is a settings preference to not use it. So you can choose if you want just the WB module.