Apologies for this very basic question. I’m trying to understand what sharpen exactly means since it’s available for Diffuse Or Sharpen module also. Contrast module also has clarity option and I like result of clarity as well as sharpen module when it comes to contrast module. There’s a subtle difference between two, but very hard figure out what changed.
So what exactly sharpen means and how does it differ from clarity?
They are all just targeted contrast enhancements done a different way to create the perception of sharpness…I believe human vision is highly responsive to contrast …there really is no such thing as being able to see sharpness… You could increase level of detail and “sharpness” with a higher resolution capture but that is a hardware things… with software its more about acutance Acutance - Wikipedia
I’ll also add that, in the context of raw editing software, clarity tends to work on fine and coarser details, which has the effect of sharpening and adding contrast. This generally affects the whole image.
Sharpening tends to work on just the fine details so that things like hair become even sharper, but not necessarily the whole image.
(I know this is v. similar to what @paperdigits has already said, but maybe it still helps…)
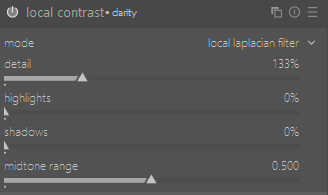
I feel for sharpening it is hard to go past the diffuse or sharpen modules many preset options including lens deblur and the more obvious sharpening presets. It seems to create less artefacts. As for local contrast, I tend to turn it on the module and check the look because with most images as it adds both clarity and contrast to an image and just looks better. It complements rather than replaces the need for sharpening.
There is global contrast: the difference between dark and light. Increasing it would make the brightest pixels brighter, the darkest pixels darker than what the output medium (screen, paper) can represent, so in practice it’s always a tradeoff: you increase contrast somewhere (for example, in the midtones), and you have to reduce contrast somewhere else (for example, in highlights and shadows). For sake of simplicity, let’s suppose represents 0 midtones, -1 the darkest your display can go, +1 the brightest, then using a function like outputBrightness = 1.3 * inputBrightness would increase contrast around 0 (midtones), but would push +/- 1/1.3 = +/- 0.77 already to +/- 1, leading to clipping – that’s why you need the contrast reduction (shoulder and toe) at the extremities.
Then, there is sharpness/sharpening. A simple kind of sharpness adjustment is ‘unsharp mask’ (USM). The original signal has been blurred. To estimate the effect of the blur, your blur the image even more. You then subtract the extra-blurred version from the original, and add the difference to the original.
Say your original has two pixels next to each-other, with values 0.7 and 0.6. You blur the image, and the pixels get closer to each-other, for example they become 0.67 and 0.62. 0.7 - 0.67 = 0.03, so you add that to 0.7 to get 0.73. Similarly, 0.6 - 0.62 = -0.02; you add that to 0.6 to get 0.58. The difference between them grew from 0.1 to 0.15, giving the perception of increased sharpness – and also a halo.
Suppose you have an edge between two flat areas, one having pixels with the value 0.7, the other with 0.6. Neighbouring pixels within the each area have no difference, so the blurring and subtracting won’t do anything, only pixels at the boundary are affected as I described above. The end result is:
0.7, 0.7, … 0.7, 0.7, 0.73, 0.58, 0.6, 0.6… 0.6…
That’s why over-sharpening causes artefacts (as if someone outlined everything with black and white sharpies).
Finally, local contrast. If you apply an unsharp-mask blur with a large radius, you get the average brightness of the surfaces at different parts of an image. By taking the difference between a pixel and the local average, and adding a tiny bit of it back to the image, you make darker objects darker than the surroundings, and brighter ones brighter. A mid-grey blob, if placed on a dark background, will become brighter than its surroundings; the same blob, on a bright background, becomes darker. In both cases, it stands out more.
Since the blurring radius is larger, the typical artefacts are not outlines that seem to have been drawn using sharpies, but halos. A dark object will make the local average (produced by the blur) darker, so a homogeneous midtone background will seem to glow around it (the midtone pixels closer to the dark object will be affected more by being adjusted after being compared to a dark local average, and will be brightened more – this then tapers off as we get further away from the dark object, and the local average becomes less affected by it).
See Local Contrast Enhancement for a great illustration.
True. I think @NH_Rao was referring to local contrast, though, as they wrote:
Apologies for this very basic question. I’m trying to understand what sharpen exactly means since it’s available for Diffuse Or Sharpen module also. Contrast module also has clarity option
‘Contrast module’ is, I think, local contrast, as diffuse or sharpen is mentioned separately.