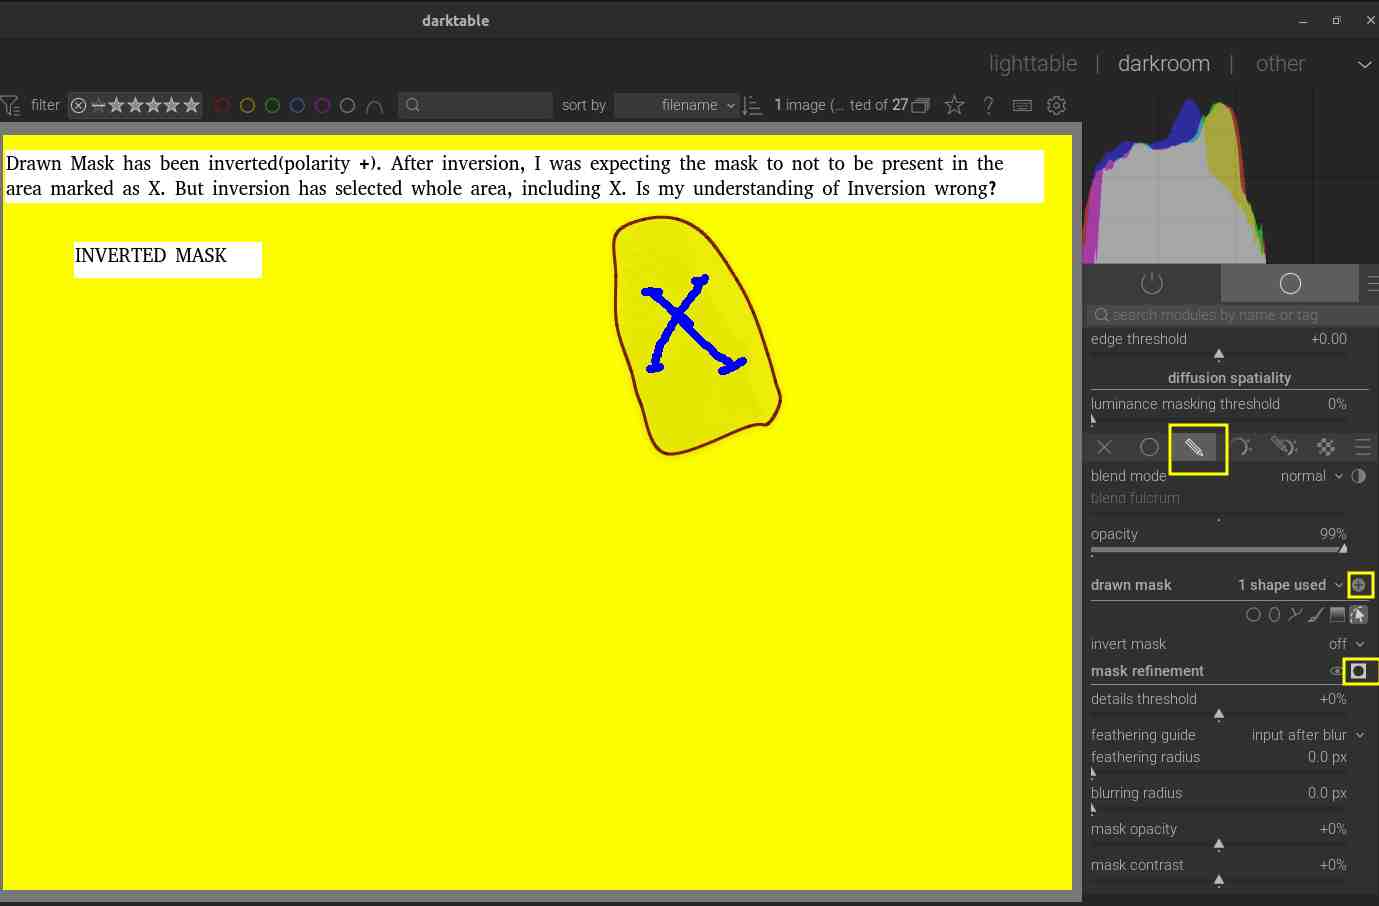
In the D & S module, I created Drawn mask using Lasso tool. Drawn mask selected just the wing of the bird. Let us call the selected area as X. Now the mask (depicted using yellow color) just covered only the area X. Polarity button was ‘-’.
To invert the mask, I changed the polarity of mask to “+”. I was expecting the inverted mask to cover the whole frame but not the area marked as X. But it was not the case; inverted mask covered whole canvas. It seems i have misunderstood the concept of inversion in MASK.
Is it possible to make the inverted mask to cover the whole frame but not the marked as X??? Please help understand.
Inverting the masl means “for each pixel, take (1-current value)”.
As your original masked area was not 100% opaque, the inverted mask will not be 100% transparent in that area…
I was going to agree with @rvietor as this is my remembered experience from the past. However, I just opened an image in the latest 4.4 version of darktable and the position of the top opacity slider which is for blending did not affect the inversion. Make sure you have installed v4.4 as the issue you are experiencing may be resolved in the latest version. install | darktable
Terry Can you please tell which OS are you running on?
My previous test was done on DT 4.2 running Ubuntu 22.04.
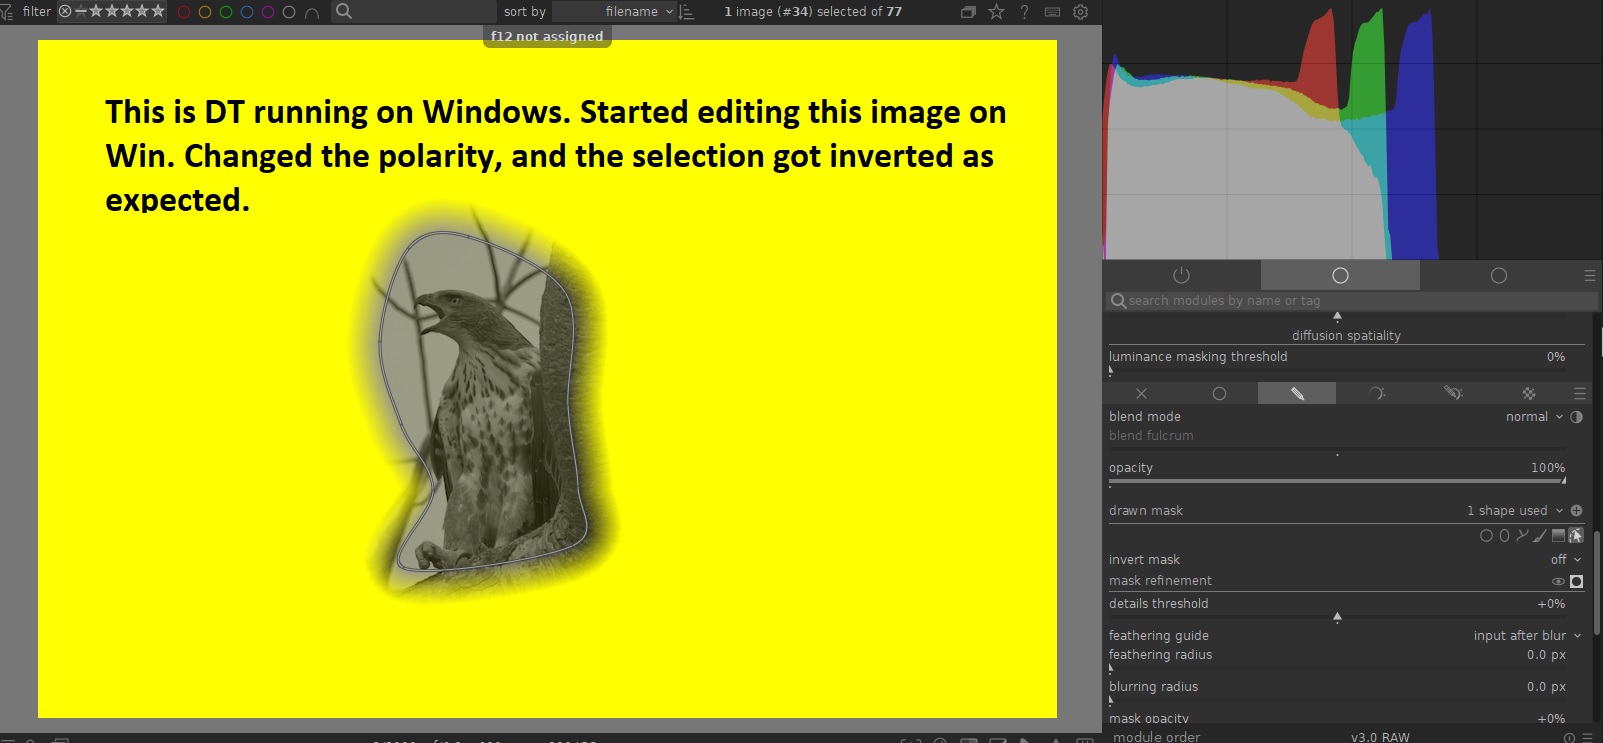
I have DT 4.2 running on Win10 and that is behaving perfectly. These are my observations
On windows, change in polarity gives the expected behavior as shown below. If I copy this specific picture(ARW and XMP file) on to Linux machine, even on Linux, the change in polarity gives the expected behavior. When we start editing on Win, it may be initializing some parameters properly. So when that same image edited on Linux we get perfect behavior for change in polarity.
If start the editing on Linux, the bring that file to Windows, the faulty behavior continues.
This image was edited on Linux and copied to Windows
The opacity of masks is stored in the config. Changing the opacity using the mouse wheel before you start drawing changes this stored default opacity. There could be a difference between your Windows and Linux darktable configurations.
And that is as it should be. The position of the “blending” slider shouldn’t influence the inversion of the mask (or mask channel). The final blending is later in the process, where current layer and previous layer are mixed.
The final mask decides how much of each pixel is retained for the final blending. The blend opacity then decides the relative contribution of each layer involved; from the manual:
The final output of a module is computed ‘per-pixel’ as follows:
where the blended_output is a combination of the input and output images, depending on the blend mode (below), and the opacity is defined ‘per-pixel’ by a combination of the mask and global opacity parameter. An opacity of 0% outputs an image that is identical to the input image of the module.
@Rawfall: your original mask as shown is partially transparent. That means the inverted mask is also partially transparent in that area. Otherwise, what happens with a feathered mask which you invert? So the behaviour you see is as expected (and needed). If you want a totally transparent area, you have to make sure that area is 100% opaque before inverting. (Note: very low opacity levels are hard to see). Your second try on Windows has a much more opaque original mask, so the inversion will be more transparent.
I agree that opacity is low on Linux compared to Win. Not only that, on Linux default opacity is not same for Drawn mask and Parametric mask. Drawn mask has lower opacity and Parametric mask has higher opacity. I do not think this by design.
@kofa I guess you are asking me to set the opacity to 100%.
I am not touching the opacity slider on any of the machines. By default opacity slider is at 100% and it will continue to stay there only. I am not changing it.
I don’t mean the slider.
Each shape in a drawn mask has its own opacity, controlled by Ctrl+scroll wheel. You have that hidden; normally, it’s displayed at the top, but you have collapsed it. Use Ctrl+Shit+T, or the small triangular mark at the top of the screen until it becomes visible.
This Ctrl+scroll behaviour can be confusing.
If you draw a shape and then use Ctrl+scroll, you adjust the opacity of the current shaped. However, if you first use Ctrl+scroll, you change the default opacity, and that is recorded in your configuration.
Once one has drawn a shape, Ctrl+scroll controls the opacity of that shape only:
There is “mask opacity” slider. -Ve 0 +ve. By default it stays at 0. If I increase this to 100%, then mask becomes fully opaque. After I change the polarity of the mask, I have to explicitly change the opacity to MIN. This will invert the mask as expected. Note these additional steps are not needed for Parametric mask.
I did play with CTRL +Scroll. Using Ctrl + Scroll, one can adjust the opacity of each shape separately. On the other hand, Opacity Slider will adjust the opacity of ALL the shapes in that image. So it is better to use CTRL +Scroll.
Example where the opacity has been changed for each shape separately using Shift + Scroll
I have downloaded and kept a copy(PDF) of user manual. I just looked at the file. In that file, I have underlined the paragraph related to CTRL+scroll but forgot it.
It’s not better, it is different. For example, for parametric masks, you cannot use Ctrl+scroll. Also, you can reduce the overall effect using the slider. One is more flexible, the other is global.
@Rawfall I see @kofa is correct and your problem is the ctrl +scroll opacity setting. I never realized it didn’t also shift the slider position. I am glad you problem seems solved. BTW, I am using DT 4.4 on windows since you asked.