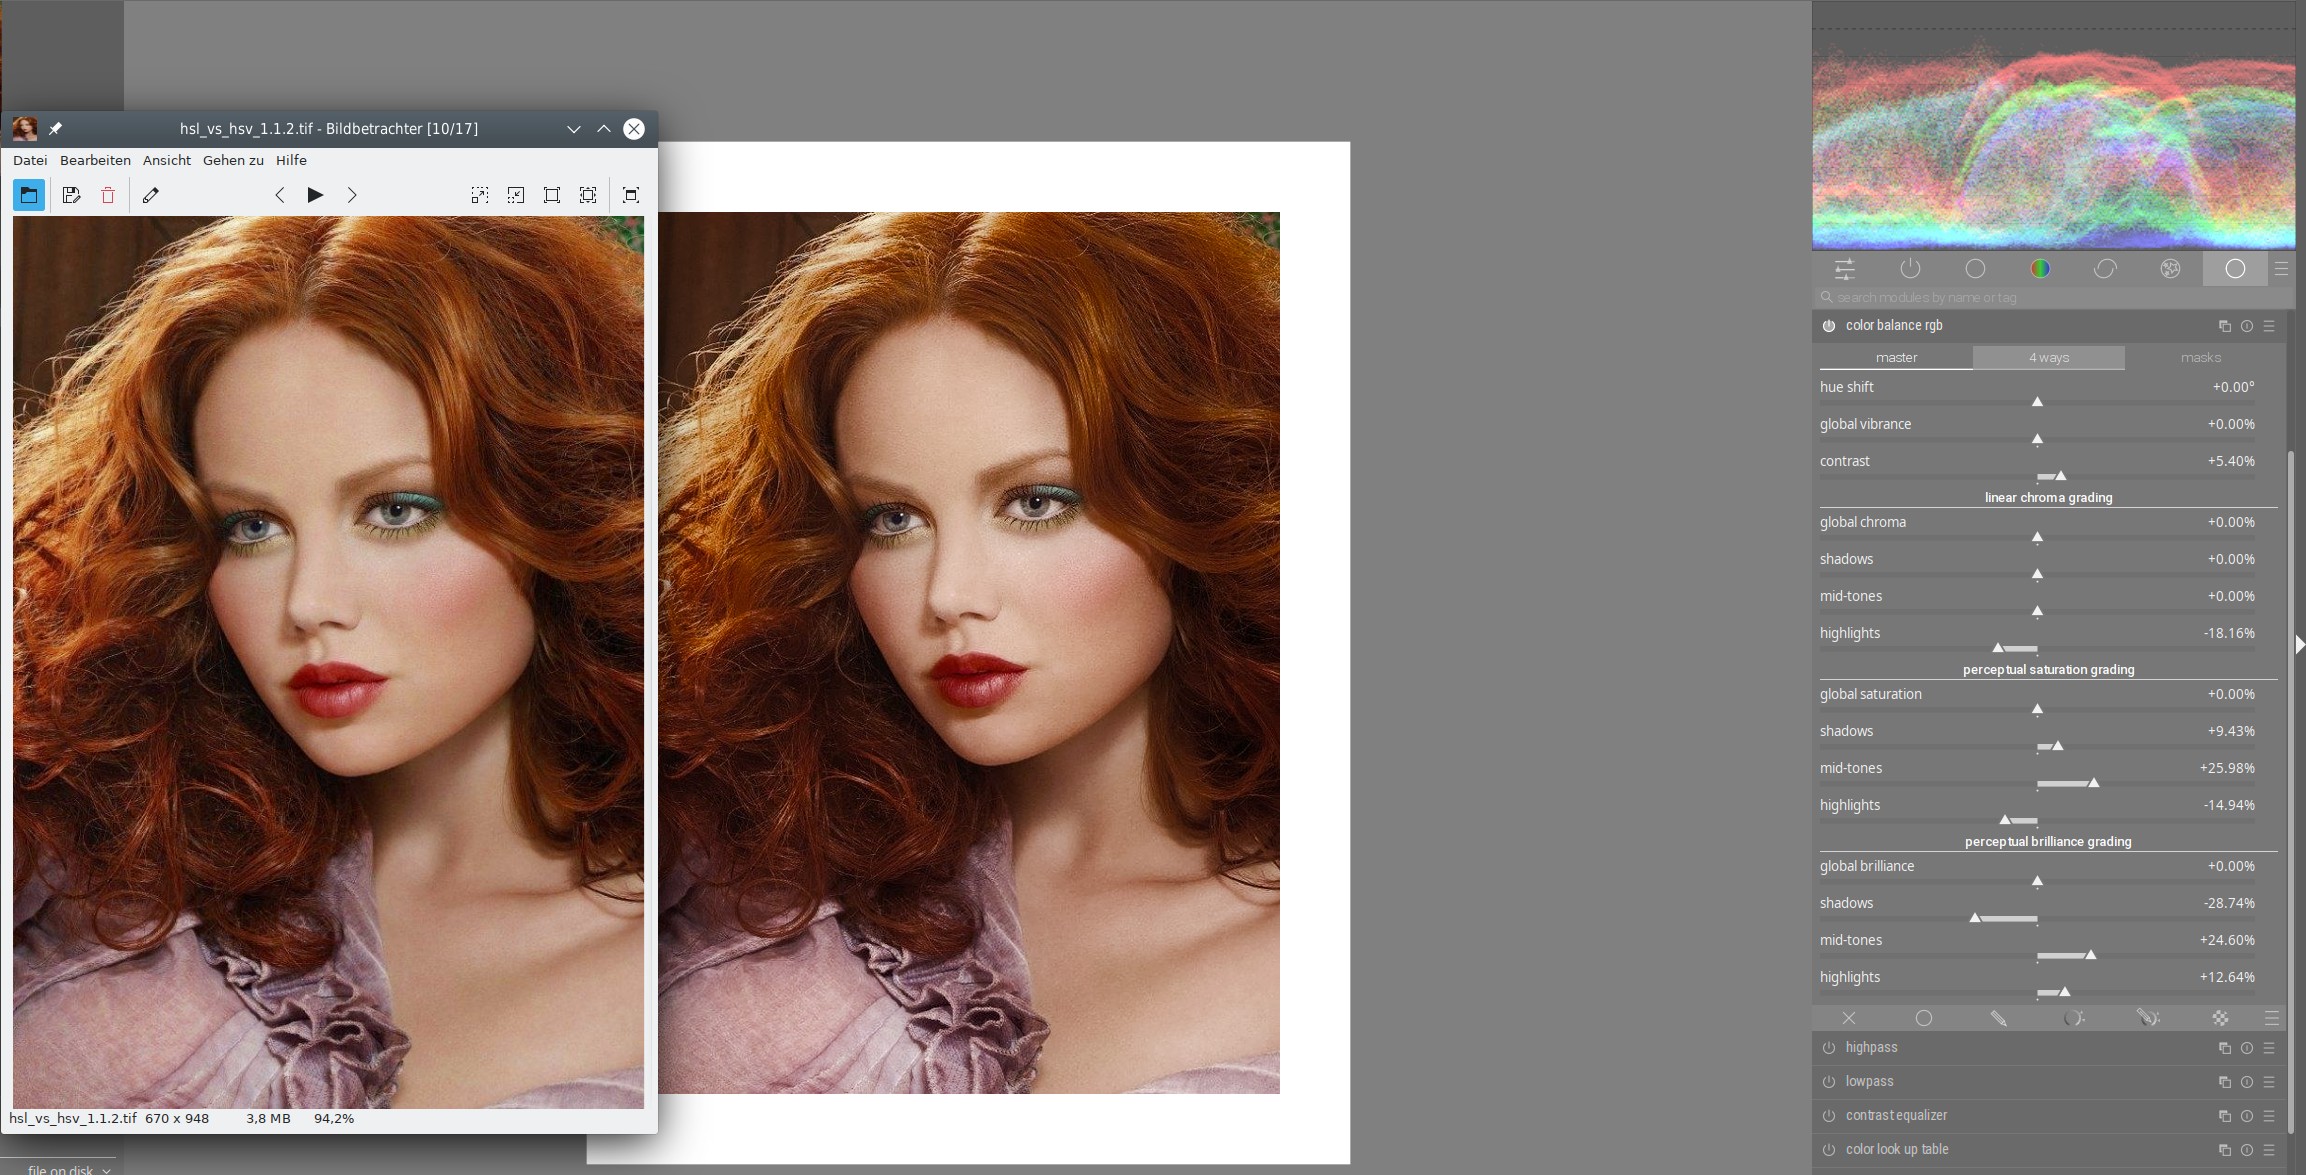
Well, in general, if we proceed from the mechanism of color balance rgb tools, then yes - this option is analogous to the work of the shift of lightness relative to saturation in hsl vs hsv. yes, Boris. Thank you. Didn’t think of that, although I knew it works that way. Closed.
Ideally, you can do all this without a mask.
Who’s interested.
source:

hsl vs hsv:
hsl_vs_hsv_1.1.2.tif (3.6 МБ)
DT/color balance rgb with sat mask
21a7510601879411d0afdac76128440d.tif (1.3 МБ)
xpm of src
21a7510601879411d0afdac76128440d.jpeg.xmp (3.4 КБ)
No. It’s nothing. It’s all regulated. The result is more important. Looks like my topic is off-topic. I’m closing it.
1 Like
This is a very interesting point.
This is the default order and sample done from the left part of the forehead (but it looks quite darker on the picker) as you mentioned because the module is before color calibration. Otherwise - it still blends okay. But I should admit - your eyes are much better trained than mine.

bottom patch is from roughly the same area and the color under the picker looks much better. But I did take it with the modules re arranged (this is why it does not look that nice)

When the modules are reordered the bottom patch is more in line.
To my eyes - #1 (default order top patch) and #3 (custom order bottom patch) look close (I can’t say I am improving it as the goal was to see it).
I can see the difference but it is more because I know it is there (so I am looking for it).
I am curious Boris - is there summary or “cheat sheet” in what cases you are opting for reordering the modules? I may need to re watch the videos but if my question is not a big trouble I would like to learn a bit more.
I am predicting Boris will say there is no list just experiment… ![]() having said that this section of the manual give some good tips about processing and if you think of DT as showing you the end result of a serial chain of modules with each taking its input from the output of the previous one you can make some educated decisions. Many of those are about moving things after filmic or moving artistic edits after the overall basic edit is completed and not where the multiple instance will be created…
having said that this section of the manual give some good tips about processing and if you think of DT as showing you the end result of a serial chain of modules with each taking its input from the output of the previous one you can make some educated decisions. Many of those are about moving things after filmic or moving artistic edits after the overall basic edit is completed and not where the multiple instance will be created…
https://docs.darktable.org/usermanual/3.8/en/overview/workflow/process/
2 Likes
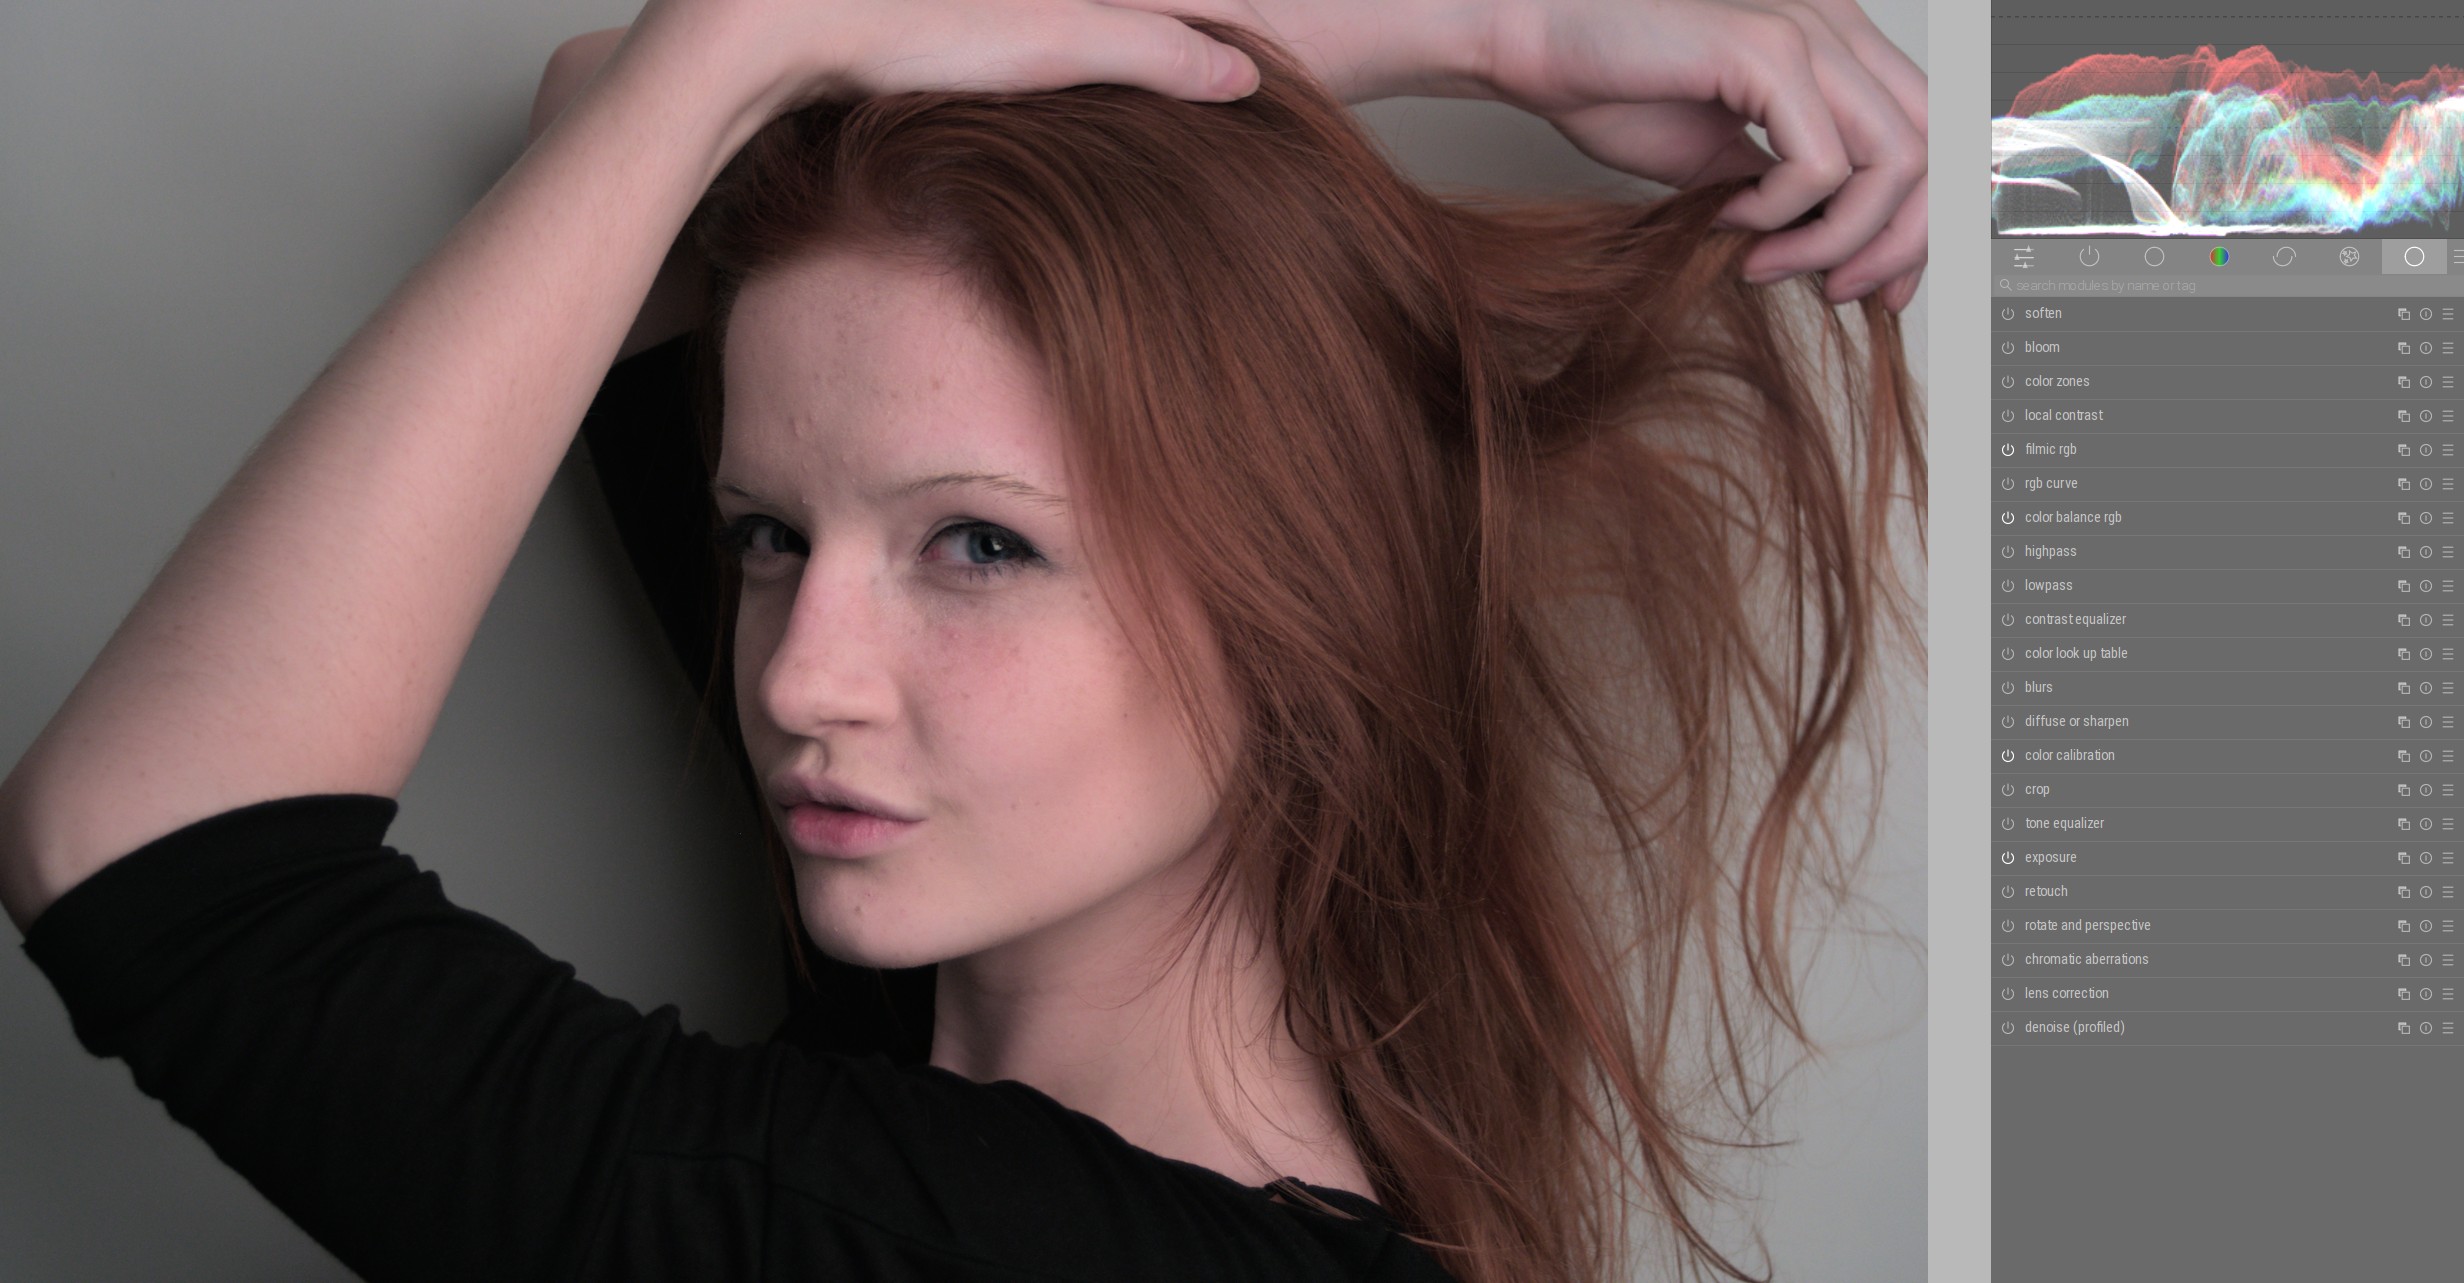
Another example.
This is how the photo looks before white balance:
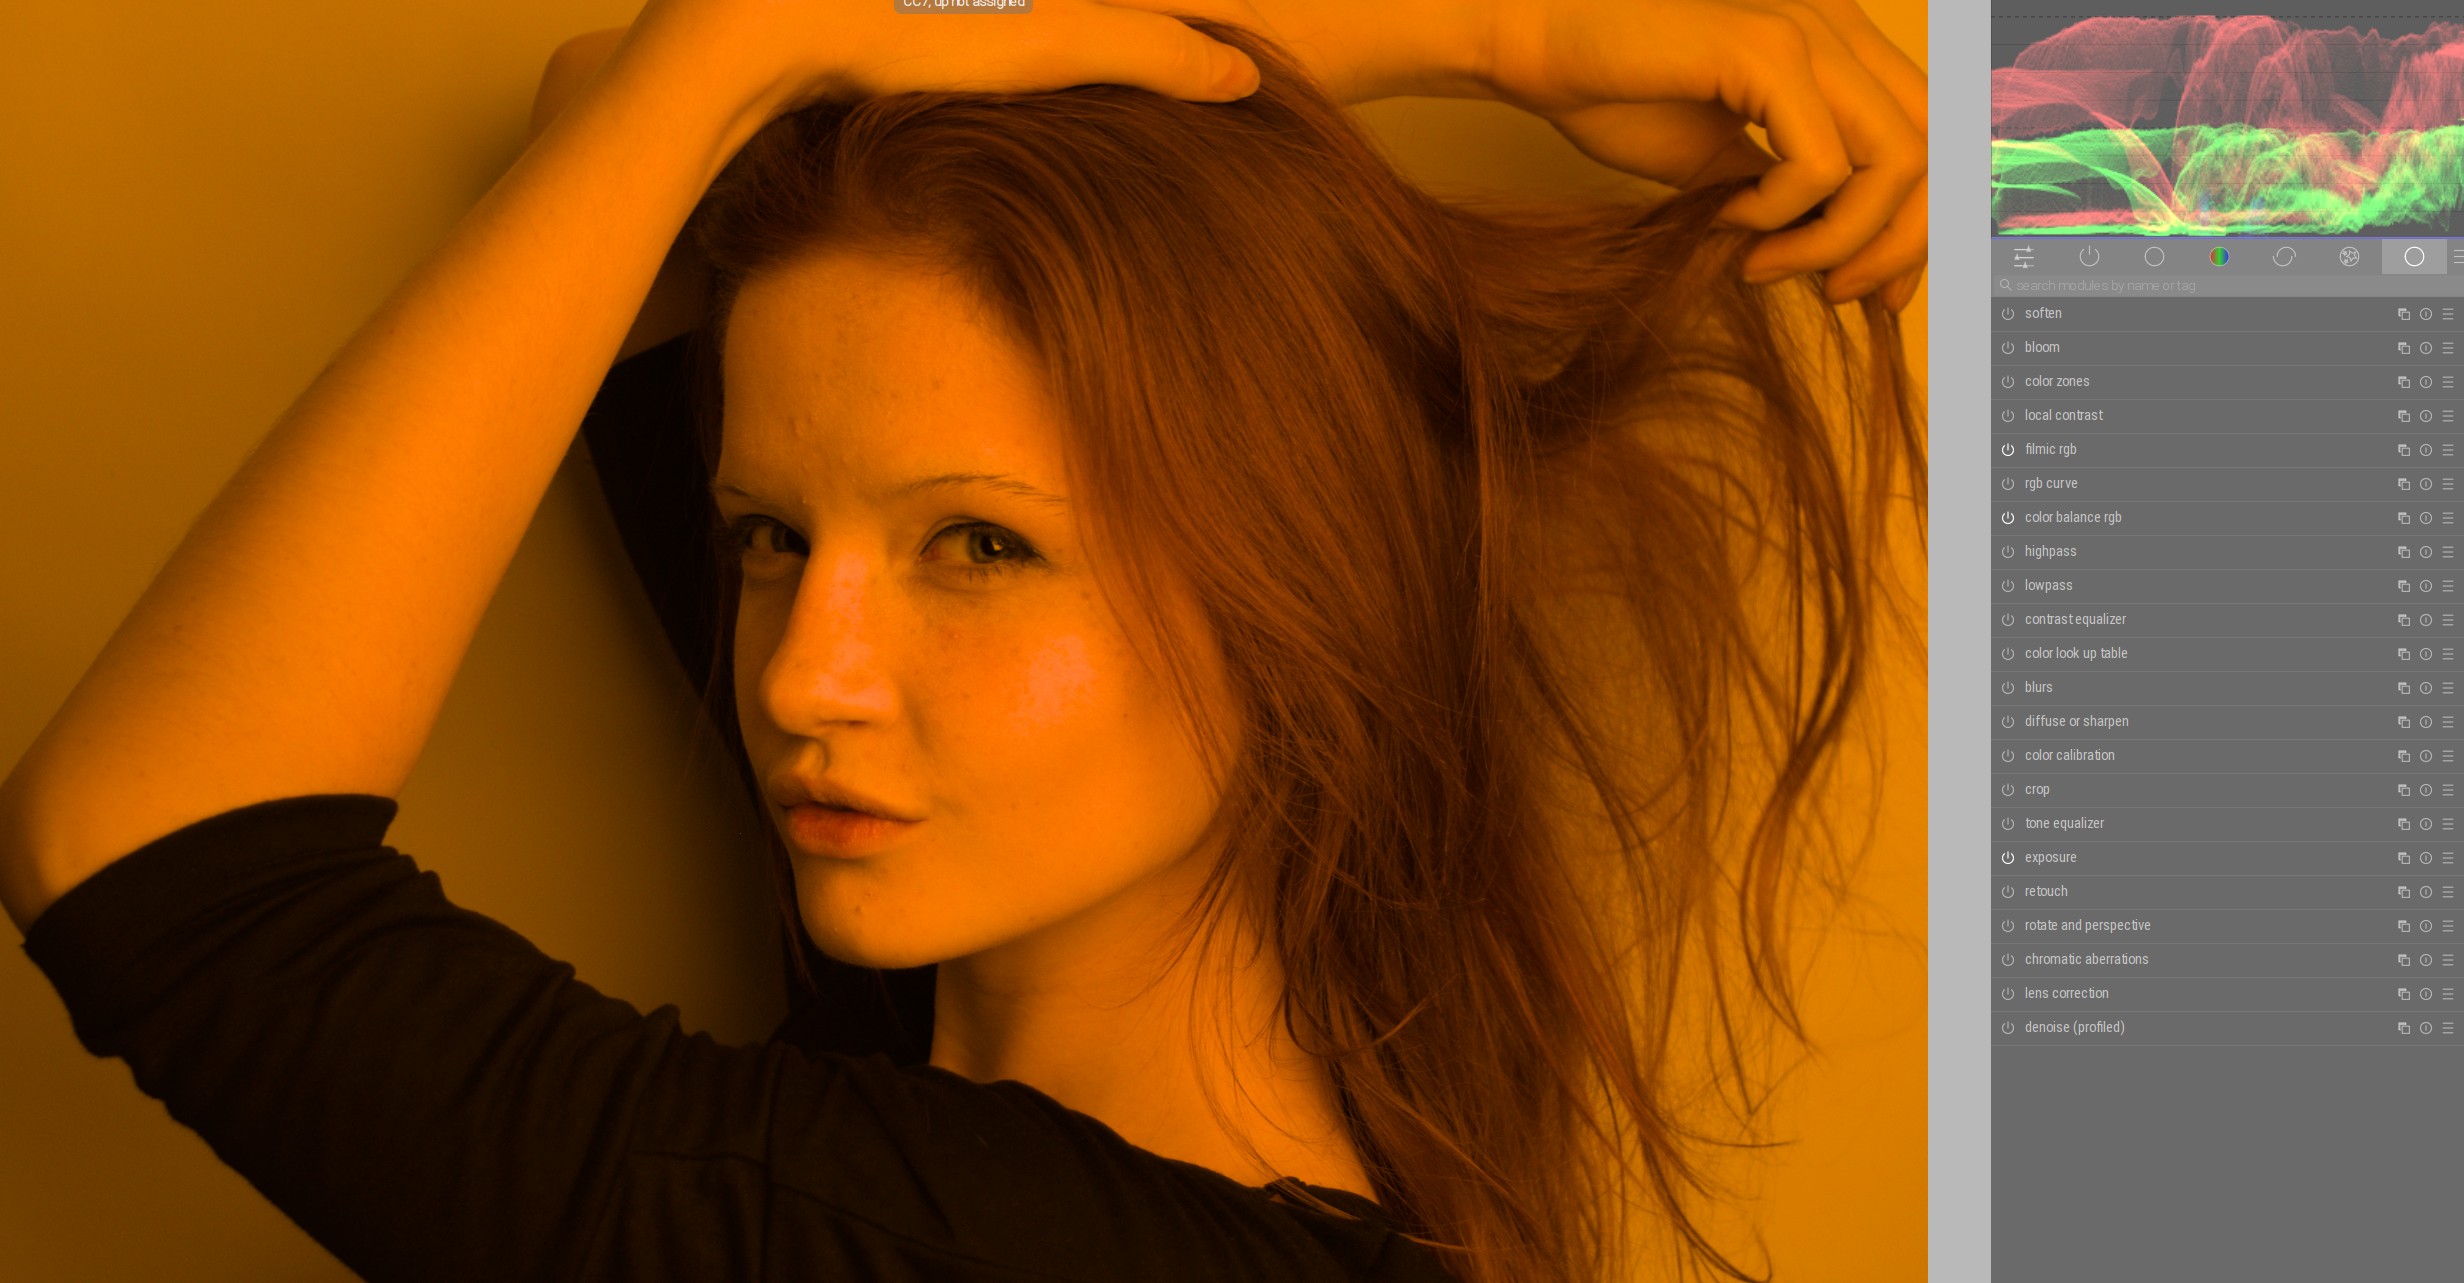
After the white balance it looks like this:
The skin color is too reddish and I can’t get a good sample out. So I have to do the color correction in the custom way.
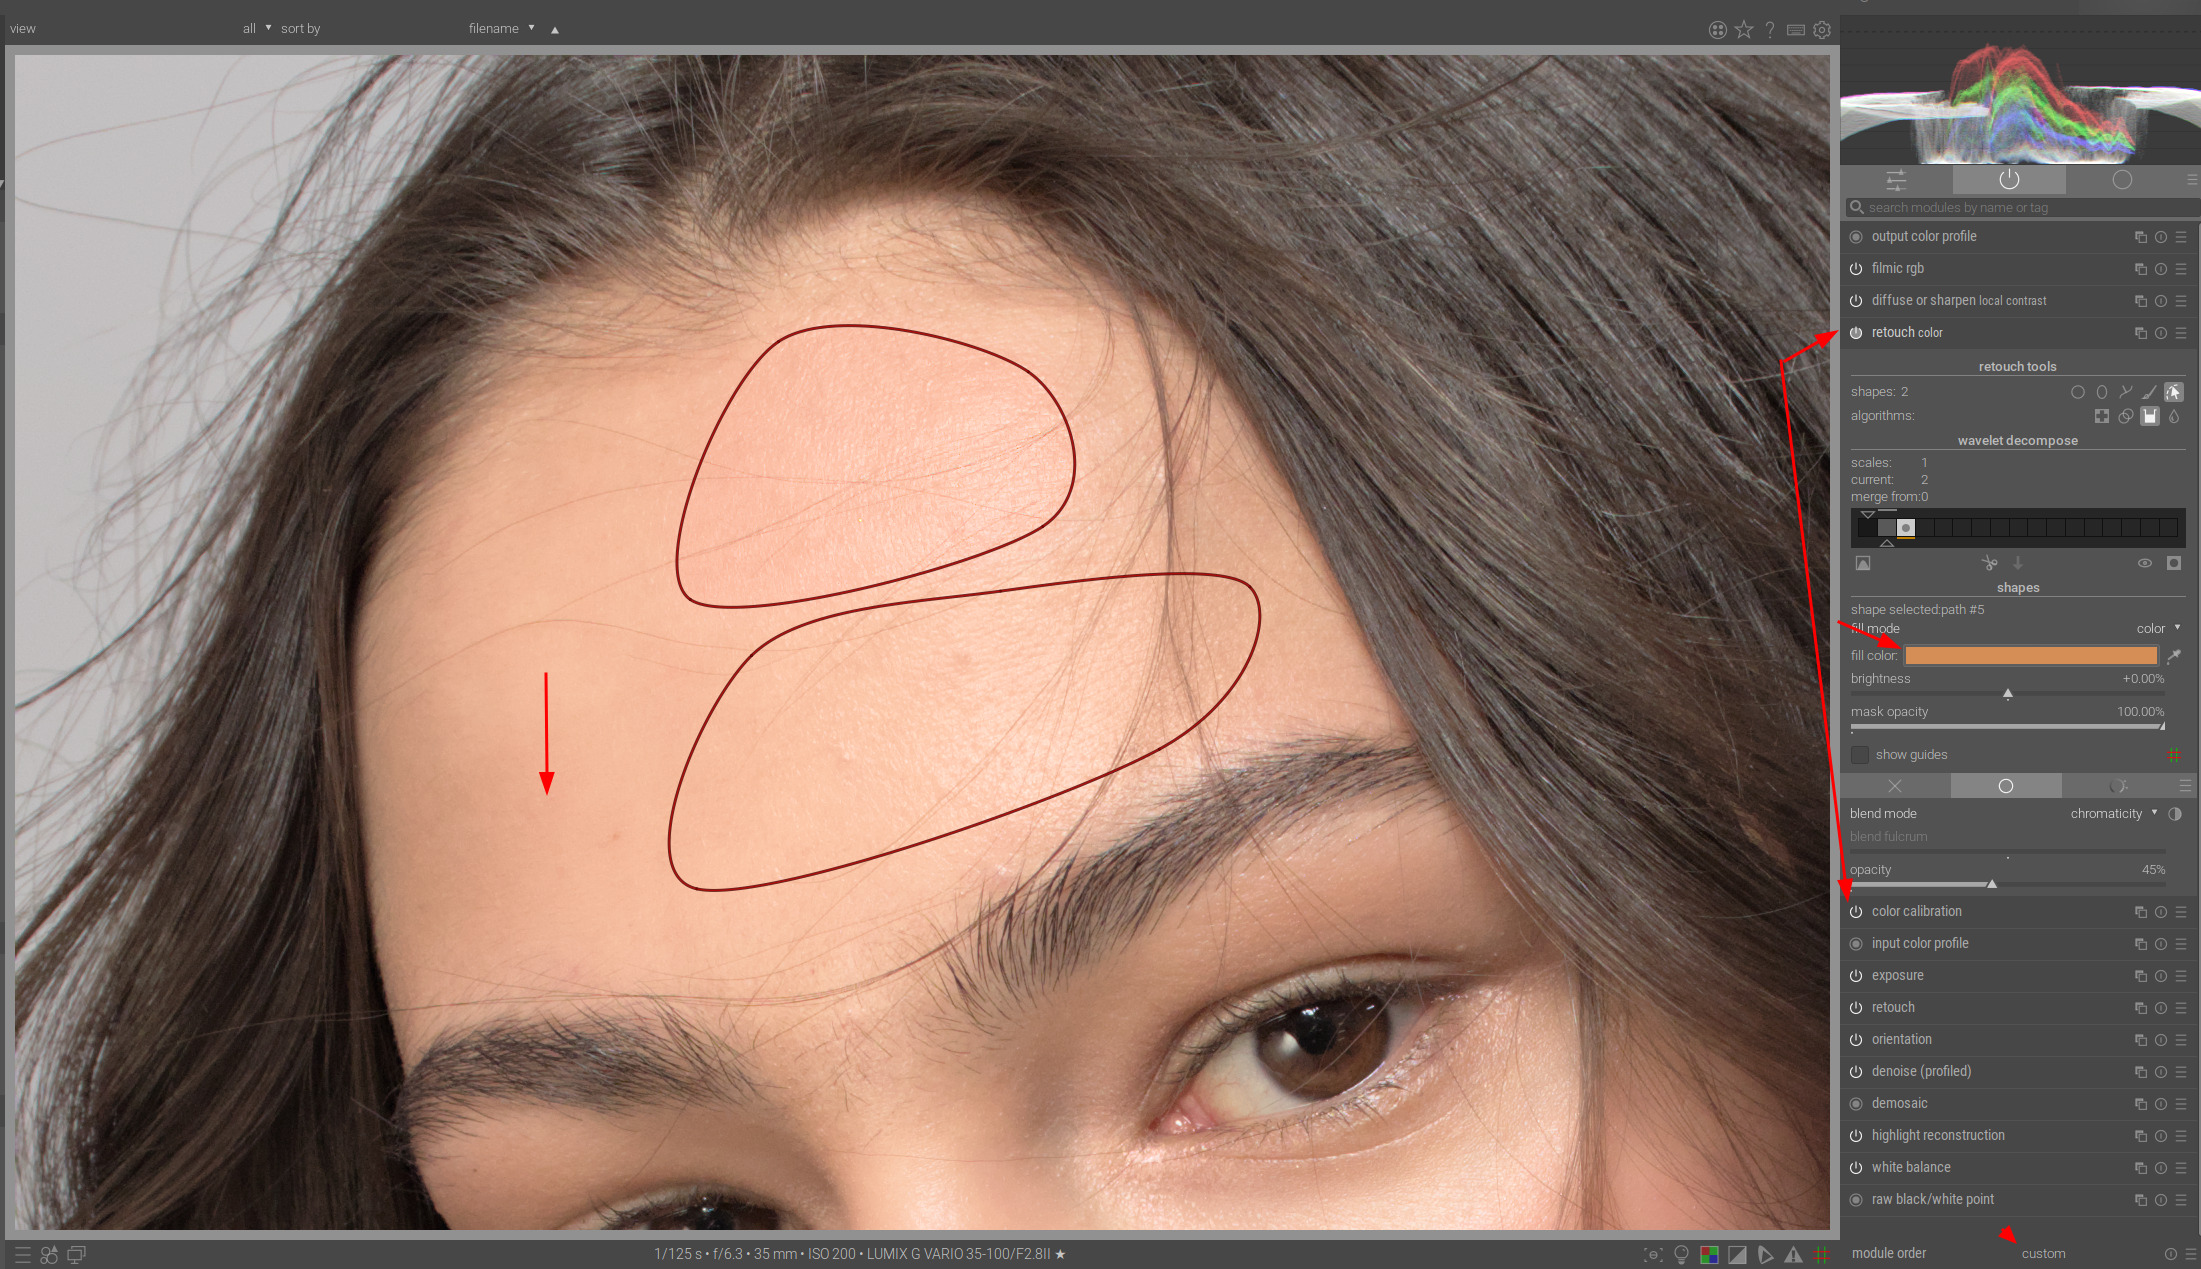
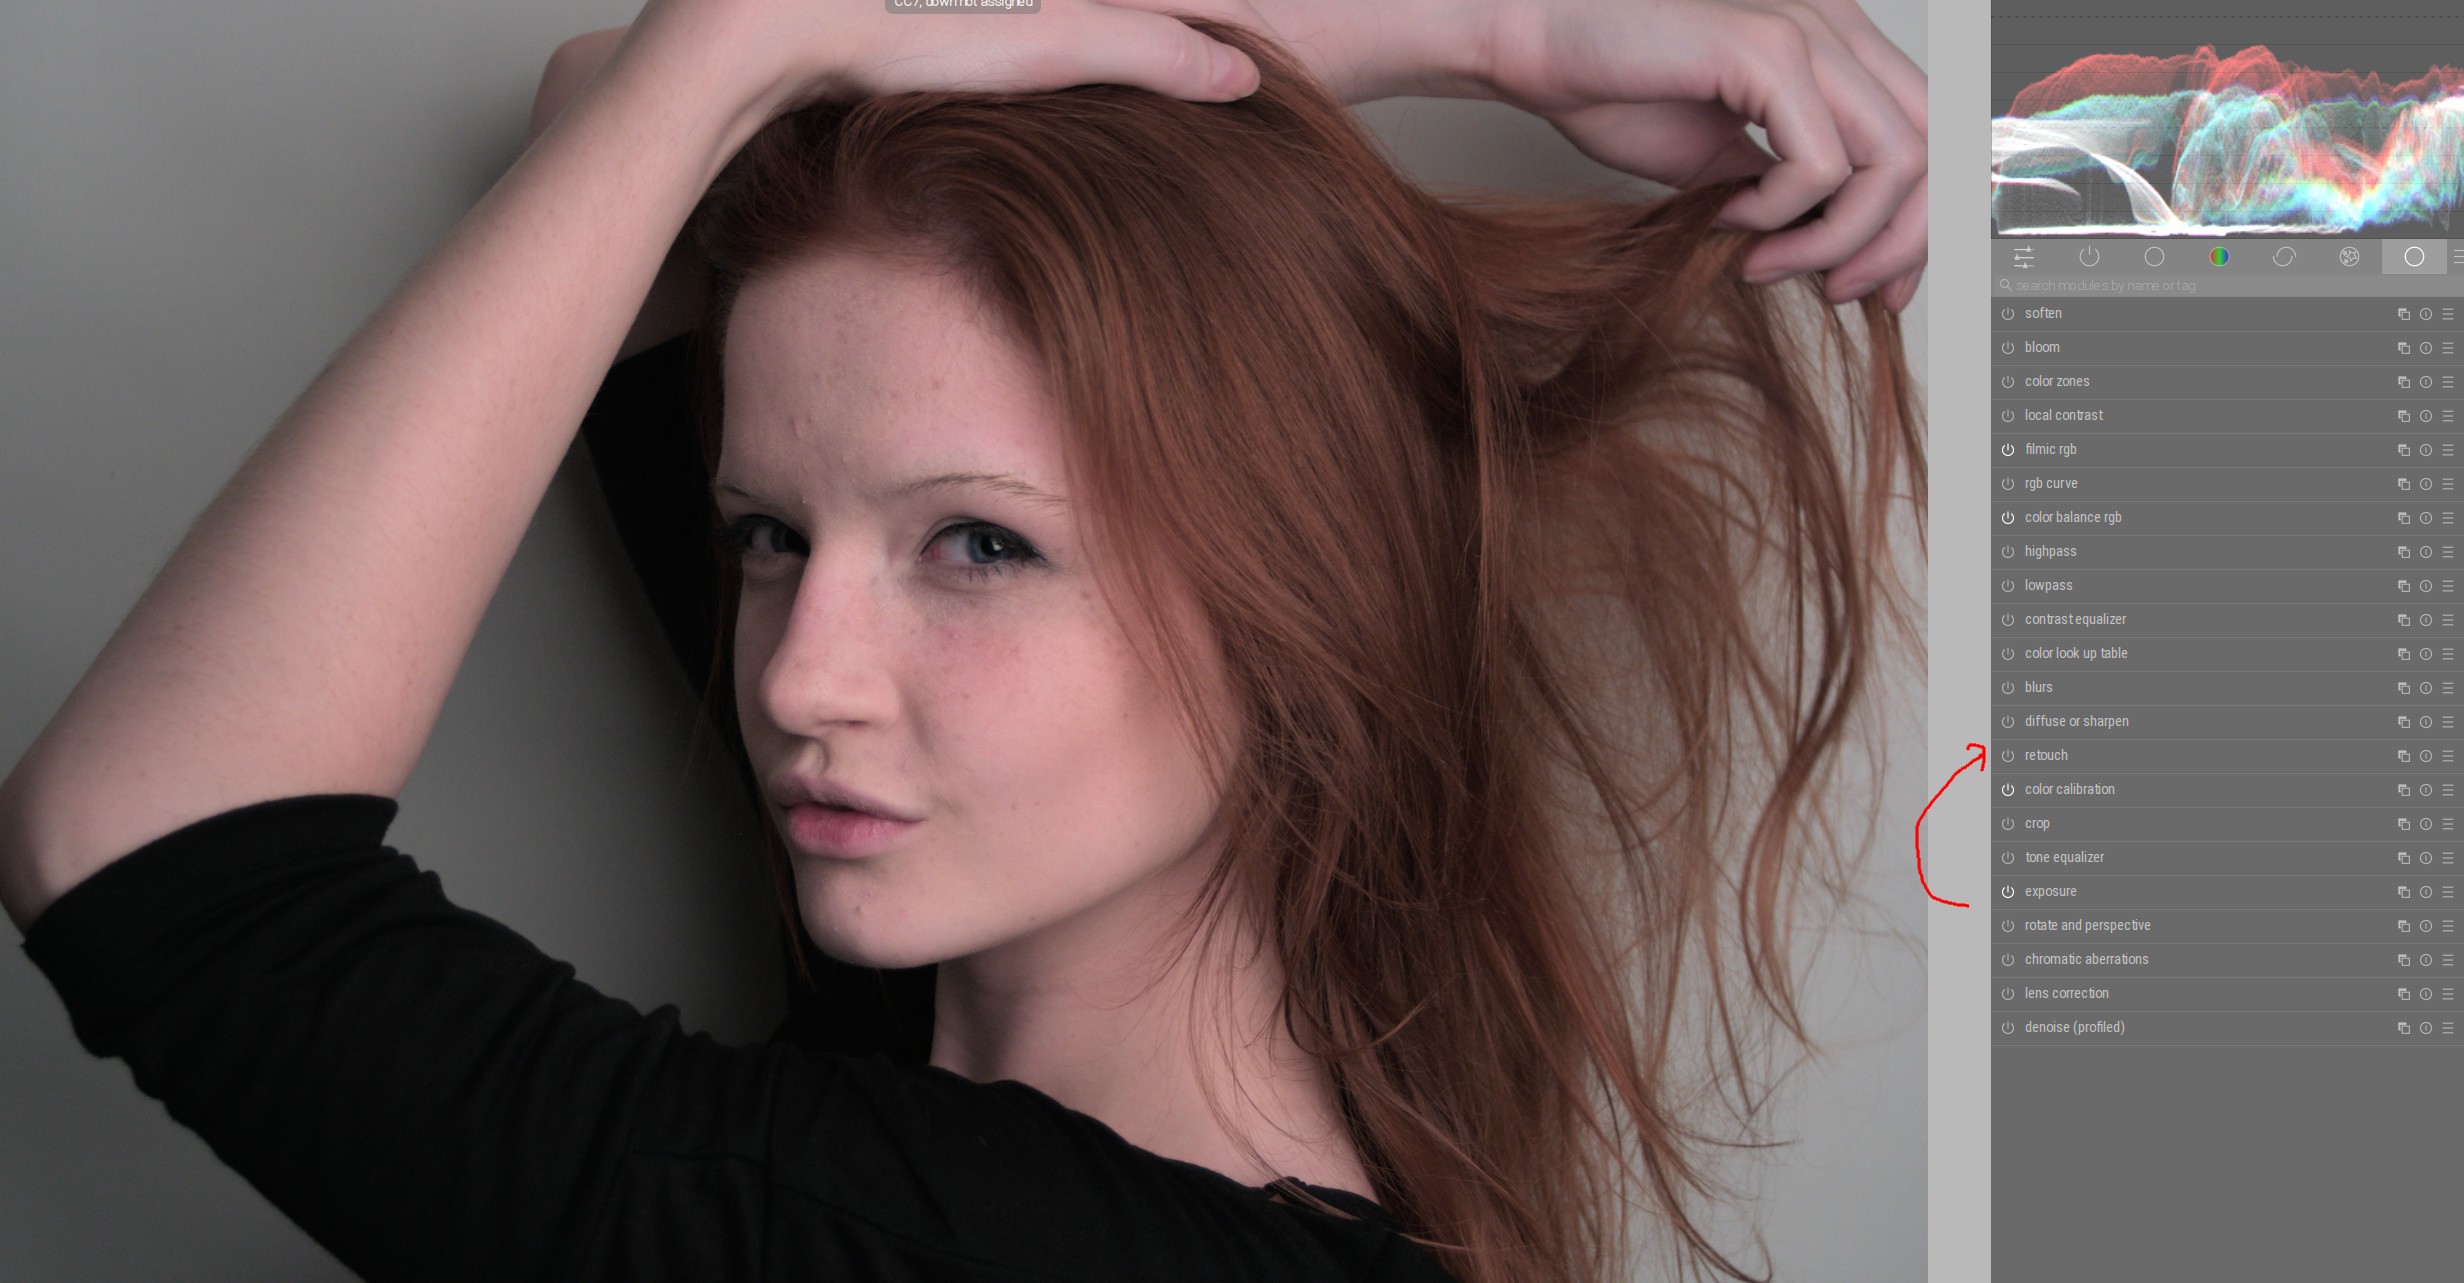
First I move the retouch module over the color calibration, because I want to make the changes after the white balance:
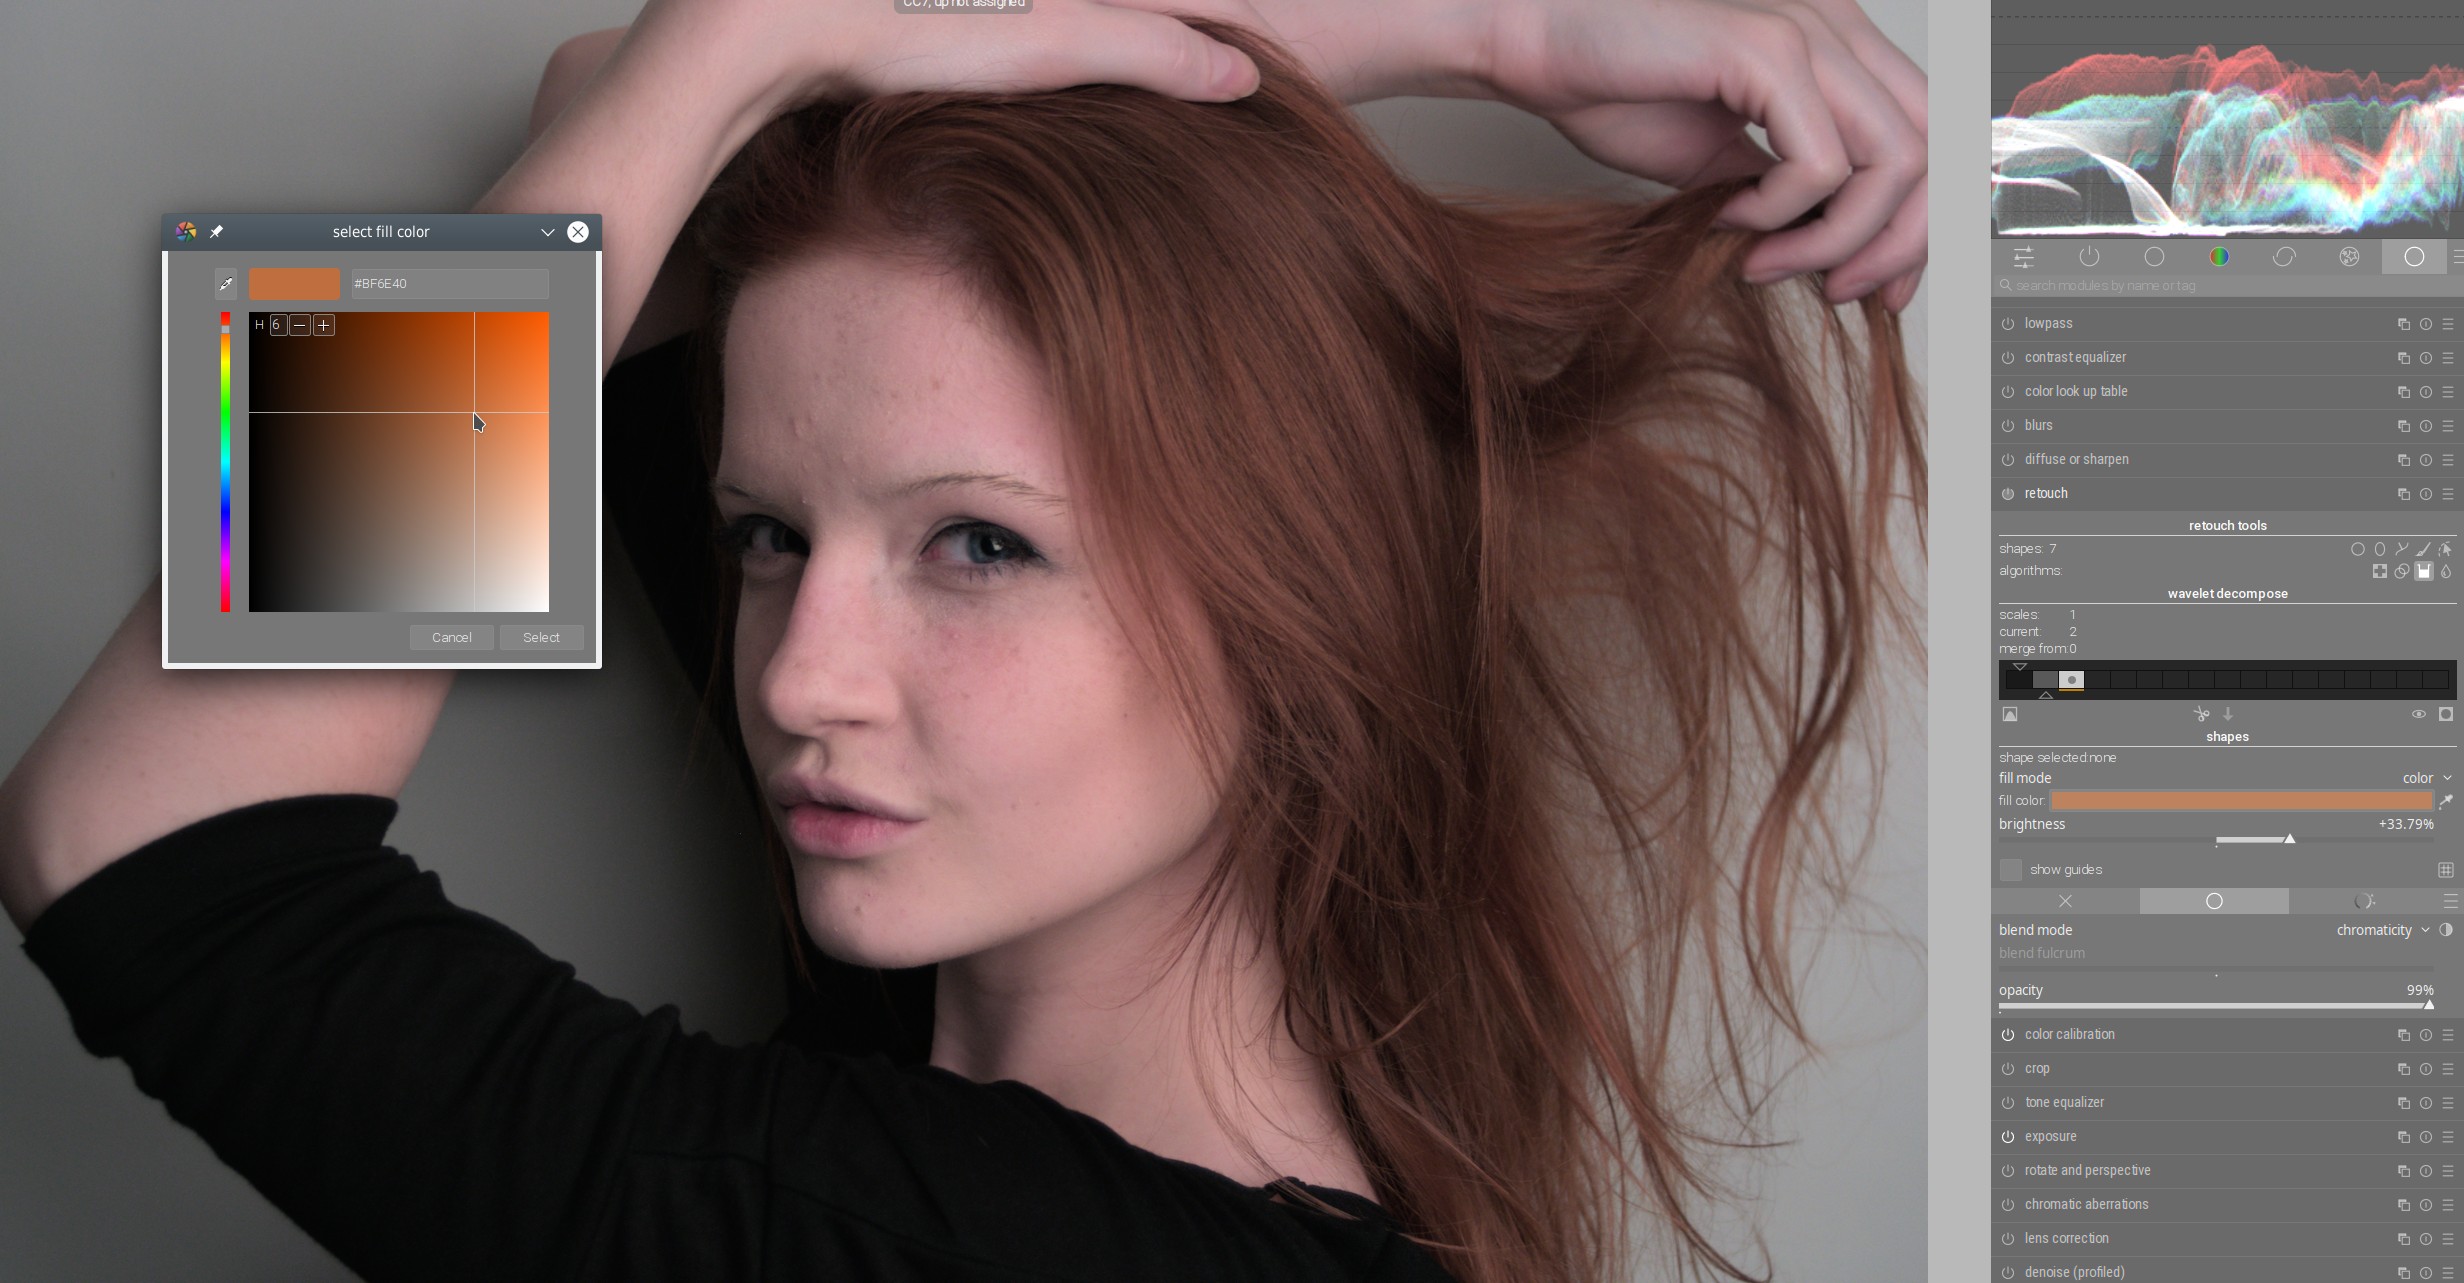
Then I choose a user-defined color to neutralize/cover the reddish:
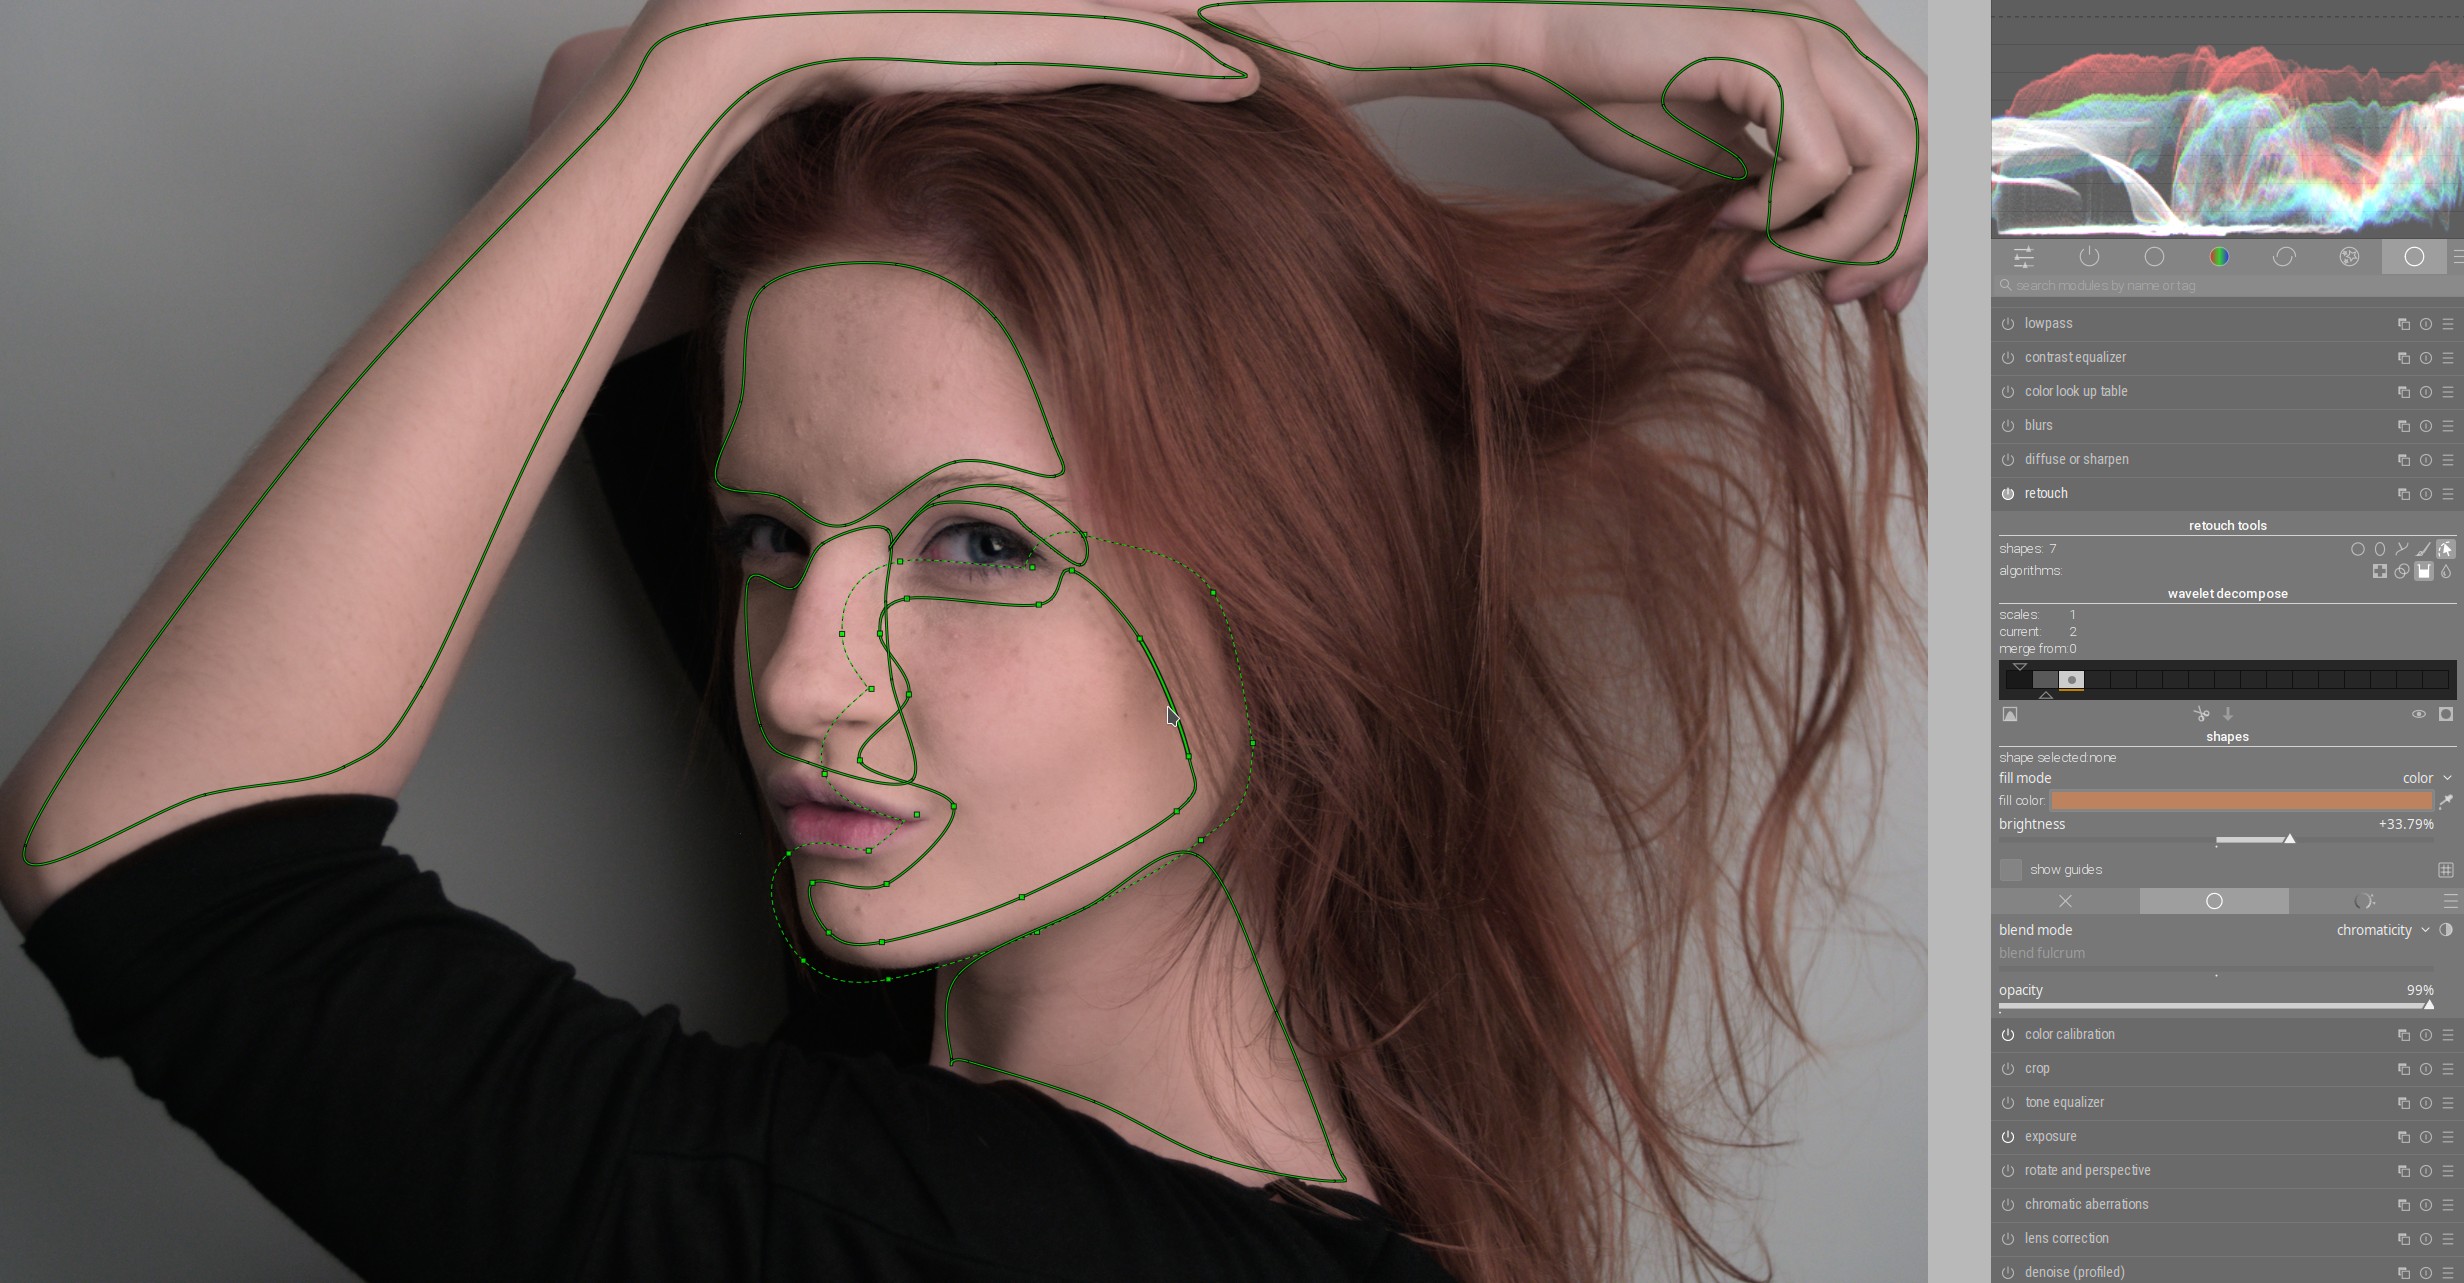
Then I mask the skin areas in question and correct the color there:
If I had done this without reordering the modules, the change in skin color would have been distorted by the white balance of the color calibration module and I would have turned the model into a character from the movie “Avatar” ![]() :
:

@priort already answered well - there are no rules or “typical” examples for this. It always depends on the intention and the photo.
The most important thing is to understand how the pixelpipe works and what happens to the colors and contrasts in certain places and then think about where it makes more sense to make a certain change.
Basically, the given order is already well thought out and rarely needs change.
4 Likes
So if I understand the situation correctly, you need to change the module order because you use an absolute colour in the retouch module, which will be changed by the color calibration module. If you could have done the same thing by specifying a relative hue shift, you wouldn’t need to reorder the modules?
Yes, but why make things more complicated?
The rule of thumb is to do all color manipulations after the white balance. In this case, it is easier and more intuitive to bring the retouching module after the color calibration (white balance), because this is the starting point for further color manipulations.
2 Likes
My question is why perform this hue shift in retouch module, instead of color balance rgb or channel mixer? Both those modules can be masked in the same fashion. Or if you like the functionality of being able to select a specific colour, colorize module can do it just the same. Is it because you apply it to the residual layer in retouch?
Is there a way to use diffuse or sharpen to replace contrast equalizer? It’s beyond me how the broad capabilities of contrast equalizer could be matched by diffuse or sharpen, but maybe someone has a way.
I think you just said it. In retouch this gets applied to the residual layer, not the fine details. In colorize you apply it to everything.
Because you can assign a different color to each drawn mask in the fill tool - if necessary. Sometimes you want to correct the makeup, or make different color shading on certain areas of the skin etc. This flexibility can only be achieved by multiple instances of other modules.
But yes, the nice thing about darktable is that you can choose different ways to achieve a certain goal. It’s up to you which one you take.
And here I want to emphasize something - it is not always the most effective way also the best. Sometimes it’s part of the creative process to go in a certain direction and then watch it develop step by step.
Later you can think, “well that wasn’t necessarily very effective, next time I’d rather do it this way”. But that doesn’t matter, because you’ve learned something along the way.
![]()
![]()
Why should you replace it?
What’s wrong with trying it out yourself? Both modules offer a lot of presets that can serve as a starting point.
So many modules are being replaced by D or S. I wanted to know if contrast equalizer should be too. Its default colorspace is Lab; to keep using it, should that be set to RGB (scene) to fit into the linear workflow?
The UI of D or S does not translate in my mind at all to the UI of contrast equalizer. I don’t have any idea of how to vary the detail scale or change from luma to chroma. I’m just looking for tips on how to do it.
Well the first part of the module is actually like the contrast eq…the central radius and span sliders are analogous to the graph used in the contrast eq…I believe this is well explained by AP or Nicolas Windspeare…or both
1 Like
New episode: Intuition as a guiding path for editing:

All Raw files from this episode are from:
Sidecar files:
122A7338.CR2.xmp (18,8 KB)
Paradise Beach LarryO photo.DNG.xmp (23,4 KB)
SIGNATURE EDITS FREE RAWS BNL_1154.NEF.xmp (27,2 KB)
by faustjoe.NEF.xmp (42,8 KB)
tag @federicopoli.DNG.xmp (42,7 KB)
14 Likes
Very nice demonstration. Lots of things to learn from. Thanks Boris.
1 Like
Well, Boris, to refer to user’s “intuition” as the main guiding line in image processing, may not help inexperienced users too much since “intuition” in cognitive psychology is mainly thought to refer to implicit knowledge derived from experience …
But, anyhow, by getting the message that we shall be careful to follow too strict procedures and rules, and the experiences gained i.a. from your videos with comments, our intuition develops over time. (“Good judgement comes from experience. Experience comes from bad judgement.”)
Thanks a lot for all the valuable input you provide with your contributions in video and comments!
1 Like