Hi
can someone explain me the edit style dialog? I wasn’t able to find the documentation for it.
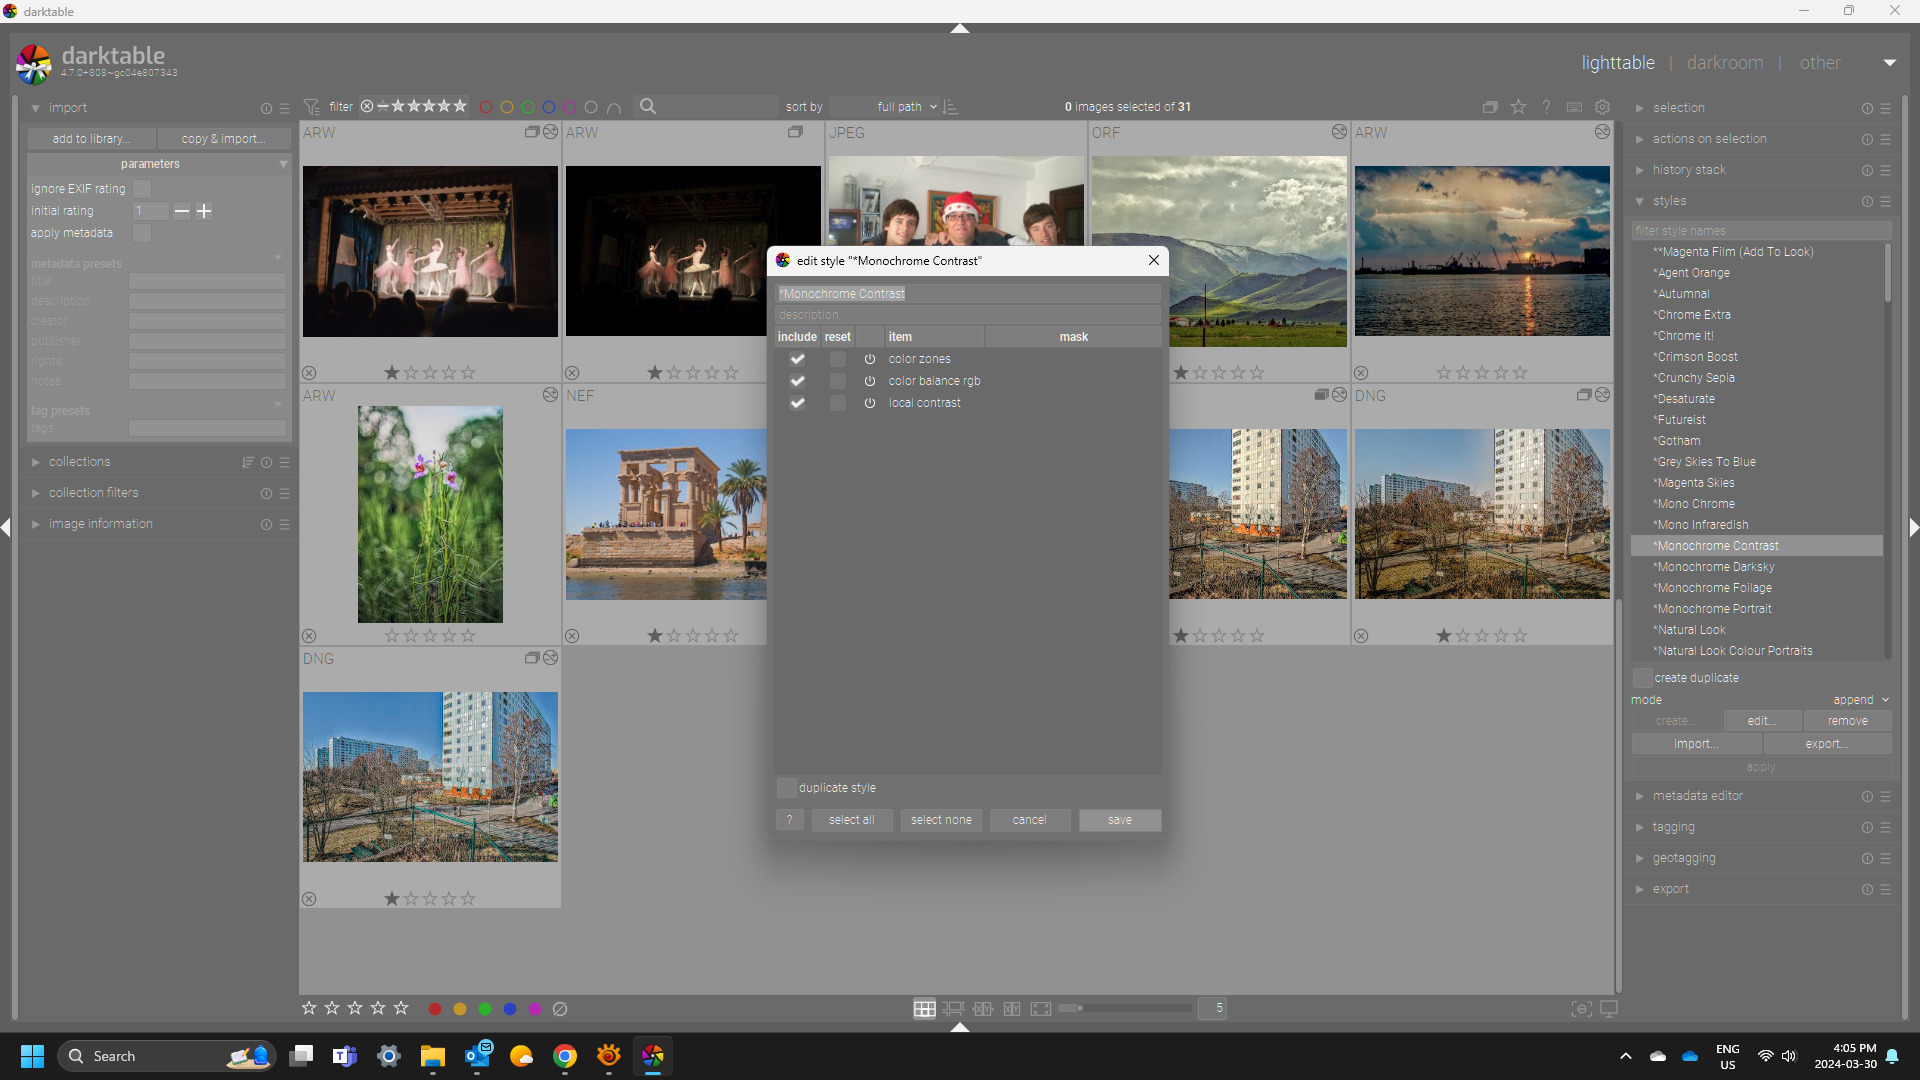
For example, I’ve ried to create a style to symulate the ‘scene-referred filmic’ auto-pixel workflow. See the screenshot.
However, I’m not sure why the ‘filmic rgb scene-referred default’ is in the ‘lower’ list. Does it mean it is not applied? But the ‘include’ tick is checked. So why they are two listboxes (upper one with module order, exposure and color calibration and lower one with the rest of modules).
Also, what do the checboxes mean - keep, reset, update, include?
Now note the difference if I have an image selected when I invoke edit…
Color zones and local contrast are not currently part of the selected image where as CB is so the modules are split and the options for how to proceed with the edit of the style are presented in each section ie to include this or that or not… etc… But I dont’ think there is currently a manual section for this but likely there is a post or pull request that has the details… I just couldn’t locate it for you but someone might have it or be able to find it…
I just selected an image in lighttable and using the styles module selected create. It opens a dialog with all the modules currently used. I then select only the minimum number of modules needed for the style. There are some modules near the bottom of the list such as white balance which normally I would exclude from a style as these are specific to individual images, cameras, iso settings and can produce strange unexpected results.
You are trying to edit a style and this creates a split list. I feel you would be better off creating a style.
To create a style, edit an image with the defaults you want to include in your new style. Then create a style from this image (either from lightable or from darkroom).
Your screen copy is from the “Edit Style” dialog that you open from lighttable. There are two ways to edit an existing style: with or without selecting an image in the lightroom.
If you edit a style with no image selected, you should only see the first list from your screenshot. If you edit a style while an image selected in the lighttable, you will see the kind of dialog you are showing, with two lists. The upper list is the list of modules of the style you are editing, the bottom list are the modules of the image you selected. You can decided to combine, overwrite, substitute, etc. modules between your current style and the image you selected.
Not sure if the above makes sense, but in summary, this allows you to use the history of an image to edit a style.
keep: keep the module in the style you are editing (again, it’s the edit dialog, not create dialog). reset: reset the module to default when applying it to an image (useful for modules like for instance lens correction) update: keep the module in the style but update it with the parameters of the image you selected before editing the style. include: add this module from the image you selected while editing the style
Also, you can decide to add a module to the style without activating it. This is convenient if you want to have a module with particular settings readily available to be activated.