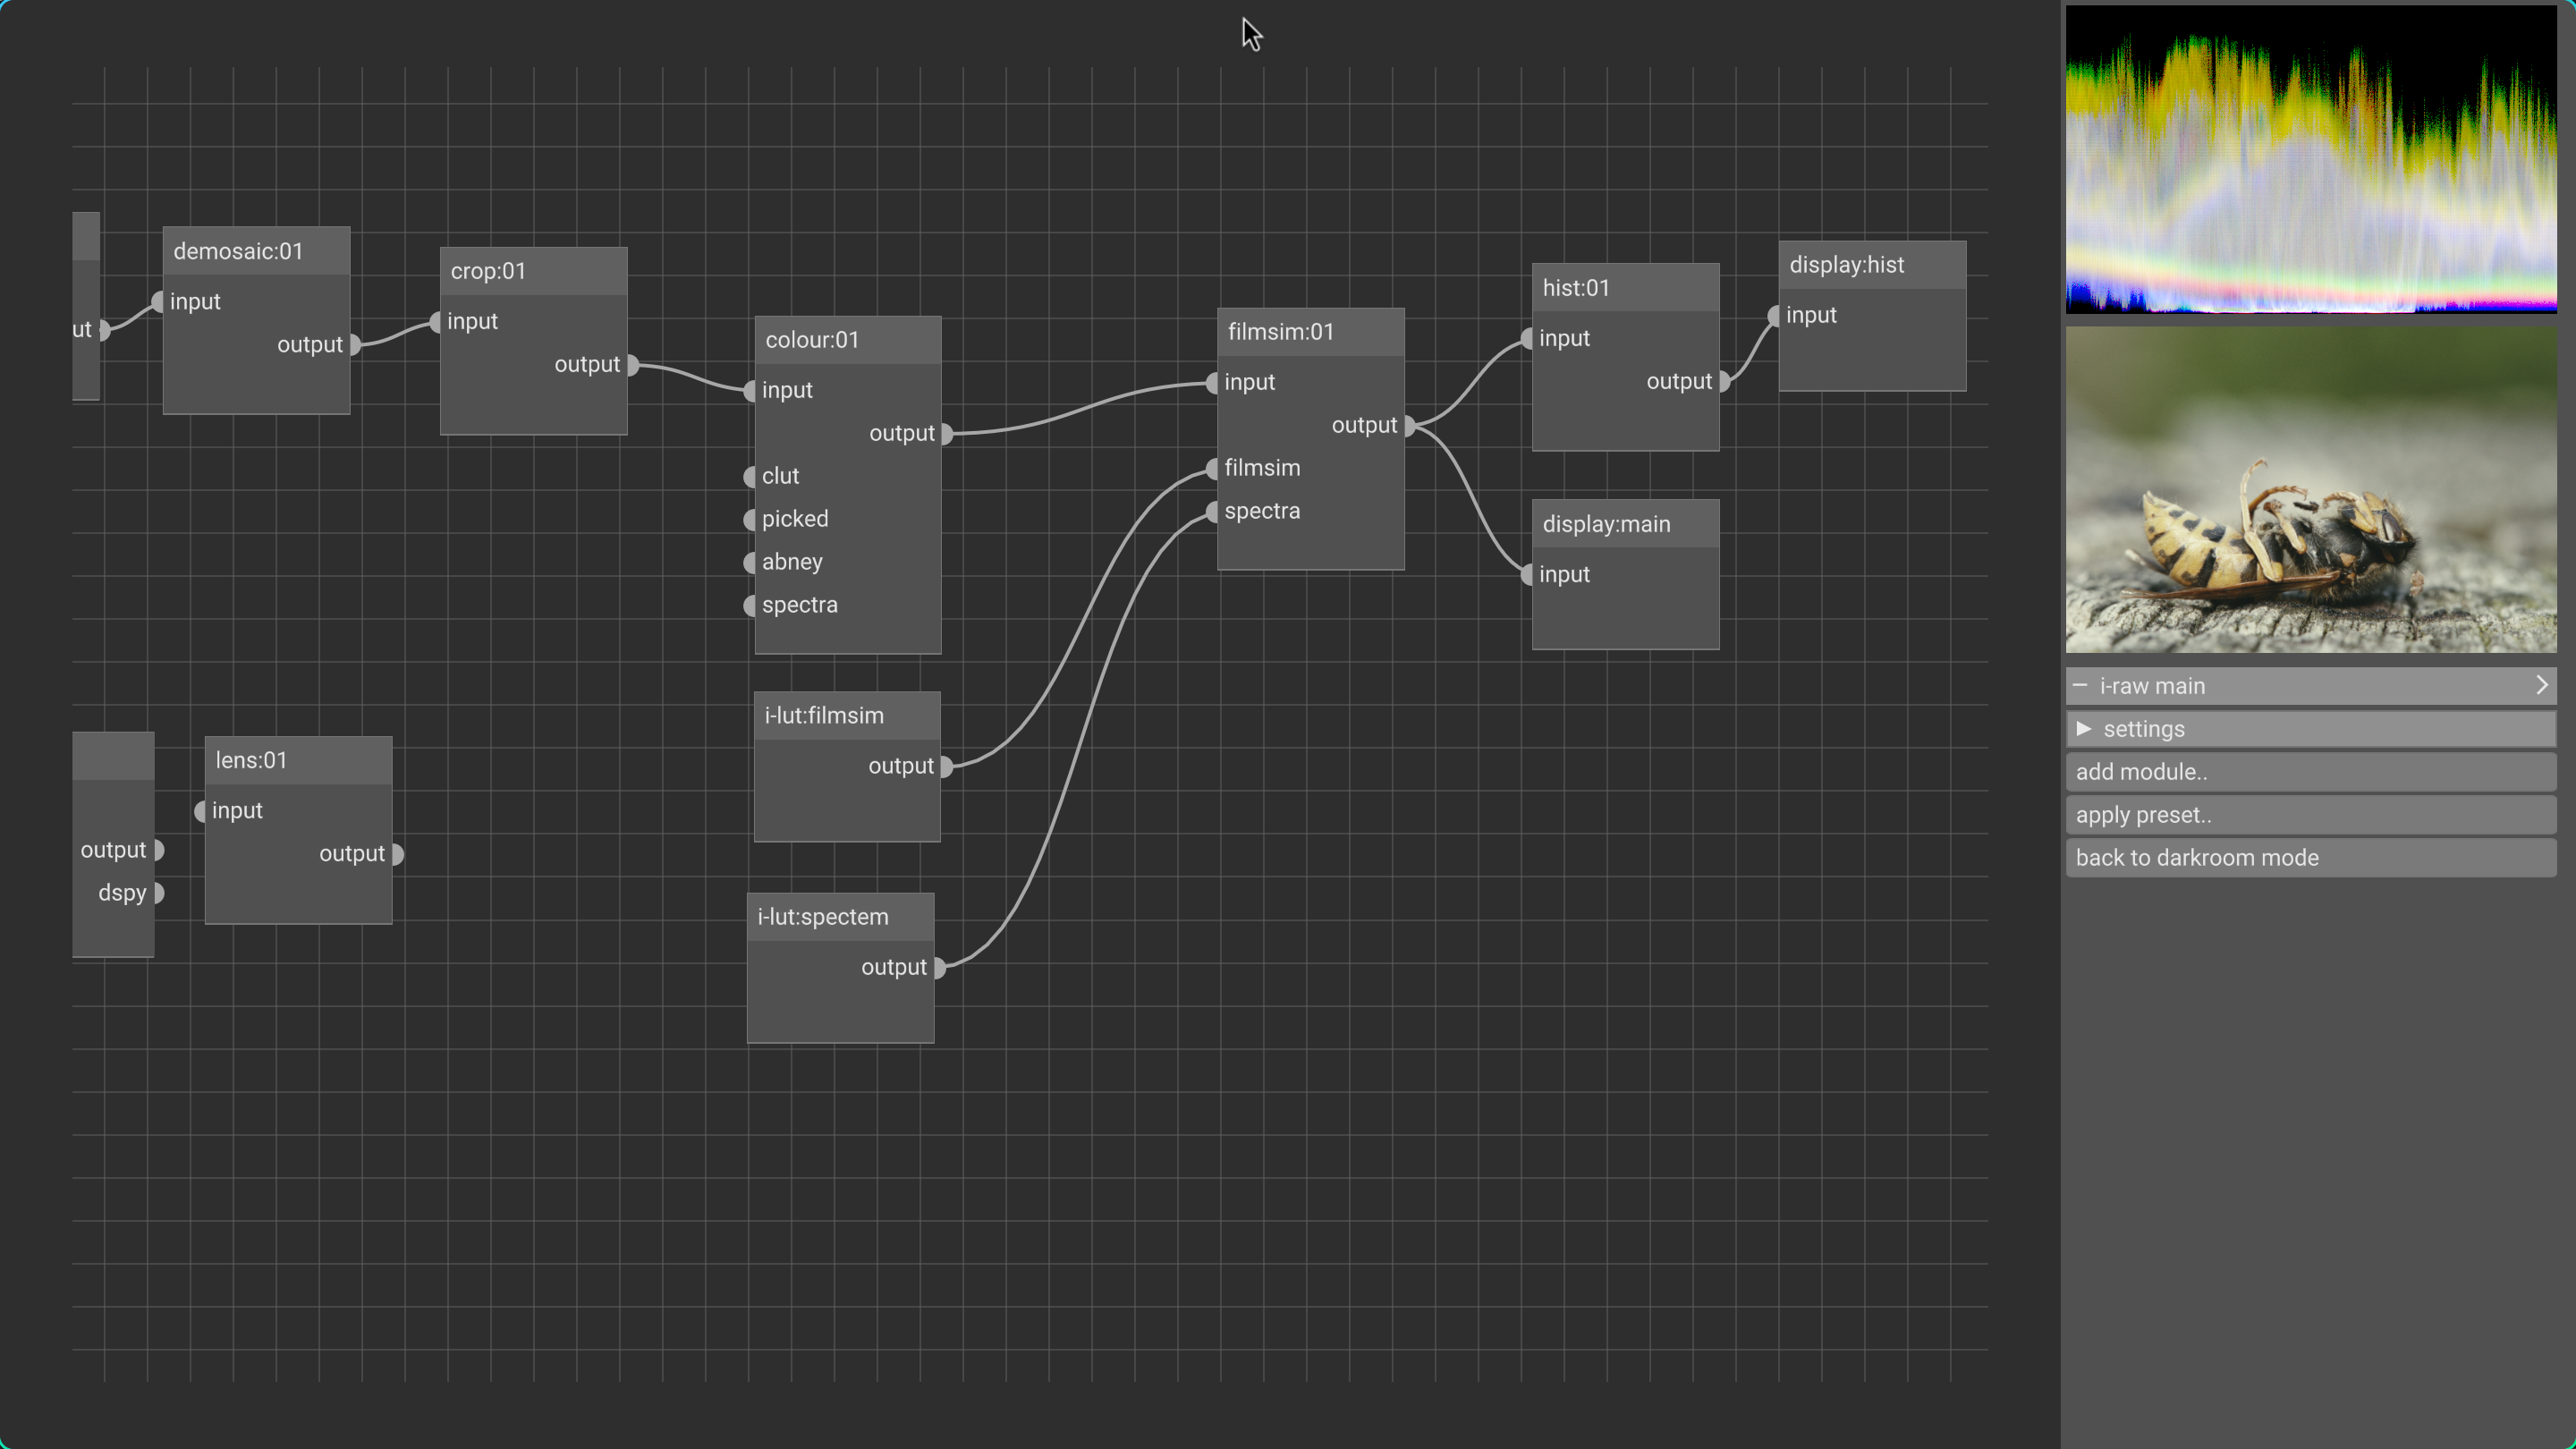
Could someone post a screenshot of what the node graph editor should look like when filmsim is used? Should any default modules be disabled and what is the optimal order of things?
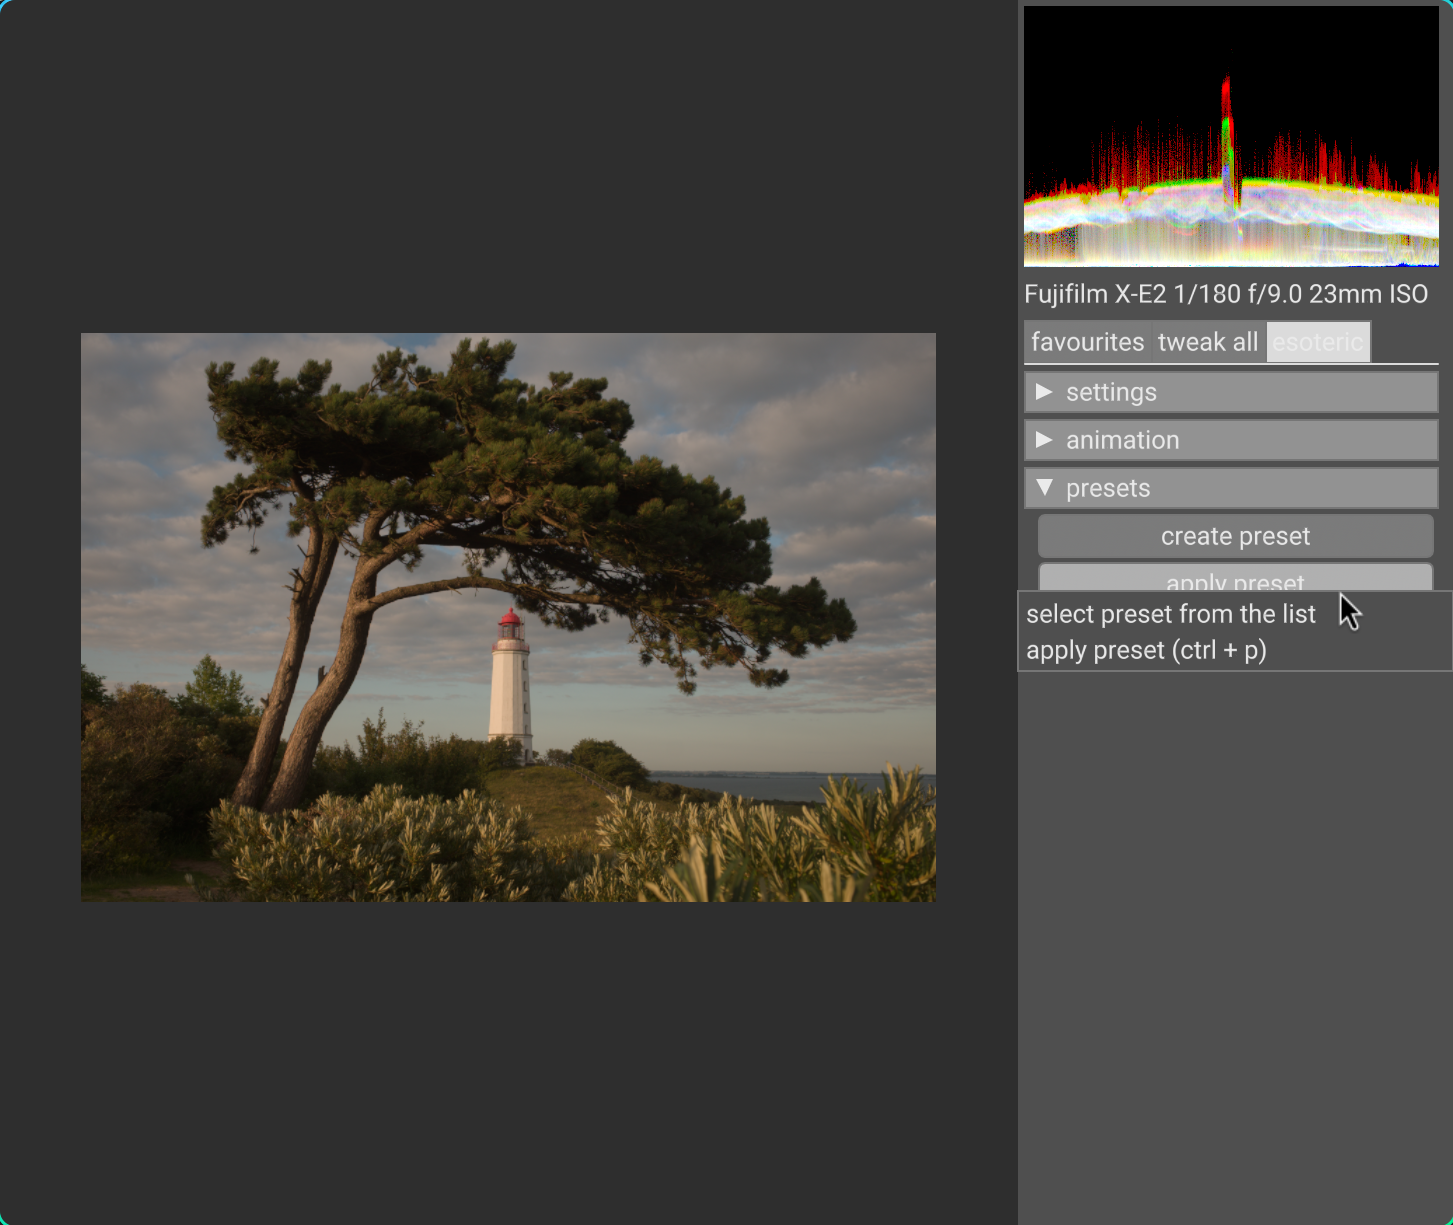
A great starting point can be found applying the filmsim preset found by pressing ctrl+p and looking for “filmsim”.
You can also then create your own presets, if you want to apply any other modules such as sharpening, etc. by default. That functionality is found at least from the third tab in darkroom mode.
yes, what niklas wrote. the input to the filmsim module should be scene referred linear, after the colour module because that corrects/standardises any camera specific rgb space. i try to document this in the tooltips for the connectors (hover over the connectors in the node graph editor).
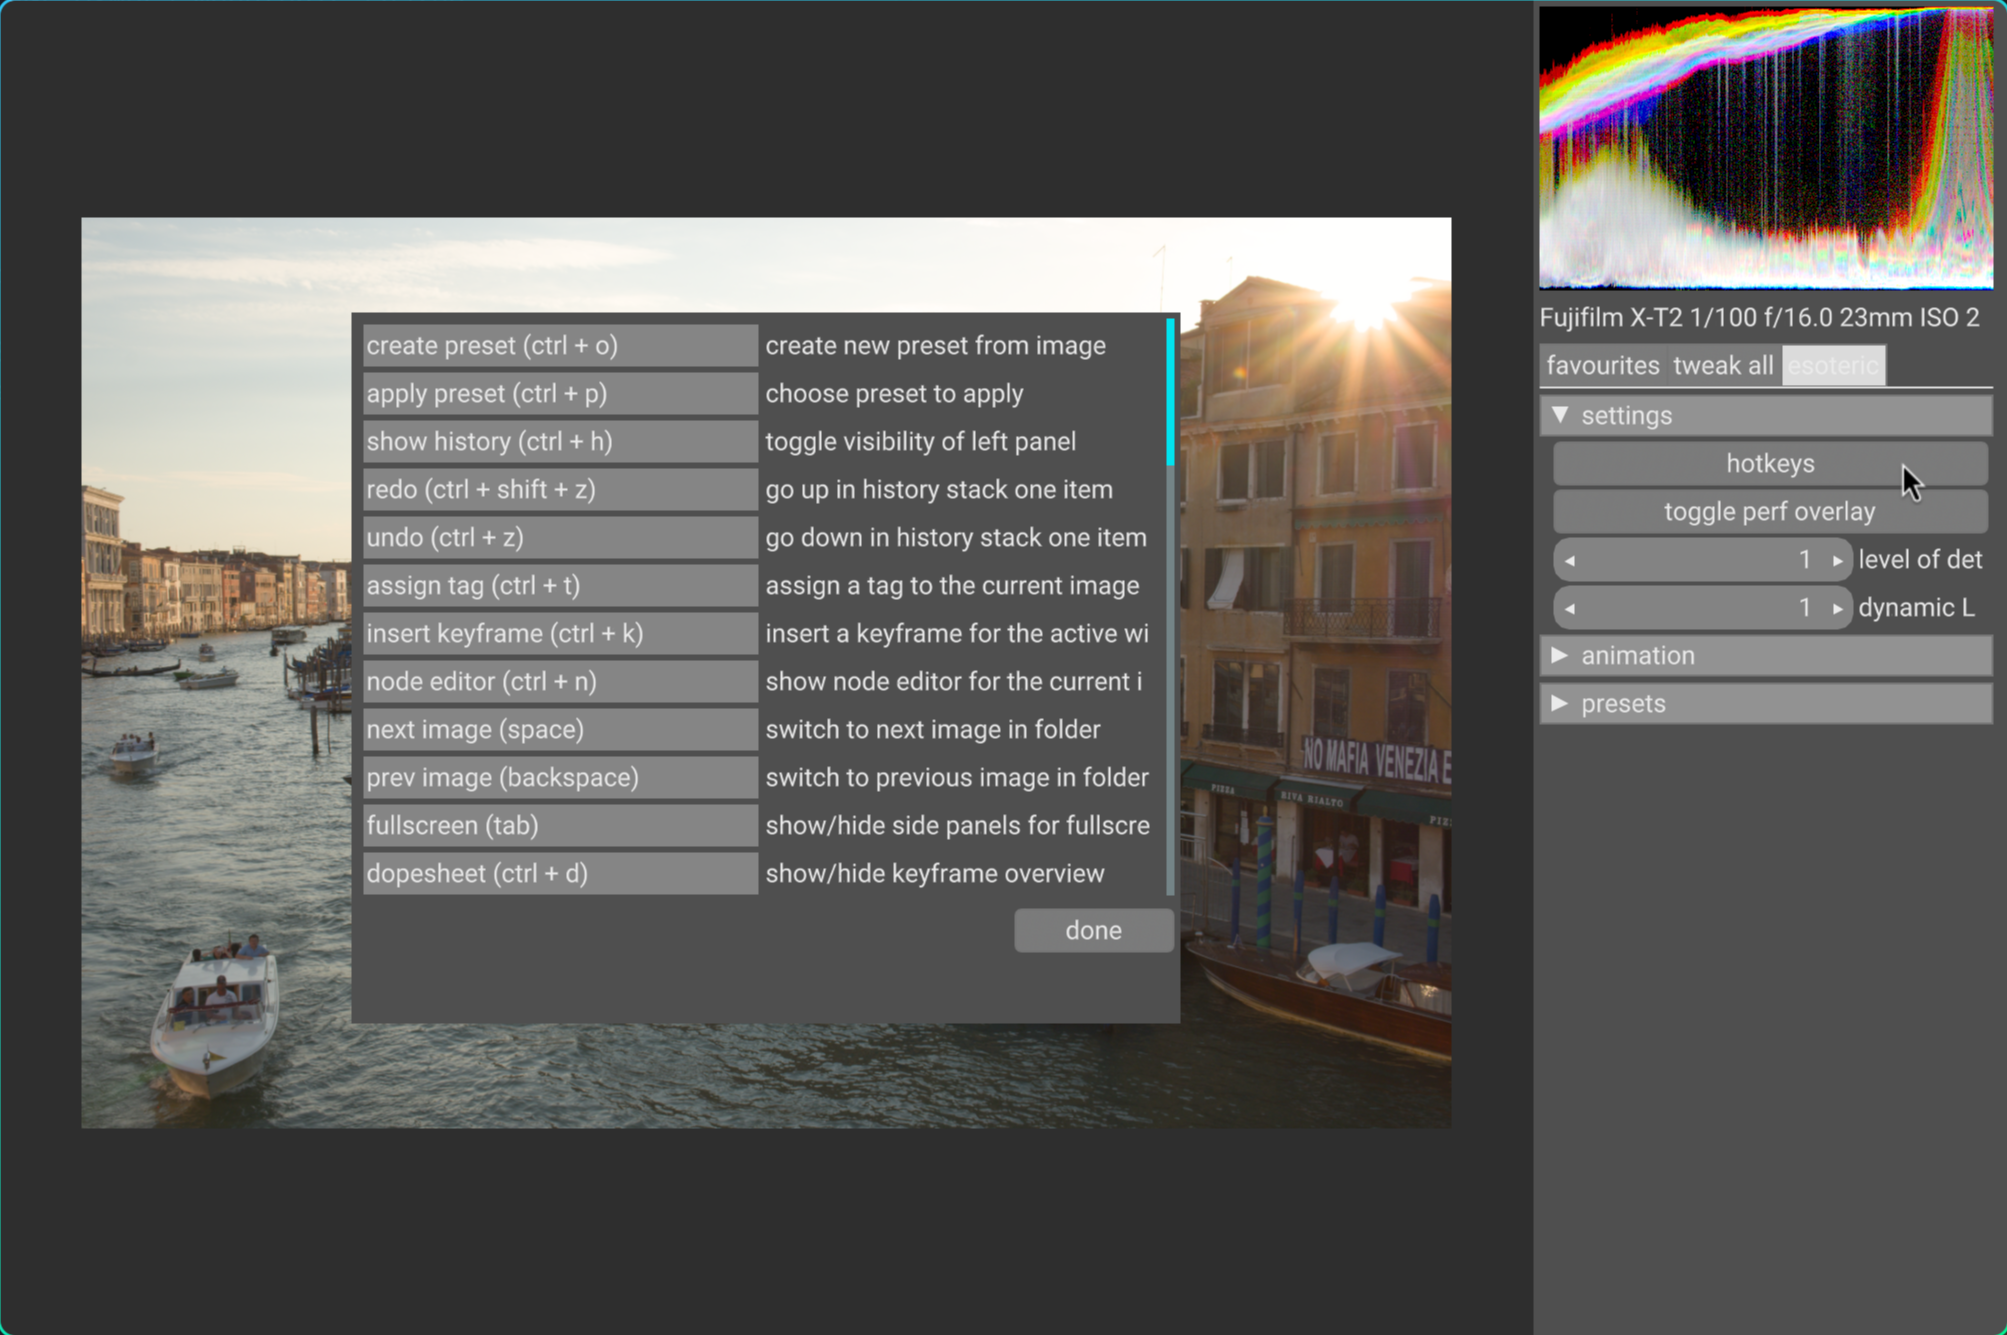
also, any other display transforms (film curve) should be removed. the mentioned preset takes care of all this. if you use a certain preset often, it’s possible to bind it to a button in the favourites tab by adding:
preset:filmsim:filmsim
to your ~/.config/vkdt/darkroom.ui file (if you don’t have the file, first copy it from the vkdt bin/ directory or else the other favs will be gone).
vkdt has a default graph and to disable modules you’ll have to disconnect them/remove them from the graph. once you get used to this node view it’s actually quite easy to see what’s going on (since our graphs here for photography/grading workflows aren’t usually that large). disabling a module is just a convenience ui switch that will not persist if you exit/re-enter darkroom mode.
Thanks both! I’m new with vkdt and the learning curve seems a bit steep as there are not many learning resources around. Are you able to supply a screenshot of the node graph with the filmsim used as you describe it?
before demosaic->crop is just the regular default raw input pipeline. the preset handles subtleties like resetting the white balance in the colour module to D65, too.
Sorry for forgetting to reply. The problem was that vkdt doesn’t pick up my remapped keys. I’ve remapped ctrl to caps lock in the Plasma settings. It works in every other application, but not in vkdt. ctrl has been on caps lock for many years, so I didn’t even think about trying pressing the actual ctrl.
ah, that makes sense… vkdt grabs the keycodes pretty much from the metal. also my caps means escape (vim user), but since i have a custom soldered keyboard now i don’t remap keys any more… still that sucks. does it work if you remap the key combo to what you expect inside vkdt?