During some experimentation I changed the working profile of one photo to “Rec709 RGB”. When I now export it to JPG (using sRGB as output profile), the resulting image looks much different to what I see in Darktable:
I’m not very familiar with how different profiles are handled, so I am not sure if this is expected behaviour. If it is, can someone explain why this happens?
In any case, I learned the lesson and won’t touch the working profile in the future. However, as I’m quite happy with the result as shown in Darktable: Is there is a way how I could save this one image?
Worst case I can change back to “Linear Rec2020” (which results in the colours changing) and try to replicate the “Rec709-look” but I’d like to avoid that if there is a better way.
What is your viewer…it might not be color managed so don’t compare it to DT if it isn’t…that is the first thing to check…Also double check that you did not have anything added in the export dialogue wrt color space…
EDIT Now looking at it you have used rec709 not linear rec709 they have a different gamma… I think 2.4 or maybe its 2.2 vs 1.0. If you use linear rec 709 you will see very little difference… its linear vs curve
DT edits are non destructive…you have not lost any thing so just reset it to linear rec 2020 and export again…maybe I am missing something from your request??
Thanks for your reply. The viewer is Gwenview which, I think, is colour managed (at least it looks the same in digikam, which definitely is).
Colour space settings in the export dialog are set to “image settings”.
I know that edits are non-destructive. However, when I set the working profile to Linear Rec2020, this changes the look of the image:
So I kind of lose the result I had with (non-linear) Rec709.
While doing some comparison, I noticed something weird now: The screenshot of Darktable in my first post is from the darkroom. On the lighttable, it actually looks different and matches the exported image.
So the problem boils down to lighttable and darkroom rendering the image differently with lighttable matching the exported image. Is there some logic behind this or is it a bug?
Note the view on lighttable clearly shows results of the editing, so it is not the embedded jpg that is shown there.
This probably is related to what @priort said: you are changing from a non-linear to a linear working space. I think most of the modules do the math in the working space, so the output from them is highly dependent on this. If the change were between different linear spaces the result would be less vissible, only on the colors on the edges of the gamut and without big changes in the luminance.
Thanks for your follow-up as the relevant information that you have nicely summarized below was in an edit to my original post after looking at it closer …so it may have gotten missed by the OP…thanks for the follow-up
Thanks, I now understand why different working profiles lead to different looks inside darktable.
However, it is still not clear to me why Darktable renders the same image so differently in lighttable and darkroom (with the exported JPG matching what I see in the lighttable view).
Thats probably cache related . After changing the working profile, make another change in one of the modules, and change it back.
The light table probably does not trigger a refresh when you only change working profile. The darkroom is the leading one.
I understand your question, since changing the working profile should not have much effect in the strictest sense of the word.
But, as others have said rec709 is a NON-linear space. So your camera data is converted to this profile, which means it gets quite a gamma boost making things brighter.
The darktable modules are expecting linear data so I think some calculations are going way off.
It could also mean that you have your output profile set to a method which does not do any conversion (have it off, or set to 'use working profile ’ or something if that is even possible). Then there of course will be differences in the output.but that means you disabled the default ‘use srgb’ as output profile setting.
If you like the effect , what has happened is that your data has had a sort of curve effect to make it brighter early in the pipeline.
You could get close by using tone equalizer to simply make the image brighter x or by raising the exposure.
But as an experiment you might also insert a tone equalizer _ before_ exposure in the pipeline (so under it in the module view) and make something like a curve there. (The least ev stays where it is, the 0ev stays where it is. But between them you go higher and higher, and I the middle you start going down again ).
Then the exported image should look like what I see in darkroom, right? However, what I get is something that looks like what is shown on lighttable, so I don’t think it is just a caching issue. I also tried changing values in other modules but it didn’t fix this.
Output profile of the image is set to sRGB and in the export dialog to “image setting”.
I tried to create a minimal example to reproduce the issue and found out that the issue is caused by the combination of using Rec709 as working profile and the LUT 3D module.
Here is the raw file with the corresponding xmp (provided under CC BY-NC license): lofoten_20210905-151506.arw (20.3 MB) lofoten_20210905-151506.arw.xmp (7.2 KB)
(Edit: I’m not sure if the LUT gets embedded. If not, it can be downloaded here. I don’t think that the specific LUT matters, though, as I saw the same issue when using an other one.)
In lighttable it looks like this:
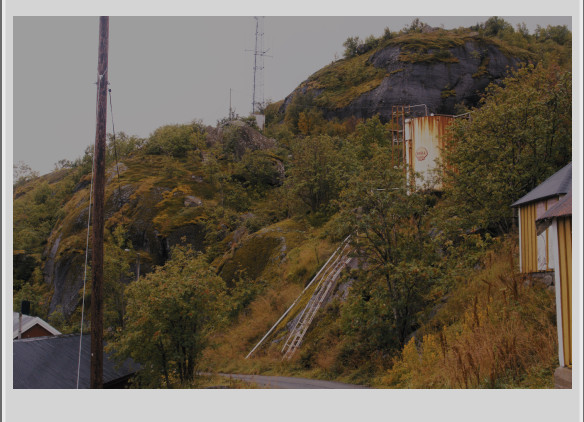
In darkroom it looks like this:
The exported jpg looks like this:
I understand that the output of any module can be crazy if the input profile is not what it assumes but in any case I would expect that the exported image matches more or less with what I see in darkroom.
PS: Thanks for the suggestion on how to replicate the “Rec709 look”. I don’t have time right now but may try it later.